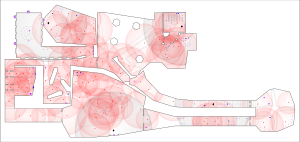
The motherboard controller in this sector is unresponsive, indicating a defect or installation problem. You will need to rely on the emergency generator while you power it down for repairs.
Infocenter[edit]
You begin in the northeast corner of the infocenter, a wide room with windows out into space. Head to the south of the room so that you can get past the barrier to the center. Save the debugger for later, when you need its 120 energy, and drive past it onto the central "play" triangle to lower the barriers in front of the three info stations. Grab the breakpoint while you're here, but switch back to dual-mounted debuggers with ). Then drive back outside the circle and into each of those stations to read their reports:
- The "Errors" info station tells you that the motherboard controller is not responding, which you already knew from the mission briefing.
- The "Concept" info station tells you that it is possible to power the lift with the emergency generator while the main power is out.
- The "Warnings" info station tells you that it is only safe to touch the motherboard when the main power supply is off.
Therefore, the basic plan for the mission is:
- Activate the emergency generator,
- Turn off the main power supply,
- Make repairs while the power is off,
- Turn the main power supply back on, and
- Boot the repaired motherboard controller.
Head to the lift in the southeast, eliminate the two spiked viruses waiting there if you are playing on hard, and press the middle button to ride to the main floor where the emergency generator is located. The exit will appear on your right, and on hard there will be a spiked virus floating near the ceiling, so look up to find and destroy it before leaving the lift. The doors then on your left will take you to the observation room.
Observation room[edit]
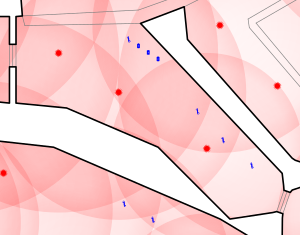
The observation room is a medium-sized room that overlooks several spinning cylinders surrounded by Matma. Ready your weapon before you open its door; there are one, two, or three spiked viruses waiting just behind it and farther back. Once you're inside and have destroyed them, top off your data and energy with refreshes and recharges and head past the pretty view and through the door to the first long hallway.
First long hallway[edit]

At the entrance to the first long hallway you will find a double eraser guarded by a lone spiked virus. Snag the weapon and use its greater firepower to finish off the virus in one close-range shot. Unless you want to pull some stunts, the double eraser is superior to the debugger for every task in this level, so you shouldn't need to switch weapons again except to use breakpoints.
Ignore the door with red trim on its sides for now and proceed down hall where you will find up to three more viruses and then, if not playing on easy, your first turret. The turret has the high ground, making it difficult to target without unlocking your weapon pitch, and since its shots are 50 damage per hit, you also need to remain attentive and shoot them down. There are two strategies you can use. The first, if you are skilled with unlocked weapons, is to attack from afar, which will give you plenty of time to react to its fire. The second is to even the playing field by charging straight at the turret—if you do this right, the incoming shells will fly at you right in your crosshairs so that you can shoot them down immediately. Then, once you start damaging the turret, it should have a hard time getting off further shots.
After these enemies are defeated, head for the doors at the far end, which lead to the piston room.
Piston room[edit]
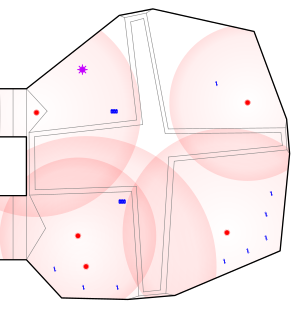
The piston room is a huge room with four "pistons", large Matma-separated pillars that move up and down continually when you approach. Yet again, there is one spiked virus just behind the door on medium and hard, so be careful opening it. Step on the triangular ledge to start the pistons moving and drive onto the first piston when it's level with the ledge. Collect the breakpoint.
To continue, you will need to cross from piston to piston clockwise around the room; each successive piston is slightly faster than the last. Unfortunately, the gaps between pistons are too wide for the Skaphander to make a jump, and the ledges halfway up the walls that run between pistons are too narrow to hold it. Discarding those options, you will have to skirt the sills at pistons' bases, which are wide enough for the Skaphander, but only just.
For each transfer, move to outer edge of room and strafe to press yourself tight against that wall. Wait until your current piston is at its lowest point and then drive completely onto the sill so that the upstroke does not tip you over and into the Matma. (If you miss the timing for this, do not jump down from your piston; wait for next cycle.) Scoot forward carefully—there's not a lot of space to work with—and hold to drive into the corner between the side of the next piston and the outer wall. When the next piston is low enough, the Skaphander will lurch forward. Again, make the crossing completely or not at all because sitting halfway on a sill and halfway on a rising piston will only tip you into the Matma.
Be aware that the second piston has a spiked virus stationed near the ceiling, and the third will also on medium and hard; if necessary, pitch your weapon up to clear these enemies. The fourth piston is even trickier, as it has one or two spiked viruses hiding under the floor; the best strategy is to watch for them to be revealed and snipe them while you are still on the third piston.
Once you've hopped off of the fourth piston onto another triangular ledge, you'll be facing the door to the second long hallway.
Second long hallway[edit]

Running parallel to the first long hallway, the more empty-seeming second one sports a protector in its northeast corner and a silver bug in its center.
Start by getting the protector so that you can use its shielding to absorb viral attacks, but do not plan on pitting it against Matma this level. Despite appearances, no Matma pool on the Hitchcock map has sides shallow enough for the Skaphander to exit, so even though you'd be safe for a while, eventually the protector would wear out, and you would die to the corrosion.
As for the silver bug, you do want to squash it, but be ready: doing so will summon up one, four, or six spiked viruses to the west, depending on your difficulty level. As a trick, if you back up hard immediately after squashing the bug, the spiked viruses will spawn without being aware of you. You can then plant a breakpoint (a breakpoint can be a good idea even if they do notice you) and draw them into it with eraser fire.
After that battle, top off your data and energy with the resource items scattered about and approach the lift at the end of the hall. It will have up to three spiked viruses riding it; though only one virus begins there, you can expect it to call for reinforcement when it notices you coming. The attack will come from below eye level, which would normally make a nice ambush, but here the viruses are easily caught on the lip of the opening, so you should be able to gun them down with no problems. Grab the breakpoint to the left when you're done with that.
Unfortunately, the lift will probably be on the floor below you, and there's no way to call it from above. Jump down, slowly if you can, and after it rises, head back where you came from to restore your data and energy. When you're in good shape again, drive back onto the lift and descend to the emergency generator room.
Emergency generator room[edit]
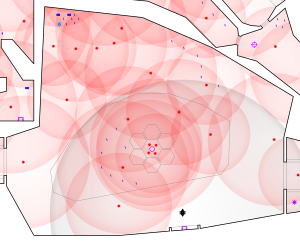
The emergency generator room is a giant boxy room with yellow pillars around a hexagonal enclosure. As you descend into it on medium or hard, there might be a turret firing on you from the south side, so be watching to your left for shells to shoot down. When the lift stops, the turret will be at eye level, so just charge it straight-on, continuing to gun down its shells, and get within weapons range to finish it off.
When the turret, if any, is eliminated, circle the rest of the room counterclockwise to clear out an infestation of 5, 9, or 13 spiked viruses, assuming you were noticed using the lift. As you pass the northwest corner, squash the silver bug sitting beside the item pile.
Once you finish your circle, you should be at the middle of the south wall where the turret was stationed. Press the button there to lower the hexagonal barriers around the emergency generator. As they drop, they will reveal one, three, or four more spiked viruses and a white pillar—the emergency generator. Destroy the viruses and tap the emergency generator to activate it.
Finally, drive up to the teal-colored lift in the west wall, press to call it down, and ride it to the supply room hallway.
Supply room[edit]
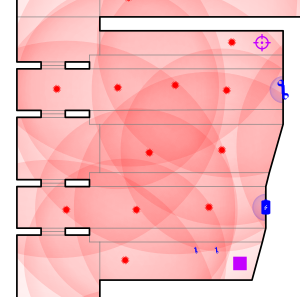
Between the lift and the supply room is a short, L-shaped hallway. You will have to clear one, two, or four spiked viruses to get through it. At its end, avoid opening the door just yet considering the commotion on the other side. Instead, curve around to the right and clear out one more spiked virus guarding a screwdriver. Grab that screwdriver, which you will need to repair the motherboard.
To the north of the passage you are in is a shooting gallery with three, six, or ten more spiked viruses. (Some may try to hide behind the doors on the left, so look carefully.) Your weapon just clears the barriers that prevent them from swarming you, so mow them all down before proceeding.
Pass through the doors and go find the debugger in the northeast to earn its points and recover some ammo. Then use the recharge and repair stations to refill the rest of the way to 400 data and 300 energy. Finish by heading north and east to the long staircase.
Long staircase[edit]
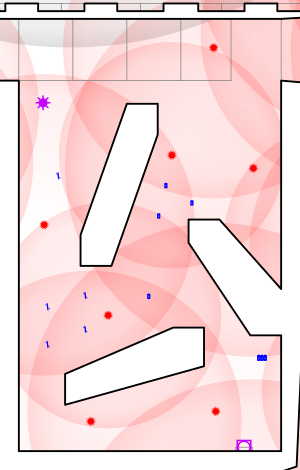
The long staircase does not begin crowded, but if you're not playing on easy, you should expect it to end up that way after the ruckus in the supply room draws their attention. Be prepared for as many as three spiked viruses waiting near the head of the stairs and up to two more at the foot, though those last two have a habit of getting themselves stuck. Shoot down the ones at the top and then descend the stairs by driving east, not south. (Although there is no railing on the south side, so you could make that jump, you do not want to take unnecessary falling damage.) Once at the bottom, clear the viruses there, and then reascend until you are level with the wider space to the south.
Explore around the three pillars in that space, keeping an eye out for the up-to-three more spiked viruses that may be lying in wait—the total counts for this room are two, five, and eight according to the difficulty. You can find a breakpoint in the northwest corner and a button in the southeast corner. Press the button to open up a shortcut from the foot of the stairs back to the main lift.
Head through that shortcut and ride the lift down to the energy room.
Energy room[edit]
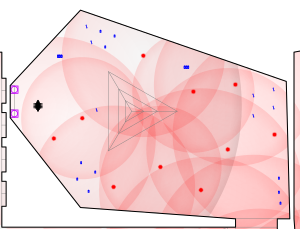
The energy room is a large square room with an untraversable "mountain" in the center and the main power supply controls on its west side. Don't be too hasty to enter it; there are potentially three, seven, or ten spiked viruses inside, with one or two ready to drop from right above the lift doors on hard, and on any difficulty level there the turret in the back has the range to hit you as soon as you show yourself.
Take the cautious approach and snipe every in-range spiked virus from the lift, where the turret cannot target you. When all spiked viruses are clear, including any that made you pitch your weapon up to find them above the lift doors, enter the room at speed and slide behind the mountain for cover. Creep around one side or the other until you are close enough to charge the turret.
Once it is destroyed, press the button to put the generator in low-power mode, shutting down the main power supply. Swing back by the infocenter to get the debugger you left there in the beginning and its 120 energy and then use the lift to return to the main floor and find the red-trim door off of the first long hallway, the door that you skipped earlier. It leads to the causeway.
Causeway[edit]
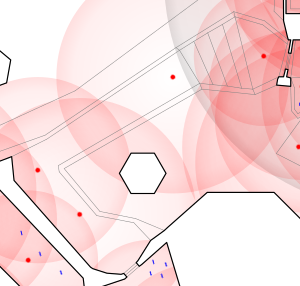
The causeway is a strip of floor that runs among the spinning pillars you could see from the observation room. One, two, or four spiked viruses are posted along its length, and on medium and hard some of them may try to set an ambush at the door, so enter the area carefully. You'll find the rest of the spiked viruses on the causeway proper.
At the end of the causeway you might notice that the railing has a gap. Just past that gap is a currently inaccessible area with a pit in the center and many spiked viruses but also many items. You might suspect that you are supposed to use the protector to swim the Matma and reach that area, but don't succumb to the temptation. That's actually impossible, and trying will kill you. Rather, the gap in the railing is for the viruses' benefit, giving them a route to pursue you if you end up retreating from the next area.
Instead, follow the causeway up to the entrance of the motherboard room.
Motherboard room[edit]
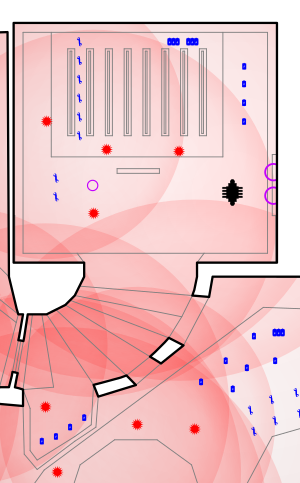
The motherboard room is a circuit-covered bank of electronic cards at the top of a spiral staircase with windows. Make sure that you are ready before opening its door, behind which you will encounter one, three, or five spiked viruses and, on hard, another turret. Easiest is to let a few spiked viruses out at a time, backing up to close the doors on any others and any turret shells. However, if you use that technique, don't overlook the possibility that you might attract the notice of the one, two, or five more spiked viruses on the inaccessible island, which could then pour through the gap in the railing to your right. Once at least the spiked viruses from the staircase are destroyed, make a run for the turret. You can bring down any spiked viruses still outside the stairwell through the safety of the windows.
Catch your breath and fill up on resource items from between the cards. Then approach the motherboard controller and press to use the screwdriver to repair it. You'll get a message saying that the motherboard is repaired but needs power. Make a quick run to the energy room to turn the main power supply back on and return to this room.
As the sign that rises from the floor suggests, approach blinking globe and press to activate it and boot the newly repaired, newly powered motherboard. That will grant you access to the formerly blocked off island and an escape shaft that the Firm's logo has appeared above.
Escape shaft[edit]
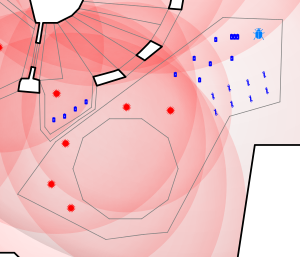
Before you plunge down the escape shaft, take a look around the island and find, among the items to the left that you should use to heal and recharge, a golden bug to squash. After you've taken care of that last task, exit the level by jumping down the pit.