Stage 10[edit]
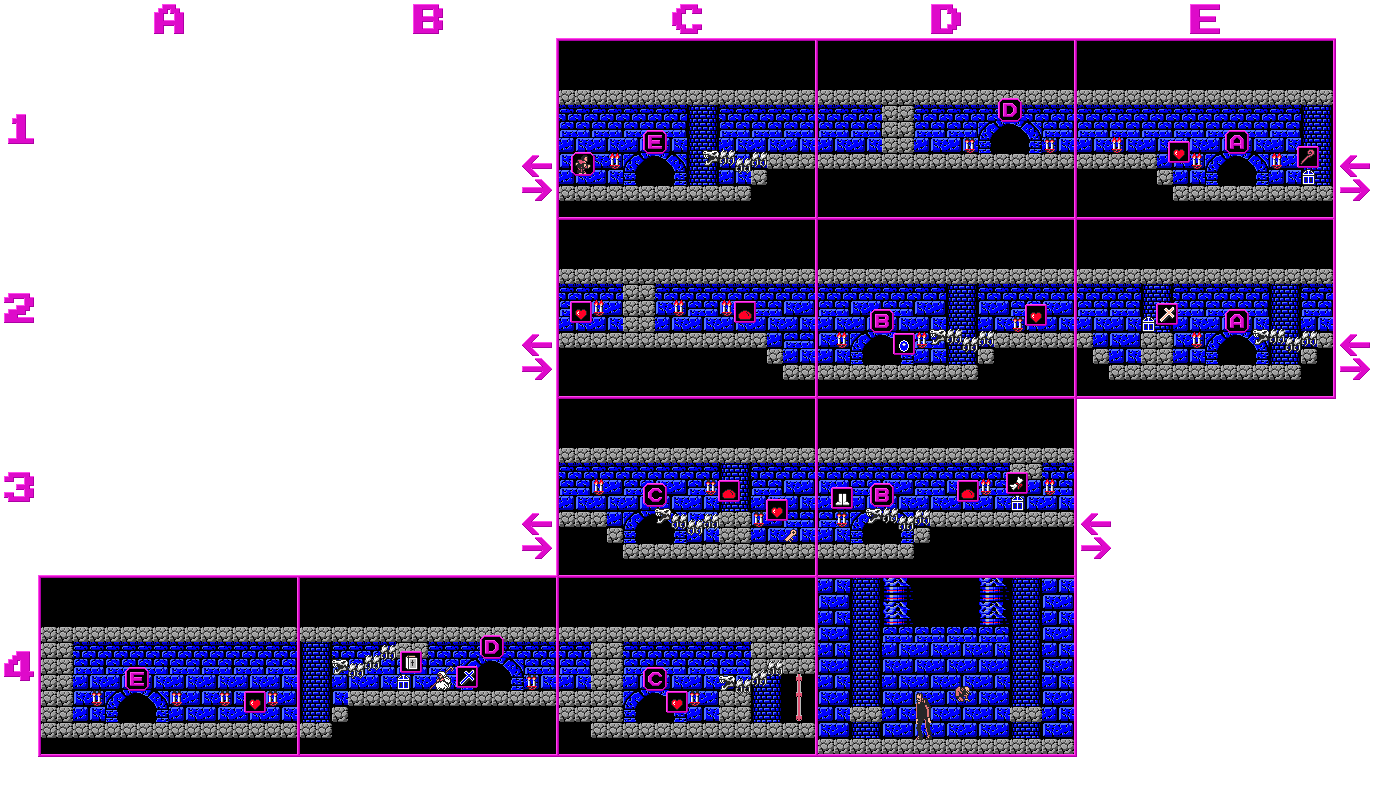
Stage 10 is where the game starts getting trickier. Like in NES Castlevania I (minus the cutscene), Simon will plummet from the heights of Stage 9 down into the caverns under Dracula’s Castle. Starting from A2, you’ll have to navigate through several screens of Bats and Red Mermen to reach the exit door to the surface.
- Silver Key
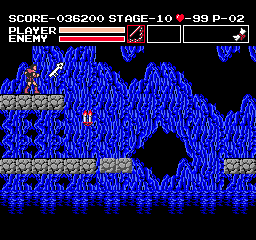
The Silver Key for Stage 10 is located on screen A2, right by the start of the Stage. However, you won’t be able to obtain it right away. Instead, you’ll have to walk all the way rightward to the upper-right ledge on screen F2, from which you’ll be able to walk rightward and wrap around to the upper left of A2 to the platform where the Key is located.
- A route through Stage 10, from the starting point of A2
- Left to F2. You’ll find yourself at a dead-end on a tiny ledge in the bottom right of the screen. Grab the Gold Key here and then go back to the right.
- Right to A2. Whip the first Bat that spawns, then grab the Invulnerability Ring from the left candle – this will give you invincibility against the continually spawning Bats for long enough that the moving platform will return to the left side of the gap, allowing you to obtain the Silver Cross in the candle over the pit. Once across the gap, use your Gold Key to open the Chest here and pick up the Morningstar Whip, and then head onwards to the right.
- Right to B2. The Silver Cross you grabbed earlier should still be preventing enemies from spawning for a few more seconds at this point. Use these seconds to jump the first gap and platform your way up to the top right platform as fast as you can. Once the Silver Cross wears off, Red Mermen will start spawning – they take two hits to defeat with the Leather Whip but only one hit with the Morningstar Whip, hence why it’s great to pick up the Morningstar in this Stage. At this point, standing on the top right platform, you have two options. If you’re low on Hearts, go up the stairs to B1 and C1. On those two screens, there are several candles that contain a total of 26 Hearts (though you will have to fight a few Red Mermen to get them). If you don’t need the Hearts (i.e., you have 75+ Hearts in your inventory), skip this and walk off the right ledge of the top platform in B2 and continue to the right.
- Right to C2. Most of the time spent in C2 consists of waiting for the moving platform below to come your way. You’ll need to time your jump to land on the platform, so it’s advisable to watch and see how far over to the left the platform travels a couple of times before attempting to jump on. Once you’re on the platform, make sure to duck while going under the low cave ceiling in the middle; otherwise, you’ll get pushed off by the ceiling into the water! When the platform reaches the right side, jump to the ledge and head onward.
- Right to D2. Here you’ll need to do conceptually the same thing as in C2. However, in D2, it’s advised to fall straight down off the top ledge onto the moving platform, rather than jumping off it at an angle, as jumping off at an angle often results in you accidentally clipping through the moving platform for reasons unknown. Once you’re on the moving platform and within range of the right-side ledge, jump to it and continue to the right.
- Right to E2. If you have a Gold Key in your inventory (which you should), the Chest on this screen contains a White Bible that’s useful for later. Then there’s one more moving platform to catch here – this one’s the easiest of the three in the Stage. Drop off the static ledge onto the moving platform when it’s underneath you, crouch under the low cave ceiling, and then jump to safety on the right side.
- Right to F2. Finally, you’ve reached F2 in a way that allows you to make progress! Being cautious of Red Fleamen jumping out of the water from below, make your way across to the central lower platform and climb your way up to the top right ledge. Walk to the right from here, grab the Silver Key from the raised platform in A2, and then go back left to F2 and head up the stairs.
- Up to F1. On F1, fight and defeat the two Red Mermen, buy a Shield B from the Merchant (it’s handy for Stage 12), and head through the exit door.
Stage 11[edit]
Upon climbing out of the caverns, you’ll find yourself in Stage 11, which is a courtyard within Dracula’s Castle. This Stage looks very short and straightforward from my provided map – the former descriptor is accurate; however, this Stage is also one of the most dangerous Stages in the entire game. That’s right – this is Vampire Killer’s “Fleaman Alley.” Unkillable Fleaman Eagles will fly in and drop Fleamen on Simon’s head on screens C1, D1, and E1 – failing to kill the Fleamen fast enough on any of these three screens will likely result in you being swarmed by them.
- Silver Key
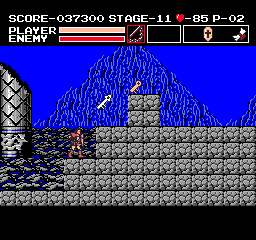
The Stage 11 Silver Key is located on screen B1, in this first rock pile's top left corner block. Deal with the Fleaman on top first, and then break the block to obtain the Key.
- A route through Stage 11, from the starting point of A1
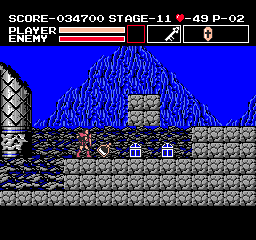
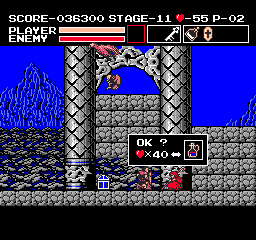
- Right to B1. Walk rightward through A1, defeating any Zombies that try to attack you head-on. In B1, jump onto the lower-left block, and wait for the Fleaman above you to jump down before taking it out. Then break the top left corner block, grab the Silver Key, grab the Gold Key above as well, and then break the block below where the Silver Key was – this will reveal a Chest containing Holy Water, which is invaluable for fighting both Fleamen in the Alley and the Stage 12 Boss later. Once you have the Holy Water, it’s time the run the gauntlet - head rightward to the next screen.
- Right to C1. The Eagles will start flying in within a couple of seconds of you entering the screen. Use the upward throwing arc of your Holy Water to kill the Fleamen the Eagles throw at you before they land on your head or reach the ground.
- Right to D1. D1 is a far more dangerous screen than C1 due to the wall of boulders ahead of you. If you’re able to use Holy Water to give yourself enough time to climb over this first pile of boulders (the top block is breakable, and Holy Water will break it if it makes contact), great! If not, you can dig through the bottom of the rock pile. Digging through will uncover a few Chests, along with a Merchant who will sell you a Max Health Potion – this is a must-buy if you’re running low on life. Regardless of your strategy, be efficient and head to the right as quickly as you can.
- Right to E1. E1 has the same setup and solution method as C1: time your Holy Water throw to eliminate the first Fleaman in midair, then run for the next screen.
- Right to F1. Congratulations – the danger of Fleaman Alley is now over. Ignore both of the candles here, as they both contain Slimes. If you hold right from when the screen transitioned to F1, you’ll be able to reach the exit door before the Bone Dragon guarding it can block your way and fire its first shot (similar to in NES Castlevania).
Stage 12[edit]
Upon heading through the exit door of Stage 11, you’ll find yourself back inside the tunnels of Dracula’s Castle. Stage 12, like the game’s Hourglass sub-weapon, takes advantage of the fact that MSX2 Vampire Killer was designed solely for keyboard controls and thus allows you to press both the “up” and “down” buttons at the same time. Unlike NES Castlevania’s completely linear Stage 12, in Vampire Killer, you have to navigate through certain arched doorways by pressing down and up (pressing up while crouching) to progress through the Stage. Given that the 1, 2, and 3 rows loop horizontally, you can clear this Stage very quickly.
- Silver Key
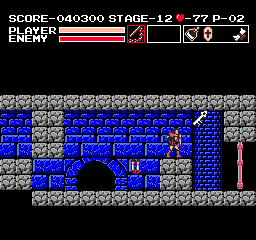
The Silver Key for Stage 12 is located on the last screen of the Stage: C4. It’s next to the exit door, hidden in the block guarded by the final Bone Dragon. Warning: it’s possible for you to softlock your game while getting this Key, as you’ll need to jump off the block on the floor (which is breakable) to reach it, or damage boost off the Bone Dragon at a perfect angle if you broke the floor block. If you destroyed the block on the floor and killed the Bone Dragon, but still don’t have the Key, then you’ll unfortunately have to reset your game. The easiest way to get this Key is to break the lowest block in the left wall of the screen, which will reveal a Chest that contains an Invisibility Orb. Use this Orb to walk through the Bone Dragon, break the ceiling block, grab the Silver Key, and jump to the exit door.
- A route through Stage 12, from the starting point of C1
- Left to E1. There’s nothing much to do here but progress – crouch in front of the background archway (hold ) and press at the same time, which will take you to the next part of the Stage.
- Through the archway to E2. Immediately walk left and jump over the block after the screen transition to avoid getting hit by the nearby Bone Dragon, and exit the screen to the left.
- Left to D2. Walk up behind the Bone Dragon’s head – that’s right, Bone Dragon body segments have no hitboxes – and destroy it from here (you’re safe, as it can’t shoot fireballs backwards). Once you’ve defeated the Bone Dragon, grab the Invisibility Orb from the candle just right of the arch and head through the archway on this screen.
- Through the archway to D3. As before, immediately go left upon entering this screen to avoid taking damage from another Bone Dragon. Having the Invisibility Orb makes this a bit more forgiving.
- Left to C3. Climb over the block in the middle of the room, and as before, stand inside the Bone Dragon’s body and attack its head from behind. Once you’ve dealt with the Bone Dragon, travel through the archway on this screen.
- Through the archway to C4. As explained before, grab the Invisibility Orb from the Chest in the base of the left wall, walk through the Bone Dragon, break the block in the top right corner of the screen, grab the Silver Key, and head through the exit door to the fourth Boss: Frankenstein’s Monster and his Fleaman friend.
Boss 4: Frankenstein's Monster[edit]
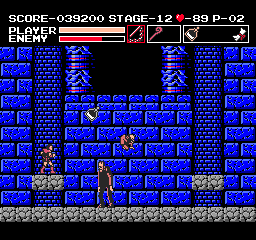
- See the Bosses page for more detailed info.
Deep within the tunnels of Stage 12 lies the next Boss, a tag-team duo of Frankenstein’s Monster and his Fleaman companion. Frank walks back and forth across the boss room floor while the Fleaman takes giant leaps around the room, periodically shooting fireballs at Simon.
Attacking the Fleaman only stuns him for a brief period – it’s Frank you’ll need to hit to take points off the Boss’s health bar. Frank’s movements around the arena aren’t predictable, and he hits like a truck, so trying to get in close with a short-range weapon is not advisable. Instead, stand on the upper-left platform and use Holy Water (found in Stage 11) to shred Frank’s health as he walks through the flames. If your timing is good, you can defeat Frank in 2-3 throws of Holy Water.


