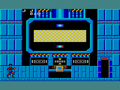
The bottom section of the base is the hardest yet, as should be expected. The walls are a dark blue hue and most rooms have a lot going on. There are more traps and more enemies and they all move a lot faster.
At the bottom of the elevator shaft, head into the hallway to the right. Drop and shoot when you get into the screen because there are two drones waiting and you'll get away unscathed if the far one doesn't kneel to shoot. Lie down and move on top of the elevator to shoot out the right wall, opening up a secret passage to another room.

Row 16, Room 3[edit]

When you get into the secret room, take out a drone on the other side of the wall, then get the level up in the level three canister for Apple. When you're done, go back out and quickly press ![]() to avoid tangling with the drones. Take the elevator up to the next level where another drone is waiting. Kill it and proceed to the right.
to avoid tangling with the drones. Take the elevator up to the next level where another drone is waiting. Kill it and proceed to the right.
Row 15, Room 3[edit]

In this room you'll find a drone behind a wall and three auto-gun turrets that will make getting the keycodes out of the canisters a little more difficult. You can shoot the mines through the wall by standing on the platform below them. All this room really takes is good timing and patience, but if you want to turn off the guns, the code is ![]()
![]()
![]()
![]() . Two elevators open, but only the top one is accessible, so move up to the next room.
. Two elevators open, but only the top one is accessible, so move up to the next room.
Row 14, Room 3[edit]

This is another room that just requires a little patience. There are four sensors scattered around and you'll need to alternate between crawling and jumping to get around. You can turn the sensors off with ![]()
![]()
![]()
![]() to make it much easier for yourself. The room to the left has a level up, a Zillion upgrade, two power ups and two ID cards. You shouldn't need any of those, and if you want the Zillion upgrade you'll have to go the long way around to get back to where you are. If you're super low on health or just want to level Apple up, go ahead, but if you skip the Zillion upgrade, it is possible to just hop along the platforms on the top to the level up and back. Even though JJ is fully maxed out, he still gets all his life back from a level up. So either when you get back from the other room or if you skipped it, head to the room on the right.
to make it much easier for yourself. The room to the left has a level up, a Zillion upgrade, two power ups and two ID cards. You shouldn't need any of those, and if you want the Zillion upgrade you'll have to go the long way around to get back to where you are. If you're super low on health or just want to level Apple up, go ahead, but if you skip the Zillion upgrade, it is possible to just hop along the platforms on the top to the level up and back. Even though JJ is fully maxed out, he still gets all his life back from a level up. So either when you get back from the other room or if you skipped it, head to the room on the right.
Row 14, Room 4[edit]

This room is extremely simple; just shoot out the mines and get the keycodes. Take the elevator up when you input the room code.
Row 13, Room 4[edit]

As soon as you get up to the next room, put the elevator down a bit, and blast away at the row of three drones waiting for on the right. Then get moving to avoid the auto-gun turrets. Turn off the turrets with ![]()
![]()
![]()
![]() or just avoid them and input the codes, clearing the upper barrier for when you come back through this way later.
or just avoid them and input the codes, clearing the upper barrier for when you come back through this way later.
Go back down to the last room, and this time take a right.
Row 14, Room 5[edit]

Take out the two drones that drop down in front of you, then avoid the turrets and put in the room code. The only time you have to worry is when you are at the far end of the room from the turret on the right wall. Take the lower elevator down to the next room.
Row 15, Room 5[edit]

This room is a mess of moving walkways, so be sure to shoot all the mines out to simplify things. Now just dodge the two autoturrets and grab the keycodes. You can turn off the walkways with ![]()
![]()
![]()
![]() and the auto-guns with
and the auto-guns with ![]()
![]()
![]()
![]() . When you're done, go to the room on the left.
. When you're done, go to the room on the left.
Row 15, Room 4[edit]

Get off a quick few shots as you come in, because there are two drones waiting. The rest of the room is fairly simple as long as you're patient to jump up to the computer console at the right time. When you're through here, move right one room and up a room to where you diverted. This time take the elevator up.
Row 13, Room 5[edit]

In this room, stick to the tops of the platforms, unless you want to turn the auto-gun turrets off with ![]()
![]()
![]()
![]() , because there are a bunch of guns and the bottom of the room also has a large moving walkway. You can shoot the drone on lowest platform by jumping by the elevator, but you have to do it right under an auto-gun. Take your time waiting for the top two turrets to move before jumping over to new parts of the room. When you're done, head to the right.
, because there are a bunch of guns and the bottom of the room also has a large moving walkway. You can shoot the drone on lowest platform by jumping by the elevator, but you have to do it right under an auto-gun. Take your time waiting for the top two turrets to move before jumping over to new parts of the room. When you're done, head to the right.
Row 13, Room 6[edit]

In this room, quickly kill the two drones that drop down, then blow the mine on the walkway and start collecting keycodes. There are three awkwardly places auto-gun turrets, and when you're on the middle platform, only stand up when you're getting a keycode to minimize the chance of being tagged by the auto-gun guarding that section. If you can make it to the computer, the auto-gun code is ![]()
![]()
![]()
![]() .
.
Now you can either go up, if you want to rescue Champ, or right if you want to skip him and the rooms associated with freeing him. Skip down to Row 13, Room 7 if you don't want to get Champ. Otherwise head up to the next level.
Row 12, Room 6[edit]

Take out the three drones that charge you from the right by using the lowered elevator trick. Once they're gone, it's very simple to crack the canisters for the code, then head to the next room on the right.
Row 12, Room 7[edit]

In this room, there are no drones, but a ton of sensors. You might as well just get the canisters without turning off the sensors, since they're mostly on the way to the computer console anyway. After you input the code, you can try crawling off to the left through the sensor and run out of the screen before the response drones can start firing, but you may lose a little health when you touch them. Head back the way you came to the room on the left and then down the elevator. Back in this room, head to the right.
Row 13, Room 7[edit]

Immediately drop down to blow the mine and start shooting at the drones. Don't waste an ID card inputting ![]()
![]()
![]()
![]() to turn off the sensor, just crawl through it and turn around as soon as your body is clear and start firing. The response drones come through the left entrance, so take them out then retrieve the keycodes from the level three canisters. Do the same thing every time you crawl through the sensor. The out of reach level three canister has the red ID card, but you'll have to get it later. When you have the codes, take the elevator down into the next room. You can save the level up until you come back up, or use it now on either JJ or Apple.
to turn off the sensor, just crawl through it and turn around as soon as your body is clear and start firing. The response drones come through the left entrance, so take them out then retrieve the keycodes from the level three canisters. Do the same thing every time you crawl through the sensor. The out of reach level three canister has the red ID card, but you'll have to get it later. When you have the codes, take the elevator down into the next room. You can save the level up until you come back up, or use it now on either JJ or Apple.
Row 14, Room 7[edit]

In here wait until the two drones below you are on their way to your side of the room, then drop down in front of them and take them out. Blow the mines and start collecting keycodes. When you're done, enter in the code and go back up. Remember there are a couple drones on the left when you come up, so use the elevator trick to take them out. From here get the level up if you didn't already, then just run through the sensor and out of the room before the drones come. In this room to the left, take the elevator down.
Row 14, Room 6[edit]

Here you'll see a few sensors and canisters each up on their own platforms. Avoid the sensors, or turn them off with ![]()
![]()
![]()
![]() , then go to work and input the code when you're done. You do need to get the level three canister behind the sensor on the right, because it contains a floppy disk, but save it for when you come back up. Take the elevator down instead.
, then go to work and input the code when you're done. You do need to get the level three canister behind the sensor on the right, because it contains a floppy disk, but save it for when you come back up. Take the elevator down instead.
Row 15, Room 6[edit]

In this room, jump over to the tiny ledge on top of the wall where the two drones are patrolling. When they turn away from you, drop down behind them and blast away. Grab the keycodes and then switch to Apple and make her drop through the two laser barriers. Hopefully as you've been going through the game you've kept her health up and given her level ups when you didn't need them so she can be your laser shield. Get the last keycode, and crawl into the room on the right.
Row 15, Room 7[edit]

As quick as you can, crawl over to the computer and get up to input the auto-gun code. You can tap ![]() to stand up quickly at the computer, and keep in mind that when your character stands up, he will be centered with where his belt was when he was prone. You can see that this room's canisters are heavily guarded by autoturrets, so it's much easier to just burn the ID card and turn them off with
to stand up quickly at the computer, and keep in mind that when your character stands up, he will be centered with where his belt was when he was prone. You can see that this room's canisters are heavily guarded by autoturrets, so it's much easier to just burn the ID card and turn them off with ![]()
![]()
![]()
![]() . After that, get the keycodes and open the barrier and elevator in other parts of the room for later.
. After that, get the keycodes and open the barrier and elevator in other parts of the room for later.
Have Apple get the level up, then head back to where you came going one room to the left, and then up another room. In here, crack the canister on the right, then run in and grab the floppy disk before running back out and quickly jumping up to the platform on the left. If you moved quickly enough, the response drones on the bottom of the room won't have a chance to get a shot off. Hurry up to the room above before they start shooting up at you though. In this room, take out the two drones, then head to the left.
Back in this room, take the platforms up to the exit on the left side of the room and enter the next room. Don't waste time in here even though you just need to run across to the other side of the room; the drones below you will shoot you up as you're trying to crawl along exploding mines.
Row 13, Room 3[edit]

When you get into this room, you'll see an auto-gun turret on the ceiling and a drone on the floor. Drop down behind him when he's facing away from you and blast him, then take care of the mines. The room to the left and the one above it aren't necessary to visit, but they're not too dangerous, and they have a power up, two level ups and two ID cards. In the top room, you'll just want to be sure you try and get up and down as fast as you can before the laser barriers come back on if you turn them off with ![]()
![]()
![]()
![]() . Either skip those rooms, come back afterwards, and take the elevator in this room up.
. Either skip those rooms, come back afterwards, and take the elevator in this room up.
Row 12, Room 3[edit]

In the room above you'll have to drop down through a laser barrier, so switch to Apple if she still has health left, but make sure you get the canister keycode before you do and blow the mine on the other side of the wall. On the other side, turn the auto-gun turrets off with ![]()
![]()
![]()
![]() if you want, then get the room code. When you're done, head back over to the right, this time with the option to turn off the laser barrier with
if you want, then get the room code. When you're done, head back over to the right, this time with the option to turn off the laser barrier with ![]()
![]()
![]()
![]() . Don't bother with the moving walkway though, because once you blow the mine it's not difficult to make the jump back up. Head into the room on the right.
. Don't bother with the moving walkway though, because once you blow the mine it's not difficult to make the jump back up. Head into the room on the right.
Row 12, Room 4[edit]

Take out the two drones that drop down, then get the code in this simple room. Just avoid the one auto-gun turret. You have the option to head to the right to rescue Champ, or go up if not. If you're skipping Champ, go down to Row 11, Room 4 after the ones dealing with him. Otherwise, head to the right.
Row 12, Room 5[edit]

In this room is a drone behind a wall, and it's obscured by a canister as well, so it may take two shots to get to him. This room has three stationary turrets, but they're all around the computer console, making it difficult for you. The trick to this room is not falling down the bottom of the room before getting the keycodes on the platforms at the top. If you do, you'll be under two more auto-gun turrets and you'll have to jump back up through a sensor barrier, or turn it off with ![]()
![]()
![]()
![]() . When you've input the room code, head to the right.
. When you've input the room code, head to the right.
This room is pretty simple, since you just have to run across the top of it along a moving walkway, drop down when you get in and try and take out the two drones before they kneel and shoot. Keep going right.
In the next room it's even easier, since there are no drones. Just run over to the elevator and take it up, while avoiding the single turret on the ceiling.
Row 11, Room 7[edit]

In this room there are a bunch of auto-gun turrets, and you should use the elevator trick to take out the drone on the left. You'll want to avoid the two turrets directly above you when you come in while waiting for the right time to jump up the series of moving walkways to the left. The turrets on the walkway platforms shoot all at once and have a nice long interval in between, so you should have no problem getting to the top in between their salvos. Get the keycode at the bottom, then take your time getting the timing right while you obtain the ones at the top of the room. Head to the left when you're done.
Row 11, Room 6[edit]

Here you'll find yourself in the room in which Champ is being held prison. Drop down behind the drones on the bottom and take them out, then you'll have to jump up through the laser barrier to get to Champ. Once again, if you are using the invincibility cheat, make sure you have JJ selected when you exit the start menu. If you select Champ here, you'll be stuck, since he doesn't have the jumping level needed to get out. You'll notice there is a barrier on the bottom left and you're on the wrong side of the room to open it. The only thing in there is a level up and a scope, and if you wanted them you'd have to have gone all the way around to open it from the other side, then come back through the way you just did.
From here on out, it's better to use level ups on Champ, since he has very high max life and you'll be using the alternate characters as humans shields. Now you need to backtrack, so go one room right, down one, then over to the left three rooms. Take the elevator up into the next room.
Row 11, Room 4[edit]

Here you'll see a standard layout with just two auto-gun turrets and one drone. After inputting the room code, head to the right.
Row 11, Room 5[edit]

Quickly take out the drone in this room. You're now free to grab the keycodes, and open up the barrier to the right and an elevator. Don't bother with the room on the right, since all it does is open the far barrier in Champ's room, and you should already have him. Instead, take the elevator up.
Row 10, Room 5[edit]

In the room above, use the elevator trick and take out the drone to the right. There are two turrets in this room, but the one on the ceiling is blocked from traversing the whole width of the room by a wall, so you really only have to worry about the one on the right side. Input the room code without getting tagged by the auto-gun turret (using ![]()
![]()
![]()
![]() if you need it), then head back down one room and over to the left two rooms.
if you need it), then head back down one room and over to the left two rooms.
Row 11, Room 3[edit]

You'll find yourself in a room with one drone and a couple of auto-gun turrets, only one of which is facing you. It would be a good idea to turn off the security sensors with ![]()
![]()
![]()
![]() , since the higher one is unavoidable when you jump up to the level above you. When you get the room code, an elevator will open at the top of the room, as will a barrier to the left. The only things in the room to the left are two ID cards and a level up, so skip that room. It's also hard to get out of and easier to trip a sensor in there. Instead, take the elevator up a level.
, since the higher one is unavoidable when you jump up to the level above you. When you get the room code, an elevator will open at the top of the room, as will a barrier to the left. The only things in the room to the left are two ID cards and a level up, so skip that room. It's also hard to get out of and easier to trip a sensor in there. Instead, take the elevator up a level.
Row 10, Room 3[edit]

This is another room where you'll likely want to turn off the security sensor, which is otherwise unavoidable. After that it is a routine matter to grab the keycodes and open up exits in both the left and right directions. There's just a level up in the room to the left, and it's fairly easy to grab it and jump out of the danger zone after tripping the security sensor, so go get it for Champ. When you get back, take the right exit.
Row 10, Room 4[edit]

This room is fairly simple; just avoid the auto-gun turrets and input the code, then head over to the room on the right. You can optionally turn off the turrets for a short time with ![]()
![]()
![]()
![]() . You've already been in the room to the right, so in there, just try to get to the top and head back to the room on the left without getting shot by the drone or auto-gun turrets, and don't land on the mine either.
. You've already been in the room to the right, so in there, just try to get to the top and head back to the room on the left without getting shot by the drone or auto-gun turrets, and don't land on the mine either.
When you get back into the room on the left, take out the two drones and run across the top platform to retrieve the last floppy disk. From here, you'll need to backtrack quite a distance. Go back to the right then into the room to the left using the bottom entrance. Go another room to the left and take the elevator down, then go to the room on the right and take that elevator down. Go one room to the left and take yet another elevator down. This time go right two rooms before taking the next elevator down. Go one room to the left and take the elevator in this room down, then go another room to the left. There's a level up in this room guarded by a drone, so grab that for Champ before heading down another level.
Row 16, Room 3[edit]
This puts you back in the secret room you first entered when you got to the bottom of the base from the red levels - only this time you're on the other side of the wall. The room has a drone on the bottom and an auto-gun turret hovering over the computer console. Grab the keycodes at the top of the room, then take the exit to the right when you've input them. You will be in a very long hallway filled with drones, so switch to Champ and go all the way to the right. It's actually not that bad if you just keep running and drop to shoot when you see a drone. At the end, take the elevator up and then go into the room on the right.
In this room, just avoid the two turrets on your side of the room and head up to the elevator in the upper left corner. If you want to get the canister here, it's just a power up, so decide if it's worth taking the time to avoid the auto-gun over there. When you go up to the room above, you'll get another power up canister and then just shoot out the mines and avoid the single auto-gun turret on the ceiling as you make your way out of the room to the right. You'll find yourself in a hallway, so take the elevator up to the first hallway going to the left. Take out the drone guarding the hallway, then grab the red keycard from the level three canister in the room on the left. Make sure you don't drop down into the room, or you'll have to go all the back around again.
Instead, go back out the way you came and keep going up in the elevator. At the top there is another guard drone, and then in the pitch black room to the left there are three more drones. Keep heading left and you'll find yourself in a room with just a single door at the left side of it. Press ![]() at the doorway to enter the main computer room.
at the doorway to enter the main computer room.
Main Computer[edit]
-
Row 10, Room 6
-
Main Computer


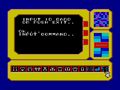
Here you will use the computer console in the center of the room to input the base explosion command ![]()
![]()
![]()
![]() . After you do that, you'll have 300 seconds, marked by a countdown timer in the upper left corner of the screen, in which to escape the base.
. After you do that, you'll have 300 seconds, marked by a countdown timer in the upper left corner of the screen, in which to escape the base.
Exit the computer room and go back into the dark room to the right. This will activate your boss fight with a big robot lizard or dinosaur.
Norsa boss[edit]
This boss fires blue bolts of energy or fire or magic at you. You have to hit him in the mouth 20 times with a level three Zillion to kill him, but only when his mouth is open, which is when he's firing at you. It's fairly easy to beat him by standing at the left side of the screen and rapidly firing your Zillion, as you happen to be just the right height to hit him in the mouth. If he sends a bolt your way, either duck it and stand back quickly, or don't worry about it, because it fall way short of you. Don't jump, as this takes way longer and you won't be in a position to shoot him in the mouth when he fires his blue magic, because you'll need to start jumping early. You'll know you've got a good shot in, because he'll flash yellow throughout his body. If you use Champ at full strength and leveled up to 8, you can honestly just sit there and spray him every time he opens his mouth without even bothering to dodge, and you won't take lethal damage from his attacks before you destroy him. This method only takes about 25 seconds, even if it isn't a super-slick looking way to play. During the fight your timer is counting down, but it's unlikely it will take you 300 seconds to beat him, and you can reset the countdown when you're done.

- The Norsa boss.

- He flashes yellow when get a good hit in on him.
Escape[edit]

To turn off the countdown, go back to the room on the left and go through the door to the main computer room, but this time input ![]()
![]()
![]()
![]() and the explosion will be canceled. Turn it back on with
and the explosion will be canceled. Turn it back on with ![]()
![]()
![]()
![]() , and you'll get another 300 seconds. If you have Apple, switch to her to escape because she runs the quickest. While running back through the base, anything that can damage you has been taken out, and the computer consoles are no longer operating. This means you can't just warp back to the first elevator with
, and you'll get another 300 seconds. If you have Apple, switch to her to escape because she runs the quickest. While running back through the base, anything that can damage you has been taken out, and the computer consoles are no longer operating. This means you can't just warp back to the first elevator with ![]()
![]()
![]()
![]() (it doesn't work from the main computer either). All drones, mines and laser barriers are gone, and auto-turrets and security sensors are disabled. The only things that still work are elevators and moving walkways. Use the route on map to the right for the quickest egress. Once you're back out of the base, head over to the Mother Ship and jump in to finish the game.
(it doesn't work from the main computer either). All drones, mines and laser barriers are gone, and auto-turrets and security sensors are disabled. The only things that still work are elevators and moving walkways. Use the route on map to the right for the quickest egress. Once you're back out of the base, head over to the Mother Ship and jump in to finish the game.
If you've rescued your teammates, you'll get a message saying how the "Zillion" men were all able to make it out, and if you don't, its says that although you've lost some, the mission was still successful.