(I know, I did it backwards, but this was easier to build than the front page.) |
m (fix FN) |
||
| (2 intermediate revisions by one other user not shown) | |||
| Line 3: | Line 3: | ||
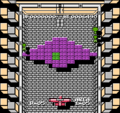
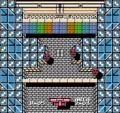
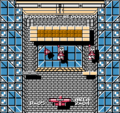
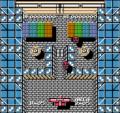
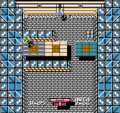
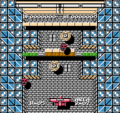
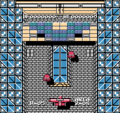
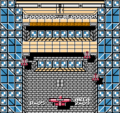
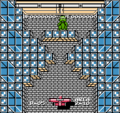
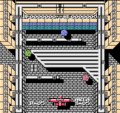
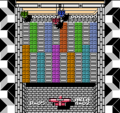
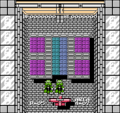
== Cubic Zone == | == Cubic Zone == | ||
<gallery> | <gallery> | ||
File:Crackout Area 1-01.png|Area 1-01 | |||
File:Crackout Area 1-02.png|Area 1-02 | |||
File:Crackout Area 1-03.png|Area 1-03 | |||
File:Crackout Area 1-04.png|Area 1-04 | |||
File:Crackout Area 1-05.png|Area 1-05 | |||
File:Crackout Area 1-06.png|Area 1-06 | |||
File:Crackout Area 1-07.png|Area 1-07 | |||
File:Crackout Area 1-08.png|Area 1-08 | |||
File:Crackout Area 1-09.png|Area 1-09 | |||
File:Crackout Area 1-10.png|Area 1-10 | |||
File:Crackout Area 1-11.png|Area 1-11 | |||
</gallery> | </gallery> | ||
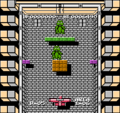
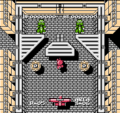
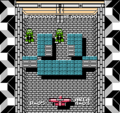
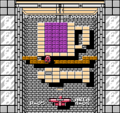
== Mirror Zone == | == Mirror Zone == | ||
<gallery> | <gallery> | ||
File:Crackout Area 2-01.png|Area 2-01 | |||
File:Crackout Area 2-02.png|Area 2-02 | |||
File:Crackout Area 2-03.png|Area 2-03 | |||
File:Crackout Area 2-04.png|Area 2-04 | |||
File:Crackout Area 2-05.png|Area 2-05 | |||
File:Crackout Area 2-06.png|Area 2-06 | |||
File:Crackout Area 2-07.png|Area 2-07 | |||
File:Crackout Area 2-08.png|Area 2-08 | |||
File:Crackout Area 2-09.png|Area 2-09 | |||
File:Crackout Area 2-10.png|Area 2-10 | |||
File:Crackout Area 2-11.png|Area 2-11 | |||
</gallery> | </gallery> | ||
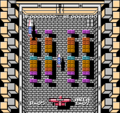
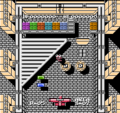
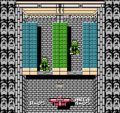
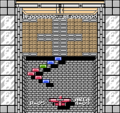
== Tube Zone == | == Tube Zone == | ||
<gallery> | <gallery> | ||
File:Crackout Area 3-01.png|Area 3-01 | |||
File:Crackout Area 3-02.png|Area 3-02 | |||
File:Crackout Area 3-03.png|Area 3-03 | |||
File:Crackout Area 3-04.png|Area 3-04 | |||
File:Crackout Area 3-05.png|Area 3-05 | |||
File:Crackout Area 3-06.png|Area 3-06 | |||
File:Crackout Area 3-07.png|Area 3-07 | |||
File:Crackout Area 3-08.png|Area 3-08 | |||
File:Crackout Area 3-09.png|Area 3-09 | |||
File:Crackout Area 3-10.png|Area 3-10 | |||
File:Crackout Area 3-11.png|Area 3-11 | |||
</gallery> | </gallery> | ||
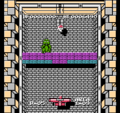
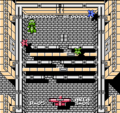
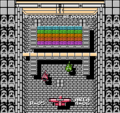
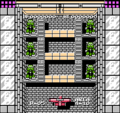
== Final Zone == | == Final Zone == | ||
<gallery> | <gallery> | ||
File:Crackout Area 4-01.png|Area 4-01 | |||
File:Crackout Area 4-02.png|Area 4-02 | |||
File:Crackout Area 4-03.png|Area 4-03 | |||
File:Crackout Area 4-04.png|Area 4-04 | |||
File:Crackout Area 4-05.png|Area 4-05 | |||
File:Crackout Area 4-06.png|Area 4-06 | |||
File:Crackout Area 4-07.png|Area 4-07 | |||
File:Crackout Area 4-08.png|Area 4-08 | |||
File:Crackout Area 4-09.png|Area 4-09 | |||
File:Crackout Area 4-10.png|Area 4-10 | |||
File:Crackout Area 4-11.png|Area 4-11 | |||
</gallery> | </gallery> | ||
== Break the System == | |||
[[File:Crackout_Final_Password.png|right]] | |||
After you defeat the final boss in Area 4-11, you will see the screen presented to the right. The purpose of this screen is to enter the correct password that will entitle you to view the ending of the game. If you do not input the correct password, you will be returned to Area 1-01 to start the game over. The correct password is composed of letters that you may have seen in the borders of the game, or by flipping out certain tiles over the course of the game. They are not presented in order, but are scrambled. In order to determine the correct password, you must have most, or all of the letters written down, and attempt to unscramble them into a fairly well-known saying or phrase. Check the spoiler below for the correct solution. | |||
{{-}} | |||
{{spoiler|title=The System Password is:|content=<center>MERRYCHRISTMAS</center>}} | |||
{{Footer Nav|game=Crackout|prevpage= | {{Footer Nav|game=Crackout|prevpage=Gameplay}} | ||
Latest revision as of 01:35, 5 June 2021
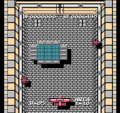
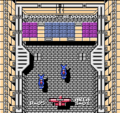
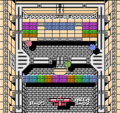
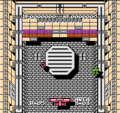
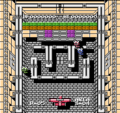
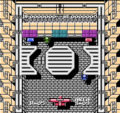
Cubic Zone[edit]
-
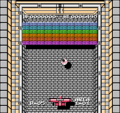
Area 1-01
-
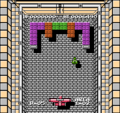
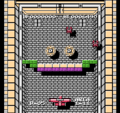
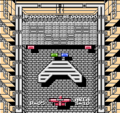
Area 1-02
-
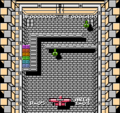
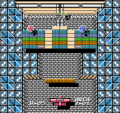
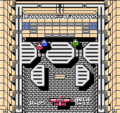
Area 1-03
-
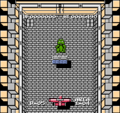
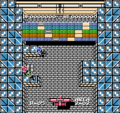
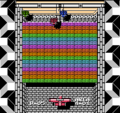
Area 1-04
-
Area 1-05
-
Area 1-06
-
Area 1-07
-

Area 1-08
-
Area 1-09
-
Area 1-10
-
Area 1-11


Mirror Zone[edit]
-
Area 2-01
-
Area 2-02
-
Area 2-03
-
Area 2-04
-
Area 2-05
-
Area 2-06
-
Area 2-07
-
Area 2-08
-
Area 2-09
-
Area 2-10
-

Area 2-11


Tube Zone[edit]
-
Area 3-01
-
Area 3-02
-
Area 3-03
-
Area 3-04
-
Area 3-05
-
Area 3-06
-
Area 3-07
-
Area 3-08
-
Area 3-09
-
Area 3-10
-
Area 3-11


Final Zone[edit]
-
Area 4-01
-
Area 4-02
-
Area 4-03
-

Area 4-04
-
Area 4-05
-
Area 4-06
-
Area 4-07
-
Area 4-08
-
Area 4-09
-
Area 4-10
-
Area 4-11


Break the System[edit]

After you defeat the final boss in Area 4-11, you will see the screen presented to the right. The purpose of this screen is to enter the correct password that will entitle you to view the ending of the game. If you do not input the correct password, you will be returned to Area 1-01 to start the game over. The correct password is composed of letters that you may have seen in the borders of the game, or by flipping out certain tiles over the course of the game. They are not presented in order, but are scrambled. In order to determine the correct password, you must have most, or all of the letters written down, and attempt to unscramble them into a fairly well-known saying or phrase. Check the spoiler below for the correct solution.