Jump to navigation
Jump to search
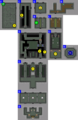
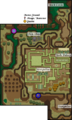
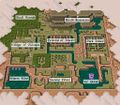
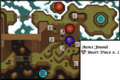
Files for the The Legend of Zelda: A Link to the Past guide.
Media in category "The Legend of Zelda: A Link to the Past files"
The following 200 files are in this category, out of 429 total.
(previous page) (next page)-
 ALttP enemies Armos.gif 72 × 156; 21 KB
-
 ALttP enemies Creepy Blue.gif 112 × 72; 3 KB
-
 ALttP enemies Creepy Green.gif 112 × 72; 3 KB
-
 ALttP enemies Gapra.gif 104 × 100; 7 KB
-
 ALttP enemies Hachi.gif 40 × 36; 574 bytes
-
 ALttP enemies Hedge.gif 72 × 104; 4 KB
-
 ALttP enemies Hinox.gif 140 × 136; 13 KB
-
 ALttP enemies Hue.gif 76 × 76; 1 KB
-
 ALttP enemies Kuu.gif 72 × 72; 2 KB
-
 ALttP enemies Kyune.gif 72 × 76; 1 KB
-
 ALttP enemies Likelike.gif 72 × 76; 1 KB
-
 ALttP enemies Lynel.gif 104 × 116; 5 KB
-
 ALttP enemies Moblin.gif 72 × 136; 4 KB
-
 ALttP enemies Octoballoon.gif 104 × 104; 11 KB
-
 ALttP enemies Pikku.gif 72 × 96; 6 KB
-
 ALttP enemies Poe.gif 76 × 76; 5 KB
-
 ALttP enemies Roper.gif 72 × 100; 6 KB
-
 ALttP enemies Slarock.gif 72 × 76; 5 KB
-
 ALttP enemies Slime.gif 72 × 72; 1 KB
-
 ALttP enemies Stal.gif 72 × 92; 2 KB
-
 ALttP enemies Swamola.gif 140 × 80; 2 KB
-
 ALttP enemies Tauros Blue.gif 132 × 112; 8 KB
-
 ALttP enemies Tauros.gif 100 × 140; 9 KB
-
 ALttP enemies Theif.gif 72 × 104; 3 KB
-
 ALttP enemies Topi.gif 72 × 72; 8 KB
-
 ALttP P4S Arrghus II.png 240 × 160; 8 KB
-
 ALttP P4S Blind II.png 240 × 160; 7 KB
-
 ALttP P4S Blue Entrance.png 240 × 160; 9 KB
-
 ALttP P4S Blue Ice.png 240 × 160; 11 KB
-
 ALttP P4S Blue Stars.png 240 × 160; 10 KB
-
 ALttP P4S Blue Switch.png 240 × 160; 10 KB
-
 ALttP P4S Blue Sword.png 240 × 160; 7 KB
-
 ALttP P4S Entrance.png 240 × 160; 11 KB
-
 ALttP P4S Final Entrance.png 240 × 160; 7 KB
-
 ALttP P4S Green Entrance.png 240 × 160; 8 KB
-
 ALttP P4S Green Swim.png 240 × 160; 12 KB
-
 ALttP P4S Green Sword.png 240 × 160; 7 KB
-
 ALttP P4S Green Torch.png 240 × 160; 11 KB
-
 ALttP P4S Hallway.png 240 × 160; 8 KB
-
 ALttP P4S Helmasaur II.png 240 × 160; 10 KB
-
 ALttP P4S Invisible Bridge.png 240 × 160; 3 KB
-
 ALttP P4S Mothula II.png 240 × 160; 9 KB
-
 ALttP P4S Purple Dash.png 240 × 160; 6 KB
-
 ALttP P4S Purple Doppleganger.png 240 × 160; 9 KB
-
 ALttP P4S Purple Entrance.png 240 × 160; 9 KB
-
 ALttP P4S Purple Likelike.png 240 × 160; 14 KB
-
 ALttP P4S Purple Plate.png 240 × 160; 6 KB
-
 ALttP P4S Purple Sword.png 240 × 160; 7 KB
-
 ALttP P4S Purple Uncle.png 240 × 160; 6 KB
-
 ALttP P4S Red Doppelganger.png 240 × 160; 9 KB
-
 ALttP P4S Red Entrance.png 240 × 160; 9 KB
-
 ALttP P4S Red Switch.png 240 × 160; 9 KB
-
 ALttP P4S Red Sword.png 240 × 160; 7 KB
-
 ALttP P4S Red Tiles.png 240 × 160; 8 KB
-
 ALttP P4S Subscreen.png 240 × 160; 6 KB
-
 ALttP P4S Swords Leave.png 240 × 160; 10 KB
-
 ALttP P4S Swords Return.png 240 × 160; 10 KB
-
 LoZLttp Castle Tower F2.png 512 × 512; 30 KB
-
 LoZLttp Castle Tower F3.png 512 × 512; 31 KB
-
 LoZLttp Castle Tower F4.png 512 × 512; 26 KB
-
 LoZLttp Castle Tower F5.png 512 × 512; 28 KB
-
 LoZLttp Castle Tower F6.png 512 × 512; 28 KB
-
 LoZLttp Castle Tower F7.png 256 × 768; 21 KB
-
 LoZLttP Dark Palace B1A.png 512 × 512; 43 KB
-
 LoZLttP Dark Palace B1B.png 384 × 384; 28 KB
-
 LoZLttP Dark Palace F1.png 664 × 1,024; 112 KB
-
 LoZLttP Dark Palace.png 388 × 644; 115 KB
-
 LoZLttP Dark World.jpg 512 × 448; 60 KB
-
 LoZLttP Death Mountain East.png 388 × 260; 51 KB
-
 LoZLttP Death Mountain West.png 388 × 260; 67 KB
-
 LoZLttP Desert of Mystery.png 388 × 260; 55 KB
-
 LoZLttP Desert Palace B1.png 768 × 495; 75 KB
-
 LoZLttP Desert Palace F1 F2.png 384 × 640; 43 KB
-
 LoZLttP Eastern Palace F1.png 768 × 976; 128 KB
-
 LoZLttP Eastern Palace F2.png 512 × 359; 43 KB
-
 LoZLttP Eastern Palace.png 388 × 516; 90 KB
-
 LoZLttP Ganons Tower B1.png 256 × 256; 19 KB
-
 LoZLttP Ganons Tower F1.png 768 × 768; 152 KB
-
 LoZLttP Ganons Tower F2.png 512 × 512; 36 KB
-
 LoZLttP Ganons Tower F3.png 512 × 512; 51 KB
-
 LoZLttP Ganons Tower F4.png 512 × 512; 42 KB
-
 LoZLttP Ganons Tower F5.png 512 × 512; 42 KB
-
 LoZLttP Ganons Tower F6.png 384 × 512; 44 KB
-
 LoZLttP Ganons Tower F7.png 512 × 512; 25 KB
-
 LoZLttP Ganons Tower.png 260 × 280; 42 KB
-
 LoZLttP Gargoyles Domain B1.png 512 × 896; 104 KB
-
 LoZLttP Gargoyles Domain B2.png 512 × 256; 37 KB
-
 LoZLttP Gargoyles Domain F1.png 1,024 × 256; 37 KB
-
 LoZLttP Great Swamp.png 388 × 388; 68 KB
-
 LoZLttP Hera Tower F1.png 512 × 512; 25 KB
-
 LoZLttP Hera Tower F2.png 512 × 512; 32 KB
-
 LoZLttP Hera Tower F3.png 512 × 512; 13 KB
-
 LoZLttP Hera Tower F4.png 512 × 512; 34 KB
-
 LoZLttP Hera Tower F5.png 512 × 512; 11 KB
-
 LoZLttP Hera Tower F6.png 512 × 512; 11 KB
-
 LoZLttP Hyrule Castle B1.png 492 × 481; 51 KB
-
 LoZLttP Hyrule Castle B2 B3.png 256 × 200; 13 KB
-
 LoZLttP Hyrule Castle F1.png 576 × 494; 58 KB
-
 LoZLttP Hyrule Castle F2.png 224 × 247; 15 KB
-
 LoZLttP Hyrule Castle.png 388 × 474; 78 KB
-
 LoZLttP Ice Palace B1.png 512 × 384; 34 KB
-
 LoZLttP Ice Palace B2.png 512 × 384; 39 KB
-
 LoZLttP Ice Palace B3.png 384 × 384; 29 KB
-
 LoZLttP Ice Palace B4.png 384 × 384; 32 KB
-
 LoZLttP Ice Palace B5.png 384 × 384; 37 KB
-
 LoZLttP Ice Palace B6.png 256 × 384; 25 KB
-
 LoZLttP Ice Palace F1.png 256 × 128; 15 KB
-
 LoZLttP Ice Palace.png 388 × 338; 66 KB
-
 LoZLttP Kakariko Village.png 388 × 388; 89 KB
-
 LoZLttP Lake Hylia.png 388 × 388; 80 KB
-
 LoZLttP Lost Woods.png 388 × 516; 103 KB
-
 LoZLttP Misery Maze B1.png 768 × 1,024; 198 KB
-
 LoZLttP Misery Maze B2.png 896 × 256; 63 KB
-
 LoZLttP Misery Maze F1.png 512 × 256; 29 KB
-
 LoZLttP Misery Mire.png 260 × 278; 37 KB
-
 LoZLttP Overworld.jpg 512 × 448; 72 KB
-
 LoZLttP Pyramid of Power.png 388 × 484; 77 KB
-
 LoZLttP Sanctuary F1.png 216 × 485; 38 KB
-
 LoZLttP Secret Passage.png 240 × 223; 26 KB
-
 LoZLttP Sewer B1.png 512 × 732; 48 KB
-
 LoZLttP Sewer F1.png 168 × 95; 4 KB
-
 LoZLttP Sewer F2.png 256 × 247; 8 KB
-
 LoZLttP Skull Dungeon Part1.png 768 × 512; 110 KB
-
 LoZLttP Skull Dungeon Part2.png 256 × 640; 52 KB
-
 LoZLttP Skull Woods.png 388 × 404; 83 KB
-
 LoZLttP Swamp Palace Part1.png 1,152 × 768; 207 KB
-
 LoZLttP Swamp Palace Part2.png 512 × 640; 78 KB
-
 LoZLttP Swamp Palace.png 388 × 388; 67 KB
-
 LoZLttP Turtle Rock B1.png 640 × 768; 107 KB
-
 LoZLttP Turtle Rock B2.png 512 × 768; 76 KB
-
 LoZLttP Turtle Rock B3.png 512 × 768; 31 KB
-
 LoZLttP Turtle Rock F1.png 512 × 768; 81 KB
-
 LoZLttP Turtle Rock.png 388 × 260; 54 KB
-
 LoZLttP Village of Outcasts.png 388 × 388; 86 KB
-
 LoZLttP Zoras Falls.png 368 × 516; 125 KB
-
 LttP Bomb Soldier.png 104 × 128; 16 KB
-
 LttP bosses Agahnim.gif 84 × 108; 58 KB
-
 LttP bosses Armos Knight.gif 68 × 108; 18 KB
-
 LttP bosses Arrghus.gif 94 × 120; 5 KB
-
 LttP bosses Blind.gif 112 × 82; 5 KB
-
 LttP bosses Ganon.gif 150 × 134; 71 KB
-
 LttP bosses Helmasaur King.gif 186 × 202; 5 KB
-
 LttP bosses Kholdstare.gif 164 × 132; 7 KB
-
 LttP bosses Lanmola.gif 106 × 104; 2 KB
-
 LttP bosses Moldorm.gif 158 × 116; 5 KB
-
 LttP bosses Mothula.gif 132 × 86; 6 KB
-
 LttP bosses Trinexx.gif 156 × 210; 14 KB
-
 LttP bosses Vitreous.gif 170 × 112; 4 KB
-
 LttP Bow Soldier Blue.png 88 × 104; 14 KB
-
 LttP Bow Soldier Grass.png 68 × 112; 12 KB
-
 LttP Chain Soldier Black.png 104 × 104; 15 KB
-
 LttP Chain Soldier Gold.png 104 × 104; 15 KB
-
 LttP enemies Babuusu.gif 68 × 104; 1 KB
-
 LttP enemies Bari Blue.gif 72 × 76; 10 KB
-
 LttP enemies Bari Red.gif 72 × 76; 10 KB
-
 LttP enemies Buzz.gif 72 × 72; 4 KB
-
 LttP enemies Buzzblob.gif 64 × 92; 3 KB
-
 LttP enemies Chyasupa.gif 64 × 72; 2 KB
-
 LttP enemies Crowl.gif 72 × 72; 2 KB
-
 LttP enemies Deadrock.gif 68 × 72; 1 KB
-
 LttP enemies Derudoman.gif 172 × 72; 4 KB
-
 LttP enemies Devilant.gif 128 × 128; 34 KB
-
 LttP enemies Eyegore Green.gif 104 × 104; 7 KB
-
 LttP enemies Eyegore Red.gif 104 × 104; 7 KB
-
 LttP enemies Gibdo.gif 72 × 112; 3 KB
-
 LttP enemies Giibo.gif 112 × 152; 2 KB
-
 LttP enemies Goozu.gif 72 × 56; 2 KB
-
 LttP enemies Goriya Green.gif 96 × 108; 8 KB
-
 LttP enemies Goriya Red.gif 96 × 108; 8 KB
-
 LttP enemies Helmasaur.gif 72 × 76; 2 KB
-
 LttP enemies Hoba.gif 72 × 68; 2 KB
-
 LttP enemies Hokuboku.gif 64 × 188; 10 KB
-
 LttP enemies Keese.gif 72 × 72; 2 KB
-
 LttP enemies Kodongo.gif 72 × 72; 8 KB
-
 LttP enemies Kyameron.gif 72 × 64; 852 bytes
-
 LttP enemies Leever Green.gif 72 × 76; 2 KB
-
 LttP enemies Leever Red.gif 72 × 76; 2 KB
-
 LttP enemies Nuranull.gif 72 × 76; 3 KB
-
 LttP enemies Octorok.gif 72 × 76; 2 KB
-
 LttP enemies Pametto.gif 72 × 72; 2 KB
-
 LttP enemies Peese.gif 112 × 76; 3 KB
-
 LttP enemies Pentagator.gif 100 × 76; 10 KB
-
 LttP enemies Pirogoose.gif 68 × 112; 3 KB
-
 LttP enemies Pon Blue.gif 72 × 96; 3 KB
-
 LttP enemies Pon Red.gif 72 × 96; 3 KB
-
 LttP enemies Popo.gif 72 × 72; 2 KB
-
 LttP enemies Rope.gif 72 × 72; 2 KB
-
 LttP enemies Skull Rope.gif 68 × 72; 2 KB
-
 LttP enemies Stalfos Head.gif 72 × 120; 13 KB
-
 LttP enemies Stalfos Knight.gif 104 × 156; 19 KB
-
 LttP enemies Stalfos Red.gif 64 × 112; 2 KB
-
 LttP enemies Stalfos.gif 72 × 112; 2 KB
-
 LttP enemies Tail.gif 120 × 64; 1 KB
-
 LttP enemies Tainon.gif 116 × 84; 7 KB
-
 LttP enemies Tektite Blue.gif 120 × 76; 3 KB
-
 LttP enemies Tektite Red.gif 120 × 76; 3 KB
-
 LttP enemies Tendol.gif 136 × 68; 4 KB
-
 LttP enemies Terubean.gif 232 × 140; 2 KB
-
 LttP enemies Wallmaster.gif 104 × 100; 3 KB
-
 LttP enemies Wizzrobe Purple.gif 128 × 104; 9 KB


