Jump to navigation
Jump to search
Images from The Legend of Zelda: Ocarina of Time.
Media in category "The Legend of Zelda: Ocarina of Time images"
The following 200 files are in this category, out of 488 total.
(previous page) (next page)-
 LegendofZeldaOcarinaofTimeFishermanshat1.jpg 1,224 × 911; 138 KB
-
 LegendofZeldaOcarinaofTimeFishermanshat2.jpg 1,128 × 854; 85 KB
-
 LegendofZeldaOcarinaofTimeFishermanshat3.jpg 1,125 × 843; 123 KB
-
 LegendofZeldaOcarinaofTimeFishermanshat4.jpg 1,128 × 847; 134 KB
-
 LOZ OOT Adult Link.PNG 640 × 480; 253 KB
-
 LOZ OOT Attacking Morpha.PNG 640 × 480; 427 KB
-
 LOZ OOT Bomb Flower Opening.PNG 640 × 480; 419 KB
-
 LOZ OOT BossKey.gif 97 × 98; 3 KB
-
 LoZ OOT Button-water.jpg 640 × 480; 27 KB
-
 LoZ OoT compass screenshot.jpg 637 × 480; 26 KB
-
 LOZ OOT Compass.gif 97 × 98; 5 KB
-
 LoZ OOT Cow in a cage.jpg 988 × 588; 491 KB
-
 LoZ OOT Dampé's heart-pounding gravedigging tour.jpg 988 × 588; 444 KB
-
 LoZ OOT Dampé's race.jpg 988 × 588; 374 KB
-
 LOZ OOT Dark Link Biggorons Sword.PNG 668 × 501; 374 KB
-
 LOZ OOT Dark Link Din's Fire.PNG 668 × 501; 333 KB
-
 LOZ OOT Dark Link Megaton Hammer.PNG 668 × 501; 409 KB
-
 LOZ OOT Dark Link Sword to Sword.PNG 668 × 501; 376 KB
-
 LOZ OOT Dark Link.PNG 668 × 501; 403 KB
-
 LOZ OOT Darunia's Advice.PNG 640 × 480; 277 KB
-
 LOZ OOT Dekutreefloor1.jpg 279 × 499; 26 KB
-
 LOZ OOT Dekutreefloor23.jpg 774 × 1,160; 77 KB
-
 LOZ OOT DekutreefloorB1.jpg 1,125 × 698; 60 KB
-
 LoZ OOT Desertff.jpg 400 × 300; 88 KB
-
 LOZ OOT Desperate Measures.PNG 668 × 501; 385 KB
-
 LoZ OOT Dmfairyfountain.jpg 640 × 480; 30 KB
-
 LoZ OOT Dmff.jpg 400 × 300; 81 KB
-
 LOZ OOT Dodongo's Cavern Intro.PNG 640 × 480; 329 KB
-
 LoZ OOT Dodongofloor1.jpg 1,400 × 1,190; 222 KB
-
 LoZ OOT Dodongofloor2.jpg 800 × 291; 39 KB
-
 LOZ OOT Door of Time Opens.PNG 640 × 480; 321 KB
-
 LoZ OOT drace.jpg 320 × 191; 72 KB
-
 LOZ OOT DungeonMap.gif 97 × 98; 6 KB
-
 LoZ OoT enemy Anubis.png 99 × 246; 23 KB
-
 LoZ OoT enemy Armos.jpg 708 × 1,023; 176 KB
-
 LoZ OoT enemy Baby Dodongo.jpg 1,712 × 1,644; 316 KB
-
 LoZ OoT enemy Baby Dodongo.png 1,301 × 1,296; 1.21 MB
-
 LoZ OoT enemy Bari.png 800 × 582; 327 KB
-
 LoZ OoT enemy Barinade.png 2,411 × 1,830; 4.12 MB
-
 LoZ OoT enemy Beamos.png 280 × 545; 171 KB
-
 LoZ OoT enemy Big Octo.png 2,375 × 1,755; 2.85 MB
-
 LoZ OoT enemy Biri.png 289 × 599; 175 KB
-
 LoZ OOT enemy Blue Bubble art.jpg 850 × 800; 99 KB
-
 LoZ OoT enemy Blue Bubble.png 331 × 435; 262 KB
-
 LoZ OoT enemy Blue Tektite.png 2,391 × 1,416; 1.81 MB
-
 LoZ OoT enemy Club Moblin.png 1,598 × 2,450; 3.6 MB
-
 LoZ OoT enemy Deku Baba (withered).png 151 × 313; 21 KB
-
 LoZ OoT enemy Deku Baba.jpg 587 × 548; 63 KB
-
 LoZ OoT enemy Deku Scrub.png 250 × 203; 55 KB
-
 LoZ OoT enemy Dinolfos.png 293 × 493; 83 KB
-
 LoZ OoT enemy Dodongo.jpg 696 × 527; 156 KB
-
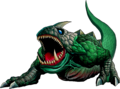 LoZ OoT enemy Dodongo.png 2,433 × 1,802; 3.16 MB
-
 LoZ OoT enemy Door Mimic.png 197 × 379; 61 KB
-
 LoZ OoT enemy Floormaster.png 782 × 912; 299 KB
-
 LoZ OoT enemy Flying Jar.png 125 × 181; 28 KB
-
 LoZ OoT enemy Freezard.png 206 × 247; 34 KB
-
 LoZ OoT enemy Gerudo Guard.png 271 × 479; 99 KB
-
 LoZ OoT enemy Gibdo.png 117 × 288; 38 KB
-
 LoZ OoT enemy Gohma Larva art.png 548 × 735; 264 KB
-
 LoZ OoT enemy Gohma Larva.png 207 × 270; 34 KB
-
 LoZ OoT enemy Gold Skulltula.png 24 × 24; 2 KB
-
 LoZ OoT enemy Guay.png 505 × 207; 91 KB
-
 LoZ OoT enemy Iron Knuckle (Nabooru).png 1,658 × 2,433; 3.29 MB
-
 LoZ OoT enemy Iron Knuckle.jpg 452 × 647; 36 KB
-
 LoZ OoT enemy Keese.png 400 × 264; 65 KB
-
 LoZ OoT enemy King Dodongo.png 3,534 × 2,538; 7.85 MB
-
 LoZ OoT enemy Leever.png 179 × 181; 36 KB
-
 LoZ OOT enemy Lizalfos art.png 1,825 × 1,937; 2.28 MB
-
 LoZ OoT enemy Lizalfos.png 350 × 380; 113 KB
-
 LoZ OoT enemy Moblin Guard.png 1,192 × 2,220; 1.77 MB
-
 LoZ OoT enemy Morpha.png 1,732 × 2,435; 2.41 MB
-
 LoZ OoT enemy Octorok.png 2,424 × 1,397; 2.41 MB
-
 LoZ OoT enemy Peahat Larva.png 503 × 147; 49 KB
-
 LoZ OoT enemy Peahat.png 180 × 140; 27 KB
-
 LoZ OoT enemy Phantom Ganon.png 2,456 × 2,357; 3.51 MB
-
 LoZ OoT enemy Poe.jpg 800 × 880; 95 KB
-
 LoZ OoT enemy ReDead.png 319 × 840; 130 KB
-
 LoZ OoT enemy Shabom.png 153 × 167; 26 KB
-
 LoZ OoT enemy Shell Blade.png 686 × 472; 169 KB
-
 LoZ OoT enemy Skull Kid.png 1,955 × 3,259; 4.09 MB
-
 LoZ OoT enemy Skulltula.png 972 × 1,600; 961 KB
-
 LoZ OoT enemy Skullwalltula.png 494 × 504; 180 KB
-
 LoZ OoT enemy Spike.png 381 × 311; 11 KB
-
 LoZ OoT enemy Stalchild.png 300 × 344; 100 KB
-
 LoZ OoT enemy Stalfos.png 255 × 322; 72 KB
-
 LoZ OoT enemy Stinger.png 145 × 93; 18 KB
-
 LoZ OoT enemy Tailpasaran.png 395 × 226; 66 KB
-
 LoZ OoT enemy Torch Slug.png 130 × 137; 19 KB
-
 LoZ OoT enemy Twinrova Sisters.png 2,322 × 1,973; 3.79 MB
-
 LoZ OoT enemy Twinrova.png 441 × 600; 365 KB
-
 LoZ OoT enemy Volvagia.png 3,493 × 2,878; 7.28 MB
-
 LoZ OoT enemy Wallmaster.png 219 × 193; 32 KB
-
 LoZ OoT enemy Wolfos.png 651 × 460; 293 KB
-
 LoZ OoT equipment subscreen.png 640 × 480; 519 KB
-
 LOZ OOT Evil Presence.PNG 668 × 501; 433 KB
-
 LoZ OoT file select.png 640 × 480; 393 KB
-
 LOZ OOT Ganon Artwork.png 1,900 × 2,471; 3.99 MB
-
 LOZ OOT Ganondorf's Triumph.PNG 640 × 480; 127 KB
-
 LoZ OOT Ganontowerff.jpg 400 × 300; 74 KB
-
 LoZ OOT GerudosMembershipCard.png 56 × 60; 6 KB
-
 LOZ OOT Get Goron's Ruby.PNG 640 × 480; 207 KB
-
 LOZ OOT Guru-Guru Angry.PNG 739 × 554; 377 KB
-
 LoZ OOT Heart 19.png 1,024 × 768; 215 KB
-
 LoZ OOT Heart 20.png 1,024 × 768; 474 KB
-
 LoZ OOT Heart 26.png 640 × 480; 204 KB
-
 LoZ OOT Heart 27.png 640 × 480; 199 KB
-
 LoZ OOT Heart 29.png 1,024 × 768; 167 KB
-
 LoZ OOT Heart 32.png 640 × 480; 92 KB
-
 LoZ OOT Heart 33.png 640 × 480; 132 KB
-
 LoZ OOT Heart 34.png 1,024 × 768; 319 KB
-
 LoZ OOT Heart 34b.png 1,024 × 768; 275 KB
-
 LoZ OOT Heart 35.png 1,024 × 768; 362 KB
-
 LoZ OOT Heart 36.png 640 × 480; 207 KB
-
 LoZ OOT Heart in the box.jpg 988 × 588; 499 KB
-
 LoZ OOT Hfdeep pool.jpg 320 × 191; 77 KB
-
 LOZ OOT Hyrule field.jpg 640 × 480; 36 KB
-
 LoZ OOT Hyrule Loach.jpg 1,222 × 914; 133 KB
-
 LoZ OOT Hyrule-castle.jpg 640 × 480; 38 KB
-
 LoZ OOT Hyruleff.jpg 400 × 300; 80 KB
-
 LOZ OOT Invisible Monster.PNG 668 × 501; 421 KB
-
 LoZ OOT Jabubellyfloor1.jpg 840 × 1,242; 138 KB
-
 LoZ OOT Jabubellyfloor2B1.jpg 621 × 986; 86 KB
-
 LoZ OoT jump.jpg 640 × 480; 176 KB
-
 LOZ OOT Kakariko Fire.PNG 668 × 501; 307 KB
-
 Loz oot LHhole.jpg 320 × 192; 84 KB
-
 LoZ OOT Link mm1.jpg 450 × 600; 53 KB
-
 LoZ OOT LLrtower.jpg 320 × 191; 89 KB
-
 LOZ OOT Longshot.PNG 401 × 416; 134 KB
-
 LoZ OOT Malon.jpg 640 × 480; 39 KB
-
 LoZ OOT man on the roof.jpg 989 × 588; 337 KB
-
 LoZ OoT map item.jpg 638 × 480; 26 KB
-
 Loz oot market-00.jpg 320 × 190; 89 KB
-
 Loz oot market-01.jpg 320 × 190; 64 KB
-
 LOZ OOT Market.png 417 × 313; 203 KB
-
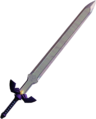 LOZ OOT Master Sword Render.PNG 582 × 723; 141 KB
-
 LOZ OOT Master Sword.PNG 640 × 480; 190 KB
-
 LOZ OOT Meg's Cutscene.PNG 640 × 480; 232 KB
-
 LOZ OOT Morning Light.PNG 640 × 480; 184 KB
-
 LOZ OOT Morpha Tentacle.PNG 640 × 480; 284 KB
-
 LOZ OOT Morpha's Lair.PNG 640 × 480; 442 KB
-
 LOZ OOT Morpha.PNG 640 × 480; 347 KB
-
 LOZ OOT Mysterious Item.PNG 640 × 480; 252 KB
-
 LOZ OOT Nocturne of Shadow.PNG 739 × 554; 381 KB
-
 LOZ OOT Open Shadow.PNG 668 × 501; 416 KB
-
 LoZ OoT outside market.png 640 × 480; 627 KB
-
 LOZ OOT Phantom Ganon Strongest Attack.PNG 640 × 480; 273 KB
-
 LOZ OOT Plot Twist.PNG 640 × 480; 401 KB
-
 LoZ OoT Queen Gohma art.jpg 2,923 × 2,037; 4.67 MB
-
 LoZ OoT quest status subscreen.png 640 × 480; 626 KB
-
 LoZ OOT Redead garding the chest.jpg 988 × 588; 324 KB
-
 LOZ OOT Royal Tomb Entrance.PNG 640 × 480; 200 KB
-
 LOZ OOT Royal Tomb Opens.PNG 640 × 480; 121 KB
-
 LoZ OoT save screen.png 640 × 480; 410 KB
-
 LoZ OoT Seal Broken.png 640 × 480; 274 KB
-
 LoZ OoT select item subscreen.png 640 × 480; 568 KB
-
 LOZ OOT Shadow Spirit.PNG 739 × 554; 392 KB
-
 LOZ OOT Shadow Temple Intro.PNG 668 × 501; 449 KB
-
 LOZ OOT Shadow Temple Opens.PNG 668 × 501; 383 KB
-
 LOZ OOT Sheik Intro.PNG 640 × 480; 168 KB
-
 LOZ OOT Sheikah Sealing Chamber.PNG 640 × 480; 420 KB
-
 LoZ OOT Shoot-eye.jpg 640 × 480; 27 KB
-
 LoZ OOT Skmemory game.jpg 320 × 191; 83 KB
-
 LoZ OOT Sksong.jpg 320 × 191; 91 KB
-
 LoZ OOT Skulltula 01.jpg 640 × 480; 131 KB
-
 LoZ OOT Skulltula 02.jpg 640 × 480; 164 KB
-
 LoZ OOT Skulltula 04.png 1,024 × 768; 484 KB
-
 LoZ OOT Skulltula 05.png 1,024 × 768; 476 KB
-
 LoZ OOT Skulltula 06.png 1,024 × 768; 365 KB
-
 LoZ OOT Skulltula 07.png 1,024 × 768; 272 KB
-
 LoZ OOT Skulltula 08.jpg 640 × 480; 135 KB
-
 LoZ OOT Skulltula 09.jpg 640 × 480; 178 KB
-
 LoZ OOT Skulltula 10.jpg 640 × 480; 187 KB
-
 LoZ OOT Skulltula 100.png 640 × 480; 148 KB
-
 LoZ OOT Skulltula 11.jpg 640 × 480; 172 KB
-
 LoZ OOT Skulltula 12.jpg 1,024 × 768; 1.01 MB
-
 LoZ OOT Skulltula 13.jpg 1,024 × 768; 809 KB
-
 LoZ OOT Skulltula 14.jpg 1,024 × 768; 1.01 MB
-
 LoZ OOT Skulltula 15.png 1,024 × 768; 471 KB
-
 LoZ OOT Skulltula 16.jpg 1,024 × 768; 822 KB
-
 LoZ OOT Skulltula 17.jpg 1,024 × 768; 829 KB
-
 LoZ OOT Skulltula 18.png 1,024 × 768; 461 KB
-
 LoZ OOT Skulltula 19.png 1,024 × 768; 299 KB
-
 LoZ OOT Skulltula 20.png 1,024 × 768; 160 KB
-
 LoZ OOT Skulltula 21.png 1,024 × 768; 239 KB
-
 LoZ OOT Skulltula 22.png 640 × 480; 188 KB
-
 LoZ OOT Skulltula 26.png 640 × 480; 83 KB
-
 LoZ OOT Skulltula 27.png 640 × 480; 90 KB
-
 LoZ OOT Skulltula 28.png 640 × 480; 139 KB
-
 LoZ OOT Skulltula 29.png 640 × 480; 122 KB
-
 LoZ OOT Skulltula 34.png 1,024 × 768; 201 KB
-
 LoZ OOT Skulltula 35.png 1,024 × 768; 379 KB
-
 LoZ OOT Skulltula 36.png 1,024 × 768; 173 KB
-
 LoZ OOT Skulltula 37.png 1,024 × 768; 265 KB
-
 LoZ OOT Skulltula 41.png 640 × 480; 165 KB
-
 LoZ OOT Skulltula 42.png 640 × 480; 124 KB
-
 LoZ OOT Skulltula 45.png 640 × 480; 95 KB
-
 LoZ OOT Skulltula 46.png 640 × 480; 80 KB
-
 LoZ OOT Skulltula 47.png 1,024 × 768; 256 KB
-
 LoZ OOT Skulltula 50.png 640 × 480; 112 KB
-
 LoZ OOT Skulltula 55.jpg 1,024 × 768; 102 KB


.png)


.png)


