Controls[edit]

- Joystick: Use the joystick to direct the explorer in any one of four diagonal directions. You can not direct the explorer in any of the cardinal directions that lie between the diagonals (north, east, south, or west). If the explorer is standing in front of a wall that is around his height, and you push the joystick towards the wall, the explorer will climb the wall.
- Jump: Press the jump button to make the explorer leap in the air. If the joystick is not pressed, the explorer will jump straight up and down. Press the jump button while holding the joystick in some direction to make the explorer jump in that direction. The explorer can up the height of one ledge, and over a distance equal to that height.
- 1-2 Players: Press either button to begin a one or two player game.
Characters[edit]
Explorer[edit]

You control this safari explorer with the bulbous red nose. After having his tent lit on fire by Bongo the ape, he is out to extract his revenge. He must overcome all of the obstacles that stand between him and Bongo, like mountain sides and rivers. For the most part, the explorer must avoid contact with any animal, although he can safely ride the backs of hippos and piranhas as long as they don't dunk or bite. Even one or two monkeys can cling to him without doing much harm. But any other animal is deadly to the explorer and should be avoided at all costs. In order to catch Bongo, the explorer must traverse and jump from the lower left corner of the stage to the upper right corner by whatever means are available. When the explorer gets too close, Bongo moves back to another stage and the chase continues until finally, when Bongo is too tired to continue, the explorer catches Bongo and lights his bed on fire as payback.
Bongo[edit]

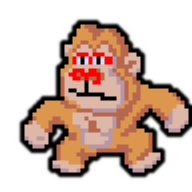
Bongo the ape may have been a little foolish for thinking that the explorer would simply run away after having his tent set ablaze, but he's no dummy. He realizes that the explorer is out to get him, and he goes to elaborate lengths to put as much distance between the explorer and him as possible. He even rallies the jungle inhabitants to his cause. Bongo rarely creates and direct threat to the explorer, and is usually simply an on-looker. However, in the very first stage, Bongo has an ample supply of coconuts that he likes to toss down on the explorer in an attempt to knock him out. Collision with a coconut will steal one chance away from the explorer.
Monkeys[edit]


Monkeys are only present in the very first stage. They like to hang out around the waterfall, and congregate there in numbers. There are two types of monkeys, the brown and the green. The brown monkeys play together, and when a visitor enters their domain, they playfully jump on the visitor's back. However, if three monkeys get on the explorer's back, they will have enough combined strength to toss him over the ledge and kill him. The explorer must shake the monkeys off his back by jumping up and down before all three climb on. The green monkeys serve a different purpose. As the explorer climbs up a ledge, green monkeys like to yank on the explorer's ankles and pull him back down. This doesn't hurt the explorer, but it does force him to reattempt his climb, and makes him vulnerable to collision with a coconut. The best way to avoid this fate is to simply jump up to the next ledge rather than climb.
Snakes[edit]

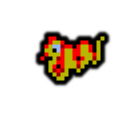
Snakes occupy the islands that lie in the water between you and Bongo in the second stage. At first, all you will see are blue snakes. The blue snakes aren't especially fast, but they do seek to occupy the island that the explorer is standing on. As a result, they will travel along the thin passageways that lie between the islands. Your only defense against them is to jump over them as they travel in the opposite direction. Later on, a red snake will occupy the large center island in the back. This red snake will never leave the island under any circumstances. Even if you manage to lure all of the blue snakes away, you will still have the red snake to contend with.
Scorpion[edit]

Two scorpions occupy the bank that you start on in stage two. They start out slow, but their speed increases with each new level. Unlike the snakes, they are bit better at tracking the explorer down and stinging him with their venomous tail. Getting away from these two threats and on to the safety of an island should be your highest priority at the start of the second stage.
Hippo[edit]
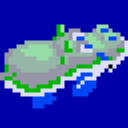
The graceful hippos can be found on stage two and four. They are harmless to the explorer, and he can safely ride on their backs. They are also somewhat oblivious to him as well. If he stands on their head in stage two, they may duck their head underwater for a drink, killing the explorer. In stage four, three hippos will happily ferry the explorer from the far bank to the bank where Bongo is sleeping. But if it comes down to keeping you afloat, or dunking to avoid a nasty bite from a giant piranha, they will always dunk themselves to avoid collision. In this sense, you can always predict when they will dive down, as they will only do it as a result of a piranha in the area, and never for any other reason. So get off their backs and on to safety if you think the hippo is likely to bail.
Rhinos[edit]
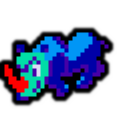

Charging rhinos are the primary threat of the jungle in stage three. There are two varieties of rhinos. The more numerous kind are the ones with the yellow horns. They charge around from location to location more or less haphazardly. If you happen to get in their way as they charge (or slide to a halt), you will lose one life. The other type of rhino, the one with the red horn, is a lot more dangerous. These rhinos actively seek to collide with you. They will reposition themselves and line up with you before beginning to charge at you. There are always two of these red horned rhinos on stage three, and they are very likely to sandwich you. Jump over them, or duck into one of the mole holes to escape their wrath.
Mole[edit]

Holes can be found throughout the vast plains of stage three. These holes were dug out and created by a mole. When the rhinos begin to charge, the mole becomes curious and pokes his head out to see what all of the commotion is about. After he witnesses the scene up above, he fills in that hole, rendering it unavailable for you to pop down into for safety. Even if you're squatting in the hole, the mole may rise up and push you out of it in the process, exposing you to a rhino attack.
Piranha[edit]
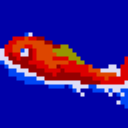
Piranhas are very similar to hippos in that you can safely ride on their back as a form of transportation on stage four. And they don't even fear colliding with another animal, like the hippos do, so they don't dive under. However, they do get an itch to bite every now and then, and unlike the rhino, it's not nearly as predictable (although the frequency increases with the level of difficulty). Fortunately, you do get one warning. The piranhas will flash a lighter shade of red before arcing up to the surface of the water and taking a bite. Unfortunately, you may be nowhere near safety in order to jump off when they do this. It's best to keep your trips on the piranhas as short as possible.
Lily Pad[edit]

Lily pads are the smallest threat to your survival in the whole game. They appear on stage four, and serve as the launch pad to the next leg of your journey across the water. They never fully submerge, but they do dunk down a bit into the water, decreasing their surface area quite a bit. Unfortunately for the explorer, if even a toe gets wet, he loses one chance. Try to remain as close the center of the lily pad as possible when riding one.
Scoring[edit]
| Walking one step | 10 points |
| Jumping on a hippo, piranha, or lily pad | 50 points + 50 × level |
| Jumping over a chasm | 500 points |
| Ducking into a mole hole | 1000 points |
| Finishing Level 1 | 5000 bonus plus remaining bonus time |
| Finishing Level 2 | 6000 bonus plus remaining bonus time |
| Finishing Level 3 | 7000 bonus plus remaining bonus time |
| Finishing Level 4 | 8000 bonus plus remaining bonus time |
| Finishing Level 5+ | 9000 bonus plus remaining bonus time |