Daily life[edit]
An average morning begins when Tsunayoshi Sawada is woken up by Reborn. After the talk, check Tsuna's trash for a Rank Up C. On the lower left and right desks you should find two more items, Rank Up E and Rank Up F, respectively. Leave the bedroom and head to the kitchen for breakfast. Once that's done, head back upstairs to Tsuna's room and talk to Reborn. After the scene, head back downstairs to begin the card hunt. Check the counter by the exit for ![]() Card No. 43 (Power-Up Bullet). Talk to Tsuna's mother for
Card No. 43 (Power-Up Bullet). Talk to Tsuna's mother for ![]() Card No. 46 (Forgive Me!). On the wall to the left of her is
Card No. 46 (Forgive Me!). On the wall to the left of her is ![]() Card No. 96 (Bat). At the back of the house is a door that leads into the bathroom. Head in for
Card No. 96 (Bat). At the back of the house is a door that leads into the bathroom. Head in for ![]() Card No. 83 (Dynamite). Finally, back upstairs on Tsuna's desk (by his bed) is
Card No. 83 (Dynamite). Finally, back upstairs on Tsuna's desk (by his bed) is ![]() Card No. 23 (Grape Candy). Talk to Reborn again and he'll explain the usage of cards to Tsuna. Choose the last option if you've heard enough and Reborn will join the party.
Card No. 23 (Grape Candy). Talk to Reborn again and he'll explain the usage of cards to Tsuna. Choose the last option if you've heard enough and Reborn will join the party.

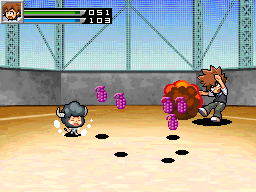
Leave Tsuna's house to begin the first battle. Lambo will always attack and never guard. Follow the same strategy and keep attacking. He is a weak opponent and serves as nothing more than a quick warm-up. Take the time to get used to the battle system and, once he's defeated, you'll obtain ![]() 100. Tsuna and Reborn will then walk off into the school, continuing to ignore the attention-seeking toddler. Once inside, talk to Hibari and Tsuna will run off to the staircase. Head up to the second floor and into the first classroom. Tsuna meets up with buddies Gokudera and Yamamato before class begins, and two transfer students are introduced: Albito and Rizona.
100. Tsuna and Reborn will then walk off into the school, continuing to ignore the attention-seeking toddler. Once inside, talk to Hibari and Tsuna will run off to the staircase. Head up to the second floor and into the first classroom. Tsuna meets up with buddies Gokudera and Yamamato before class begins, and two transfer students are introduced: Albito and Rizona.
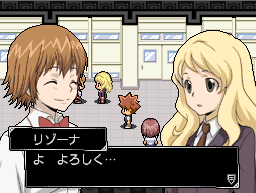
After class, approach Albito and Tsuna will discover his popularity with the girls (including his crush, Kyoko) in a humorous scene. Outside the classroom, approach Rizona to eavesdrop on her conversation with Kyoko. After the scene, it's time to do some item-hunting. In the first classroom on the first floor (to the far-left) you'll find Rank Up F in the trash, and in the halls are Stun (One) in the locker and another Rank-Up F in the trash. On the same floor in the infirmary, Tsuna will have a short talk with Dr. Shamal. On the second desk you can find Rebuke Pills. Exit the school and Tsuna will bump into Albito. After the talk, leave the area and head home. Talk to Tsuna's mom, then approach the exit. Gokudera and Yamamoto enter but only hang around for a short while. Tsuna heads upstairs to sleep for the night and the eventful day comes to an end.
Attack of the Kokuyo Gang[edit]
The next morning, Tsuna wakes up to Lambo switching with himself from ten years later. He leaves with Reborn and Tsuna goes off to school. Unfortunately for him, the scene is different as Hibari and his team of prefects have assembled to guard the school against the recent attacks against its students. Tsuna is then caught in a battle as Kokuyo kids arrive just as Hibari had predicted. This battle will be done with Hibari in your party.

Complete the battle successfully for ![]() 150. Hibari will subsequently be dropped from the party and Reborn will come back in.
150. Hibari will subsequently be dropped from the party and Reborn will come back in.
Back on the field, go up to the second floor and talk to Rizona for a scene in which Tsuna cheers her up. In the classroom, Gokudera approaches Tsuna to express his suspicions about Albito. Albito overhears the two and comes over to ask about why Gokudera calls Tsuna "10th" before the 10th himself can defuse the situation. Exit the classroom and head back downstairs. Your next stop is the hospital to see Kyoko's older brother, Ryohei Sasagawa, who has been attacked by Kokuyo for unknown reasons. Kyoko arrives soon after to check up on her brother, and she joins the party.

Back at the school, Tsuna and Kyoko are approached by some thugs. This battle shouldn't be too difficult, as Kyoko's attack even proves effective against them. However, if they begin to target Kyoko, don't hesitate to heal. Collect the ![]() 150 and return to Tsuna's classroom, where Kyoko leaves the party. Enter Namimori's shopping district, where Tsuna is once again attacked. This is another easy battle, as each should go down in one blow. I-Pin may land some status attack on Tsuna but nothing immediately threatening. Defeat them all for a good
150 and return to Tsuna's classroom, where Kyoko leaves the party. Enter Namimori's shopping district, where Tsuna is once again attacked. This is another easy battle, as each should go down in one blow. I-Pin may land some status attack on Tsuna but nothing immediately threatening. Defeat them all for a good ![]() 300. Control then switches to a lone Gokudera.
300. Control then switches to a lone Gokudera.

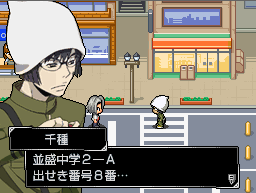
Approach the unfamiliar figure on the next screen and Gokudera will identify one of the culprits behind the recent attacks. He will then enter a one-on-one battle with Chikusa. Chikusa's attacks are strong, but fortunately, Gokudera's dynamite is stronger. He should be finished in only a couple of turns, netting ![]() 50. After the battle, Tsuna approaches the two, leading into another battle, this time two-on-one. Have the two of them attack together with Gokudera lending some occasional support and the battle should once again conclude quickly, earning another
50. After the battle, Tsuna approaches the two, leading into another battle, this time two-on-one. Have the two of them attack together with Gokudera lending some occasional support and the battle should once again conclude quickly, earning another ![]() 200. Gokudera falls after battle, but Yamamoto jumps to Tsuna's rescue just in time.
200. Gokudera falls after battle, but Yamamoto jumps to Tsuna's rescue just in time.
Evocatore[edit]
The scene changes to the school infirmary where Gokudera recovers. Bianchi arrives to watch over him and so Tsuna is sent off with Yamamoto.

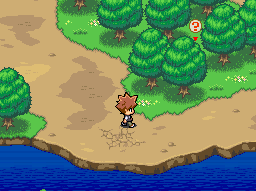
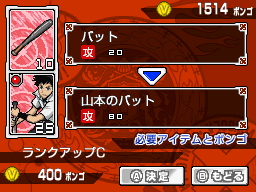
A new area opens up in the forest, where enemies are abundant. Now would be a good time to grind, meanwhile heading one screen right and then north into a clearing. Tsuna will spot Rizona with some thugs and attack them to protect her. The enemies in this battle are a bit tougher than the random ones but still shouldn't be a problem. Nevertheless, the battle proves ineffective, leaving Tsuna stunned at their strength until Albito comes along. He performs his own attack on the thug, and so does Rizona, showing a confused Tsuna that she didn't need his help after all. Exit the forest and head back to the school infirmary. Gokudera will rejoin the party after a scene. Note that you can return to Tsuna's house where Dino and Romario can sell various items in exchange for the gold collected from battles. Back at the school, talk to Rizona on the second floor and to Reborn in the room on the other side of the roof for ![]() Card No. 56. Once ready, go to Tsuna's room, save, and talk to Reborn. Choose the first option (second if you'd like to do more grinding or buy more items) and Gokudera, Yamamoto, Bianchi, Albito, and Rizona will all gather at Tsuna's house. You can now talk to Tsuna's mother to switch up the party. However, Tsuna can't be removed and Reborn, Hibari, and Kyoko can't be added. This leaves offensive fighters Bianchi, Albito, and Rizona. Once satisfied with the party, upgrade some cards by talking to Giannini up in Tsuna's room. Exit the house and, after all preperations are made, head to Kokuyo Land.
Card No. 56. Once ready, go to Tsuna's room, save, and talk to Reborn. Choose the first option (second if you'd like to do more grinding or buy more items) and Gokudera, Yamamoto, Bianchi, Albito, and Rizona will all gather at Tsuna's house. You can now talk to Tsuna's mother to switch up the party. However, Tsuna can't be removed and Reborn, Hibari, and Kyoko can't be added. This leaves offensive fighters Bianchi, Albito, and Rizona. Once satisfied with the party, upgrade some cards by talking to Giannini up in Tsuna's room. Exit the house and, after all preperations are made, head to Kokuyo Land.
Kokuyo Land[edit]
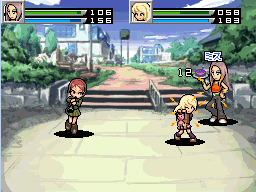
Go north, then left. A scene plays in which Ken Joshima attacks Yamamoto and the two get seperated from the group. This leads into a one-on-one battle. Defeat him with a couple of heavy hits; the only real cost to this battle should be Yamamoto's CP. A scene follows in which Ken is knocked out for good and the group can finally continue on west. This is where they come across another one of Mukuro's subordinates, M.M. The scene leads into a battle against her and two gang members, with Bianchi and Rizona in your party. This is a battle where you'll want to have a lot of items ready. The girls will attempt to take out Rizona first as the weaker party member; protect her with guards and items, as her attacks won't have an effect on M.M. Attack the enemy party with Bianchi and Rizona can back her up with support when needed. This battle is followed by a one-on-one between Bianchi and M.M. Attack and use items when HP and CP run low. This is another tough battle, made more difficult without Rizona's back-up, but as long as you have the items, you can run out her health while restoring yours. Defeat her for ![]() Card No. 229.
Card No. 229.
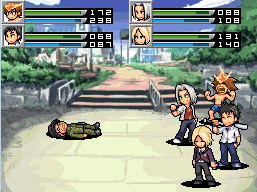
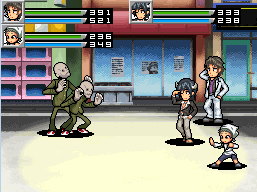
Continue north to find another subordinate of Mukuro, Birds. This battle is fought with a party of Tsuna, Gokudera, Yamamoto, and Albito. The four guys should have an easy time helping each other, though Tsuna tends to be an easy target for the enemy party. Send him into Dying Will mode if his health gets too low and Tsuna will be able to perform more powerful attacks, evening the party out. Back at the Namimori Shopping District, Kyoko and Haru are attacked by the Bloody Twins. Fortunately, Dr. Shamal, along with Lambo and I-Pin (from ten years later) come to their aid. Stay on the offensive and Lambo and I-Pin should perform a lot of combination attacks together. With only one target, this is a quick battle. Tsuna then attacks Birds for another quick battle. He is extremely weak (especially against Dying Will Tsuna) so this should be no problem. Continue north and Tsuna will chase after a possessed Fuuta, leaving the party. Reborn will join the party and the battle begins, but don't bother taking it seriously. Lancia will eliminate the entire party in one hit, and the point of view switches to a lone Tsuna. Tsuna then watches over as another battle follows; Bianchi and Rizona are also easily defeated by Lancia. Reborn then sends Tsuna into Dying Will mode. His attacks are strong, so heal constantly (with sushi, preferably) between attacks. Defeat him and Lancia (and Tsuna, for that matter) come back to their senses.
With the other members of his group injured, Tsuna has no choice but to go it alone. Head east, north up the slope, west to the next screen, and north into the building. In the building, head continue north until there's a scene. The stairs are taken out, so go west, then south through the doorway instead. Continue past another broken down staircase and right at the fork. Reaching the ladder triggers a scene. Choose the first option to open the menu, the third to return, and the second to continue on. Choose the first option to confirm and Reborn will allow you to move on. Move forward and Chikusa will attack. Gokudera rushes to counterattack, giving Tsuna and the group the opportunity to continue uninterrupted. Gokudera should be able to beat him out without having to heal if you focus on strong attacks, but a slower approach may be safer. Following the battle, Ken comes to Chikusa's aid and Hibari comes to Gokudera's. Hibari's attacks aren't too strong against his two opponents, but he at least has the ability to dodge many of theirs. Take them both out and the point of view will switch back to Tsuna.
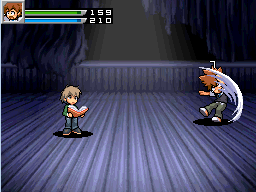
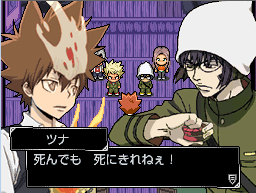
Go left and up through the doorway. The possessed Fuuta stabs Bianchi before facing Tsuna for battle. Knocking him out isn't difficult, but Mukuro has more up his sleeve. The next battle is with Rizona, Albito, and Reborn against the snakes he's summoned. They aren't exactly powerful, but will attempt to cast poison every chance they get. Defeat them, then Gokudera and Hibari will arrive for back-up. Defeat Mukuro as Hibari. Tsuna must then fight the possessed sibling duo of Gokudera and Bianchi along with Chikusa and Ken. This is followed by another battle against only the siblings without Reborn. This is followed by a scene in which Tsuna and his team are knocked out. However, after remembering all who depend on him, Tsuna reawakens in Hyper Dying Will mode. Gokudera and Bianchi attack once again. This battle should be easy as long as you don't fully deplete Tsuna's CP. Their attacks no longer affect his health as they used to and his strongest attack is capable of finishing them in two blows. This leads into the final battle with Mukuro, who is capable of using two cards at a time and is no stranger to unleashing criticals. Make sure you have health and CP items on hand and use Tsuna's strongest card until Mukuro falls.
Congratulations; Namimori's greatest threat has been expelled! After the scenes, head to the school roof, where Tsuna and his friends enjoy their peace.
Varia[edit]
Clearing the game unlocks a post-game subplot involving the Vongola Family's Varia Assassination Squad as they rebel against the Vongola Decimo, Tsuna. You may begin collecting the Vongola Rings now to begin a tournament against the Varia. The following are the locations of the missing ring halves:
| Ring | Holder (Vongola) | Holder (Varia) | Half #1 | Half #2 |
|---|---|---|---|---|
| Sun | Ryohei Sasagawa | Lussuria | Trash of a classroom on the third floor of the school. | Chest in the hospital. |
| Storm | Hayato Gokudera | Belphegor | Desk in the school infirmary. | Trash of a classroom on the second floor of the school. |
| Rain | Takeshi Yamamoto | Squalo | Trash of a classroom on the second floor of the school. | Trash next to sushi restaurant. |
| Cloud | Kyoya Hibari | Gola Mosca | Trash of a classroom on the third floor of the school. | Trash at the right of the hall on the third floor of the school. |
| Mist | Chrome Dokuro | Mammon | Top floor of Kokuyo Land. | School gymnasium. |
| Lightning | Lambo | Levi | Trash of Tsuna's room. | Opening of super mall. |
| Sky | Tsunayoshi Sawada | Xanxus | White vending machine in shopping district. | Room on the left side of school roof. |
After finding all rings, defeat the Varia guardians in the coliseum to unlock them as playable characters.