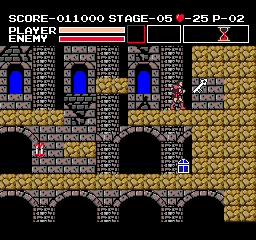
Stage 4[edit]
At the start of Stage 4, you'll notice all your inventory items from the previous three Stages were removed upon defeating the Vampire Bat. This is standard Vampire Killer - after defeating each Boss, you'll have to regain your inventory items from various places around the subsequent three Stages, before fighting the next boss and repeating the process once again. Stage 4 takes us out of the front halls of Dracula's Castle and places Simon in a series of basement catacombs. These catacombs come with a handful of new enemies, including Spear Knights, Medusa Heads, and Blue Slimes. These enemies are noticeably tougher than the ones introduced in the prior three Stages, so proceed with caution.
- Silver Key

Stage 4's Silver Key can be found on Screen A2, in the wall on the left side of the raised platform. To get the Key, you'll have to fall to this ledge from screen A1, being wary of the Spear Knight patrolling the platform as you do.
- A route through Stage 4, from the starting point of A2
- Right to B2. Jump past the first Spear Knight on A2 and head into B2. Walk straight to the right and onto the stairs – once you're on the stairs, you can't take knockback from the Spear Knight. Break the lower-left candle to get an Invulnerability Ring, which will allow you to defeat the enemies on the screen with ease. Grab the Silver Cross from the upper-left candle, and proceed up the stairs.
- Up to B1. On B1, grab the Gold Key from the lowest platform, and open the left Chest on the screen to obtain an Hourglass. Then, while being mindful of Medusa Heads, head to the left.
- Left to A1. Jump across the first pit, defeat the Bat that swoops down towards you, and drop down the left side hole.
- Down to A2. After dropping down to A2, you'll find yourself on the raised platform in the top left. Defeat the Spear Knight (the Hourglass helps with this), and obtain the Stage's Silver Key from the left wall. Then jump down to the floor of the screen and head left.
- Left to C2. As soon as you enter C2, whip the candle in front of you to obtain an Invisibility Orb. Walk left through the Spear Knight, and head up the stairs to the raised platform. Grab the Health Orb from the candle here, and then head up the upper left staircase.
- Up to C1. This screen is pretty empty – the Chest contains a Shield A, which you can grab if you so desire. Once you're set, head to the left across the top platform.
- Left through B1 to A1. Cross through B1, being mindful of Medusa Head spawns. Once you're back to A1, jump across both pits (defeat the Bat before jumping over the second one), and head through the exit door.
Stage 5[edit]
Stage 5 is a very short and linear Stage, similar to its NES Castlevania counterpart. You'll have to travel back and forth across the Stage as you head upward, while simultaneously fending attacks from Medusa Heads on almost every screen.
- Silver Key

Stage 5's Silver Key is located on screen C1, hidden in the wall on the right of the upper platform. Be mindful in dealing with the Spear Knight guarding this spot before attempting to grab the Key.
- A route through Stage 5, from the starting point of C2
- Left to B2. After getting through the Medusa Heads on C2, B2 continues to send more Medusa Heads at you. If you have an Hourglass, using it to stop Medusa Heads from spawning for long enough that you can cross the moving platform on this screen can be lifesaving. Once you've crossed the gap safely, keep heading left.
- Left to A2. Jump down to the Chest, which contains an Invulnerability Ring – this allows you to take out the Spear Knight patrolling this screen instantly. Then head to the left, obtain the Silver Cross from the candle, and head up the stairs.
- Up to A1. Make your way to the right from here – don't bother with the candles. Assuming you grabbed the Silver Cross right before leaving A2, you should be able to get through the lower section of A2 before the Medusa Heads start spawning again.
- Right through B1 to C1. Fend off Medusa Heads and cross the lower platforms in B1 to reach C1. The lower Chest in C1 contains Holy Water, which is a very useful sub-weapon for the next Boss and becomes even more devastating when paired with the Hourglass. After obtaining the Stage 5 Silver Key in the wall to the right of the upper ledge, traverse left across the top platform.
- Left to B1. In the upper level of B1, you'll have to jump your way across these two moving platforms to reach the other side while simultaneously dodging Medusa Heads. While this may seem challenging at first, if you hold left from the transition to B1 and jump off each of the three edges at the last moment (Simon's boot should overlap each platform by around 2-4 pixels), you can make it across every time guaranteed.
- Left to A1. Once you cross the top of B1, all you have to do is walk left to the exit door on the upper level of A1.
Stage 6[edit]
Stage 6 is another short and linear Stage and throws a few new enemies and obstacles at the player, namely, Ghost Skulls, Crushers, and Bone Pillars. The former two of these enemies also never appear in any other part of the game.
- Silver Key

The Silver Key for Stage 6 is found on the first screen, C2. You'll have to dig through the blocks on the bottom of the screen from left to right (crouching in the hole on the left should allow you to break the first one), being mindful of the Slimes hiding in the blocks as you break them, along with any Ghost Skulls that may try to attack you while you're digging.
- A route through Stage 6, from the starting point of C2
- Collect the Silver Key on C2. It's important to remember to grab the Stage 6 Silver Key on the first screen before progressing onwards through the Stage – backtracking in Vampire Killer is doable most of the time, but it's always a real pain. Once you've obtained the Key, head onward to the left.
- Left to B2. Watch out for the Crushers as you advance to the left on this screen. Thankfully, they're reasonably easy to get past with proper timing – they're also far more forgiving than their NES Castlevania counterparts, as they deal half your max health in damage instead of instantly killing the player and have far more accurate hitboxes.
- Left to A2. Break the block in your way, and open the Chest hidden inside. This Chest contains an Invulnerability Ring that allows you to destroy the Bone Pillar above with ease. Once you've climbed the stairs and defeated the Bone Pillar, head rightward along the top platform.
- Right to B2. Whip the leftmost candle here to obtain a Morningstar Whip, then keep walking to the right.
- Right to C2. Climb the stairs here – don't delay your movements, as Ghost Skulls will start spawning and chasing after Simon if you do.
- Up to C1. Being mindful of the Medusa Heads, climb up the stairs and head leftward. The leftmost candle contains a Silver Cross, which will stop the Medusa Heads from spawning for a brief time on this screen and the next.
- Left to B1. Break the candle second from the right to obtain a Big Heart, and then without further ado, head on through the exit door to the second Boss of the game.
Boss 2: Medusa[edit]

- See the Bosses page for more detailed info.
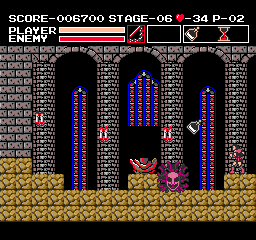
Shortly after entering the boss room, the bust in the centre of the screen will transform into a giant Medusa head, which flies through the air in a wavelike pattern, periodically shooting hair snakes at Simon.
Both of Vampire Killer's sub-weapons are extremely useful for this fight. This Hourglass, found in Stage 4, will allow you to freeze Medusa in place, making it easier to land more hits with your weapons without taking damage yourself. The Holy Water, found in Stage 5, can shred Medusa's health to zero in a matter of moments – this works exceptionally well when paired with the Hourglass, allowing you to freeze Medusa near the floor and then one-shot her with a single throw of Holy Water.


