No edit summary |
m (Robot: Changing template: StarCraft level) |
||
| (7 intermediate revisions by 5 users not shown) | |||
| Line 1: | Line 1: | ||
{{ | {{Header Nav|game=StarCraft}} | ||
{{StarCraft/Level | |||
|Jacobs Installation, Mar Sara | |||
| | |||
* Jim Raynor (enhanced Marine) | |||
* Terran Civilians (Confederate) | |||
|None | |||
| | |||
* Terran SCV | |||
* Terran Marine | |||
* Terran Firebat | |||
* Terran Vulture | |||
* Terran Goliath | |||
* Wall-mounted Turret | |||
| | |||
# Retrieve data discs from the Confederate network. | # Retrieve data discs from the Confederate network. | ||
# Raynor must survive. | # Raynor must survive. | ||
|Since you've allied yourself with the Sons of Korhal 'terrorist' group, your tenure as Magistrate is suspended... a nice way of saying you're fired. The planet of Mar Sara is being overrun by Zerg forces, and both the Confederacy and the Sons of Korhal are evacuating the planet. However, Mengsk wants you and Raynor (whom he rescued from the Confederates as well) pick up some data discs from an installation before you leave. | |||
|Terran Beacons (dispersed throughout map) | |||
|map=[[File:SC Terran 4.png]] | |||
}} | |||
This is the first of the three 'installation' missions in StarCraft, four if you count the installation mission in Starcraft: Brood War. In these types of missions, you must wind through a maze-like path to get to the end. You cannot harvest resources or build a base; therefore, you don't get to build new units. Instead, the game will give you reinforcements at key points along the mission. | |||
: | |||
; | |||
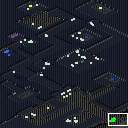
Group all units including Raynor (who is a Marine this time) into one. Simply go along the path until it splits into three, taking out the easily-to-destroy wall turret en route. The path going southwest is a longer but resistance-free one, and northwest is a shortcut with resistance (ignore the northeast path, while it shows information about other locations on the map, it is not required to complete the mission). Pick either one. If you choose the shortcut and run into enemies, focus fire on the weaker units first, then finish the Goliath off last. This is because it is the unit that takes the longest to destroy. Either path will eventually end up at the same spot, and a bit farther from there will take you to a place with another split path. | |||
If you choose northwest and walk onto that beacon, which will unlock two doors containing hostile Zerglings, critters (which are harmless), and also some plot dialogue you'd otherwise miss. If you take the south-east path from the intersection, this leads to a beacon that disables the security systems. | |||
The north-east path will continue along a long corridor into a room - ignore the vultures behind the door, and proceed up the stairs to the northwest. This beacon is a teleportation system that brings you near the objective. From here, follow the path to the south-east, annihilating resistance (using StimPacks if you have to). Walk onto the final beacon within the last room to complete the mission. | |||
{{Footer Nav|game=StarCraft|prevpage=Terran mission 3: Desperate Alliance|nextpage=Terran mission 5: Revolution}} | |||
{{Footer Nav|game=StarCraft| | |||
Latest revision as of 18:46, 5 February 2012
This is the first of the three 'installation' missions in StarCraft, four if you count the installation mission in Starcraft: Brood War. In these types of missions, you must wind through a maze-like path to get to the end. You cannot harvest resources or build a base; therefore, you don't get to build new units. Instead, the game will give you reinforcements at key points along the mission.
Group all units including Raynor (who is a Marine this time) into one. Simply go along the path until it splits into three, taking out the easily-to-destroy wall turret en route. The path going southwest is a longer but resistance-free one, and northwest is a shortcut with resistance (ignore the northeast path, while it shows information about other locations on the map, it is not required to complete the mission). Pick either one. If you choose the shortcut and run into enemies, focus fire on the weaker units first, then finish the Goliath off last. This is because it is the unit that takes the longest to destroy. Either path will eventually end up at the same spot, and a bit farther from there will take you to a place with another split path.
If you choose northwest and walk onto that beacon, which will unlock two doors containing hostile Zerglings, critters (which are harmless), and also some plot dialogue you'd otherwise miss. If you take the south-east path from the intersection, this leads to a beacon that disables the security systems.
The north-east path will continue along a long corridor into a room - ignore the vultures behind the door, and proceed up the stairs to the northwest. This beacon is a teleportation system that brings you near the objective. From here, follow the path to the south-east, annihilating resistance (using StimPacks if you have to). Walk onto the final beacon within the last room to complete the mission.
