| Protoss mission 8: The Trial of Tassadar | |
|---|---|
| Location | Aiur |
| Special Units |
|
| New Units | Protoss Carrier |
| New Enemy Units | None |
| Special Structures | Stasis Cell (destructible w/2000 HP) |
| Objectives | |
| |
Surviving the Early Game[edit]
You may have faced the Protoss multiple times throughout the singleplayer campaign (that is, if you've played the three campaigns in chronological order), but this mission really shows you their nasty side. The two enemy tribes are extremely aggressive, and will attack any and all of your bases with huge forces. Therefore, it's in your interest to build up defenses in your main base before you venture out. While you steadily increase the size of your Probe fleet (make around 2 per mineral patch as before; also, the distance from your Nexus to the Vespene Geyser is slightly farther than usual, so consider putting five Probes rather than four on gas), save enough resources to build Photon Cannons at each base entrance. In fact, you should try to have three Cannons on each side before you even build a Gateway (you start out with a Forge, so this basic building can wait for a bit). Also, take the Carrier that you start with and stock it with four Interceptors. You will eventually be able to build eight per Carrier, but not until you tech to the most advanced Protoss structure—the Fleet Beacon.
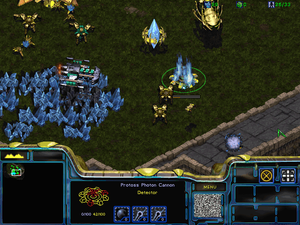
Placement of your defending troops should be intuitive by now. The Hyperion is of special note here—this souped-up Battlecruiser is pretty slow, but its powerful attacks can be effective in repelling the early attacks (do not hesitate to use the Yamato Cannon on incoming Reavers or Carriers). Just make sure something else is taking damage, because you cannot repair any damage done to the Hyperion. Remember, Terran mechanical units don't have shields and only SCVs can repair them. 850 HP might sound like a lot, but enemy Protoss units can often kill Raynor before you know what's happening if you don't pay attention. So you should have the Hyperion near the center of your base and bring it out when attacks begin. Use Raynor mainly against Reavers and Carriers, and use Fenix against the Scouts. Place a shield battery at both entrances as well as the wall where Scouts and Carriers attack you from.
Once the money starts coming in, build two Gateways and start pumping equal numbers of Zealots and Dragoons. The map is rich in resource nodes that you will be conquering later (that is, unless you're following one of the alternate strategies), so you can tech relatively slowly. Keep building Photon Cannons: the nearby Furinax Tribe (purple) has a sizable number of Reavers, and you need a large network of Cannons to distract them while your units go in for the kill. Also, Ara Tribe (red) will periodically send large fleets of Carriers and Scouts to your main base. To defeat these, at least eight Cannons covering each other per entrance is necessary. Don't forget to build a few more in the area between your mineral patches and the geyser.
Pushing Past the Reavers[edit]
Unless you are going for a quick strike on the Stasis Cell, you will need two or three additional resource deposits. The Furinax Tribe base directly to the south is the closest, so make this your first target. As mentioned before, these guys have quite a few Reavers; you can obviously get past them with air units, but you don't want to wait that long to attack this base, or it will be mined out. The solution? Reavers of your own. Build a Robotics Facility and Support Bay, and then three or four Reavers. The enemy have more than this, but they won't be clumped together for focus firing like yours will be. Before you push, there are a few things you should do. First, prepare twelve Zealots and eight Dragoons (including Fenix). Also, have a Probe get out to the area outside the bottom corner of your base, and then build a Pylon plus four or so Photon Cannons (refer to screenshots for the location). This will not only help your defense later, but also deter attempts by the Furinax to strike while your force is assembling. Also, periodically take the Hyperion to the northern edge of their base, and make surgical strikes on their Reavers and Photon Cannons with the Yamato Cannon. This will weaken their forces while making your own Reavers that much more potent. Finally, make sure Scarab damage has been researched at the Robotics Support Bay.
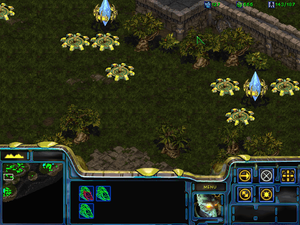
When ready, take the aforementioned strike force plus the Carrier and head south (you can take Raynor if you want, but he tends to take undue damage). Lead with the Reavers and bomb their defenses. Enemy Reavers are your priority targets; remember, they have the same range as yours do, so it's a matter of whether you notice them fast enough to order two of your Reavers to shoot at it. The Carrier can also help protect your ground units from them, as Reavers tend to run away when fire upon by air units. The Zealots and Dragoons can move in either when the coast seems clear, or your Reavers fall in danger. Combat enemy Reavers with Zealots; Scarabs do Explosive damage, which means that the large Dragoons will take full damage but the smaller Zealots only take 50%. Still, three Scarabs and their splash damage will massacre groups of Zealots (it should normally be four, but enemy Reavers have the Scarab damage upgrade), so do try to take them out as quickly as possible. Once the lumbering behemoths are gone, the rest of the base should be easy pickings.
Money in the South, the Northeast, and the East, Oh My![edit]
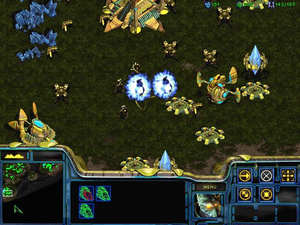
Quickly build an expansion on this new spot. You can choose to relocate some of the main base Probes here, but you will end up having to produce at least some new ones. There's a ramp on the south end of this location, which you should try and physically "wall" with Pylons and Cannons (your troops will not be using it, and this can block enemy ground attacks for a while). Also, remember to dot the perimeter with Photon Cannons. Your conquering force can stay here for a while, but you should immediately get your Gateways running full-time again to replace the ones that took damage in preparation for the next battle. The damaged Zealots and Dragoons should stay behind at this expansion for added defense.
Now, you should have enough resources coming in to develop the remaining two Protoss advanced techs. If you still can't afford to develop both the Stargate and Templar techs concurrently, focus on the Stargate first. In fact, the Templar tech is not a necessity for this scenario, but any Archons that you make will help you immensely. Anyways, as soon as your first Stargate is up, build a Fleet Beacon while you warp in Scouts. You will be building a second Stargate eventually, but whether you do so now or after you take the northeastern Furinax tribe base is up to you (it is recommended that you build the second one now if you can afford it).
For the second plundering, prepare a dozen each of Zealots and Dragoons, four Reavers, four Carriers (maxed out with eight Interceptors each; research the relevant upgrade at the Fleet Beacon), an Observer, and a couple Scouts. This is actually slight overkill for this enemy base, but you will need the extra troops to defend a third expansion that comes with this attack.
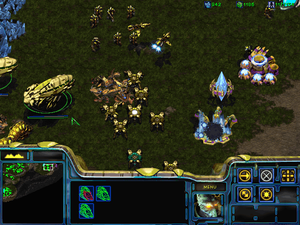
When ready, push straight to the east of your main base. Again, lead with Reavers, and make sure to have backup handy in case they get into trouble. This base doesn't have as many Reavers as the other one, so it should be significantly easier to gain ground. The Ara Tribe may send a Carrier fleet cloaked by Arbiters to help its neighbor out; this is actually a very dangerous threat, so get that Observer in to reveal the cloaked units and focus fire on the Arbiters first. Try to fight close to the enemy units so that if masses of your units get placed into Stasis, their units will be caught in it too. Again, the key is destroying these Arbiters. The more you can blow up, the less they will have later on when you mount the final assault (they can build more, but shortly you'll be making sure that they don't).
When this base is razed, build an expansion and defend it with Photon Cannons as usual—but there's more to it this time. Take your Observer down the right side of the map and you will find another, larger resource node, defended by a meager two Dragoons. You may not need the extra money here, but hey, it never hurts to have fallback resources in case your units run into trouble and get toasted. So build a third expansion here, and until defenses can be set up, guard it with the Zealots and Dragoons from the conquering force.
Disrupting Arbiter Production[edit]
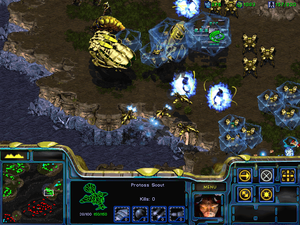
Arbiters cost a lot of gas. 350 gas, to be exact, which makes them more expensive in that regard than Archons. The Ara Tribe starts with three Arbiters in the game, ready to put your units under a Stasis Field. To finance a whole fleet of Arbiters, the Ara Tribe mines from two Vespene Geysers, located in a plateau base in the southwest corner of the map. Give this base a good whacking, and soon enough the enemy will run out of gas to make Arbiters or any other high-end units (they will have some stocked up, but that doesn't last). The force you take there is going to be the same army that mounts the final assault, so build up 12 Zealots, 12 Dragoons, 4 Archons (if you took the Templar build), 4 Reavers, at least 6 Scouts, and at least 6 Carriers. It's advantageous to have eight of each of the air units by the final assault however. Use an Observer to scout out the path you will take: starting from the third expansion, go southwest following the river. Continue into the canyon leading southeast, and that's where you will start the assault. As your ground units lumber along the small ground path, they might come under attack by Photon Cannons above. Use Carriers and Dragoons to take these out quickly. In general, the Carriers and Scouts should move further away from the enemy ridge, and it's a good idea to actually have them fly above the river the whole time. This is done to avoid Arbiters freezing these units for a long time.
When you're there, have the Carriers move into the enemy base, taking out the Cannons and Dragoons first, then targeting the two Assimilators. The other base will send Arbiters and Shuttles loaded with ground troops as reinforcements, so have all your Dragoons positioned in the canyon between the two bases to deter their movement. Zealots and Reavers obviously can't do anything here (other than dispatch any units that get prematurely dropped from Shuttles), so just make sure they're protected from marauding enemies. The Archons can help deal with airborne threats as well.
Breaking the Stasis Cell[edit]
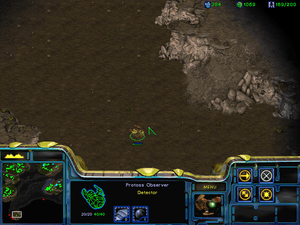
You are ready for the last offensive. Check to make sure any severely damaged units are rotated out from the attack force, and also make sure everything is upgraded, because the enemy Protoss were since the beginning. Specifically, Ground Weapons, Ground Armor, Shields, Air Weapons, and Air Armor should all be at level 3. You'll need two Forges and two Cybernetic Cores to get this done in any sort of timely manner. As mentioned above, Scarab Damage should have been researched, with the Scarab Capacity upgrade as an option (unlike the Interceptor Capacity upgrade, this one is completely redundant, provided you can keep an eye on when your Reavers are low on Scarabs). Singularity Charge at the Core and Leg Enhancements at the Citadel are always mandatory. Interceptor Capacity should have been upgraded immediately after the Fleet Beacon came in, as stated above; the Scout upgrades are not required, but if you have the money go for them.
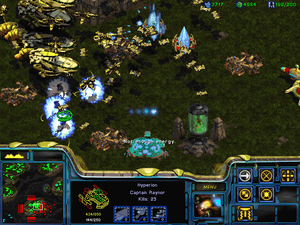
When ready, start your attack from the canyon in the previous step. Ground units are vulnerable while they move up the ramp (by the way, follow this pattern when moving ground units here: Archons, then Zealots, then Reavers, and finally Dragoons), so the air units should be ready to attack anything distracting. Then go around the northwest wall of their enclosed base and move in through the entrance on that wall. The Stasis Cell is located smack dab in the center; the huge number of enemy structures will be distracting, but all you need to worry about are the Photon Cannons. Have Archons and Zealots go at them, while the Reavers go straight for the Stasis Cell. Dragoons and Scouts should work to distract any Arbiters or enemy Carriers, while your own Carriers can move around working as powerful firefighters. After the Cannons are down, the Reavers don't really need help destroying the Stasis Cell; so long as you protect them from enemy units being pumped from the nearby Gateways you should be done in no time. The following cutscene will be slightly long, so sit back and enjoy the drama.
Alternate Strategies[edit]
Air Superiority[edit]
Building and managing ground units can be a pain. With this scenario in particular, to attack the Stasis Cell with a large ground force you all but have to fight through one of the Furinax Tribe bases. If you don't want this, you can mount an air-only attack on the enemy. After setting up the initial defense, tech straight to Carriers and build about 12 each of Carriers and Scouts. This is going to take a gigantic amount of resources and time (you will need two Stargates as well), so if you can try to secure the lightly defended deposit on the right side of the map. You can attempt to steal resources from the other bases, but by the time you have enough Carriers to give a good fight, they'll probably have mined too much of it. Either way, secure enough resources to build the aforementioned fleet and upgrade Air Weapons, Air Armor, and Shields to level 3. Take the attack force plus the Hyperion and fly straight to the Stasis Cell. Chances are, you will not have destroyed many Arbiters if you took this approach, so prepare to see your entire force get frozen multiple times. To avoid this, have the fleet split into two or three groups that will not all get hit by a Stasis at once. When you get there, pound the Stasis Cell with everything you've got, including the Yamato Cannon; but do take the time to kill annoying Dragoons or Scouts if it looks like they are doing too much damage to your Carriers.
Backdoor Rush[edit]
The last Ara Tribe base may look like it's pretty much closed off except for the one ramp used in the main walkthrough, but there is another way into it. Remember that ramp? Continue along the canyon there, and you'll come to another body of water. From here, go straight east until the edge of the map, and there will be a low ground area. To take advantage of this, you'll need Shuttles. Prepare a sizable air force (you need at least six Carriers and four Scouts), and a ground force with four Reavers, a dozen Zealots, and four Archons (if you can't afford these, replace with four Dragoons). You will need seven Shuttles to transport those ground units. Make your way around to the lower right corner of the map as stated above, and drop the ground units there. Go up the ramp and dispatch the Photon Cannons, and you will have a clear path straight to the Stasis Cell. Depending on how early you attempt this "rush", there could be a good number of Arbiters and Carriers waiting for you. The Reavers still do the heavy lifting with destroying the Cell here, so just do everything possible to protect them, even if it means sacrificing Carriers to draw enemy fire.
Carrier Distraction[edit]
For this strategy you will need three Carriers, six Dragoons, six Reavers, six Zealots, Fenix, Raynor and eight Shuttles. What you have to do is simple – get all your ground units into the Shuttles and fly the Hyperion with them to the front of the enemy base (however, try to avoid enemy Cannons or Dragoons – keep a safe distance). Meanwhile, the Carriers should go to the plateau behind the base and get inside through the backdoor entrance. The Ara Tribe will send all their Scouts, Carriers, Dragoons and Arbiters to destroy your Carriers and give you about 20 seconds in which the base is practically empty, except a few Zealots. So all you have to do is quickly drop your forces into the base and attack the Stasis Cell with everything you have (including the Yamato Gun). The Cell won't last too long.