With Pester Balls
| ||
 Bulbasaur Bulbasaur
|
 Ditto Ditto
|
 Grimer Grimer
|
 Jigglypuff Jigglypuff
|
 Jynx Jynx
|
 Koffing Koffing
|
 Magikarp Magikarp
|
 Muk Muk
|
 Victreebel Victreebel
|
 Weepinbell Weepinbell
|
 Zubat Zubat
| |
| Special Picture: "Balloon Pikachu" | ||
| Special Picture: "Jigglypuff on Stage" | ||
| Special Picture: "Jigglypuff Trio on Stage" | ||
With PokeFlute
| ||
 Articuno Articuno
| ||
| Special Picture: "Flying Pikachu" | ||
Pokemon Sign
| ||
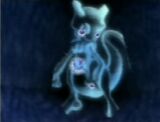
 Mewtwo Constellation Mewtwo Constellation
| ||
Challenge Score: 1,510,000
If you hit the last hiding porygon of the river level with a pester ball, it will jump out of hiding and onto a switch. This switch will open the way into the next level: the cave. In this course, the Zero-One will hover along a preset course through a cave.
Pokemon
Zubat: If you look straight down, this is the first pokemon you will see on this course, though there are a number of different places you can find Zubat in this level. Memorize where they pop out so you will know where to look to get a good shot.
Grimer: On the grassy ledges off to the left of the Zero-One, there are a few Grimer walking around. If you get a shot of the first two Grimer, two more will appear, one with the Bulbasaur and one across from it. The one that appears with the Bulbasaur is your best bet for a great shot.
Muk: If you hit the Grimer that appears with the Bulbasaur with a pester ball, it will evolve into a Muk.
Bulbasaur: Past the first two Grimer are what appear to be two Bulbasaur on the left. Use an apple to get them together. A shot of them reacting to pokemon food will get the most points.
Ditto: If you hit the Bulbasaur with a pester ball, they will reveal that they are actually Ditto in disguise! Bring several together with the apples for a high scoring group shot.
Jigglypuff: On the left side, just past the Ditto, a Jigglypuff will emerge chased by a Koffing. Hit the Koffing with a pester ball and the Jigglypuff will dance around in celebration. For the best shot of Jigglypuff, make sure to save all three of them. See the "Jigglypuff Trio on Stage" special picture below for more.
Koffing: You can find these guys chasing the Jigglypuff around. The first one will be just after the Ditto on the left. If you play different tunes on the pokeflute, it will emit different patterns of smoke. Hitting one with a pester ball will cause it to implode. A picture of either of these reactions will net the most points.
Weepinbell: Just past the first Jigglypuff in distress, you will see a Weepinbell moving around a small pool of water. Wait until you get close for a great close-up.
Victreebel: If you hit the Weepinbell with an apple at the right time, very similar to the Charmeleon on the volcano course, it will fall into the pond and evolve. As it emerges, it will jump around. A good shot of it jumping around will get the most pose points.
Magikarp: If you throw an apple into the pond the Weepinbell is walking around, a Magikarp will likely jump out.
Pikachu: Through the opening past the Weepinbell, there will be a Zubat carrying a Pikachu. See the "Flying Pikachu" special picture below for more details.
Jynx: At the bottom of this section of the cave, a group of Jynx are standing around a blue egg. Unless you have the pokeflute, though, you won't be able to get a good shot of them. However, once they hear the tune from the pokeflute, they will get up, spin around, and dance. This is your shot to get some great pose points.
Articuno: Play the pokeflute as you pass the large blue egg and an Articuno will hatch out of it. How close you are to the hatch depends on when you started playing the flute. If you managed to save Pikachu from the Zubat, turn around as you exit the area to get a shot of Articuno giving Pikachu a ride.
Special Pictures
Balloon Pikachu
Just past the Weepinbell, a Zubat is flying around carrying a Pikachu. If you hit the Zubat with a pester ball, it will drop the Pikachu. Start throwing pester balls as you go through the opening for the best chance at hitting the Zubat. It will take a bit of practice, but once you hit it, the newly freed Pikachu will magically grow some balloons and float off safely. A good shot of this phenomenon will earn 1600 special points.
Flying Pikachu
For this picture, you must both save Pikachu from the Zubat and the hatch the Articuno. If you have done both of these things, then look backwards as you enter the last tunnel (the one where the Jigglypuff sing). The newly freed Articuno will be flying toward the tunnel with a Pikachu on its back!
Jigglypuff on Stage
Throughout the course, you will encounter three Jigglypuff being chased by a Koffing. If you hit the Koffing with a pester ball, the Jigglypuff will show up at the very end of the course to sing to you. This shot is worth 500 special points.
Jigglypuff Trio on Stage
If you manage to save all three of the Jigglypuff from Koffing, the image will be worth 1200 special points. In addition, there will be a same pokemon bonus if you get the right angle. If you play the flute as you pass, they tend to get jealous and make weird faces at you. It doesn't award any more pose points, but it's funnier to look at.
To save the three Jigglypuffs, you need to hit the Koffings as soon as possible, as only one pair will be visible at a given time.
Pokemon Sign

You can find this sign near the Cave. In one area, if you look off in the distance to the left, in the same cavern as the bellsprout, you will see some purple, shining crystal-like objects. If you take a picture of this formation, you will see a strange portrait of Mewtwo when it develops.
