m (moved The Legend of Zelda: The Wind Waker/Din's Pearl to The Legend of Zelda: The Wind Waker/Dragon Roost Island: organization) |
(Added Wii U button.) |
||
| (30 intermediate revisions by 4 users not shown) | |||
| Line 1: | Line 1: | ||
{{Header Nav|game=The Legend of Zelda: The Wind Waker}} | {{Header Nav|game=The Legend of Zelda: The Wind Waker}} | ||
{{Control selector|GameCube, Wii U}} | |||
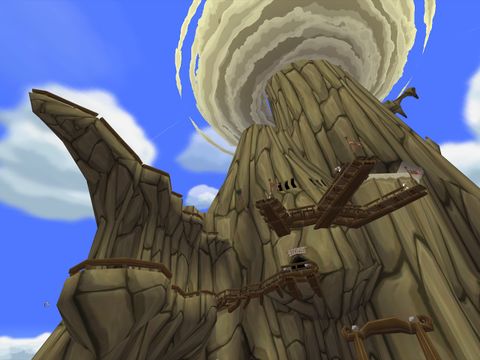
<center>[[File:LOZWW Dragon Roost Island.jpg|thumb|none|480px|Dragon Roost Island]]</center> | |||
The | When you arrive, the King of Red Lions will give you the {{The Legend of Zelda: The Wind Waker/Item|name=Wind Waker}}, a magical conducting baton that works much like the Ocarina from [[Ocarina of Time]], and proceed to teach you how to use it. In summary, {{Control|set the Wind Waker to {{gc|X}}, {{gc|Y}}, or {{gc|Z}} and press the associated button|press {{wiiu|Up|Dpad}}}} to start conducting, then use {{control|{{gc|neutral|Control}}|{{wiiu|neutral|Lstick}}}} to set the time and push {{control|{{gc|neutral|Cstick}}|{{wiiu|neutral|Rstick}}}} in time with the onscreen metronome to conduct a song. | ||
Head straight and pass through a tunnel, and you'll be on a shore. Swim across to the small island and walk to the slabs of stone on the island. Engraved in one of them are notes for a song. Pull out the Wind Waker and play the notes, and you'll learn the [[../Wind Waker Songs#Wind's Requiem|Wind's Requiem]] which allows you to control the wind's direction. You'll then meet a frog spirit who ask you to look out for his brother within the tornados across the Great Sea, which you're underprepared for... at the moment. | |||
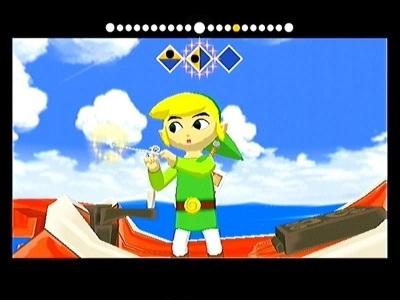
[[File: | <center>[[File:LOZWW Wind's Requiem.jpg|thumb|none|480px|Link learns the Wind's Requiem.]]</center> | ||
Head left and you'll see some blue bomb flowers. Use them to blow up the rocks that block your path. When you reach the top, you'll have to sidle the wall to get across the broken bridge. Drop one more bomb flower to drop the blocks obstructing your path and continue on. You'll meet up again with Quill. He'll invite you to enter the island, so do. | |||
The Rito tribe will tell you of their problem with their wing-giving dragon, Valoo, and that he has become violent and angry. They ask you to help Prince Komali, the chieftain's son. Quill will give you a {{The Legend of Zelda: The Wind Waker/Item|name=Delivery Bag}}, for holding letters. | |||
Take Quill's advice and look for Medli in one of the upper rooms. She'll give you a '''Letter to Komali''' and she'll also ask you to meet her later. It's not a date. I promise. Head down to the bottom floor and enter the hallway leading to the Prince's room. | |||
= | In this room, Prince Komali will be sitting in bed holding {{The Legend of Zelda: The Wind Waker/Item|name=Din's Pearl}}, but he won't give it to you. Deliver the letter and leave his room. In the main room, go through the door with the feathers above it. | ||
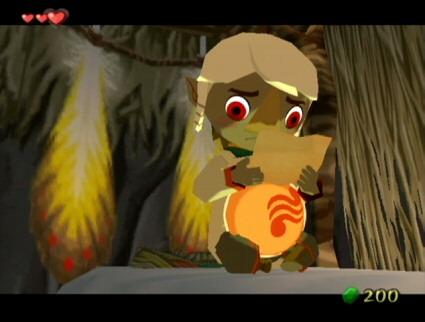
<center>[[File:LOZWW Prince Komali.jpg|thumb|none|480px|Prince Komali holds Din's Pearl.]]</center> | |||
Out here, jump down to find Medli. She'll talk to you, and then ask you to throw her up onto a ledge. Pick her up and go to the top of the little hill. When the wind blows towards the ledge, throw her towards it and she'll fly up there. She'll give you an {{The Legend of Zelda: The Wind Waker/Item|name=Empty Bottle}} for your efforts. | |||
Note: For some fun, you can throw her on to a wall and she'll say funny things before begging you to throw her to the ledge. Experiment to see what she'll say while the birds are chirping! | |||
Head over to the center of the room by the rock that has water around it. Equip your bottle and grab some water with it. Climb back up to the entrance to Dragon Roost Cavern and pour the water on the red withered bomb flowers to turn it into one you can use, then throw one down onto the rock below. This will create a lake so that you can swim and follow Medli into Dragon Roost Cavern. Throw bomb flowers into the pots that the statues hold, and they will fall over and make platforms that allow you to cross the lava. Note: throwing bombs into the statue can be difficult so do your best to line up the distance and angle correctly before picking up a bomb. It may take a couple of tries. | |||
The next area is your first sword-equipped dungeon: Dragon Roost Cavern. | |||
{{Footer Nav|game=The Legend of Zelda: The Wind Waker|prevpage=Windfall Island|nextpage=Dragon Roost Cavern}} | |||
{{Footer Nav|game=The Legend of Zelda: The Wind Waker|prevpage= | |||
Latest revision as of 22:45, 19 March 2023

When you arrive, the King of Red Lions will give you the ![]() Wind Waker, a magical conducting baton that works much like the Ocarina from Ocarina of Time, and proceed to teach you how to use it. In summary, set the Wind Waker to
Wind Waker, a magical conducting baton that works much like the Ocarina from Ocarina of Time, and proceed to teach you how to use it. In summary, set the Wind Waker to ![]() ,
, ![]() , or
, or ![]() and press the associated button to start conducting, then use
and press the associated button to start conducting, then use ![]() to set the time and push
to set the time and push ![]() in time with the onscreen metronome to conduct a song.
in time with the onscreen metronome to conduct a song.
Head straight and pass through a tunnel, and you'll be on a shore. Swim across to the small island and walk to the slabs of stone on the island. Engraved in one of them are notes for a song. Pull out the Wind Waker and play the notes, and you'll learn the Wind's Requiem which allows you to control the wind's direction. You'll then meet a frog spirit who ask you to look out for his brother within the tornados across the Great Sea, which you're underprepared for... at the moment.

Head left and you'll see some blue bomb flowers. Use them to blow up the rocks that block your path. When you reach the top, you'll have to sidle the wall to get across the broken bridge. Drop one more bomb flower to drop the blocks obstructing your path and continue on. You'll meet up again with Quill. He'll invite you to enter the island, so do.
The Rito tribe will tell you of their problem with their wing-giving dragon, Valoo, and that he has become violent and angry. They ask you to help Prince Komali, the chieftain's son. Quill will give you a ![]() Delivery Bag, for holding letters.
Delivery Bag, for holding letters.
Take Quill's advice and look for Medli in one of the upper rooms. She'll give you a Letter to Komali and she'll also ask you to meet her later. It's not a date. I promise. Head down to the bottom floor and enter the hallway leading to the Prince's room.
In this room, Prince Komali will be sitting in bed holding ![]() Din's Pearl, but he won't give it to you. Deliver the letter and leave his room. In the main room, go through the door with the feathers above it.
Din's Pearl, but he won't give it to you. Deliver the letter and leave his room. In the main room, go through the door with the feathers above it.

Out here, jump down to find Medli. She'll talk to you, and then ask you to throw her up onto a ledge. Pick her up and go to the top of the little hill. When the wind blows towards the ledge, throw her towards it and she'll fly up there. She'll give you an ![]() Empty Bottle for your efforts.
Empty Bottle for your efforts.
Note: For some fun, you can throw her on to a wall and she'll say funny things before begging you to throw her to the ledge. Experiment to see what she'll say while the birds are chirping!
Head over to the center of the room by the rock that has water around it. Equip your bottle and grab some water with it. Climb back up to the entrance to Dragon Roost Cavern and pour the water on the red withered bomb flowers to turn it into one you can use, then throw one down onto the rock below. This will create a lake so that you can swim and follow Medli into Dragon Roost Cavern. Throw bomb flowers into the pots that the statues hold, and they will fall over and make platforms that allow you to cross the lava. Note: throwing bombs into the statue can be difficult so do your best to line up the distance and angle correctly before picking up a bomb. It may take a couple of tries.
The next area is your first sword-equipped dungeon: Dragon Roost Cavern.