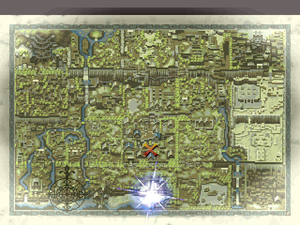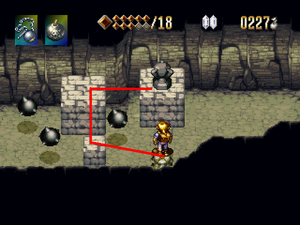
Upon entering the Coastal Cave, equip the Flail and hit the left and middle stack of rocks once, forming steps for Alundra to reach the higher level. Use Bombs to kill the Turtles and then destroy the rocks in front of the door with the Iron Flail, and go through it.
In the next room, kill the Turtles again and hit the leftmost rock twice with the Iron Flail, use it to reach the higher level. Destroy the two pillars on the left to reach a chest containing Herbs and then destroy the rock cube near the dark grey rock. Go back to near the start of the room and pick up the light grey rock and place it on the floor where the most recently destroyed rock cube was. Use it as a stepping stone to reach the highest platform, jump North off this platform and follow the path, destroying the other blocks with the Flail and then going through the door at the end.
For this room, jump across the pit using the two moving platforms, jumping onto the higher one when it goes over the one that Alundra is standing on. Hit the lever to the right and jump quickly across the cracked platforms. Go up and then hit the lever at the top of the room, opening the door. Jump down and destroy the topmost block that's blocking Alundra's way and then destroy the leftmost block, climbing up the ladder that's revealed. Go down and then use the Flail to hit the lever, jumping over the cracked tiles, making sure to go right at the rocks, climb up the ladder, open the chest containing the Herbs and keep on going North, through the door.
In the next room, pick up the wooden block and then jump onto the raised platform with the spikes on, making sure to stay near the bottom of it, where there are no spikes, turn North and then throw the block, jump onto the trunk and then over to the chest, which contains a key. Head back to the previous room and jump down any of the pits. Go to the top of the room and use the key to open the locked door, go through it.

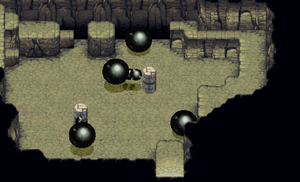
The next room contains four exits, three of these (bottom-right, top-left and top-right) contain gems that need to be hit to open a passageway in the last room (top-middle exit). Firstly, go to the bottom right door and destroy the blocks there to get into the room. Once in there, destroy the lower stone blocks while dodging the spiked balls, but leave the blocks as how they are shown in the screenshot, once at the stone block with a gem on the top, jump onto the pot, then onto the lower blocks, then over to the higher blocks, then onto the block with the gem, hit the gem and then leave the room. Alternatively, Alundra can just jump up below the block, and at the peak of the jump, use the Flail to hit the gem.
After this, go to the top left room, destroying the blocks in the way once again. Inside the room, hit the stone pillar after the ball swings past Alundra, and then hit the gem, leave this room and go into the top-right one. In this room, kill the Turtles with bombs while leaving the blocks in the room intact, after all the enemies are killed, the gem will fall down at the top right of the room, use the block to reach it and then hit it. Leave the room and go through the top-middle door. Ignore the two block filled pits in the room and just go down the staircase. If Alundra did not activate the gems, the staircase would be blocked by a plate.
In the next room, follow the path and jump onto the tile, which will then rise. At this point, Alundra must stay on the raised parts of the room, if he falls off, leave the room to reset it. Go around the outer ring and jump on the switch, three Turtles will appear in the middle, use Bombs to kill them. After killing them, another switch will fall down, jump on that, three Mudmen will appear in the middle, use charged Sword strikes to kill them, just on the third switch when it appears. Three Graggs will fall down in the middle, use charged Sword attacks to kill them. Jump on the final switch and three Graggs will fall down on the sides of the arena, kill them and the chest at the top of the room will become reachable, open it to receive the Merman Boots.
These Boots allow Alundra to swim in all but the deepest water. Head back two rooms and jump in the pool there, the wooden platform at the bottom right of the pool has a chest with Herbs inside, after taking them, head out of the room through the South door. Use the tile at the bottom right to leave the next room. Go through the room Alundra emerges in once again to leave through the North dor.
In this room, pick up the log on land and jump onto the logs in the water, going towards the one furthest to the upper-right, once there, throw the log towards the North and use it as a stepping stone to reach the chest, which contains Herbs, then swim into the next room. In this room, swim right, avoiding or killing the Mudmen. Climb up the steps and ladder at the bottom right of the room in order to reach a bush, throw it and a Herb will appear that will either go into Alundra's inventory, or heal him. Go into the next room through the Northeast exit.
Leave the pool using the steps and kill the Graggs, after that, use the barrel to reach the higher point of the room, go right, using the tile to get across, exit through the right. In this room, jump down the cracked platforms, staying slightly to the right to dodge the Turtle at the end, kill it using a bomb and open the chest which contains a key. Walk off the bottom of the platform to land on a chest containing 30 Gilder. Swim to the North, dodging the spiked balls, and go back to the previous room, once there, go to the door at the Northwest of the room, unlock it, and go through it.
Kill the Graggs in the next room and then step on the switch. Alundra then has to get past the obstacle course in the room before the block falls back down, preventing him from getting to the exit. The spiked balls that move up and down should be jumped over when they are as low as possible, while the large ones suspended in the air should be sprinted under. If done quickly and well enough, Alundra should reach the block with a few seconds to spare, go underneath it and through the exit. Destroy the blocks and pick up the rock to climb the ladder behind it, and then exit the room through the North door.
In this room, hit the first two pillars to prevent Alundra from getting hit by the large balls. Kill the Graggs and then hit the bottom pillar when the ball is pointing Southwest, it should land against the high wall, at this point, go to the northwest of the room, destroy the blocks there and pick up the barrel, place the barrel near the large ball and use it as a stepping stone up to the high area and the exit.
Follow the path in the next room, making sure to not hit the lever on the bridge. Destroy the blocks with the flail, behind the fourth column from the left is a lever, which opens the hidden door on the left of the room, go through it. Inside there is a chest containing a Gilded Falcon. Leave the room and head through the Northeast door, the path to the South blocked by destroyable blocks leads to a Warp Tile and a currently locked door.

The next room features two rotating balls with an accompanying chain and pillar, as well as two holes that are too large for Alundra to jump over. Alundra should hit the upper pillar while it is pointing to the West, and the lower pillar while it is pointing South, this should place the balls in a position where they are able to be used as steps by Alundra, do so and exit through the Southeast door.
In the next room, swim downwards, if you don't wish to collect a Wonder Essence, swim through the exit in the right and skip this paragraph, if you do, swim down to the bottom of the room, dodging the spiked balls. Once at the bottom of the room, pick up the log and then jump across the platforms, once at the small square one directly beneath the chest, throw the log upwards and then use it to reach the platform with the chest, which contains a Wonder Essence, after this, exit through the hole in the right.
Kill the Graggs and then use the pile of pots to jump over to the platform in the water. Head upwards at the fork and jump to the platform with the log on, stand in the middle of the platform and then jump, throwing the log while facing right. Jump onto the log and then use the Flail to destroy the blocks and jump across, opening the chest containing a key.
Go back to the room with the sign that read Prison and destroy the blocks, going downwards. Use the Warp Tile to save and then open the locked door with the key. Past the door and to the left are two chests, the upper one contains a Life Vessel and the lower one contains a Strength Elixir, destroy the blocks with the Flail and go to the next room.
In the next room, step on the switch and then walk to the right, when the boulder rolls into the shallow hole, jump on it, and then onto the next boulder that falls down. Use the ledges at the back of the room to dodge the spiked ball, right before the boulder falls into the hole there, jump onto the high platform with the switch, and then onto the switch itself, opening the way into the next room.
After going down the stairs in the next room, Alundra will face The Watcher in the Water, after defeating him the boss, Alundra will meet Vul. Vul will give Alundra the Water Scroll, but tell him that the Garnet Crest was taken by the Murgg, after that he will summon a warp tile to take Alundra back to the start of the Coastal Cave.