(Finished passwords and screenshots) |
(Added guide for levels 43 and 44) |
||
| Line 13: | Line 13: | ||
[[File:LoloDaibouken_09-3.png|thumb|left]] | [[File:LoloDaibouken_09-3.png|thumb|left]] | ||
[[File:AdvLoloGB_1-4-01.png|thumb|right]] | [[File:AdvLoloGB_1-4-01.png|thumb|right]] | ||
Of the four hearts surrounding Lolo, three are unguarded, so take all of them but the one on the direct left. These three hearts provide a hammer, and the lower of the three also provides shots. Use the hammer on the rock just above the upper-right Snakey, creating room to push it down first after you turn it into an egg. Push the egg down two tiles, left one tile, then down again to block the bottom-right Medusa and collect the heart in that row. But then you will need to quickly use another shot to turn the left Snakey into an egg and push it up two tiles to block the lower-left Medusa while also finding a moment to shoot the right Snakey egg before it hatches. Remember, to make this easier, you could have left the right Snakey egg a half-tile away from the bottom to enable you to shoot it from the left side safely. | |||
As you collect the center heart, leave the remaining Snakey where it is to continue to protect Lolo traveling up and down the room, just so long as no part of it is below the Medusa's row. When the upper-right Snakey returns, push it down two tiles and all the way left to get the heart underneath the Medusas, then shoot the egg away again as soon as Lolo is out of that column. When that Snakey returns for the second time, you only need to push it down one tile, left two tiles, and all the way up for protection in reaching the final heart and the jewel box. | |||
{{-}} | {{-}} | ||
== O73AVR — 0JΔMFZ == | == O73AVR — 0JΔMFZ == | ||
[[File:LoloDaibouken_09-4.png|thumb|left]] | [[File:LoloDaibouken_09-4.png|thumb|left]] | ||
[[File:AdvLoloGB_1-4-02.png|thumb|right]] | [[File:AdvLoloGB_1-4-02.png|thumb|right]] | ||
Only the hearts below Lolo contain shots, so leave the very top corner heart until you've got all the enemies locked up. The upper Skulls should each half-cover two of the Gols on the right: First push one to cover the rightmost Gol and the center Gol within the upper flowerbed, then push the other one right beside it to cover the center Gol and left Gol in the same row. Move the lone emerald out and around to half-cover both those Skulls from above: They will now each be trapped by half the emerald, half a flowerbed tile, the Gols, and each other. (Slightly different configurations are also possible here, as a Skull on the right can still be sufficiently trapped wandering the desert by the emerald and jewel box while still blocking the Gol's shots.) | |||
The lower Skulls you can simply push into the corners of the lower flowerbeds, trapping them between whole flowerbed tiles. Now when you collect the final heart, you will need to remember to walk around the tree behind the nearby leftmost Gol to avoid getting fried, and don't bump that emerald out of place. | |||
{{-}} | {{-}} | ||
== 5♥♥49I — NGFHBB == | == 5♥♥49I — NGFHBB == | ||
Revision as of 06:11, 29 April 2019
Again the section names are the passwords to access each stage, where the first password is for the Japanese version and the second password is for the European version, but only for the first eight puzzles of this stage. After that, all puzzles are new for the European release and cannot be found in Lolo no Daibouken, and so therefore only one password will be provided for each.
Furthermore, the order of the last five puzzles of the Japanese version was changed for the European version, saving the original 46th and 47th puzzles for 49th and 50th instead.
 Castle of Egger (5 rooms) Gentry Parade (5 rooms) |
 |
3I9HDK — P17QZJ
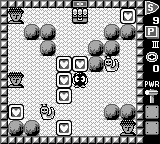
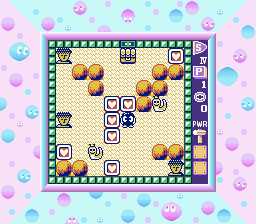
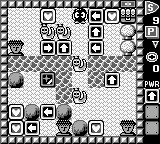
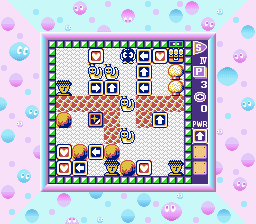
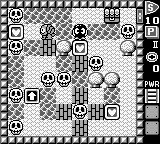
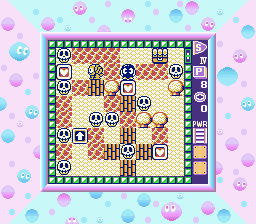
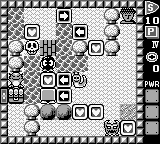
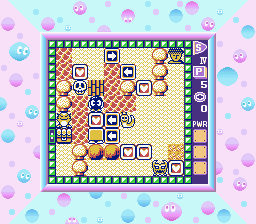
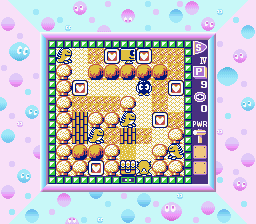
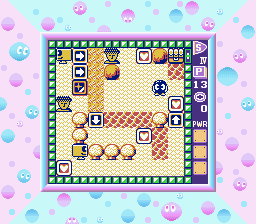
Of the four hearts surrounding Lolo, three are unguarded, so take all of them but the one on the direct left. These three hearts provide a hammer, and the lower of the three also provides shots. Use the hammer on the rock just above the upper-right Snakey, creating room to push it down first after you turn it into an egg. Push the egg down two tiles, left one tile, then down again to block the bottom-right Medusa and collect the heart in that row. But then you will need to quickly use another shot to turn the left Snakey into an egg and push it up two tiles to block the lower-left Medusa while also finding a moment to shoot the right Snakey egg before it hatches. Remember, to make this easier, you could have left the right Snakey egg a half-tile away from the bottom to enable you to shoot it from the left side safely.
As you collect the center heart, leave the remaining Snakey where it is to continue to protect Lolo traveling up and down the room, just so long as no part of it is below the Medusa's row. When the upper-right Snakey returns, push it down two tiles and all the way left to get the heart underneath the Medusas, then shoot the egg away again as soon as Lolo is out of that column. When that Snakey returns for the second time, you only need to push it down one tile, left two tiles, and all the way up for protection in reaching the final heart and the jewel box.
O73AVR — 0JΔMFZ
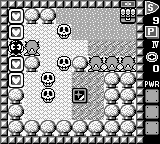
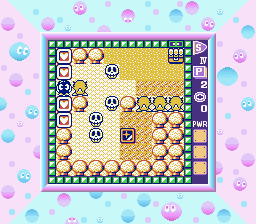
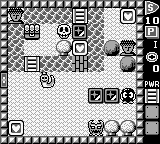
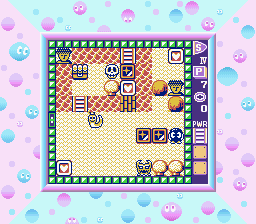
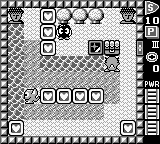
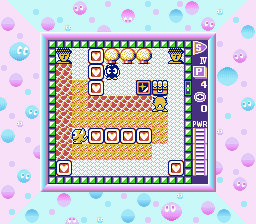
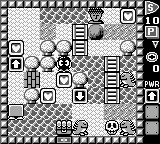
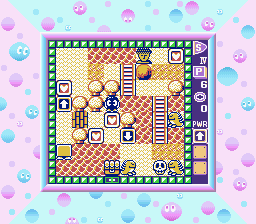
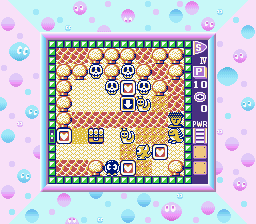
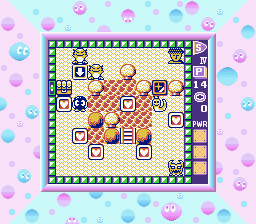
Only the hearts below Lolo contain shots, so leave the very top corner heart until you've got all the enemies locked up. The upper Skulls should each half-cover two of the Gols on the right: First push one to cover the rightmost Gol and the center Gol within the upper flowerbed, then push the other one right beside it to cover the center Gol and left Gol in the same row. Move the lone emerald out and around to half-cover both those Skulls from above: They will now each be trapped by half the emerald, half a flowerbed tile, the Gols, and each other. (Slightly different configurations are also possible here, as a Skull on the right can still be sufficiently trapped wandering the desert by the emerald and jewel box while still blocking the Gol's shots.)
The lower Skulls you can simply push into the corners of the lower flowerbeds, trapping them between whole flowerbed tiles. Now when you collect the final heart, you will need to remember to walk around the tree behind the nearby leftmost Gol to avoid getting fried, and don't bump that emerald out of place.
5♥♥49I — NGFHBB

In the European version, the next puzzle is #CL48♦♦ — AEM1V7.
QQG♥RP — ZVH♥QC
7WAF4W — MS37M8
In the European version, the next puzzle is #XA926K.
CL48♦♦ — AEM1V7
XAΔ2G5 — LB8WAJ
E0HJYC — ♦XAS+0

Password: ZTBDC3
In the European version, the next puzzle is #QQG♥RP — ZVH♥QC.
XA926K
K♥CHM0
♥9IDIC
YR4♦18
9O♥8XK
WMDND0
Stage 5: Grand finale surprise JJZJXC