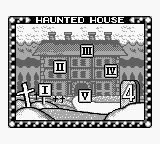
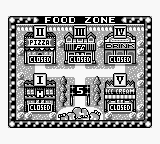
The section names are actually the passwords to access each stage. The first password is for the Japanese version, the second password is for the European version.
 Row Boat Depot (5 rooms) Haunted House (5 rooms) Food Zone (5 rooms) Souvenir Photo (5 rooms) |
 |
6JG51P — KWI6NI[edit]


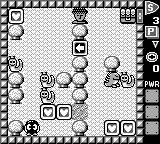
With the two nearby Heart Framers providing Magic Shots, you will need to double-shoot away one of the nearby Snakeys in order to move two Snakeys in eggs to block the Medusa on its left and bottom. You could simply double-shoot one of the two Snakeys in the same column, move the other, then wait for the first Snakey to reappear to be able to move it. But if you want to save time, you can double-shoot the leftmost Snakey, push the lowermost Snakey left and up, and with the extra space left from double-shooting, push it back to the right.
With the top-left heart collected and a Snakey on the left-arrow tile, proceed through the flowerbed to collect the bottom-right hearts. You will need to turn both Gol and the rightmost Snakey into eggs, the Gol to block the Medusa on its right, and the Snakey to get out of the way of pushing Gol to the left first. Just make sure you have Gol already in an egg before pushing the Snakey, don't dawdle, and you should easily be able to reach the jewel box before Gol hatches.

R8AΔJW — ♥UO17Y[edit]


You can freely grab three hearts at the top—all but the one farthest left—and one heart in the center, by the Emerald Framer. Now you can push that emerald one tile left and down all the way to block the bottom Medusa and the Skulls. You also have shots to turn Alma and Snakey into eggs to block the top-left Medusa on both sides. Collect the bottom-left heart last so that you don't have to cross any moving Skulls or the Medusa they may stop guarding.
8E5W♥Δ — IRVX3A[edit]


Here is this game's first arrow maze. Observe how the two closest open tiles are completely surrounded by inward-pointing arrow tiles: If you step all the way into one of these, you will be permanently trapped and forced to restart the puzzle, so watch your step. Now see that the upper emerald is inside a third instance of this configuration, so it will require careful half-tile maneuvering to move it out of there.
If you only push that emerald up a half-tile, you can still step back down that half-tile and work your way around to the emerald's left side to push it to the right one tile. Now step up and around the same ring of arrows one more time to push the emerald up to the next open tile, then push it all the way to the right to block the upper Medusa's downward sight.
Step back and down one row to get underneath the upper emerald, and from there you can push the lower emerald down onto an up-arrow. Step back up and around the middle Snakey to be able to push that emerald to the right to block the lower Medusa's upward sight. Now you can collect the heart, and just step back to get around the arrows beside it to reach the jewel box.
D3ΔQFU — 9Δ1CJ6[edit]


With the magic shots in the heart beside you, you will want to turn both Snakey and Leeper into eggs in order to block Medusa and Don Medusa on two sides. It should be easy enough to start with Leeper, keeping in mind that you need to shoot it before you walk all the way down to it. Push the egg as far down as you can to block Don Medusa's right side when it is on your left, push the egg all the way to the left to trap Don Medusa above Medusa, and then push the egg down just a half-tile so that it also blocks Medusa's right. With this egg here, you ought to stand beside it until the egg hatches so that Leeper falls asleep instead of wandering away and freeing Don Medusa. Then you can get back to Snakey by stepping from the jewel box onto an arrow tile, turn Snakey into an egg, and push it down through the arrow and over Don Medusa so that all hearts are safe to collect.
YXH3X♥ — W+J♦FI[edit]


The idea behind the bridge power is that you can place the bridge just under the jewel box to eventually place something to block the Gol below. With the shots in the heart on Rocky's left, you could use Rocky as an egg twice, first to temporarily block in Don Medusa to the left, and again after it wanders out to become the second Gol block after having blocked the Gol on the left with the emerald, while carefully dodging Don Medusa's gaze in the setup. However, this is by no means the only solution.
It may actually be simpler to block Don Medusa permanently with the emerald and make use of the break tile to shoot the upper-left Gol just before grabbing the heart it guards as your last. At this distance, you don't even need to dodge the other Gol's flame before stepping all the way onto the jewel box from the side.
FMC♥B4 — J8Q7ZY[edit]


The two hearts closest to Medusa are actually unguarded. You can reach the lower of them right away, and you can push both emeralds to the right to reach the higher heart before doing anything else.
Just those two hearts will give you a bridge you should use to push the upper emerald to where it can block one side of Medusa. Probably the simplest solution is to place the bridge just above the emerald to push it down to collect the left heart, then put Snakey into an egg from the left to push it all the way to the right to grab the top heart.

+B6VSB — UQW2EA[edit]


With only the right heart providing a pair of shots and only one emerald, you will need to time the collecting of some hearts to be done when Leepers happen to be moving in front of the Medusas.
First you can push the emerald all the way to the right to collect that heart when the right Leeper steps below the top-right Medusa. Then you can collect the leftmost heart the same way by waiting for the left Leeper to step below the top-left Medusa. Now you should turn the left Leeper into an egg from below when it's anywhere to the right of that Medusa, and push it all the way up if it isn't already. This way you only have to wait for the right Leeper to move up to the top-right Medusa's left side to collect the top heart.
Head back down the screen and wait for the Leeper to hatch and wander out the opening you provided. Be ready to shoot it at a safe distance to be able to push the egg all the way down to safely collect the treasure. If you spent your second shot on anything else already, you could also put the Leeper to sleep at the bottom row by standing on the right edge of the flowerbed a half-tile from the bottom wall and rushing to the left just as the Leeper gets there.
1HO86I — HNEIA6[edit]


Observe that of the figure-8 formation of hearts, only two are really guarded by Don Medusa, between the upper Snakey and the rock, so that leaves eleven hearts you can grab straight away. Now push the left emerald up, turn the upper Snakey into an egg, push it to the right, and push the right emerald up, and that's two more hearts made safe to collect.
In this game it's possible to put Don Medusa into an egg and buy some time to get the other hearts that way, but if you want to trap Don Medusa permanently, your next move should be to shoot the Snakey egg to blast it away and duck behind a framer for safety. When that Snakey returns, turn it into an egg again and push it to the right again as Don Medusa is nearing the top, then push the egg up to totally trap it. Alternatively, you could remove Don Medusa entirely by double-shooting it and moving the Snakey egg onto its starting location, one tile above the rocks.
You'll need to double-shoot the lower Snakey to get to the rightmost heart and stay there until it reappears so that you can turn it into an egg again and push it all the way left to collect the bottom-left heart.
M6I2O9 — 8LKDUI[edit]


To begin, you'll need to take the heart by the chest for a shot to turn the nearest Gol into an egg and push it down just a half-tile and then right against the Medusas. Of the two Skulls in the column on your left, shoot the higher one and push it left to reach two more hearts, including one with more shots.
Go back up and around the lower Snakey and Gol to push the bottom emerald all the way to the left. Push the other emerald up three tiles to fill in the first gap you opened, make the Snakey an egg to block the Skull on the right along with the Gol above, and make the left-facing Gol an egg to cover the other opening to Skulls on the left. Now it is perfectly safe to collect the final heart.
3+DZ2G — FIRΔAY[edit]


Here is another puzzle where you will need to gradually encroach on the Skulls' area while they are awake to get them out of the way of the goal, bearing in mind that a half-tile gap between blocks is enough to stop Skulls from slipping through. The left emerald you will first push across the middle flowerbed. With the emerald still beside you, you can step halfway off the flowerbed without being in danger from Skulls, but once you push it further right, you open that tile up to attack. You will want to push it to a half-tile away from the right emerald once the Skulls have fully vacated the top-right row to close it off and immediately retreat to that top row.
You can start pushing the left emerald one tile downward whenever there are no Skulls in the area just to its left, and then you can push the right emerald as many as two-and-a-half tiles down, but here comes the tricky part. You need to push the left emerald a half-tile to the right again to get it around the rocks, yet this will open up your position to Skulls while you walk around to the emerald's top to push it down, so you'll need to wait patiently again until a moment when all the Skulls are not headed your way or are at least four tiles away from reaching you.
You can only push the left emerald down to where it lines up with the rocks above the sand yet, even as you can push the right emerald a tile-and-a-half farther, because you need to wait for the Skulls to all get out of the desert path to the jewel box before you push them out of the way, or else you'll be trapping them in there and then letting them right back out onto yourself once again. Once all the Skulls are all the way out, the next half-tile push of the left emerald will be enough to keep them out.
OP7T+M — 64XS+B[edit]


Grab the two hearts near Lolo and Snakey, turn Snakey into an egg, and push it right, down, and right into the bottom-right water to ride it. Disembark on the middle water tile to collect the heart and push an emerald out to the left. Continue pushing it up and under Medusa to collect the two hearts on the far left.
When Snakey returns, turn it into an egg again and push it right into the water over the closest Gol, which will carry you to the right. Step onto the jewel box and around the emerald to collect the last heart. Other sequences of moves are possible, but this one lets you get away with never even moving these last two emeralds!

5EP6ET — T2FOQ7[edit]


Out of the eight hearts, four are unguarded by Medusas, and of those four only the lower-left one is guarded by Don Medusa. Three of them contain shots as well, all but the upper-right of them. You could spare a shot to put Don Medusa into an egg to keep it from catching you in two directions for a while, but if you want a safe way, start by pushing the leftmost Snakey in an egg straight down to block Don Medusa into the left corner.
This puzzle requires pushing two Snakeys around each of the remaining hearts to block the Medusas while collecting, then blasting away some of the Snakeys to bring them back to the center and reuse them on another wall. Only the bottom heart does not provide shots, so save that one for last to keep from running out. On one wall you will want to blast away both Snakeys after grabbing the heart, but against the other two walls you should only blast away one of the Snakey eggs, leaving you with one shot left when you have just the one Snakey left you need to push into the bottom-right for the bottom heart.
Remember that you need to step out of the Medusas' line of sight before you blow away the eggs blocking them! If you find it difficult to get out around to the sides of the eggs in order to shoot them in time, you could only half-block the Medusas with them, and after collecting the heart, you only need to step back a half-tile to safely turn and shoot the egg.
AKK0W+ — GZMJMJ[edit]


The one heart beside Lolo provides shots, so use it to turn the Snakey beside Lolo into an egg, and push it up and over the Don Medusas to half-cover both of them. Be careful to avoid the heart in the top-left corner for now, because you'll want to save it for last to avoid having to cross one of the Gols awake. Turn the other Snakey into an egg, push it to the right, and push the first egg down before it hatches so you can reach the heart to the right of the Don Medusas and push the second egg up into the water to reach the top-right corner's heart before crossing back to the left.
Still avoiding the very top-left heart, push the upper emerald down and to the right to half-cover both Don Medusas from below. Collect the four hearts in a row and maneuver the lower emerald left and up around the trees to block the upper Gol that faces the jewel box. Now when you collect the final heart, the up-facing Gol is already blocked, and that's all you need to cross.
With careful maneuvering, this puzzle could also be completed with an emerald and Snakey swapped or a different heart left behind as long as the last heart is still in the upper area and you don't end up blocked by the return of a sunk Snakey.
V9EX93 — RHSF5Z[edit]


Use the uppermost Snakey to cross the river on the right when Rocky is not about to reach the upper-left part of its island. After you collect the heart there, make Rocky an egg when it is in the upper-left area in order to cross straight back to the left.
Use the leftmost Snakey in an egg to raft downward and shoot the next Snakey at the end to push it out of your way. Before pushing it into the water, head up to grab the heart in front of Gol. Now push your latest Snakey egg to cross the water to the right and take the last heart; in this game, you have just enough time to cross those two tiles and back to the area with the jewel box before the egg is fully sunk.
You could also have used Rocky in an egg to reach the lower-right heart and cross back up, but since this makes the heart in front of Gol the final one, you would need to shoot Gol once from above and waste no time pushing the last two Snakeys to retrieve it before Gol hatches.
Stage 3: House music CΔWBRY — EEAYLB