As a preface to this guide, every boss in Vampire Killer has a cap on the max amount of damage they can take per hit from any of Simon's Primary Weapons - no matter what main weapon you hit them with, they won't take more than 1.5 points of damage at a time.
Vampire Bat

| Vampire Bat | |
|---|---|
| Health | 16 |
| Damage Dealt Per Hit | Body Contact: 4 Fireballs: 1 |
| Points | 2000 |
| Recommended Items | Morningstar, Hourglass, Shield B |
| Attack Pattern | Shoots a fireball, and then either swoops down at the player or flies directly to somewhere else in the room. |
The Level 1 boss in Vampire Killer is far more of a threat than its NES counterpart, due to its fast movement patterns and unique ability to shoot fireballs. The lack of a substitute for Castlevania's Axe sub-weapon in Vampire Killer (i.e., a weapon that arcs upwards in the air) also makes this fight more challenging.
The best strategy for the Vampire Bat is to grab the Hourglass in Stage 2 and use that to freeze the boss when he swoops down towards you, leaving him completely vulnerable to any attacks for four seconds at a time. You can also grab a Shield B (the reflect shield) two screens before the boss, which allows you to block boss’s fireballs. The Morningstar whip is easily the best primary weapon for this fight, given how fast it can hit enemies.
Medusa

| Medusa | |
|---|---|
| Health | 16 |
| Damage Dealt Per Hit | Body Contact: 4 Snakes: 1 |
| Points | 2000 |
| Recommended Items | Holy Water, Hourglass |
| Attack Pattern | Flies slowly towards the player in a wavy line, periodically stopping to shoot snakes directly at Simon. |
Medusa is by far the easiest boss in Vampire Killer, only remotely becoming a threat if you let the battle continue for more than 10 seconds. If that iss the case, there's a health orb in one of the left-side candles in the boss room.
The most effective item combo to use in this fight is the Hourglass with Holy Water, which allows you to freeze Medusa in place and then shred her HP to zero in a matter of moments- the boss damage cap, conveniently, does not apply to sub-weapons. Alternatively, you can freeze Medusa with the Hourglass and then attack her with whichever primary weapon you have on hand, though this method will require you to use the Hourglass more than once for it to be successful.
The Mummies


| The Mummies | |
|---|---|
| Health | 32 |
| Damage Dealt Per Hit | Body Contact: 4 Bandages: 1 |
| Points | 2000 |
| Recommended Items | Throwing Knives, Shield B |
| Attack Pattern | The Mummies walk quickly around the boss room, periodically stopping to shoot bandages in Simon's direction. |
The Mummies are a very easy boss, as long as you have the proper items. Entering the fight with Shield B in your inventory and holding crouch upon entering the room will allow you to attack the boss safely- you're immune to the Mummies' bandages due to the properties of Shield B, and outrange the Mummies' melee hitboxes. The Throwing Knives are easily the best primary weapon for this fight, given their screen-wide range and spammability.
Frankenstein's Monster
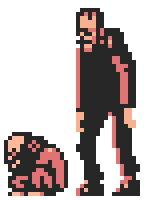
| Frankenstein's Monster | |
|---|---|
| Health | 32 |
| Damage Dealt Per Hit | Frank Body Contact: 6 Fleaman: 2 Fireballs: 1 |
| Points | 3000 |
| Recommended Items | Holy Water |
| Attack Pattern | Frank runs back and forth, while his Fleaman friend jumps high into the air and shoots fireballs at Simon. |
Frank is the first truly dangerous boss in Vampire Killer. This fight can get dire very quickly without the right equipment.
The only truly useful item for this fight is the Holy Water, which you can throw at Frank's feet and deals massive damage as he walks over the flames. With perfect aim, you can two-shot him in this manner. Note that Frank is the only one of the two enemies in this fight that actually has a damageable hitbox- attacking the Fleaman will only stun it for a couple seconds, and does not decrease the boss' total health. If you can, try to take damage to either the Fleaman or its fireballs, as they deal far less damage than being hit by Frank himself.
Death
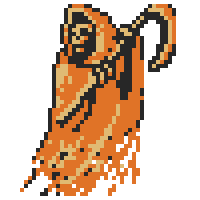
| Death | |
|---|---|
| Health | 32 |
| Damage Dealt Per Hit | Body Contact: 6 Scythes: 1 |
| Points | 7000 |
| Recommended Items | Hourglass, Shield A |
| Attack Pattern | Flies quickly around his boss room in straight, angled lines, bouncing off the walls. Frequently spawns mini scythes which fly around the room after the player, damaging Simon on contact. |
Death is arguably the most challenging of Vampire Killer's bosses during a standard playthrough. None of the quick kill strategies from NES Castlevania work in this game. Death’s a lot faster in VK than in Castlevania too, but he’s also far more predictable given his simplistic movement behaviour. His mini scythes also don’t deal immediate damage when spawning in, which gives you a few extra frames to get out of the way.
In terms of strategy, the best plan for Death is to pick up the Hourglass and use that to freeze him when he’s level with the boss room's platform. You’ll be able to get in a bunch of hits with whatever primary weapon you’re using during those four seconds. Repeat this move until Death’s health is depleted to zero. Grabbing a Shield A (defense shield) will half the contact damage you take from Death himself, which can be very beneficial for tanking extra damage.
Count Dracula
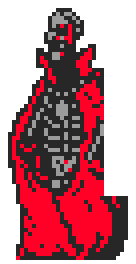
| Dracula | |
|---|---|
| Health | Phase 1: 32 Phase 2: 32 |
| Damage Dealt Per Hit | Body Contact: 6 Fireballs: 1 Bats: 2 |
| Points | Phase 1: 30,000 Phase 2: 50,000 |
| Recommended Items | Throwing Knives, Hourglass, Shield A |
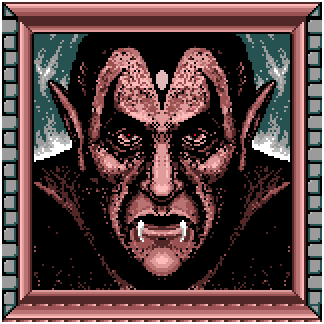
| Attack Pattern | Dracula shoots a cone of three fireballs from his exposed ribcage, disappears, and then teleports to another spot on the boss room floor. After being defeated once, the massive Dracula portrait on the wall comes to life and starts spewing waves of bats from its mouth. |
If you’ve got the right items, enough hearts, and your wits about you, the final fight against Dracula won’t pose much of a threat.
Phase 1 is your average initial Dracula battle: teleportation and fireballs. Dracula’s only hitbox is his head, as is the case with many Castlevania games- you’ll have to jump to get high enough to deal damage to him. The Throwing Knives are an excellent choice for this fight, as their screen-wide range allows you to attack Dracula no matter where he appears after teleporting. To further decrease the difficulty of this fight, the Hourglass allows you to freeze Dracula onscreen, making it easy to get in several extra hits on him before he teleports again. You can even one-cycle Dracula’s first phase consistently if you chain the Hourglass fast enough.
In Phase 2, if you grabbed the Shield A earlier in Level 6, the bats summoned from Dracula's portrait shouldn't cause you any problems. Climb up the blocks on either side of the boss room, and use your primary weapon to attack the glowing oval on portrait Dracula’s forehead- this is his only damageable hitbox. Once again, if you have the Throwing Knives, this fight will be easy, and you can use any Hearts you still have to repeatedly freeze the bats with the Hourglass.