Jump to navigation
Jump to search
Images pertaining to Star Wars: Battlefront II.
Media in category "Star Wars: Battlefront II images"
The following 129 files are in this category, out of 129 total.
-
 SW B2 Death star map.jpg 590 × 443; 21 KB
-
 SWB2 Mustafar map.jpg 590 × 443; 32 KB
-
 SWBFII A Line in the Sand 2nd Point.png 1,024 × 768; 1.18 MB
-
 SWBFII A Line in the Sand 4th Point.png 1,024 × 768; 1.37 MB
-
 SWBFII A Line in the Sand First Wave.png 1,024 × 768; 1.17 MB
-
 SWBFII A Line in the Sand ITF-X Tank.png 1,024 × 768; 1.25 MB
-
 SWBFII A Line in the Sand Refinery.png 1,024 × 768; 1.31 MB
-
 SWBFII A Line in the Sand Spawn Menu.png 1,024 × 768; 942 KB
-
 SWBFII A Line in the Sand Turret.png 1,024 × 768; 1.26 MB
-
 SWBFII A Line in the Sand Yoda.png 1,024 × 768; 1.34 MB
-
 SWBFII Among the Ruins 1st Objective.jpg 1,024 × 768; 110 KB
-
 SWBFII Among the Ruins Bridge.jpg 1,024 × 768; 115 KB
-
 SWBFII Among the Ruins Capturing 1st Point.jpg 1,024 × 768; 89 KB
-
 SWBFII Among the Ruins Generator.jpg 1,024 × 768; 76 KB
-
 SWBFII Among the Ruins Guarding Troops.jpg 1,024 × 768; 105 KB
-
 SWBFII Among the Ruins Jet Trooper.jpg 1,024 × 768; 92 KB
-
 SWBFII Among the Ruins Shields.jpg 1,024 × 768; 108 KB
-
 SWBFII Among the Ruins Turret.jpg 1,024 × 768; 105 KB
-
 SWBFII Birth of the Rebellion Cavern.png 1,024 × 768; 1.04 MB
-
 SWBFII Birth of the Rebellion Databank.png 1,024 × 768; 1.23 MB
-
 SWBFII Birth of the Rebellion Fighting to Holodisk.png 1,024 × 768; 1.03 MB
-
 SWBFII Birth of the Rebellion Hangar.png 1,024 × 768; 1.13 MB
-
 SWBFII Birth of the Rebellion Sniper.png 1,024 × 768; 1.08 MB
-
 SWBFII Capital Ship Map.jpg 300 × 225; 40 KB
-
 SWBFII Changing of the Guard 1st Gunship.png 1,024 × 768; 1.27 MB
-
 SWBFII Changing of the Guard 2nd Gunship.png 1,024 × 768; 1.2 MB
-
 SWBFII Changing of the Guard DNA sample.png 1,024 × 768; 978 KB
-
 SWBFII Changing of the Guard Life Support.png 1,024 × 768; 1.08 MB
-
 SWBFII Changing of the Guard Rail Arc Trooper.png 1,024 × 768; 957 KB
-
 SWBFII Changing of the Guard Turret.png 1,024 × 768; 1.15 MB
-
 SWBFII First Line of Defense Auto-Turret.jpg 1,024 × 768; 78 KB
-
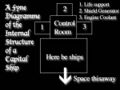
 SWBFII First Line of Defense Battle Plans.jpg 1,024 × 768; 94 KB
-
 SWBFII First Line of Defense Destroying Heavy Turret.jpg 1,024 × 768; 82 KB
-
 SWBFII First Line of Defense Engine Cooling Tanks.jpg 1,024 × 768; 93 KB
-
 SWBFII First Line of Defense Escaping Enemy Ship.jpg 1,024 × 768; 63 KB
-
 SWBFII First Line of Defense First Frigate.jpg 1,024 × 768; 75 KB
-
 SWBFII First Line of Defense Friendly Hangar.jpg 1,024 × 768; 99 KB
-
 SWBFII First Line of Defense Frigate from above.jpg 1,024 × 768; 99 KB
-
 SWBFII First Line of Defense Frigate from below.jpg 1,024 × 768; 55 KB
-
 SWBFII First Line of Defense Heavy Turrets.jpg 1,024 × 768; 84 KB
-
 SWBFII First Line of Defense Landing.jpg 1,024 × 768; 78 KB
-
 SWBFII First Line of Defense What Happens When Player Rushes In.jpg 1,024 × 768; 78 KB
-
 SWBFII Heart of Darkness 2nd Turret.jpg 1,024 × 768; 137 KB
-
 SWBFII Heart of Darkness Acklay 1.jpg 1,024 × 768; 109 KB
-
 SWBFII Heart of Darkness Acklay 2.jpg 1,024 × 768; 120 KB
-
 SWBFII Heart of Darkness Acklay 3.jpg 1,024 × 768; 107 KB
-
 SWBFII Heart of Darkness AT-TE.jpg 1,024 × 768; 98 KB
-
 SWBFII Heart of Darkness Defense.jpg 1,024 × 768; 143 KB
-
 SWBFII Heart of Darkness Power Cell.jpg 1,024 × 768; 134 KB
-
 SWBFII Heart of Darkness Taking out droid.jpg 1,024 × 768; 143 KB
-
 SWBFII Heart of Darkness Tank Droid.jpg 1,024 × 768; 106 KB
-
 SWBFII Heart of Darkness Turret on hill.jpg 1,024 × 768; 55 KB
-
 SWBFII Heart of Darkness Turret.jpg 1,024 × 768; 119 KB
-
 SWBFII Imperial Diplomacy Destroying Console.png 1,024 × 768; 1.27 MB
-
 SWBFII Imperial Diplomacy Enemy Tank.png 1,024 × 768; 1.23 MB
-
 SWBFII Imperial Diplomacy First Bridge.png 1,024 × 768; 1.01 MB
-
 SWBFII Imperial Diplomacy Plaza Security Post.png 1,024 × 768; 1.16 MB
-
 SWBFII Imperial Diplomacy Queen.png 1,024 × 768; 923 KB
-
 SWBFII Imperial Diplomacy Recon Droid.png 1,024 × 768; 1.05 MB
-
 SWBFII Imperial Diplomacy Second Bridge.png 1,024 × 768; 1.24 MB
-
 SWBFII Imperial Diplomacy Self-Destruct.png 1,024 × 768; 1.25 MB
-
 SWBFII Imperial Diplomacy Target Jedi.png 1,024 × 768; 1.16 MB
-
 SWBFII Knightfall 1st Jedi.png 1,024 × 768; 1.04 MB
-
 SWBFII Knightfall Archive Room.png 1,024 × 768; 1.27 MB
-
 SWBFII Knightfall Beginning.png 1,024 × 768; 1.1 MB
-
 SWBFII Knightfall Council Chamber.png 1,024 × 768; 997 KB
-
 SWBFII Knightfall Holocron Jedi.png 1,024 × 768; 806 KB
-
 SWBFII Knightfall Holocron.png 1,024 × 768; 1.05 MB
-
 SWBFII Knightfall Jedi Master.png 1,024 × 768; 1.05 MB
-
 SWBFII Knightfall Library.png 1,024 × 768; 1.2 MB
-
 SWBFII Knightfall Repairs.png 1,024 × 768; 1,014 KB
-
 SWBFII Knightfall Veranda.png 1,024 × 768; 992 KB
-
 SWBFII Map Geonosis.jpg 590 × 443; 19 KB
-
 SWBFII Map Mygeeto.jpg 590 × 443; 26 KB
-
 SWBFII Map Yavin IV.jpg 590 × 443; 26 KB
-
 SWBFII Our Finest Hour Back Hangar.png 1,024 × 768; 842 KB
-
 SWBFII Our Finest Hour Bomb Beacon.png 1,024 × 768; 1.08 MB
-
 SWBFII Our Finest Hour Bunker.png 1,024 × 768; 857 KB
-
 SWBFII Our Finest Hour Echo Base Hangar.png 1,024 × 768; 1.09 MB
-
 SWBFII Our Finest Hour End.png 1,024 × 768; 954 KB
-
 SWBFII Our Finest Hour Outlook.png 1,024 × 768; 1.14 MB
-
 SWBFII Our Finest Hour Panel.png 1,024 × 768; 1.01 MB
-
 SWBFII Our Finest Hour Shield Generator.png 1,024 × 768; 1.19 MB
-
 SWBFII Our Finest Hour Snowspeeder.png 1,024 × 768; 1.21 MB
-
 SWBFII Preventative Measures Attacking Shields.png 1,024 × 768; 1.06 MB
-
 SWBFII Preventative Measures CIS Gunship.png 1,024 × 768; 956 KB
-
 SWBFII Preventative Measures Destroying Enemy Fighter.png 1,024 × 768; 1.18 MB
-
 SWBFII Preventative Measures Enemy Bomber.png 1,024 × 768; 778 KB
-
 SWBFII Prison Break Defending Hangar.png 1,024 × 768; 1.16 MB
-
 SWBFII Prison Break Destroying Shuttle.png 1,024 × 768; 1.14 MB
-
 SWBFII Prison Break Fire Control Room.png 1,024 × 768; 1.17 MB
-
 SWBFII Prison Break Jedi.png 1,024 × 768; 1.15 MB
-
 SWBFII Prison Break Map.png 1,024 × 768; 811 KB
-
 SWBFII Prison Break Plans.png 1,024 × 768; 956 KB
-
 SWBFII Prison Break Shuttle.png 1,024 × 768; 1.11 MB
-
 SWBFII Prison Break Walkway.png 1,024 × 768; 1.26 MB
-
 SWBFII Recovering the Plans Barracks.png 1,024 × 768; 1.01 MB
-
 SWBFII Recovering the Plans Engine Room.png 1,024 × 768; 967 KB
-
 SWBFII Recovering the Plans Going to the Engine Room.png 1,024 × 768; 688 KB
-
 SWBFII Recovering the Plans Leia.png 1,024 × 768; 1.1 MB
-
 SWBFII Recovering the Plans Start.png 1,024 × 768; 1.23 MB
-
 SWBFII Revenge of the Empire Bothan Spy.png 1,024 × 768; 1.34 MB
-
 SWBFII Revenge of the Empire Breaching Bomb.png 1,024 × 768; 1.13 MB
-
 SWBFII Revenge of the Empire Fountain.png 1,024 × 768; 1.56 MB
-
 SWBFII Revenge of the Empire Great Temple.png 1,024 × 768; 1.27 MB
-
 SWBFII Revenge of the Empire Pool Defense.png 1,024 × 768; 1.34 MB
-
 SWBFII Revenge of the Empire Pool Mines.png 1,024 × 768; 1.75 MB
-
 SWBFII Revenge of the Empire Pool.png 1,024 × 768; 1.54 MB
-
 SWBFII Revenge of the Empire Small Temple.png 1,024 × 768; 1.49 MB
-
 SWBFII Revenge of the Empire Turret.png 1,024 × 768; 1.32 MB
-
 SWBFII Revenge of the Empire Viaduct.png 1,024 × 768; 1.36 MB
-
 SWBFII Tying Up Loose Ends Beacon.png 1,024 × 768; 1.31 MB
-
 SWBFII Tying Up Loose Ends Bombardment.png 1,024 × 768; 709 KB
-
 SWBFII Tying Up Loose Ends Destroying Schematics.png 1,024 × 768; 1.48 MB
-
 SWBFII Tying Up Loose Ends Gizor Delso.png 1,024 × 768; 1.43 MB
-
 SWBFII Tying Up Loose Ends LOR.png 1,024 × 768; 1.35 MB
-
 SWBFII Tying Up Loose Ends Placing Beacon.png 1,024 × 768; 1.1 MB
-
 SWBFII Tying Up Loose Ends Sniper.png 1,024 × 768; 1.35 MB
-
 SWBFII Tying Up Loose Ends Turret.png 1,024 × 768; 1.03 MB
-
 SWBFII Underground Ambush AA Turret.png 1,024 × 768; 1.48 MB
-
 SWBFII Underground Ambush Grievous vs Obi-Wan.png 1,024 × 768; 1.53 MB
-
 SWBFII Underground Ambush Hangar CP.png 1,024 × 768; 1.4 MB
-
 SWBFII Underground Ambush Highway CP.png 1,024 × 768; 1.29 MB
-
 SWBFII Underground Ambush ITF-X.png 1,024 × 768; 1.32 MB
-
 SWBFII Vader's Fist Corvettes.png 1,024 × 768; 1.04 MB
-
 SWBFII Vader's Fist Enemy Fighter.png 1,024 × 768; 863 KB
-
 SWBFII Vader's Fist Engines.png 1,024 × 768; 849 KB
-
 SWBFII Vader's Fist Transports.png 1,024 × 768; 1.28 MB
-
 SWBFII Vader's Fist Turret.png 1,024 × 768; 1.19 MB


