(→Level 16: CELLBLOCKED: Added best time) |
|||
| (38 intermediate revisions by 11 users not shown) | |||
| Line 1: | Line 1: | ||
{{Header Nav|game=Chip's Challenge}} | {{Header Nav|game=Chip's Challenge}} | ||
The first page of this walkthrough covers level 1 (''LESSON 1'') through level 20 (''TOSSED SALAD''). | |||
__NOTOC__ | |||
<center> | |||
{| {{prettytable|notwide=1|text center=1|style=font-size:12px}} | |||
|- | |||
| width=225px | [[#Level_1:_LESSON_1|'''Level 1''': ''LESSON 1'']] <br> [[#Level_2:_LESSON_2|'''Level 2''': ''LESSON 2'']] <br> [[#Level_3:_LESSON_3|'''Level 3''': ''LESSON 3'']] <br> [[#Level_4:_LESSON_4|'''Level 4''': ''LESSON 4'']] <br> [[#Level_5:_LESSON_5|'''Level 5''': ''LESSON 5'']] | |||
| width=225px | [[#Level_6:_LESSON_6|'''Level 6''': ''LESSON 6'']] <br> [[#Level_7:_LESSON_7|'''Level 7''': ''LESSON 7'']] <br> [[#Level_8:_LESSON_8|'''Level 8''': ''LESSON 8'']] <br> [[#Level_9:_NUTS_AND_BOLTS|'''Level 9''': ''NUTS AND BOLTS'']] <br> [[#Level_10:_BRUSHFIRE|'''Level 10''': ''BRUSHFIRE'']] | |||
| width=225px | [[#Level_11:_TRINITY|'''Level 11''': ''TRINITY'']] <br> [[#Level_12:_HUNT|'''Level 12''': ''HUNT'']] <br> [[#Level_13:_SOUTHPOLE|'''Level 13''': ''SOUTHPOLE'']] <br> [[#Level_14:_TELEBLOCK|'''Level 14''': ''TELEBLOCK'']] <br> [[#Level_15:_ELEMENTARY|'''Level 15''': ''ELEMENTARY'']] | |||
| width=225px | [[#Level_16:_CELLBLOCKED|'''Level 16''': ''CELLBLOCKED'']] <br> [[#Level_17:_NICE_DAY|'''Level 17''': ''NICE DAY'']] <br> [[#Level_18:_CASTLE_MOAT|'''Level 18''': ''CASTLE MOAT'']] <br> [[#Level_19:_DIGGER|'''Level 19''': ''DIGGER'']] <br> [[#Level_20:_TOSSED_SALAD|'''Level 20''': ''TOSSED SALAD'']] | |||
|}</center> | |||
==Level 1: ''LESSON 1''== | |||
[[File:Chip's Challenge Lesson1.png|thumb|right|Level 1, time limit 100, 11 chips. Here we go...]] | |||
The first eight levels of Chip's Challenge are ''lessons'': they teach the basic workings of the game, introducing specific tiles in groups. | |||
;Lessons | |||
* To play the game, Chip must collect all specified ''computer chips'' to pass through the ''socket'', which will allow him to ''exit'' within the ''time limit''. | |||
* The ''locks'' are opened by their color ''keys''. Each key works only once, but can be stacked; the green key, however, is infinite. | |||
* The ''hint'' is a valuable tool for Chip. | |||
To solve this level, move 2L 2U L, take this key and chips, then swap this for a green key and go in a counterclockwise circle to get the rest of the chips. Your first 83 seconds! | |||
{{-}} | {{-}} | ||
== Level 2: LESSON 2 == | ==Level 2: ''LESSON 2''== | ||
[[File:Chips Challenge Lesson2.png|thumb|right|Level 2, time limit 100, 4 chips. Yikes!]] | |||
;Lessons | |||
* The ''blocks'' can remove ''water'', which is deadly to Chip if he steps on it (unless he has flippers, introduced later). | |||
* ''Dirt'' blocks the passage of blocks (and monsters), and can be removed by Chip. | |||
* ''Monsters'' are deadly to Chip on contact, forcing him to start the level over. This type of monster is the ''bug'' - they follow the left wall until there is no obstacle, then turn west. | |||
''Lesson 2'' is likely slightly easier than ''Lesson 1'', as it requires less thinking. Take the two chips and then move blocks 2 and 1 over the top part of the water, touching the dirt both times. The bugs can be ignored with this route; take the top, then the bottom chip, and exit to the west. This scores 90. | |||
{{-}} | |||
==Level 3: ''LESSON 3''== | |||
[[File:Chips Challenge Lesson3.png|thumb|right|Level 3, time limit 100, 4 chips. These shoes are too small!]] | |||
;Lessons | |||
* Water, ''fire'', ''ice'' and ''force floors'' can be passed like normal tiles, with some exceptions in the case of ice, with the use of ''flippers'', ''fire boots'', ''ice skates'' and ''suction boots''. The ice corners can be skated over from within the tile (not into the tile) if the move is legal; should there be a floor to the west of the ice corners, Chip could move L off the ice corner. This is not, however, allowed in Lynx. | |||
* Fire will kill Chip without fire boots; ice will slide anything on it uncontrollably, and force floors will slide objects other than Chip similarly, but Chip can override them by stepping off in any direction. | |||
This level is still simpler; get the flippers, then the ice skates, the fire boots, and then the suction boots and chip below you. To exit, follow in either direction. The best time is 89. | |||
{{-}} | |||
==Level 4: ''LESSON 4''== | |||
[[File:Chips Challenge Lesson4.png|thumb|right|Level 4, time limit 150, 9 chips. Watch out for hidden fire!!]] | |||
;Lessons | |||
* ''Tank''s are monsters controlled by the ''blue button''. A tank moves until it hits something and then will not move until a blue button is pressed; then it moves in the opposite direction. More aspects of the tank can be discussed later. | |||
* Objects can be under blocks, for better or for worse. Chip will immediately be affected by the item under the block. | |||
* ''Toggle walls'' are controlled by the ''green button'', and all toggle walls switch every time one is pressed. | |||
There are three separate rooms in ''Lesson 4'', each introducing the above concepts separately: | |||
''West room'': Go along the path and switch the tanks to collect the chip. | |||
'' | ''South'': Avoid block 3; move block 2 L and move 2D 2L 2U 2R to take the chips on the other four. | ||
'' | ''East'': The path splits into two paths, which lead to four, and then to a chip apiece. Take the top chips, then the bottom, and then go back to the center and exit. The best time is 116. | ||
{{-}} | |||
==Level 5: ''LESSON 5''== | |||
[[File:Chip's Challenge Lesson5.png|thumb|right|Level 5, time limit 100, no chips. Fire can clone itself? It must be the Apocalypse!]] | |||
;Lessons | |||
* The ''clone machine'' creates a monster (or block) in the direction it is pointed, whenever the specified ''red button'' is pressed. The ''trap'' traps anything that steps on it, and is only released when the specified ''brown button'' is pressed. | |||
* The ''fireball'' runs and turns right when it runs into an obstacle. Fire does not affect it. The ''glider'' turns left instead, and water does not affect it. All other monsters die in fire and water (with two exceptions). The ''pink ball'' bounces back and forth every time it hits an obstacle. | |||
* The ''bomb'' destroys any object that touches it. Monsters and blocks are erased, and Chip will die! | |||
'' | ''Lesson 5'' is definitely one of the harder lessons in the group. Move to the top, release the pink ball to slow the cloning down, and take the red key. You can now enter the upper room; release the glider into the bomb with the two brown buttons to exit for a time of 85. | ||
{{-}} | |||
==Level 6: ''LESSON 6''== | |||
[[File:Chip's Challenge Lesson6.png|thumb|right|Level 6, time limit 100, 4 chips. Choices, choices.]] | |||
;Lessons | |||
* The ''invisible wall'', shown as a black '''X''' in maps, cannot be seen and will never be seen, but acts as a wall. The ''hidden wall'', shown as a white tile with a black border in maps, cannot be seen but will be revealed as a wall when Chip touches it. Other objects will not reveal either of these. | |||
* The ''blue wall'', shown as a teal tile in play and as a translucent blue tile or blue-tinged wall on the map, can be real or fake, which can only be determined in play if Chip touches it, and is only removable by Chip. | |||
* There may be extra chips. Collecting more will only keep the counter at zero. | |||
With a map, ''Lesson 6'' is trivial, but it's uncommonly frustrating in this group otherwise. Move 3L 3U 3L D, collect the chips and then return to the exit. As can be seen in the map, you cannot reach the other four chips, but you have enough already. The best time is 94. | |||
{{-}} | {{-}} | ||
== Level | ==Level 7: ''LESSON 7''== | ||
[[File:Chip's Challenge Lesson7.png|thumb|right|Level 7, time limit 150, 3 chips. Those programmers have got to have nerves of steel.]] | |||
;Lessons | |||
* The ''teleport'' takes any object to the next teleport in reverse reading order: Chip's Challenge reads due west, then moves up a row and continues, starting from the current location and wrapping back to the southeast if required. The object comes out on the opposite side of the new teleport from where it entered the old one, so this move ''must'' be legal; otherwise, the next teleport is tried. If no legal exit is found, the object slides across or bounces back, depending on whether sliding across is legal. | |||
* The ''thief'' takes all boots Chip is holding and blocks other objects. | |||
* The ''recessed wall'' blocks everything but Chip, who can pass through it only once before it turns to wall. | |||
''Lesson 7'' is most likely the hardest of the seven lessons, as it combines several more advanced concepts and also sets up a devious trap! If both boots are collected, the thief will take both, and Chip cannot reach the other chip. | |||
Slide D through the teleport, take the chip, and >U to the flippers. Continue >DL, through the water to one of the chips, and then back to the start. Now, you will take the fire boots with >RL, then >U to take the last chip, and teleport into the exit room to win the level for 139. | |||
{{-}} | {{-}} | ||
== Level 8: LESSON 8 == | ==Level 8: ''LESSON 8''== | ||
[[File:Chip's Challenge Lesson8.png|thumb|right|Level 8, time limit 100, 1 chip. Don't forget to brush your teeth...]] | |||
;Lessons | |||
* Dirt is usable as a tile, as well as creating it from water; in addition to blocks, it also stops monsters from passing it. ''Gravel'' is similar, but is unremovable and blocks only monsters. | |||
* The ''teeth'' is introduced; he moves on every other turn, always towards the moving Chip, either horizontally or vertically depending on which is further. If both are tied, the vertical move is always chosen. | |||
Although the teeth is often feared, it is actually a very easy monster to combat. The trickiest part is doing it ''quick''; anti-teeth play is held in high regard. To win ''Lesson 8'', play 4R, U or D, and east to the chip, then further east to the exit. | |||
===Odd and even step=== | |||
This solution will require ''odd step'' mode at this speed. This basic mechanic determines whether teeth and a later monster known as the ''blob'' move on step 2 or step 3, as Chip starts with a free move. Even step is step 3, and odd step is step 2. In even step, wait a further [1], and this will not cost Chip a score of 96. | |||
There is a control in Tile World that allows you to set this feature simply by pressing ''O''; in MS, you'll have to be more interactive. Chip will always begin a session in even step; he can change to odd step by using clock setting after an odd number of seconds. However, if the patch ''Fullsec'' is downloaded, Chip is allowed to change modes by simply pressing F5. | |||
For people learning how to deal with teeth, playing around with this level for a while will allow for valuable lessons! | |||
{{-}} | |||
==Level 9: ''NUTS AND BOLTS''== | |||
[[File:Chips Challenge Nuts and Bolts.png|thumb|right|Level 9, time limit 400, 9 chips. Call in the specialists for this one.]] | |||
Finally, we get to the tougher levels. You might find some beginners already starting to stumble...it's the way to the exit that hangs them up. | |||
Start with the yellow key, bust through its lock, and hold the east key until you stop in front of a block. Move this 2U, then step RDR, use block 4, and take the remaining three blocks to the water by themselves. The red key frees an ice rink: move RDLULDRULD 2R DLULU off the red lock to reach the next section. Touch the green button twice, using the force floor as an extra boost on both touches, and then continue to the blue key. Use this to initiate a chain of keys that leads to the red lock; wait [1/2] to avoid being hit and slide to the next area. | |||
This room contains bugs walking around through an "S"; the top chip is currently open, so move 4U and west. Sneak into the room to the left and collect the chip, then move into the block room to your right. Four blocks are diagonally located from each other; move block 1 R, then use blocks 3 and 4, collect the chip in this room, and use block 2. Now, nick the last block R and get behind it to finish the bombs. Expropriate the three chips, with one being under a block, and head towards the socket, collecting the final chip from the bugs. | |||
In this final area, the fireball is stuck on the trap, and releasing it will simply cause it to circle around again without you being able to reach the exit. An easy way to fix this is to drop the block onto the brown button and then exit the level. Quite a nutty solution! You should have 306. Another way you can do this part is that you may also push the block to the tile that is adjacent to the entrance of the hallway to the room with the exit, blocking the hallway, then push the brown button to release the fireball and head towards the trap and hold on the up key, with the block at that location will get the fireball to cross over the brown button and as long as you have the up key held, you will head up and to the exit as the fireball opens the trap when it crosses over the brown button. | |||
{{-}} | |||
== Level 10: BRUSHFIRE == | ==Level 10: ''BRUSHFIRE''== | ||
[[File:Chip's Challenge Brushfire.png|thumb|right|Level 10, time limit 80, no chips. Like it hot?]] | |||
It's a big, but not hard, maze of fire, and it's completed with a series of moves: 4D 4R 4U 12R 3D 3L U 7L 7D L 3D 8R U 10R 10D 4R 2U L 3U R 2U L 6U 3R 18D 5L 2U 10L 7U 5R. | |||
An additional property of the bug that you can see in ''Brushfire'' is that it treats fire as an obstacle; it will therefore move through this maze, but you won't be seeing it with this 51 route. If you go slower, you might see him. | |||
{{-}} | |||
==Level 11: ''TRINITY''== | |||
[[File:Chip's Challenge Trinity.png|thumb|right|Level 11, time limit 300, 3 chips. Watch out for...the triple threat.]] | |||
The level contains three keys and three different monsters guarding them, three boots and their hazards, and three chips. The name of the level "Trinity" means three and it refers to the three different sections of the level. | |||
Begin with D 3L D, then walk to the extreme west, turn slightly north, and then circle to the west to reach the red key from the fireball. With flawless boosting, Chip can ''just'' make it safely. Move back onto the extreme west, go to the southwest corner, and then east to the yellow key. When you pass the start, take the ice skates before you continue east and take the path to the north. | |||
This leads to the last key, then down to the southeast corner, and then take the up force floor to a west force floor, and to another west force floor, which brings you back to the start. Now, take the flippers, its chip, the fire boots, its chip, and skate up and west to the third chip. The exit is down the path to the right, which is reached at 211. | |||
{{-}} | |||
== Level 12: HUNT == | ==Level 12: ''HUNT''== | ||
[[File:Chip's Challenge Hunt.png|thumb|right|Level 12, time limit 400, 652 chips. Are you hunter...or hunted?]] | |||
Fortunately, not all the chips are required (there's actually 788 chips in this level). What makes it difficult are the teeth at the bottom of the level! There are many, many solutions to ''Hunt'', even many that lead to 270. | |||
Play as follows: U 12L 4U 3R 2D, all the way east and west, then up another row and 10R, up again and 18L 2D 4L, across to the west, and then collecting the columns of seven on the far west as the teeth escape. As Chip moves 29R across the very top of the level, the teeth will become lodged between a strip of chips and the three-wall sections to the northwest and northeast, due to the matching chips left in one layer to the northwest of the wall section. As all the chips remaining aside from a few, such as the ones in the wall corners and the ones left behind to block the teeth, are below the trapped area, there is little need for further guidance. | |||
Generally, ignore the chips in the four wall corners; they cause a diversion from collecting chips continuously. The only other time Chip will not be collecting chips is when diving into the center to finish the level; this should be done at about 100 to 150 chips remaining, as there are 180 chips in the center. | |||
{{-}} | |||
==Level 13: ''SOUTHPOLE''== | |||
[[File:Chip's Challenge Southpole.png|thumb|right|Level 13, no time limit, no chips. Never trust penguins!]] | |||
''Southpole'' is the first untimed level, and in addition the first level where Chip can ''never'' die: there are no blocks, destructive obstacles, or monsters, and no time limit. | |||
The hint next to Chip says ''"What was the name of this level?"'' This suggests a solution where Chip holds south the entire duration (5D). However, a slightly faster solution, though not enough for an extra second if the level were timed, is RDL 2U 3D. Either route scores a theoretical 982 time under T-Chip rules. | |||
{{-}} | |||
== Level 14: TELEBLOCK == | ==Level 14: ''TELEBLOCK''== | ||
[[File:Chip's Challenge Teleblock.png|thumb|right|Level 14, time limit 250, 4 chips. Got ESP?]] | |||
Begin by sliding >LRLU to reach the main area with a red key in tow: you'll find four block sections, three with another key behind them. | |||
Open the north lock and push block 1 through, then move >R and push the block west to the water. Slide >RU back, throw block 2 in, and now open the west lock; this cycle will repeat around the room. Use block 1 here, move >U R, use this block and slide >UL back (which pushes north block 2 L). Again, throw block 2 in, then move on to the south lock and its block 1. Step >L U, then circle clockwise to use two blocks, and return to the south with >UD. | |||
Continue the cycle with south block 2, the east lock and its block 1, then slide >D, where Chip can now use ''all three'' blocks. Finish with >LR, east block 2, >D and use the last block; jump directly south to exit the level for 203. | |||
Currently, however, the record stands at 204, and I've puzzled away at it with no result. Sometime, we'll find out what it is, since it's not that big. | |||
{{-}} | |||
'' | ==Level 15: ''ELEMENTARY''== | ||
[[File:Chip's Challenge Elementary.png|thumb|right|Level 15, time limit 250, 12 chips. Are you smarter than a Bit Buster?]] | |||
''Elementary'' is a good way to learn how to move through corridors, because even with the 89 seconds remaining in the bold route, you can actually run out of time! Fortunately, there's some useful timesavers which will reduce this possibility. | |||
Use the red key on the left to collect flippers and a blue key, then the blue key to collect suction boots and a red key, and swim through the water, holding to the right, to two chips and a blue key. Circle through the southwest and swim out to the force floors, this time holding to the northeast side, and then venture to the very southwest for one more chip. In this room, Chip can sacrifice the suction boots, but this loses more time than it saves. | |||
For the second half of ''Elementary'', unlock the blue lock to take fire boots and a red key, then walk through the red lock to collect ice skates and a blue key. Move the block L out of the way, then go into the fire and turn first west to two chips, then east to a red key and chip. In the ice section, make the first turn east to one chip, follow the path further and turn south next to a blue key, then move under the thief and collect two chips. In this case, the time spent going to the thief is less than the time saved by sliding, so throw the boots away and slide back! | |||
To finish, push the block L again on the path to the blue lock and socket, then hold down the brown button before opening the red lock to exit. This scores 89 seconds, and it might be elementary to some. | |||
{{-}} | |||
'' | ==Level 16: ''CELLBLOCKED''== | ||
[[File:Chip's Challenge Level 16.png|thumb|right|Level 16, no time limit, no chips. It's time to face...the cell. Solution: 4R 12D 4R 4U 4R 8D 4R 8U 4L 4U 20L 4D 4L 16D 4R 8D 20R 4U 4R 4D]] | |||
''Cellblocked'' is a maze level, where any wrong turn requires you to restart, which occurs if you head upwards to read the hint. The hint basically just tells you the shortcut to restart the level is, which is Ctrl+R because if you take the wrong path, you will definitely need to restart. While ''Cellblocked'' has no deadly obstacles or time limit, unlike ''Southpole'', a mistake is as good as death. However, if a mistake ''is'' made, simply move to another level and return to your current level rather than use the restart command, as this preserves your full level score. The best time is 971 under T-Chip rules. | |||
{{-}} | |||
==Level 17: ''NICE DAY''== | |||
[[File:Chip's Challenge Nice Day.png|thumb|right|Level 17, time limit 100, 46 chips. Happy days are here again...?]] | |||
You won't get this every time, because this level contains a new monster: the ''walker''. Besides blobs, the walker is usually the most hated monster of any player! It moves like a fireball or glider, but makes a ''random'' turn when it hits something. In addition, the walker will also treat fire as an obstacle. | |||
Play 5L, collect the first "eye" 2U R 2D, run east to the other eye and pick it up the same way, and now walk 5L 7D or any route as such depending on the walkers. Continue to take the "smiling" chips all the way west, then exit to the lower left. 83 will result if the toggle walls did not block Chip; because the walkers can hit the green buttons and clash with the pink balls which also hit the buttons, this is not guaranteed. | |||
{{-}} | {{-}} | ||
If you have ever wondered of the reason the name of this level is called "Nice Day" it is because of the way this level is structured out in the manner of which it is designed to look like a happy face. The happy face is normally used as a logo for the slogan "Have a Nice Day". | |||
==Level 18: ''CASTLE MOAT''== | |||
[[File:Chip's Challenge Castle Moat.png|thumb|right|Level 18, time limit 600, no chips. Psst! Secret drawbridge!]] | |||
Looking at the map, you can spot a pair of flippers in the upper right corner, which dramatically decreases the difficulty of ''Castle Moat''. | |||
Go along the only available path until you reach the area with the blocks, and walk alternately east and north to where a block is in the middle of a vertical wall. Knock this 2R 2U, then move the other block to take the flippers. Swim through the moat and there comes 553. | |||
{{-}} | |||
== Level | ==Level 19: ''DIGGER''== | ||
[[File:Chip's Challenge Digger.png|thumb|right|Level 19, time limit 210, 146 chips. I thought I said brush your teeth! They're really dirty!]] | |||
''Digger'' is a series of variations on a theme of teeth, and it can get rather annoying. However, this guide is foolproof, and will work every time if you follow the instructions! This guide will assume odd step. | |||
Follow the chips out to the exit and 8U, then 6L 2D and continue to follow 3U 11R, down to a teeth, R 5U to give him room, then follow to the next teeth and 5L 5D 8R (teeth) L 7D (teeth) 8L 2U (to shorten the path later) 4D 5L UD 8L D. At this point, a relatively simple path remains, but the teeth are now on your tail! | |||
Escape this teeth monster with U 3R 5U 5L 3U, follow northeast towards the exit, then turn back and collect the remaining chips counterclockwise, and now exit the level and dig up 171 seconds. | |||
{{-}} | |||
== Level | ==Level 20: ''TOSSED SALAD''== | ||
[[File:Chip's Challenge Tossed Salad.png|thumb|right|Level 20, time limit 400, 15 chips. Not all the bugs are yellow, episode 1.]] | |||
''Tossed Salad'' is the first ''busted level'', as when originally designing it, the programmers forgot to include the socket, which means Chip does not have to take any chips! In future versions, including the MS emulation, this bust was preserved. | |||
Run east into the teleport, which puts Chip in a tank/toggle wall room. In here, the tanks and toggle walls swap alternately every [4]. An additional property of the tank which Chip can learn here is when it actually moves after being switched. The rule as it applies here is that if a monster touches a blue button, ''stationary'' tanks ahead of it in the monster order (in this case, tanks 2 and 6 that you meet) wait [1] after the button is hit, and tanks behind it switch instantly like a pink ball. | |||
Walk to the bottom and across the bottom, turn to the north and wait [1], then proceed to the red key. From this, wait for the tank to switch back, go to the next tank and wait for it to turn back right (as it will switch shortly), and now open the red lock at the top, slide east to a pair of fire boots, and squeeze past the bouncing ball below when it moves to the very far right. | |||
Follow the path onto a force floor, west to more force floors, and now R 4D 2R 3D through these tanks to take the yellow key. Wait [1], run all the way north through the tanks, wait [2] and run through the balls, then open the yellow lock to the exit. The result is 340 seconds, and a bunch of mad programmers. | |||
{{-}} | |||
{{Footer Nav|game=Chip's Challenge|prevpage=Walkthrough|nextpage=Levels 21-40}} | {{Footer Nav|game=Chip's Challenge|prevpage=Walkthrough|nextpage=Levels 21-40}} | ||
Latest revision as of 16:30, 15 October 2015
The first page of this walkthrough covers level 1 (LESSON 1) through level 20 (TOSSED SALAD).
Level 1: LESSON 1[edit]
The first eight levels of Chip's Challenge are lessons: they teach the basic workings of the game, introducing specific tiles in groups.
- Lessons
- To play the game, Chip must collect all specified computer chips to pass through the socket, which will allow him to exit within the time limit.
- The locks are opened by their color keys. Each key works only once, but can be stacked; the green key, however, is infinite.
- The hint is a valuable tool for Chip.
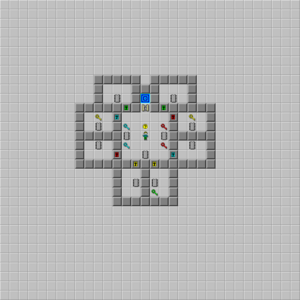
To solve this level, move 2L 2U L, take this key and chips, then swap this for a green key and go in a counterclockwise circle to get the rest of the chips. Your first 83 seconds!
Level 2: LESSON 2[edit]
- Lessons
- The blocks can remove water, which is deadly to Chip if he steps on it (unless he has flippers, introduced later).
- Dirt blocks the passage of blocks (and monsters), and can be removed by Chip.
- Monsters are deadly to Chip on contact, forcing him to start the level over. This type of monster is the bug - they follow the left wall until there is no obstacle, then turn west.
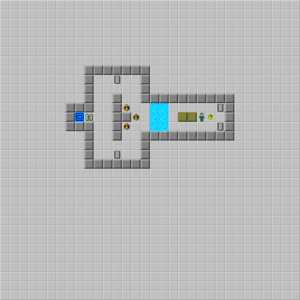
Lesson 2 is likely slightly easier than Lesson 1, as it requires less thinking. Take the two chips and then move blocks 2 and 1 over the top part of the water, touching the dirt both times. The bugs can be ignored with this route; take the top, then the bottom chip, and exit to the west. This scores 90.
Level 3: LESSON 3[edit]
- Lessons
- Water, fire, ice and force floors can be passed like normal tiles, with some exceptions in the case of ice, with the use of flippers, fire boots, ice skates and suction boots. The ice corners can be skated over from within the tile (not into the tile) if the move is legal; should there be a floor to the west of the ice corners, Chip could move L off the ice corner. This is not, however, allowed in Lynx.
- Fire will kill Chip without fire boots; ice will slide anything on it uncontrollably, and force floors will slide objects other than Chip similarly, but Chip can override them by stepping off in any direction.
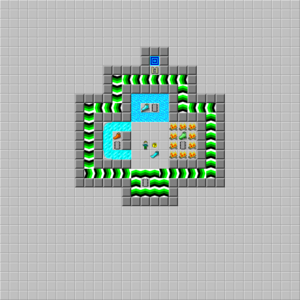
This level is still simpler; get the flippers, then the ice skates, the fire boots, and then the suction boots and chip below you. To exit, follow in either direction. The best time is 89.
Level 4: LESSON 4[edit]
- Lessons
- Tanks are monsters controlled by the blue button. A tank moves until it hits something and then will not move until a blue button is pressed; then it moves in the opposite direction. More aspects of the tank can be discussed later.
- Objects can be under blocks, for better or for worse. Chip will immediately be affected by the item under the block.
- Toggle walls are controlled by the green button, and all toggle walls switch every time one is pressed.
There are three separate rooms in Lesson 4, each introducing the above concepts separately:
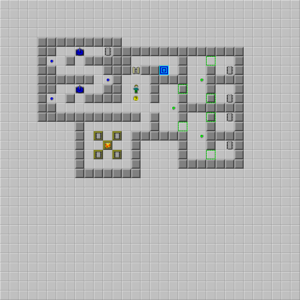
West room: Go along the path and switch the tanks to collect the chip.
South: Avoid block 3; move block 2 L and move 2D 2L 2U 2R to take the chips on the other four.
East: The path splits into two paths, which lead to four, and then to a chip apiece. Take the top chips, then the bottom, and then go back to the center and exit. The best time is 116.
Level 5: LESSON 5[edit]
- Lessons
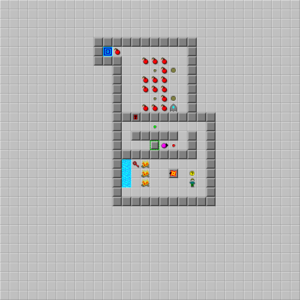
- The clone machine creates a monster (or block) in the direction it is pointed, whenever the specified red button is pressed. The trap traps anything that steps on it, and is only released when the specified brown button is pressed.
- The fireball runs and turns right when it runs into an obstacle. Fire does not affect it. The glider turns left instead, and water does not affect it. All other monsters die in fire and water (with two exceptions). The pink ball bounces back and forth every time it hits an obstacle.
- The bomb destroys any object that touches it. Monsters and blocks are erased, and Chip will die!
Lesson 5 is definitely one of the harder lessons in the group. Move to the top, release the pink ball to slow the cloning down, and take the red key. You can now enter the upper room; release the glider into the bomb with the two brown buttons to exit for a time of 85.
Level 6: LESSON 6[edit]

- Lessons
- The invisible wall, shown as a black X in maps, cannot be seen and will never be seen, but acts as a wall. The hidden wall, shown as a white tile with a black border in maps, cannot be seen but will be revealed as a wall when Chip touches it. Other objects will not reveal either of these.
- The blue wall, shown as a teal tile in play and as a translucent blue tile or blue-tinged wall on the map, can be real or fake, which can only be determined in play if Chip touches it, and is only removable by Chip.
- There may be extra chips. Collecting more will only keep the counter at zero.
With a map, Lesson 6 is trivial, but it's uncommonly frustrating in this group otherwise. Move 3L 3U 3L D, collect the chips and then return to the exit. As can be seen in the map, you cannot reach the other four chips, but you have enough already. The best time is 94.
Level 7: LESSON 7[edit]
- Lessons
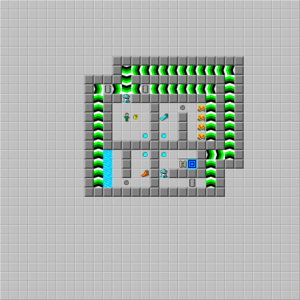
- The teleport takes any object to the next teleport in reverse reading order: Chip's Challenge reads due west, then moves up a row and continues, starting from the current location and wrapping back to the southeast if required. The object comes out on the opposite side of the new teleport from where it entered the old one, so this move must be legal; otherwise, the next teleport is tried. If no legal exit is found, the object slides across or bounces back, depending on whether sliding across is legal.
- The thief takes all boots Chip is holding and blocks other objects.
- The recessed wall blocks everything but Chip, who can pass through it only once before it turns to wall.
Lesson 7 is most likely the hardest of the seven lessons, as it combines several more advanced concepts and also sets up a devious trap! If both boots are collected, the thief will take both, and Chip cannot reach the other chip.
Slide D through the teleport, take the chip, and >U to the flippers. Continue >DL, through the water to one of the chips, and then back to the start. Now, you will take the fire boots with >RL, then >U to take the last chip, and teleport into the exit room to win the level for 139.
Level 8: LESSON 8[edit]
- Lessons
- Dirt is usable as a tile, as well as creating it from water; in addition to blocks, it also stops monsters from passing it. Gravel is similar, but is unremovable and blocks only monsters.
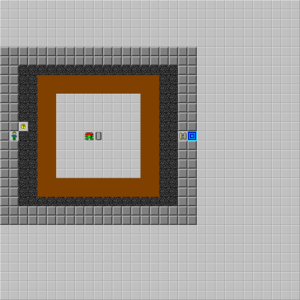
- The teeth is introduced; he moves on every other turn, always towards the moving Chip, either horizontally or vertically depending on which is further. If both are tied, the vertical move is always chosen.
Although the teeth is often feared, it is actually a very easy monster to combat. The trickiest part is doing it quick; anti-teeth play is held in high regard. To win Lesson 8, play 4R, U or D, and east to the chip, then further east to the exit.
Odd and even step[edit]
This solution will require odd step mode at this speed. This basic mechanic determines whether teeth and a later monster known as the blob move on step 2 or step 3, as Chip starts with a free move. Even step is step 3, and odd step is step 2. In even step, wait a further [1], and this will not cost Chip a score of 96.
There is a control in Tile World that allows you to set this feature simply by pressing O; in MS, you'll have to be more interactive. Chip will always begin a session in even step; he can change to odd step by using clock setting after an odd number of seconds. However, if the patch Fullsec is downloaded, Chip is allowed to change modes by simply pressing F5.
For people learning how to deal with teeth, playing around with this level for a while will allow for valuable lessons!
Level 9: NUTS AND BOLTS[edit]
Finally, we get to the tougher levels. You might find some beginners already starting to stumble...it's the way to the exit that hangs them up.
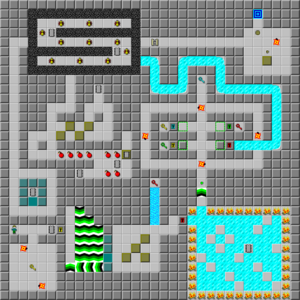
Start with the yellow key, bust through its lock, and hold the east key until you stop in front of a block. Move this 2U, then step RDR, use block 4, and take the remaining three blocks to the water by themselves. The red key frees an ice rink: move RDLULDRULD 2R DLULU off the red lock to reach the next section. Touch the green button twice, using the force floor as an extra boost on both touches, and then continue to the blue key. Use this to initiate a chain of keys that leads to the red lock; wait [1/2] to avoid being hit and slide to the next area.
This room contains bugs walking around through an "S"; the top chip is currently open, so move 4U and west. Sneak into the room to the left and collect the chip, then move into the block room to your right. Four blocks are diagonally located from each other; move block 1 R, then use blocks 3 and 4, collect the chip in this room, and use block 2. Now, nick the last block R and get behind it to finish the bombs. Expropriate the three chips, with one being under a block, and head towards the socket, collecting the final chip from the bugs.
In this final area, the fireball is stuck on the trap, and releasing it will simply cause it to circle around again without you being able to reach the exit. An easy way to fix this is to drop the block onto the brown button and then exit the level. Quite a nutty solution! You should have 306. Another way you can do this part is that you may also push the block to the tile that is adjacent to the entrance of the hallway to the room with the exit, blocking the hallway, then push the brown button to release the fireball and head towards the trap and hold on the up key, with the block at that location will get the fireball to cross over the brown button and as long as you have the up key held, you will head up and to the exit as the fireball opens the trap when it crosses over the brown button.
Level 10: BRUSHFIRE[edit]
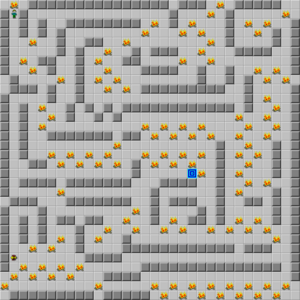
It's a big, but not hard, maze of fire, and it's completed with a series of moves: 4D 4R 4U 12R 3D 3L U 7L 7D L 3D 8R U 10R 10D 4R 2U L 3U R 2U L 6U 3R 18D 5L 2U 10L 7U 5R.
An additional property of the bug that you can see in Brushfire is that it treats fire as an obstacle; it will therefore move through this maze, but you won't be seeing it with this 51 route. If you go slower, you might see him.
Level 11: TRINITY[edit]
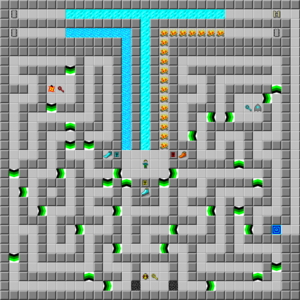
The level contains three keys and three different monsters guarding them, three boots and their hazards, and three chips. The name of the level "Trinity" means three and it refers to the three different sections of the level.
Begin with D 3L D, then walk to the extreme west, turn slightly north, and then circle to the west to reach the red key from the fireball. With flawless boosting, Chip can just make it safely. Move back onto the extreme west, go to the southwest corner, and then east to the yellow key. When you pass the start, take the ice skates before you continue east and take the path to the north.
This leads to the last key, then down to the southeast corner, and then take the up force floor to a west force floor, and to another west force floor, which brings you back to the start. Now, take the flippers, its chip, the fire boots, its chip, and skate up and west to the third chip. The exit is down the path to the right, which is reached at 211.
Level 12: HUNT[edit]
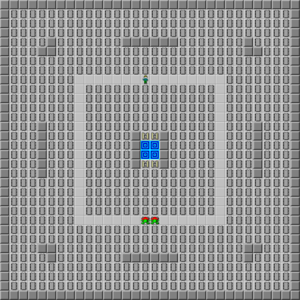
Fortunately, not all the chips are required (there's actually 788 chips in this level). What makes it difficult are the teeth at the bottom of the level! There are many, many solutions to Hunt, even many that lead to 270.
Play as follows: U 12L 4U 3R 2D, all the way east and west, then up another row and 10R, up again and 18L 2D 4L, across to the west, and then collecting the columns of seven on the far west as the teeth escape. As Chip moves 29R across the very top of the level, the teeth will become lodged between a strip of chips and the three-wall sections to the northwest and northeast, due to the matching chips left in one layer to the northwest of the wall section. As all the chips remaining aside from a few, such as the ones in the wall corners and the ones left behind to block the teeth, are below the trapped area, there is little need for further guidance.
Generally, ignore the chips in the four wall corners; they cause a diversion from collecting chips continuously. The only other time Chip will not be collecting chips is when diving into the center to finish the level; this should be done at about 100 to 150 chips remaining, as there are 180 chips in the center.
Level 13: SOUTHPOLE[edit]
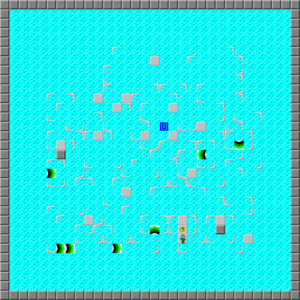
Southpole is the first untimed level, and in addition the first level where Chip can never die: there are no blocks, destructive obstacles, or monsters, and no time limit.
The hint next to Chip says "What was the name of this level?" This suggests a solution where Chip holds south the entire duration (5D). However, a slightly faster solution, though not enough for an extra second if the level were timed, is RDL 2U 3D. Either route scores a theoretical 982 time under T-Chip rules.
Level 14: TELEBLOCK[edit]
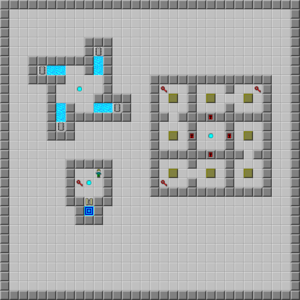
Begin by sliding >LRLU to reach the main area with a red key in tow: you'll find four block sections, three with another key behind them.
Open the north lock and push block 1 through, then move >R and push the block west to the water. Slide >RU back, throw block 2 in, and now open the west lock; this cycle will repeat around the room. Use block 1 here, move >U R, use this block and slide >UL back (which pushes north block 2 L). Again, throw block 2 in, then move on to the south lock and its block 1. Step >L U, then circle clockwise to use two blocks, and return to the south with >UD.
Continue the cycle with south block 2, the east lock and its block 1, then slide >D, where Chip can now use all three blocks. Finish with >LR, east block 2, >D and use the last block; jump directly south to exit the level for 203.
Currently, however, the record stands at 204, and I've puzzled away at it with no result. Sometime, we'll find out what it is, since it's not that big.
Level 15: ELEMENTARY[edit]
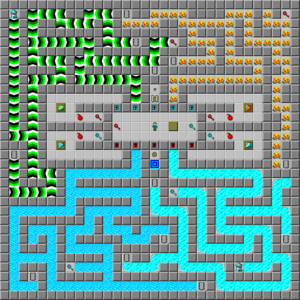
Elementary is a good way to learn how to move through corridors, because even with the 89 seconds remaining in the bold route, you can actually run out of time! Fortunately, there's some useful timesavers which will reduce this possibility.
Use the red key on the left to collect flippers and a blue key, then the blue key to collect suction boots and a red key, and swim through the water, holding to the right, to two chips and a blue key. Circle through the southwest and swim out to the force floors, this time holding to the northeast side, and then venture to the very southwest for one more chip. In this room, Chip can sacrifice the suction boots, but this loses more time than it saves.
For the second half of Elementary, unlock the blue lock to take fire boots and a red key, then walk through the red lock to collect ice skates and a blue key. Move the block L out of the way, then go into the fire and turn first west to two chips, then east to a red key and chip. In the ice section, make the first turn east to one chip, follow the path further and turn south next to a blue key, then move under the thief and collect two chips. In this case, the time spent going to the thief is less than the time saved by sliding, so throw the boots away and slide back!
To finish, push the block L again on the path to the blue lock and socket, then hold down the brown button before opening the red lock to exit. This scores 89 seconds, and it might be elementary to some.
Level 16: CELLBLOCKED[edit]
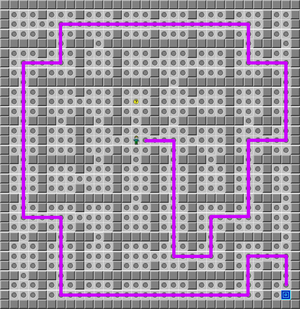
Cellblocked is a maze level, where any wrong turn requires you to restart, which occurs if you head upwards to read the hint. The hint basically just tells you the shortcut to restart the level is, which is Ctrl+R because if you take the wrong path, you will definitely need to restart. While Cellblocked has no deadly obstacles or time limit, unlike Southpole, a mistake is as good as death. However, if a mistake is made, simply move to another level and return to your current level rather than use the restart command, as this preserves your full level score. The best time is 971 under T-Chip rules.
Level 17: NICE DAY[edit]
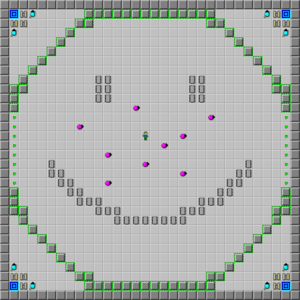
You won't get this every time, because this level contains a new monster: the walker. Besides blobs, the walker is usually the most hated monster of any player! It moves like a fireball or glider, but makes a random turn when it hits something. In addition, the walker will also treat fire as an obstacle.
Play 5L, collect the first "eye" 2U R 2D, run east to the other eye and pick it up the same way, and now walk 5L 7D or any route as such depending on the walkers. Continue to take the "smiling" chips all the way west, then exit to the lower left. 83 will result if the toggle walls did not block Chip; because the walkers can hit the green buttons and clash with the pink balls which also hit the buttons, this is not guaranteed.
If you have ever wondered of the reason the name of this level is called "Nice Day" it is because of the way this level is structured out in the manner of which it is designed to look like a happy face. The happy face is normally used as a logo for the slogan "Have a Nice Day".
Level 18: CASTLE MOAT[edit]
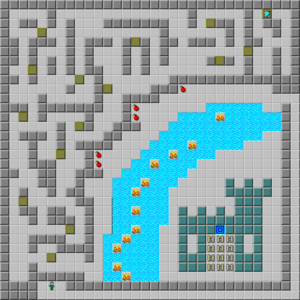
Looking at the map, you can spot a pair of flippers in the upper right corner, which dramatically decreases the difficulty of Castle Moat.
Go along the only available path until you reach the area with the blocks, and walk alternately east and north to where a block is in the middle of a vertical wall. Knock this 2R 2U, then move the other block to take the flippers. Swim through the moat and there comes 553.
Level 19: DIGGER[edit]
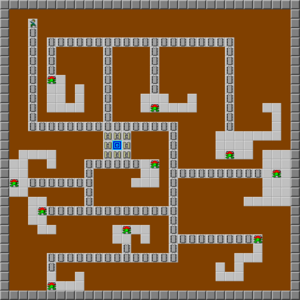
Digger is a series of variations on a theme of teeth, and it can get rather annoying. However, this guide is foolproof, and will work every time if you follow the instructions! This guide will assume odd step.
Follow the chips out to the exit and 8U, then 6L 2D and continue to follow 3U 11R, down to a teeth, R 5U to give him room, then follow to the next teeth and 5L 5D 8R (teeth) L 7D (teeth) 8L 2U (to shorten the path later) 4D 5L UD 8L D. At this point, a relatively simple path remains, but the teeth are now on your tail!
Escape this teeth monster with U 3R 5U 5L 3U, follow northeast towards the exit, then turn back and collect the remaining chips counterclockwise, and now exit the level and dig up 171 seconds.
Level 20: TOSSED SALAD[edit]
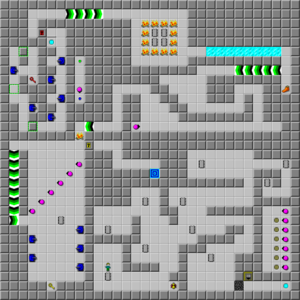
Tossed Salad is the first busted level, as when originally designing it, the programmers forgot to include the socket, which means Chip does not have to take any chips! In future versions, including the MS emulation, this bust was preserved.
Run east into the teleport, which puts Chip in a tank/toggle wall room. In here, the tanks and toggle walls swap alternately every [4]. An additional property of the tank which Chip can learn here is when it actually moves after being switched. The rule as it applies here is that if a monster touches a blue button, stationary tanks ahead of it in the monster order (in this case, tanks 2 and 6 that you meet) wait [1] after the button is hit, and tanks behind it switch instantly like a pink ball.
Walk to the bottom and across the bottom, turn to the north and wait [1], then proceed to the red key. From this, wait for the tank to switch back, go to the next tank and wait for it to turn back right (as it will switch shortly), and now open the red lock at the top, slide east to a pair of fire boots, and squeeze past the bouncing ball below when it moves to the very far right.
Follow the path onto a force floor, west to more force floors, and now R 4D 2R 3D through these tanks to take the yellow key. Wait [1], run all the way north through the tanks, wait [2] and run through the balls, then open the yellow lock to the exit. The result is 340 seconds, and a bunch of mad programmers.