From StrategyWiki, the video game walkthrough and strategy guide wiki
Jump to navigation Jump to search
m (Abacos moved page Mega Man Xtreme 2/Bosses to Mega Man Xtreme 2/Enemies and Bosses: expanding contents (soon))
(→‎Damage charts: moved section to other page)
Line 1: Line 1:
{{Header Nav|game=Mega Man Xtreme 2}}


== Damage charts ==
== Enemies ==
=== X's weapons ===
=== Regular enemies ===
The "Ult. +3" column lists the damage dealt by the X-buster when the following three parts are equipped at the same time: "Ultimate Buster", "Buster +1" and "Buster +2".
{{Sect-stub}}
{|{{prettytable|notwide=1|text center=1}}
=== Sub-bosses ===
! !! X<br/>Buster !! Ult.<br/>+3 !! Strike<br/>Chain !! Sonic<br/>Slicer !! Bomb<br/>Bee !! Tornado<br/>Fang !! Ray<br/>Claw !! Tri-<br/>Thunder !! Marine<br/>Tornado !! Fire<br/>Wave !! Giga<br/>Crush !! Shotokan<br/>moves
{{Sect-stub}}
|-
These enemies cannot be dodged: they must be destroyed to advance.
| ''Req. energy''        || ''0'' || ''0'' || ''2;4'' || ''2;4'' || ''2;4'' || ''2;4'' || ''2;4'' || ''2;4'' || ''2;4'' || ''2;4'' || ''32'' || ''0''
=== Obstacles ===
|-
{{Sect-stub}}
| Wire Sponge      || 2;3 || 6 || {{no|0}} || 3;3 || 2;3 || 2;3 || 2;3 ||  -  || 2;3 || {{yes|4;6}} || 8 || 16
These enemies cannot be destroyed: they must be dodged.
|-
| Overdrive Ostrich || 2;3 || 6 || {{yes|4;6}} || {{no|0}} || 2;3 || 2;3 || 2;3 || 2;3 || 2;3 || 2;3 || 8 || 16
|-
| Blast Hornet      || 2;3 || 6 || 2;3 || {{yes|4;6}} || {{no|2;3}} || 2;3 || 2;3 || 2;3 || 2;3 || 2;3 || 8 || 16
|-
| Tunnel Rhino      || 2;3 || 6 ||  -  ||  -  || {{yes|4;6}} || {{no|0}} ||  - || 2;3 || 2;3 ||  -  || 8 || 16
|-
| Neon Tiger        || 2;3 || 6 || 2;3 || 2;3 || 2;3 || {{yes|4;6}} || {{no|0}} || 2;3 || 2;3 || 2;3 || 8 || 16
|-
| Volt Catfish      || 2;3 || 6 || 2;3 || 2;3 || 2;3 || 2;3 || {{yes|4;6}} || {{no|0}} ||  -  || 2;3 || 8 || 16
|-
| Launch Octopus    || 2;3 || 6 || 2;3 || 2;3 ||  -  || 2;3 || 2;3 || {{yes|3;6}} || {{no|0}} ||  -  || 8 || 16
|-
| Flame Mammoth    || 2;3 || 6 ||  -  || 2;3 ||  -  || 2;3 || 2;3 || 2;3 || {{yes|4;6}} || {{no|0}} || 8 || 16
|-
! !! X<br/>Buster !! Ult.<br/>+3 !! Strike<br/>Chain !! Sonic<br/>Slicer !! Bomb<br/>Bee !! Tornado<br/>Fang !! Ray<br/>Claw !! Tri-<br/>Thunder !! Marine<br/>Tornado !! Fire<br/>Wave !! Giga<br/>Crush !! Shotokan<br/>moves
|-
| Velguarder        || 1;2 || 5 ||  -  || 2;3 ||  -  || 4;6 || {{yes|4;6}} ||  -  ||  -  ||  -  || 8 || -
|-
| Isaz and Sowilo  || 1;2 || 5 ||  -  ||  -  ||  -  || 4;6 || {{yes|2;6}} ||  -  ||  -  || 2;3 || {{yes|12}} || -
|-
| Berkana          || 1;0 || 4 || 2;3 || {{yes|4;5}} || 2;3 || 2;3 || 5;6 || 2;3 || 2;3 || 2;3 || 6 || 4
|-
| Sigma (1)        || 1;2 || 5 ||  -  || {{yes|4;6}} ||  -  || 2;3 ||  -  ||  -  || {{yes|4;6}} ||  -  || 8 || 4
|-
| Sigma (2)        || 2;3 || 6 ||  -  || {{yes|5;6}} ||  -  || {{yes|5;6}} ||  -  ||  -  || 5;6 ||  -  || - || -
|}
 
=== Zero's weapons ===
The "Ult. +3" column lists the damage dealt by the Z-saber when the following three parts are equipped at the same time: "Ultimate Saber", "Saber +1" and "Saber +2".
{|{{prettytable|notwide=1|text center=1}}
! !! Z<br/>Saber !! Ult.<br/>+3 !! Lightning !! Dash !! Earth<br/>Geyser !! Drill<br/>Crush !! Rising !! Tri<br/>Thunder !! Fish<br/>Fang !! Fire<br/>Wave !! Zero<br/>Final
|-
| ''Req. Energy''  || ''0'' || ''0'' || ''4'' || ''4'' || ''10'' || ''0'' || ''0'' || ''4'' || ''4'' || ''4'' || ''20''
|-
| Wire Sponge      || 2;3 || 6 || {{no|0}} || 3 || 1 || 5 || 3 || - || 3 || {{yes|6}} || 10
|-
| Overdrive Ostrich || 2;3 || 6 || {{yes|6}} || {{no|0}} || 1 || 5 || 2 || 5 || 3 || 3 || 10
|-
| Blast Hornet      || 2;3 || 6 || 3 || {{yes|6}} || {{no|1}} || 3 || 4 || 3 || 3 || 3 || 10
|-
| Tunnel Rhino      || 2;3 || 6 || 3 || 3 || {{yes|6}} || {{no|0}} || 2 || 3 || - || - || 10
|-
| Neon Tiger        || 2;3 || 6 || 3 || 3 || 1 || {{yes|5}} || {{no|0}} || 3 || 3 || 3 || 10
|-
| Volt Catfish      || 2;3 || 6 || - || 3 || 1 || 3 || {{yes|4}} || {{no|0}} || 3 || 3 || 10
|-
| Launch Octopus    || 2;3 || 6 || 6 || 3 || - || 3 || 3 || {{yes|6}} || {{no|0}} || - || 10
|-
| Flame Mammoth    || 2;3 || 6 || 3 || 3 || - || 3 || 3 || 3 || {{yes|4}} || {{no|0}} || 10
|-
! !! Z<br/>Saber !! Ult.<br/>+3 !! Lightning !! Dash !! Earth<br/>Geyser !! Drill<br/>Crush !! Rising !! Tri<br/>Thunder !! Fish<br/>Fang !! Fire<br/>Wave !! Zero<br/>Final
|-
| Velguarder        || 2;3 || 6 || - || - || - || {{yes|4}} || {{yes|4}} || 3 || - || - || 10
|-
| Isaz and Sowilo  || 2;3 || 6 || 3 || {{yes|3+3}} || 2 || 6 || 4 || - || 5 || 3 || 6+6
|-
| Gareth            || {{yes|2;4}} || 6 || - || - || - || 4 || 4 || - || 3 || - || 6
|-
| Sigma (1)        || 2;3 || 6 || - || {{yes|6}} || - || 3 || 4 || - || 5 || 3 || 8
|-
| Sigma (2)        || {{yes|2;4}} || 6 || - || - || - || 3 || 4 || - || 4 || - || -
|}


== Gallery ==
== Gallery ==

Revision as of 12:03, 29 July 2017

Enemies

Regular enemies

This section is a stub. Help us expand it, and you get a cookie.

Sub-bosses

This section is a stub. Help us expand it, and you get a cookie.

These enemies cannot be dodged: they must be destroyed to advance.

Obstacles

This section is a stub. Help us expand it, and you get a cookie.

These enemies cannot be destroyed: they must be dodged.

Gallery

X's Mission
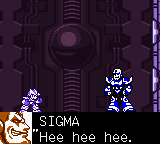
MMX-SoulEraser stage05.png MMX-SoulEraser stage06.png MMX-SoulEraser stage07.png MMX-SoulEraser stage08.png
Zero's Mission
MMX-SoulEraser stage01.png MMX-SoulEraser stage02.png MMX-SoulEraser stage03.png MMX-SoulEraser stage04.png
Extreme boss
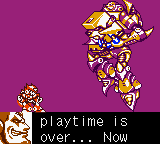
MMX-SoulEraser boss14.png MMX-SoulEraser boss15.png