| Line 21: | Line 21: | ||
== Board 27 == | == Board 27 == | ||
[[File:Military madness bd27.png|right]] | [[File:Military madness bd27.png|right]] | ||
Form a vertical defensive line anchored on your Trigger as quickly as possible to minimize losses and set up some nice flanking maneuvers. Your Charlie can walk behind the line and take the factory in the Northwest. | Form a vertical defensive line anchored on your Trigger as quickly as possible to minimize losses and set up some nice flanking maneuvers. Your Charlie can walk behind the line and take the factory in the Northwest. | ||
Revision as of 08:42, 14 January 2014
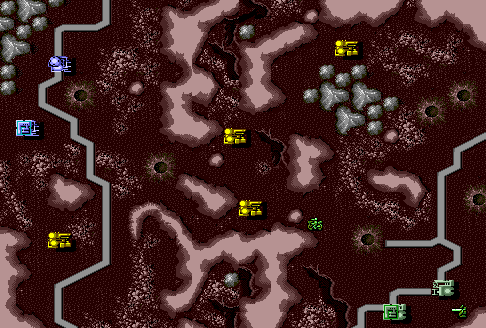
Be warned: boards at this point are beginning to get so difficult, that they really aren't fun anymore. Expect to lose often, and expect to win only by maximizing the very smallest advantages.
Board 25

Send a Mule with Charlie to the south factory as quickly as you can, and bring the reinforcements north to join the rest of your forces.
Meanwhile you can use your two Rabbits and two Seekers to first kill his Rabbit then kill his Charlie trying to capture the second central factory. He'll still get the factory, but only by diverting his Pelican that otherwise would have taken the Northeast neutral factory.
He'll get two Hunters but they'll go straight for your Eagles, so you can be waiting for them with your Hawkeyes. You should be able to kill them both while saving one or both of your Eagles. After that it's pretty much just a mop-up operation. But here and elsewhere don't even think about attacking his Giants without first getting the surround effect by first placing a unit on the side opposite of the side where you begin your attack.
Board 26

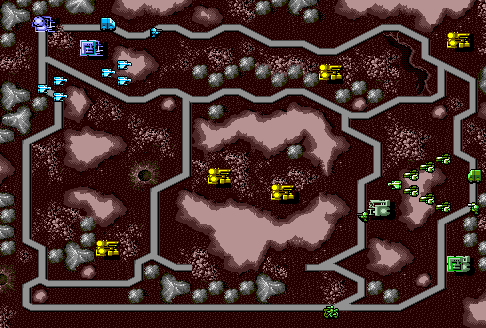
Park one Falcon in front of the southwest factory for one turn to divert his Panthers. Then try to stage and win an air war in range of your Hawkeyes as soon as possible. Be sure to attack his pieces from opposite sides as much as possible to get the benefit of the surround effect.
Once you rule the air, use your Falcons to obstruct his pieces and control the flow of the game. You should be able to capture the southwest factory with its two Hunters and also get the Pelican in the second closest neutral factory. Then use the Pelican or the Mule on the southern highway to win the game.
Board 27

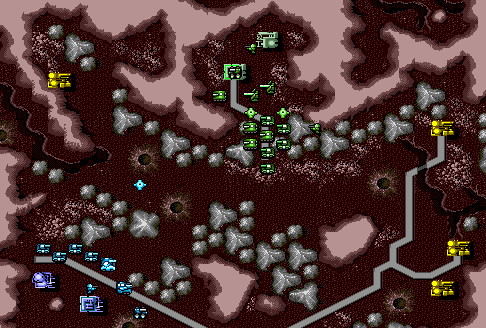
Form a vertical defensive line anchored on your Trigger as quickly as possible to minimize losses and set up some nice flanking maneuvers. Your Charlie can walk behind the line and take the factory in the Northwest.
There's no chance to get any of the neutral factories in the East, so don't bother trying. Just wait for the enemy to throw himself against your line and stay out of range of the Atlases.
You'll need to mobilize a coordinated attack at the end, but by this time you should have massive unit advantage over the enemy -- e.g. 15 to 18 units versus his Giant, Atlases, and Triggers. Use Charlies in the mountains to occupy his Atlases while you get behind his Triggers as quickly as possible to destroy them via the surround effect (Rabbits are particularly useful here since they can move again after they attack). After one or two tense turns his defenses will crumble fast.
Board 28

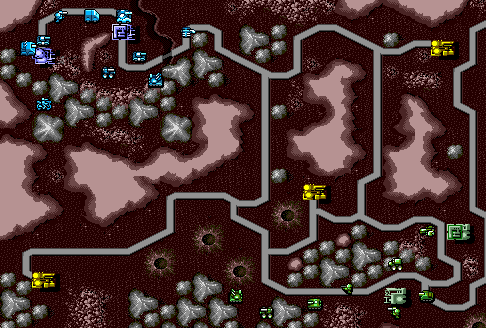
You should be able to get both neutral factories in the corners while making it hard for the enemy to exploit the third neutral factory. It may even be possible to kill his Panthers before they reach the third factory.
Go for the southwest neutral factory with a Charlie in a Pelican, plus a Falcon to keep the enemy Seeker from getting in the way.
Meanwhile, the Panther and everything fast should make for the northeast neutral factory as fast as possible to prevent his Pelican from capturing it.
Finally, the Eagles and a few other units should attempt to slow down or stop the enemy from obtaining the central neutral factory.
If done right it'll be a slaughter.