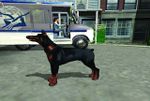
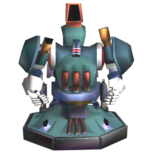
m (→Achievement/trophy template: break) |
(→collapsible infobox: outdated) |
||
| (24 intermediate revisions by 5 users not shown) | |||
| Line 1: | Line 1: | ||
{{ | ==image swap test== | ||
{{col|3|begin}} | |||
<span class="spoilerimage">[[File:Flow Free Jumbo Pack Grid 14x14 Level 14.png|200px]]</span> | |||
{{col|3}} | |||
<span class="spoilerimage">[[File:SMB3 Box Art.png|133px]]</span> | |||
{{col|3}} | |||
<span class="spoilerimage">[[File:Final Fantasy famicom cover.jpg|274px]]</span> | |||
{{col|3|end}} | |||
<span class="spoilerimage">[[File:Flow Free Jumbo Pack Grid 14x14 Level 14.png|thumb]]</span> | |||
< | |||
{{-}} | {{-}} | ||
==series== | |||
{| class="collapsible collapsed series_box" style="width:100%;text-align:left;" | |||
! class="series_box_header" style="background-color:#e9e9e9;text-align:center;" colspan="2"| <span class="plainlinks" style="float:left;"><small>[{{fullurl:Template:{{{name|God of War}}}|action=edit}} edit]</small></span>[[:Category:{{{name|God of War}}}|{{{name|God of War}}}]] series | |||
|- | |||
!style="background-color:#d2e0e4;padding:0 3px 0 3px;width:100px;"| {{{title1|Main}}} | |||
|style="border-bottom:1px solid #d2e0e4;padding:0 3px 0 3px;"| {{{games1|[[God of War]]{{dot}}[[God of War II]]{{dot}}[[God of War III]]{{dot}}[[God of War: Ascension|Ascension]]}}} | |||
|- | |||
!style="background-color:#d2e0e4;padding:0 3px 0 3px;"| {{{title2|Handheld}}} | |||
|style="border-bottom:1px solid #d2e0e4;padding:0 3px 0 3px;"| {{{games2|[[God of War: Betrayal|Betrayal]]{{dot}}[[God of War: Chains of Olympus|Chains of Olympus]]{{dot}}[[God of War: Ghost of Sparta|Ghost of Sparta]]}}} | |||
|- | |||
!style="background-color:#d2e0e4;padding:0 3px 0 3px"| {{{title3|Parent series}}} | |||
|style="border-bottom:1px solid #d2e0e4;padding:0 3px 0 3px;"| {{{games3|[[:Category:{{{parent|God of War}}}|{{{parent|God of War}}}]]}}} | |||
|- | |||
!style="background-color:#d2e0e4;padding:0 3px 0 3px"| {{{title4|Compilations}}} | |||
|style="border-bottom:1px solid #d2e0e4;padding:0 3px 0 3px;"| {{{games4|God of War{{dot}}God of War}}} | |||
|} | |||
==Tag template test== | |||
Example big usage: | |||
{{User:Najzere/Tag|text=Please help clean up this page to conform to standards in the [[SW:GUIDE|StrategyWiki Guide]].}} | |||
Example small usage with different colors: | |||
{{User:Najzere/Tag|small=1|shorttext=This page needs to be cleaned up.|bordercolor=goldenrod|backcolor=lightyellow}} | |||
Multiple issues: | |||
{{User:Najzere/Multiple issues | |||
|cleanup=long paragraphs should be split up, needs less bolding | |||
|needcontrols=ps3 | |||
|needcontrols2=360 | |||
|stub=1 | |||
|rename=User:Najzere/Test cases | |||
}} | |||
</div> | ==Achievement/trophy template== | ||
<div style="float:right">'''Achievement template'''</div> | |||
{{Achievement|name=achievement or trophy name|g=15|trophy=bronze|image=Enslaved achievement A Bridge Too Far.jpg|description=Complete Chapter 6.|total=100|progress=3|units=turtles}} | |||
{{-}} | |||
<div style="float:right">'''Div version'''</div> | |||
{{User:Najzere/Achievement|name=achievement or trophy name|g=15|trophy=bronze|image=Enslaved achievement A Bridge Too Far.jpg|description=Complete Chapter 6.|total=100|progress=3|units=turtles}} | |||
{{-}} | {{-}} | ||
| Line 27: | Line 57: | ||
| 3 | | 3 | ||
|- | |- | ||
! [[ | ! [[File:FFXIII damage fire icon.png|Fire]] !! [[File:FFXIII damage ice icon.png|Ice]] !! [[File:FFXIII damage lightning icon.png|Lightning]] !! [[File:FFXIII damage water icon.png|Water]] !! [[File:FFXIII damage wind icon.png|Wind]] !! [[File:FFXIII damage earth icon.png|Earth]] !! [[File:FFXIII damage physical icon.png|Physical]] !! [[File:FFXIII damage magical icon.png|Magic]] !! [[File:FFXIII status deprotect icon.png|Deprotect]] | ||
| 70% | | 70% | ||
|- | |- | ||
| {{n/a}} || {{n/a}} || {{n/a}} || {{n/a}} || {{n/a}} || {{n/a}} || {{n/a}} || {{n/a}} | | {{n/a}} || {{n/a}} || {{n/a}} || {{n/a}} || {{n/a}} || {{n/a}} || {{n/a}} || {{n/a}} | ||
! [[ | ! [[File:FFXIII status deshell icon.png|Deshell]] | ||
| 70% | | 70% | ||
|- | |- | ||
|colspan="8" rowspan="6"| [[ | |colspan="8" rowspan="6"| [[File:FFXIII PSICOM Enforcer.PNG]] | ||
! [[ | ! [[File:FFXIII status imperil icon.png|Imperil]] | ||
| 70% | | 70% | ||
|- | |- | ||
! [[ | ! [[File:FFXIII status poison icon.png|Poison]] | ||
| 70% | | 70% | ||
|- | |- | ||
! [[ | ! [[File:FFXIII status slow icon.png|Slow]] | ||
| 70% | | 70% | ||
|- | |- | ||
! [[ | ! [[File:FFXIII status pain icon.png|Pain]] | ||
| 70% | | 70% | ||
|- | |- | ||
! [[ | ! [[File:FFXIII status fog icon.png|Fog]] | ||
| 70% | | 70% | ||
|- | |- | ||
! [[ | ! [[File:FFXIII status curse icon.png|Curse]] | ||
| 70% | | 70% | ||
|- | |- | ||
| Line 57: | Line 87: | ||
!colspan="2"| HP | !colspan="2"| HP | ||
|colspan="2"| 171 | |colspan="2"| 171 | ||
! [[ | ! [[File:FFXIII status daze icon.png|Daze]] | ||
| 70% | | 70% | ||
|- | |- | ||
| Line 64: | Line 94: | ||
!colspan="2"| Magic | !colspan="2"| Magic | ||
|colspan="2"| 0 | |colspan="2"| 0 | ||
! [[ | ! [[File:FFXIII status provoke icon.png|Provoke]] | ||
| 70% | | 70% | ||
|- | |- | ||
!colspan="4"| Normal Drop | !colspan="4"| Normal Drop | ||
!colspan="4"| Rare Drop | !colspan="4"| Rare Drop | ||
! [[ | ! [[File:FFXIII status death icon.png|Death]] | ||
| 70% | | 70% | ||
|- | |- | ||
|colspan="4"| Potion (10%) | |colspan="4"| Potion (10%) | ||
|colspan="4"| Phoenix Down (2%) | |colspan="4"| Phoenix Down (2%) | ||
! [[ | ! [[File:FFXIII status dispel icon.png|Dispel]] | ||
| 0% | | 0% | ||
|- | |- | ||
| Line 81: | Line 111: | ||
==Trophy template== | ==Trophy template== | ||
<div style="{{#if:{{{width|}}}|width:{{{width|250px}}}|}}" class="trophy" id="trophy_{{anchorencode:{{{1|{{{name}}}}}}}}"><div class="achievement_image">{{#if:{{{image|}}}|[[ | <div style="{{#if:{{{width|}}}|width:{{{width|250px}}}|}}" class="trophy" id="trophy_{{anchorencode:{{{1|{{{name}}}}}}}}"><div class="achievement_image">{{#if:{{{image|}}}|[[File:{{{image}}}|48px|{{{name}}}]]|[[File:Trophy locked.png|Trophy]]}}</div><div class="achievement_body"><p style="padding-bottom: 0px; padding-top:0px;"><span class="trophy_title">Trophy</span> {{#if:{{{trophy|}}}| [[File:{{{trophy|}}} Trophy unlocked.png|12px|{{{trophy|}}} trophy]]}}</p><p class="achievement_name">{{{1|{{{name}}}}}}</p></div>{{#if:{{{total|}}}|<div class="achievement_progress">{{progress bar|total={{{total}}}|progress={{{progress|1}}}|units= {{{units|}}}}}</div>}}{{#if:{{{description|}}}|<p class="trophy_description">{{{description}}}</p>}}</div> | ||
{{-}} | {{-}} | ||
==Hold image test== | |||
Test test test test test <div class="hold"><span style="opacity:0.7;filter:alpha(opacity=70);">{{psx|T}}</span></div> test test test. | |||
Test test test test test <div class="hold"><span style="opacity:0.7;filter:alpha(opacity=70);">{{wii|Clockwise|Nunchuk}}</span></div> test test test. | |||
Test test test test test <div class="hold"><span style="opacity:0.7;filter:alpha(opacity=70);">{{mouse|r}}</span></div> test test test. | |||
Test test test test test <div class="hold"><span style="opacity:0.7;filter:alpha(opacity=70);">{{guitar|Blue}}</span></div> test test test. | |||
Works with this class for the hold image: | |||
<pre>.hold { | |||
display: inline-block; | |||
width: 40px; | |||
height: 30px; | |||
background: transparent url('http://media.strategywiki.org/images/2/2e/Hold.png') no-repeat center center; | |||
text-align: center; | |||
}</pre> | |||
==num test== | ==num test== | ||
| Line 89: | Line 137: | ||
==unlinked images and such== | ==unlinked images and such== | ||
<gallery> | <gallery> | ||
File:Hold.png|[<nowiki/>[Template talk:Hold|Hold template]] | |||
File:Yellow-background-24x24.png|[[User talk:Najzere/Talk page archive 1–100#Arcade buttons|Talk archive]] | |||
File:Button sort-asc.png|Custom toolbar button. | |||
File:Button sort-desc.png|Custom toolbar button. | |||
File:Button achievements.png|Custom toolbar button. | |||
File:2Dimage-3Dimage.txt|2Dimage-3Dimage.txt | File:2Dimage-3Dimage.txt|2Dimage-3Dimage.txt | ||
File:Future box art.png|Preserved for posterity | |||
</gallery> | </gallery> | ||
testing | testing | ||
==list test== | ==list test== | ||
| Line 338: | Line 174: | ||
{{col|2|begin}} | {{col|2|begin}} | ||
<div style="width:90%;padding:5px;text-align:justify:margin-left:auto;margin-right:auto;background-color:#eeeeee"> | <div style="width:90%;padding:5px;text-align:justify:margin-left:auto;margin-right:auto;background-color:#eeeeee"> | ||
<div style="float:left;border-right:1em solid #eeeeee;border-bottom:1em solid #eeeeee"><div style="border: thin solid #cecece;padding:3px;background-color:#ffffff">[[ | <div style="float:left;border-right:1em solid #eeeeee;border-bottom:1em solid #eeeeee"><div style="border: thin solid #cecece;padding:3px;background-color:#ffffff">[[File:Dog's Life Doberman.jpg|150px]]</div></div> | ||
<div style="background-color:#dddddd;font-size:2em;font-weight:bold;text-align:center">Enemy Name</div> | <div style="background-color:#dddddd;font-size:2em;font-weight:bold;text-align:center">Enemy Name</div> | ||
| Line 353: | Line 189: | ||
<div style="width:90%;padding:5px;text-align:justify:margin-left:auto;margin-right:auto;border:thin solid #888888"> | <div style="width:90%;padding:5px;text-align:justify:margin-left:auto;margin-right:auto;border:thin solid #888888"> | ||
<div style="float:left;border-right:1em solid #ffffff;border-bottom:1em solid #ffffff"><div style="border: thin solid #cecece;padding:3px;background-color:#ffffff">[[ | <div style="float:left;border-right:1em solid #ffffff;border-bottom:1em solid #ffffff"><div style="border: thin solid #cecece;padding:3px;background-color:#ffffff">[[File:Dog's Life Doberman.jpg|150px]]</div></div> | ||
<div style="background-color:#dddddd;font-size:2em;font-weight:bold;text-align:center">Enemy Name</div> | <div style="background-color:#dddddd;font-size:2em;font-weight:bold;text-align:center">Enemy Name</div> | ||
| Line 367: | Line 203: | ||
{{col|2}} | {{col|2}} | ||
<div style="width:90%;text-align:justify:margin-left:auto;margin-right:auto"> | <div style="width:90%;text-align:justify:margin-left:auto;margin-right:auto"> | ||
<div style="float:left;border-right:1em solid #ffffff;border-bottom:1em solid #ffffff"><div style="border: thin solid #cecece;padding:3px;background-color:#ffffff">[[ | <div style="float:left;border-right:1em solid #ffffff;border-bottom:1em solid #ffffff"><div style="border: thin solid #cecece;padding:3px;background-color:#ffffff">[[File:Dog's Life Doberman.jpg|150px]]</div></div> | ||
<div style="font-size:2em;font-weight:bold;text-align:center;text-decoration:underline">Enemy Name</div> | <div style="font-size:2em;font-weight:bold;text-align:center;text-decoration:underline">Enemy Name</div> | ||
| Line 382: | Line 218: | ||
<div style="width:90%;text-align:justify:margin-left:auto;margin-right:auto"> | <div style="width:90%;text-align:justify:margin-left:auto;margin-right:auto"> | ||
<div style="float:left;border-right:1em solid #ffffff;border-bottom:1em solid #ffffff"><div style="border: thin solid #cecece;padding:3px;background-color:#ffffff">[[ | <div style="float:left;border-right:1em solid #ffffff;border-bottom:1em solid #ffffff"><div style="border: thin solid #cecece;padding:3px;background-color:#ffffff">[[File:Dog's Life Doberman.jpg|150px]]</div></div> | ||
<div style="font-size:2em;font-weight:bold;text-align:center;border-top:thin solid #888888;border-bottom:thin solid #888888">Enemy Name</div> | <div style="font-size:2em;font-weight:bold;text-align:center;border-top:thin solid #888888;border-bottom:thin solid #888888">Enemy Name</div> | ||
| Line 399: | Line 235: | ||
<div style="width:95%;margin-left:auto;margin-right:auto;border-bottom:thin solid;text-align:center">'''in a table'''</div> | <div style="width:95%;margin-left:auto;margin-right:auto;border-bottom:thin solid;text-align:center">'''in a table'''</div> | ||
{| | {| | ||
|align="center"| [[ | |align="center"| [[File:DR Iris.gif]] || '''Iris (アイリス)''' | ||
|- | |- | ||
|align="center"| [[ | |align="center"| [[File:DR Mino Mushi.gif]] || '''Mino Mushi (みのむし)''' | ||
|- | |- | ||
|align="center"| [[ | |align="center"| [[File:DR Kumo Green.gif]] || '''Green Kumo (クモ・緑)''' | ||
|- | |- | ||
|align="center"| [[ | |align="center"| [[File:DR Kumo Red.gif]] || '''Red Kumo (クモ・赤)''' | ||
|} | |} | ||
{{col|3}} | {{col|3}} | ||
<div style="width:95%;margin-left:auto;margin-right:auto;border-bottom:thin solid;text-align:center">'''using line breaks'''</div> | <div style="width:95%;margin-left:auto;margin-right:auto;border-bottom:thin solid;text-align:center">'''using line breaks'''</div> | ||
[[ | [[File:DR Iris.gif]] '''Iris (アイリス)'''<br /> | ||
[[ | [[File:DR Mino Mushi.gif]] '''Mino Mushi (みのむし)'''<br /> | ||
[[ | [[File:DR Kumo Green.gif]] '''Green Kumo (クモ・緑)'''<br /> | ||
[[ | [[File:DR Kumo Red.gif]] '''Red Kumo (クモ・赤)''' | ||
{{col|3}} | {{col|3}} | ||
<div style="width:95%;margin-left:auto;margin-right:auto;border-bottom:thin solid;text-align:center">'''unordered list'''</div> | <div style="width:95%;margin-left:auto;margin-right:auto;border-bottom:thin solid;text-align:center">'''unordered list'''</div> | ||
*[[ | *[[File:DR Iris.gif]] '''Iris (アイリス)''' | ||
*[[ | *[[File:DR Mino Mushi.gif]] '''Mino Mushi (みのむし)''' | ||
*[[ | *[[File:DR Kumo Green.gif]] '''Green Kumo (クモ・緑)''' | ||
*[[ | *[[File:DR Kumo Red.gif]] '''Red Kumo (クモ・赤)''' | ||
{{col|3|end}} | {{col|3|end}} | ||
== Testing == | == Testing == | ||
| Line 535: | Line 371: | ||
{|{{prettytable|text center=1}} | {|{{prettytable|text center=1}} | ||
|+ Bug Collector | |+ Bug Collector | ||
|[[ | |[[File:Dog's Life Jake.jpg|50px]] | ||
|[[ | |[[File:Dog's Life Jake.jpg|50px]] | ||
|[[ | |[[File:Dog's Life Jake.jpg|50px]] | ||
|[[ | |[[File:Dog's Life Jake.jpg|50px]] | ||
|[[ | |[[File:Dog's Life Jake.jpg|50px]] | ||
|[[ | |[[File:Dog's Life Jake.jpg|50px]] | ||
|[[ | |[[File:Dog's Life Jake.jpg|50px]] | ||
|[[ | |[[File:Dog's Life Jake.jpg|50px]] | ||
|[[ | |[[File:Dog's Life Jake.jpg|50px]] | ||
|[[ | |[[File:Dog's Life Jake.jpg|50px]] | ||
|- | |- | ||
|HH | |HH | ||
| Line 609: | Line 445: | ||
<div style="text-align: justify; font-size: 14px; border: thin solid #000000"> | <div style="text-align: justify; font-size: 14px; border: thin solid #000000"> | ||
<div style="background-color: #eeeeff; padding: 3px; font-weight: bold; font-size: 16px; border-bottom: thin solid #000000">{{{name}}}</div> | <div style="background-color: #eeeeff; padding: 3px; font-weight: bold; font-size: 16px; border-bottom: thin solid #000000">{{{name}}}</div> | ||
<div style="padding: 10px">[[ | <div style="padding: 10px">[[File:{{{image}}}|{{{float|left}}}|200px]]{{{description}}}</div> | ||
</div> | </div> | ||
==Zelda template== | ==Zelda template== | ||
{|style="border:thin solid #000000" cellspacing="0" | {|style="border:thin solid #000000" cellspacing="0" | ||
|colspan="2" style="background-color:#90ee90;color:#006400;padding:3px"| [[ | |colspan="2" style="background-color:#90ee90;color:#006400;padding:3px"| [[File:LOZ NES Armos.png|30px|left]] <big>'''''<span id="Armos">Armos</span>'''''</big> | ||
|- | |- | ||
|colspan="2" style="padding:3px"| A large grey statue with a huge head. It glows bright blue as you approach it, then starts slamming around its hammer like crazy. It has a gem in its back. You should know what that means by now. | |colspan="2" style="padding:3px"| A large grey statue with a huge head. It glows bright blue as you approach it, then starts slamming around its hammer like crazy. It has a gem in its back. You should know what that means by now. | ||
| Line 648: | Line 484: | ||
==Smuggler's Run template== | ==Smuggler's Run template== | ||
<div style="width:300px;margin-left:1.4em;float:right;border:thin solid #000000;background-color:#99cc66;padding:3px">[[ | <div style="width:300px;margin-left:1.4em;float:right;border:thin solid #000000;background-color:#99cc66;padding:3px">[[File:SmugglersRun2_t01recon.jpg|300px]] | ||
<div style="background-color:#005500;color:#00dd00;font-family:courier"> | <div style="background-color:#005500;color:#00dd00;font-family:courier"> | ||
SUBJECT: TRAINING 1<br /> | SUBJECT: TRAINING 1<br /> | ||
| Line 720: | Line 556: | ||
<div style="clear:both;border:thin solid #bbbbbb;background-color:#efefef;padding:15px;text-align:justify;border-radius: 30px;-moz-border-radius: 30px;-webkit-border-radius: 30px;"> | <div style="clear:both;border:thin solid #bbbbbb;background-color:#efefef;padding:15px;text-align:justify;border-radius: 30px;-moz-border-radius: 30px;-webkit-border-radius: 30px;"> | ||
<div style="width:80%;border:thin solid #bbbbbb;margin-left:auto;margin-right:auto;padding:5px;text-align:center;background-color:#bfdcec;font-size:2em;border-radius: 30px;-moz-border-radius: 30px;-webkit-border-radius: 30px;">'''Air Buster'''</div> | <div style="width:80%;border:thin solid #bbbbbb;margin-left:auto;margin-right:auto;padding:5px;text-align:center;background-color:#bfdcec;font-size:2em;border-radius: 30px;-moz-border-radius: 30px;-webkit-border-radius: 30px;">'''Air Buster'''</div> | ||
<div style="float:left;border-right: 1em solid #efefef;border-bottom: 1em solid #efefef;border-top: 1em solid #efefef">[[ | <div style="float:left;border-right: 1em solid #efefef;border-bottom: 1em solid #efefef;border-top: 1em solid #efefef">[[File:FF7.Air Buster.png|border|150px]]</div> | ||
This is the first boss fight that might get you a bit sweaty, but you aren't in any real danger if you just remember to heal up if you're getting serious damage. The fight is unusual in that Tifa and Barret are on one side and Cloud on the other. Take advantage of this fact if you can by alternating attacks so Air Buster's back is to the attacker. This tactic is especially effective with Limit Breaks; someone on one side draws its attention first, then a party member on the opposite side attacks it with a Limit Break. Keep hacking and Bolting the thing. The retaliations and cannonstuff is pretty bad, so heal really often. But before you know, the thing firstly stops turning, so it can't retaliate on the other side any more. And when you start preparing for the worst, the thing just gets a short circuit or something and explodes. This is the first boss fight that might get you a bit sweaty, but you aren't in any real danger if you just remember to heal up if you're getting serious damage. The fight is unusual in that Tifa and Barret are on one side and Cloud on the other. Take advantage of this fact if you can by alternating attacks so Air Buster's back is to the attacker. This tactic is especially effective with Limit Breaks; someone on one side draws its attention first, then a party member on the opposite side attacks it with a Limit Break. Keep hacking and Bolting the thing. The retaliations and cannonstuff is pretty bad, so heal really often. But before you know, the thing firstly stops turning, so it can't retaliate on the other side any more. And when you start preparing for the worst, the thing just gets a short circuit or something and explodes. | This is the first boss fight that might get you a bit sweaty, but you aren't in any real danger if you just remember to heal up if you're getting serious damage. The fight is unusual in that Tifa and Barret are on one side and Cloud on the other. Take advantage of this fact if you can by alternating attacks so Air Buster's back is to the attacker. This tactic is especially effective with Limit Breaks; someone on one side draws its attention first, then a party member on the opposite side attacks it with a Limit Break. Keep hacking and Bolting the thing. The retaliations and cannonstuff is pretty bad, so heal really often. But before you know, the thing firstly stops turning, so it can't retaliate on the other side any more. And when you start preparing for the worst, the thing just gets a short circuit or something and explodes. This is the first boss fight that might get you a bit sweaty, but you aren't in any real danger if you just remember to heal up if you're getting serious damage. The fight is unusual in that Tifa and Barret are on one side and Cloud on the other. Take advantage of this fact if you can by alternating attacks so Air Buster's back is to the attacker. This tactic is especially effective with Limit Breaks; someone on one side draws its attention first, then a party member on the opposite side attacks it with a Limit Break. Keep hacking and Bolting the thing. The retaliations and cannonstuff is pretty bad, so heal really often. But before you know, the thing firstly stops turning, so it can't retaliate on the other side any more. And when you start preparing for the worst, the thing just gets a short circuit or something and explodes. | ||
Latest revision as of 02:38, 29 March 2023
image swap test[edit]
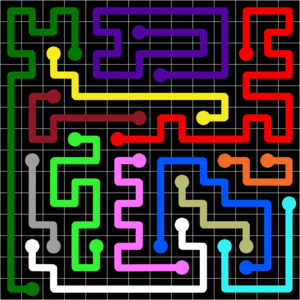
series[edit]
| editGod of War series | |
|---|---|
| Main | God of War · God of War II · God of War III · Ascension |
| Handheld | Betrayal · Chains of Olympus · Ghost of Sparta |
| Parent series | God of War |
| Compilations | God of War · God of War |
Tag template test[edit]
Example big usage:

Example small usage with different colors:
Multiple issues:

There are multiple issues with this page. Please help fix these or discuss them on the talk page.
- It has been suggested that this page be renamed.
- This page is a stub that needs to be expanded.
- This page should be cleaned up to meet wiki standards.
- This page needs images of controls to replace text descriptions.
- Systems needed: PlayStation 3, Xbox 360.
Achievement/trophy template[edit]
FFXIII enemy card[edit]
| PSICOM Enforcer | CP | 3 | |||||||
|---|---|---|---|---|---|---|---|---|---|
| 70% | |||||||||
| N/A | N/A | N/A | N/A | N/A | N/A | N/A | N/A | 70% | |
| File:FFXIII PSICOM Enforcer.PNG | 70% | ||||||||
| 70% | |||||||||
| 70% | |||||||||
| 70% | |||||||||
| 70% | |||||||||
| 70% | |||||||||
| Level | 24 | HP | 171 | 70% | |||||
| Strength | 13 | Magic | 0 | 70% | |||||
| Normal Drop | Rare Drop | 70% | |||||||
| Potion (10%) | Phoenix Down (2%) | 0% | |||||||
| The Hanging Edge · Lake Bresha | |||||||||
Trophy template[edit]
Hold image test[edit]
Test test test test test
test test test. Test test test test test
test test test. Test test test test test
test test test. Test test test test test
test test test.
Works with this class for the hold image:
.hold {
   display: inline-block;
   width: 40px;
   height: 30px;
   background: transparent url('http://media.strategywiki.org/images/2/2e/Hold.png') no-repeat center center;
   text-align: center;
}
num test[edit]
3,455,930,430
unlinked images and such[edit]
-
Hold template]]
-
Custom toolbar button.
-
Custom toolbar button.
-
Custom toolbar button.
-
2Dimage-3Dimage.txt
-
Preserved for posterity
testing
list test[edit]
- test
Collapsible table[edit]
| Weapon Stats | ||
|---|---|---|
| Weapons | Attack | Money |
| Spoon | 15 | 20 |
| Fork | 20 | 35 |
| Knife | 50 | 100 |
Template substitution[edit]
Signature[edit]
Dogz enemy[edit]
Sensitivity
Damage
this enemy is super badass and will kick your dog'z butt if you're not careful. you can give the enemy a flower bouquet to make him settle down, and then you guys are best friends and go to tea party's and stuff.
Sensitivity
Damage
this enemy is super badass and will kick your dog'z butt if you're not careful. you can give the enemy a flower bouquet to make him settle down, and then you guys are best friends and go to tea party's and stuff.
Sensitivity
Damage
this enemy is super badass and will kick your dog'z butt if you're not careful. you can give the enemy a flower bouquet to make him settle down, and then you guys are best friends and go to tea party's and stuff.
Sensitivity
Damage
this enemy is super badass and will kick your dog'z butt if you're not careful. you can give the enemy a flower bouquet to make him settle down, and then you guys are best friends and go to tea party's and stuff.
Dangerous Seed enemies[edit]
Testing[edit]
link to the bottom sub headings:
[edit]
Or you can go to File and select it from the drop down.
code template[edit]
HTML
{{code|lang|text}}
<table>
 <tr><td>cell 1</td><td>cell 2</td><td>cell 3</td></tr>
 <tr><td>cell 4</td><td>cell 5</td><td>cell 6</td></tr>
 <tr><td>cell 7</td><td>cell 8</td><td>cell 9</td></tr>
</table>
In a line of text: {{dot}} some code.
Area information template[edit]
| Characters | Scents |
|---|---|
|
|
| Diary Entries | Items |
|
|
| Buildings | najzere |
|
     test test test

     test test test

     test test test
Bug Table[edit]

|

|

|

|

|

|

|

|

|

|
| HH | HH | HH | HH | HH | HH | HH | HH | HH | HH |
| HH | HH | HH | HH | HH | HH | HH | HH | HH | HH |
| HH | HH | HH | HH | HH | HH | HH | HH | HH | HH |
| HH | HH | HH | HH | HH | HH | HH | HH | HH | HH |
Bug template[edit]
| Cabbage Butterfly | |
| Category | A bug with beautiful wings |
| Description | A small white butterfly. |
| Rank | C |
| Location | Green Meadows Treely Woods Zoomy Lake Hoya Plains Gola Higlands |
Dog's Life character template[edit]
Zelda template[edit]
| description of the armos enemy | |||
| Locations | Recommended Weapons | ||
| level of a thousand corpses | BFG 9000, staff of request lightning | ||
hit this guy on the head a bunch | |||
| |||
Smuggler's Run template[edit]
SUBJECT: TRAINING 1
FROM: FRANK LUGER
[FLUG@EX_IMP.COM]
THIS IS A WARM UP FOR YOU, ROOKIE. CLEAR ALL THE RED CHECKPOINTS AS FAST AS POSSIBLE AND KEEP YOUR EYES OPEN. LEARN THE TERRITORY AS YOU GO.
Audio: Ready for a little Russian roulette?
Dog Island diary entry template[edit]
testing anchor tags[edit]
Some main text
sub heading 1[edit]
Some sub heading 1 text
and some more
and some more
sub heading 2[edit]
Some sub heading 2 text
and some more
and some more
sub heading 3 [edit]
Some sub heading 3 text
and some more
and some more
Strike-through text
ff7 boss template[edit]
This is the first boss fight that might get you a bit sweaty, but you aren't in any real danger if you just remember to heal up if you're getting serious damage. The fight is unusual in that Tifa and Barret are on one side and Cloud on the other. Take advantage of this fact if you can by alternating attacks so Air Buster's back is to the attacker. This tactic is especially effective with Limit Breaks; someone on one side draws its attention first, then a party member on the opposite side attacks it with a Limit Break. Keep hacking and Bolting the thing. The retaliations and cannonstuff is pretty bad, so heal really often. But before you know, the thing firstly stops turning, so it can't retaliate on the other side any more. And when you start preparing for the worst, the thing just gets a short circuit or something and explodes.
| Level | Hit Points | Magic | Weak against | Strong against | Absorbs |
|---|---|---|---|---|---|
| 15 | 1200 | 0 | Lightning | Gravity, Earth | - |
This is the first boss fight that might get you a bit sweaty, but you aren't in any real danger if you just remember to heal up if you're getting serious damage. The fight is unusual in that Tifa and Barret are on one side and Cloud on the other. Take advantage of this fact if you can by alternating attacks so Air Buster's back is to the attacker. This tactic is especially effective with Limit Breaks; someone on one side draws its attention first, then a party member on the opposite side attacks it with a Limit Break. Keep hacking and Bolting the thing. The retaliations and cannonstuff is pretty bad, so heal really often. But before you know, the thing firstly stops turning, so it can't retaliate on the other side any more. And when you start preparing for the worst, the thing just gets a short circuit or something and explodes. This is the first boss fight that might get you a bit sweaty, but you aren't in any real danger if you just remember to heal up if you're getting serious damage. The fight is unusual in that Tifa and Barret are on one side and Cloud on the other. Take advantage of this fact if you can by alternating attacks so Air Buster's back is to the attacker. This tactic is especially effective with Limit Breaks; someone on one side draws its attention first, then a party member on the opposite side attacks it with a Limit Break. Keep hacking and Bolting the thing. The retaliations and cannonstuff is pretty bad, so heal really often. But before you know, the thing firstly stops turning, so it can't retaliate on the other side any more. And when you start preparing for the worst, the thing just gets a short circuit or something and explodes.
This is the first boss fight that might get you a bit sweaty, but you aren't in any real danger if you just remember to heal up if you're getting serious damage. The fight is unusual in that Tifa and Barret are on one side and Cloud on the other. Take advantage of this fact if you can by alternating attacks so Air Buster's back is to the attacker. This tactic is especially effective with Limit Breaks; someone on one side draws its attention first, then a party member on the opposite side attacks it with a Limit Break. Keep hacking and Bolting the thing. The retaliations and cannonstuff is pretty bad, so heal really often. But before you know, the thing firstly stops turning, so it can't retaliate on the other side any more. And when you start preparing for the worst, the thing just gets a short circuit or something and explodes.
| Level | Hit Points | Magic | Weak against | Strong against | Absorbs |
|---|---|---|---|---|---|
| 15 | 1,200 | 0 | Lightning | Gravity Earth |
- |

![Hold template]]](http://cdn.wikimg.net/en/strategywiki/images/2/2e/Hold.png)


