Overworld[edit]
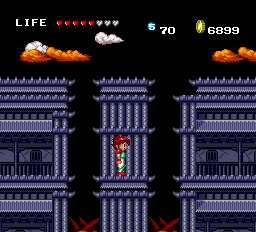
It seems like the only unusual feature of Magic Zone is the unusually high number of houses it contains, where the occupants frequently discuss their inability to use magic. As usual, flying cats and a few small enemies will approach before you reach the first door.
- Nurse Nancy welcomes you to the Magic Zone and tries to use some magic.
Walk ahead to the next building with two doors.
- The Prophet informs you that you need the Alpha Sword to save the world.
- Nurse Nancy once again tries to use magic, but fails.
Walk ahead to the door of the next building.
- The Weapons Master suggest you give Nurse Nancy some magic lessons.

Jump over to the blue structure. Once you set foot on it, the flying cats stop appearing, you can't exploit them for coins as you could in the Fire Zone. You don't necessarily need to jump all the way up to the top, in fact you're a bit safer staying down below and avoiding the enemies. Step down to reach the next building with two doors.
- The Prophet offers you words of encouragement.
- A third Nurse Nancy will finally be able to heal your wounds for 400 Coins. There will be other opportunities later in the stage. She is wrong when she claims that the Nova hut is nearby.
More enemies will attack as you approach the next door.
- The Wise Wizard offers to sell you Bolt Bombs for 400 Coins.
You must cross a low blue structure to reach the next door beyond.
- The Weapons Master wonders if other zones sell cheaper weapons.
Jump over the spikes and clear a few enemies away to reach the next door.
- The Wise Wizard informs you that the Magic Zone has reduced his powers.

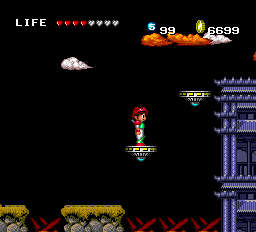
Carefully jump over the spikes and onto the vertically floating platforms. Let them carry you up to the roof of the blue structure on your right and jump off. After dropping back down, you must leap across three more vertically floating platforms in order to reach the other side and the next building.
- Nurse Nancy is trying to practice magic and asks you to leave.
- The Prophet once again encourages you to succeed.
Eliminate a few more enemies along the way to the next door.
- Nurse Nancy, for a second time, offers to heal your wounds for 400 Coins. She's still not correct about the Nova hut being close.
In what seems like a repeat of earlier, you must jump onto two vertically floating platforms to reach the roof of a blue structure before dropping back down to the ground.
- The Weapons Master basically compliments himself on how helpful his weapons have been to you.
- The Wise Wizard offers to sell you Bolt Bombs for a second time.
You must then leap onto a blue structure similar to the one you encountered early in the stage. However, beyond the small middle section, you must hop onto two horizontally floating platforms to get across the bed of spikes below and reach the land to the right. Then approach the next building.
- Nurse Nancy, yet again, offers to heal your wounds for 400 Coins. If you wish to take her up on it, this is your last chance.
Hop over the spikes and continue right to the next building.
- The Weapons Master finally offers to sell you a weapon, the Alpha Sword, for the high price of 4800 Coins. Not only should you buy it now for the benefit it will provide you in the Underworld, if you don't buy it here, the price for the sword will double to a ridiculous 9600 Coins in the next zone. Avoid the need to collect that much money by buying it now.
At last, run to the right and reach the Nova hut.
Underworld[edit]
As soon as you arrive, you will need to jump over a set of spikes, and immediately face off with a Titan Guard on the other side. After facing off with a few Titan Guards, a Stitch will attack you as a regular enemy. Remove him and continue to the right. After a Dr. Sting appears, you will see a gap in the ground. If you continue to the right beyond that gap, the game will merely dead-end, so drop down the gap.
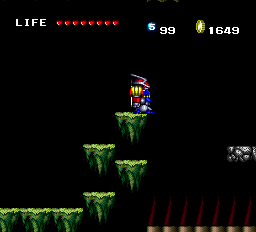
Let the small gray platform that you land on disappear and drop down to the ground. As above, if you go to the right, the screen will dead-end, so return to the left. Clear another Stitch out of the way, and jump over the spikes to the high platforms above. Watch out for the Titan Guard on the other side, and jump over to the next platforms as well. A Dr. Sting will attack as you approach another gap in the floor. Drop down to proceed.

When you drop down to the second sub-level, another Stitch will attack. You can attack it from the higher ledge you stand on. Now the first dangerous portion of the zone will occur. After jumping up to the high ledge, you will stand before a bed of spikes, with a small gray platform out in the distance for you to jump to. Wait for it to reappear before leaping, but watch out for the ledge above your head which may cut your jump short. From the gray platform, you can safely leap to the right.
At this point, you have a choice: continue on to the right, or drop down a level. If you drop down here, you will only find a dead-end. Instead, leap to the next gray platform above the spikes and continue right. Once again, you will be given the choice to continue right or drop down. This time, dropping down is the right choice, as continuing right will also lead to a dead-end. However, drop straight down to avoid accidentally landing on any spikes.
After a bit of a drop, head to the left, but instead of using the gray platform to climb up to the higher ledge, simply walk to the left and drop down to the level below. When you land, head to the right. You will see another Stitch on a ledge and you may also be attacked by a Dr. Sting. Clear them out of the way and proceed right. Carefully jump over to the small gray platforms after they reappear, and deal with one final Stitch and Dr. Sting pair before dropping down the last gap to the boss pit.
Boss[edit]

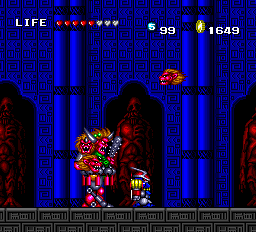
The boss of this Zone is known as Dongoro. He is a tall enemy with lion heads for hands. He remains on the ground much like Stitch, so you don't have to worry about jumping into the air in order to hit him. He walks back and forth and breathes fireballs at you. Whenever you strike him with your sword, he sends out one of the lion heads to fly around and attack you. You can destroy the lion heads with one strike, but they will return when you hit Dongoro again. You can try your best to avoid him, his fireballs and his lion heads, but ultimately, you've simply got to get close and strike with your sword (unless you have plenty of Bolt Bombs and decide to take him out from a distance.) It will take 24 strikes with your Alpha Sword to bring Dongoro down.