(→The Holding Area: Details, rephrase) |
m (cleanup) |
||
| (3 intermediate revisions by one other user not shown) | |||
| Line 55: | Line 55: | ||
==Underground Dock== | ==Underground Dock== | ||
[[Image:Re4 13 03.jpg|250px|thumb|caption|He has his own shop.]] | [[Image:Re4 13 03.jpg|250px|thumb|caption|He has his own shop.]] | ||
Follow the passage over a ledge and collect Handgun Ammo from the corner. There is a dock nearby, but there are no boats at the moment. Follow the passage right, past a barrel, to find the Merchant waiting in his very own shop. If you’ve completed the Blue Medallion side quest then you can collect your reward now, the Punisher. This gun has stats nearly identical to the Handgun you already have; what makes it different is that you can shoot through one enemy to hit another. That's assuming they're nice enough to line up for you. | |||
There's a typewriter across from the merchant so you can save your game, recommended since it's been a while. Follow the ledge to the left of the Merchant to find another barrel. | |||
Go back to the previous area and take the other exit, now on the right. | |||
==Swamp== | |||
You enter a narrow canyon which slopes downward. Check the shack on the right for Handgun Ammo and a barrel, then continue down the path. The red sign and the canyon should remind you of something, and your suspicions will be confirmed when villagers roll another rock toward you just like when you left the farm. Follow the same procedure here to escape, but keep in mind that the button combination at the end may be different this time. | |||
Just after you've evaded the rolling rock, look up and shoot a sparkle in the overhanging cliff for a Spinel. | |||
You now enter a swampy area with boardwalks to help get around. There are several villagers in the area to fight. There are also a few tripwire mines scattered around and you can often lure the resident villagers into setting them off. The first mine is across the boardwalk near the entrance, but the villager here turns out to be in front of it. Fight him as usual and maybe the commotion will cause others to follow him and trip the mine. Eventually the scene will become to chaotic for this type of game, so just fight the enemies as you can. Reinforcements come in from where you entered to keep things interesting. | |||
Items to find in this area include: | |||
*Hand Grenade to the left of the first boardwalk | |||
*Two boxes and a barrel in the shack connected to this; snake in the right box | |||
*Incendiary Grenade on a bench, right side of second boardwalk. | |||
*Antique Pipe, nest in tree to the right of the second boardwalk. | |||
*Handgun ammo in the shack on the far side of the swamp | |||
*Box in the same shack; snake in the box | |||
You | You may occasionally see a snake just swimming around, these will probably leave you alone but you can be bitten if you stumble upon one. | ||
Follow the path on the far side of the swamp to the gate to the next area. | |||
==The Lake== | ==The Lake== | ||
Follow the path and go left when you come the fork. This takes you to bluff overlooking a lake and a cutscene begins. | |||
Follow the path | |||
[[Image:Re4 13 04.jpg|300px|thumb|caption|Oh no...]] Two villagers take a motorboat to the middle of the lake and dump the body of one of the police officers. They leave in a hurry while you watch the body. Something big eats it but you don't get a good look because the field of vision in your binoculars is too small. Now you have an idea what you are up against. | |||
Head back | There is a red herb hidden next to the tree near the ledge where the cutscene occurs. Head back and go left to follow the path that you passed previously. Get the Gold Bangle w/ Pearls from the nest in a tree on the left. Then check the shack on the right to get Handgun Ammo and a box with a Yellow Herb inside. | ||
Continue to a cabin at the end of the path. Get a barrel and Green Herb inside, then definitely save your game at the typewriter since we're coming up on the end of Part 1 and that means it's boss fight time. | |||
Head to the small dock and jump into the motorboat which awaits you. You control the motorboat more or less the same way you control Leon, except for the fact that you can't equip a knife or do a turn-around. The boat is equipped with an unlimited supply of harpoons and you use them the same way you use a gun on land. Stay close to the dock and get used to the feel of things. Then head out into the middle of the lake to start a cutscene. | |||
Del Lago spots you from under the water. It is a whale sized fish that tries to capsize your boat, but somehow your anchor gets hooked on it and it starts to drag you around the water. | |||
{{Bossbar | {{Bossbar | ||
|title=Boss: Del Lago | |title=Boss: Del Lago | ||
|contents=As you | |contents=Your boat is now being dragged around the lake by a giant fish. As you might imagine, this makes the steering a bit wonky. Unfortunately for you, Del Lago will try to knock you out of your boat by dragging you through the floating tree trunks that dot the surface of the lake. Del Lago will also attempt to come directly at you from time to time. It's best to avoid being capsized, so steer around the tree trunks as best as you can. Keep an eye out for when Del Lago dives since that means it's about to charge and you should swerve out of the way. [[Image:Re4 13 boss1.jpg|thumb|caption|Swim for your life!]] | ||
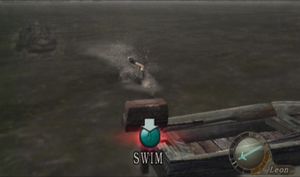
If the boat is capsized then you'll take damage and be thrown into the water. You must then swim back to your boat as quickly as possible (by repeatedly pressing the button that appears on the screen) before you are eaten. Make sure that you heal yourself when necessary since you don't swim as fast when wounded. | |||
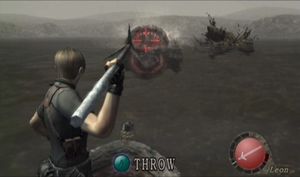
[[Image:Re4 13 | If you go for enough time without being capsized then Del Lago will go underwater completely, and you will be unable to see him for a few seconds; the boss monster music stops when this happens. [[Image:Re4 13 boss2.jpg|thumb|caption|Throw harpoons at it.]] The boat will stop, and Leon will look right and left frantically. At this time, you need to equip your harpoon, because Del Lago will attempt to ram you. On-screen arrows will direct you in Del Lago's direction when it surfaces, and you must throw harpoons in it's mouth to deter it from doing so. | ||
You can also throw harpoons into Del Lago while it's dragging you around, so try to get some shots in while your environment is relatively clear of any debris and you don't need to dodge anything. | |||
Keep it up, and when Del Lago has had enough he starts sinking to the bottom, a big problem for you since the anchor rope he’s still attached to is tangled around your leg. Quickly press the on-screen button repeatedly to cut the rope before you are dragged under. | |||
}} | |||
Once you rid yourself of that rope, this boss battle comes to an end. There is a cutscene where you land the boat and pass out in an abandoned house. | |||
Once you rid yourself of that rope, this boss battle comes to an end | |||
{{Footer Nav|game=Resident Evil 4|prevpage=Chapter 1-2|nextpage=Chapter 2-1}} | {{Footer Nav|game=Resident Evil 4|prevpage=Chapter 1-2|nextpage=Chapter 2-1}} | ||
Latest revision as of 22:40, 20 May 2022
Chief's House (continued)[edit]
Hunnigan checks in and tells you that the village is under the control of a cult known as Los Illuminados. (Allowing for a spelling correction to Los Iluminados, this translates to "the Illuminated".) You tell her about your encounter with Mendez but neither of you can explain his behavior.

If you want, you can go back into the bedroom to trigger an optional cutscene. Mendez is there and is starting to get annoyed with you. But he is distracted by shots coming from the window and you catch a glimpse of a woman in red who makes her escape to the roof while Mendez jumps out the window after her.
Check the cabinet near the door to get a Green Herb. Go down the stairs, then turn around and open the door to find villager in the bathroom. If you take too ling with him it may alert villagers outside. Check the rest of the house for items before going outside. There is a Brown Egg in the oven, 1000 PTAS in a cabinet and an Incendiary Grenade in a cupboard. Save your game at the typewriter if you want.
Villagers attack when you step outside, and Dr. Salvador is with them. Try to get in one shot at him with the rifle, but switch to shotgun if he gets close. He drops a Ruby, a valuable treasure, so be sure to get the spoils when the battle is over.
Continue along the path, but look for a nest in an overhanging branch and shoot it for a Spinel. There is a shack on the left with a villager waiting outside and another hiding inside. Get the box inside the shack. Just beyond this is another nest with TMP ammo inside. There are more villagers at the end of the path, possibly including Dr. Salvador again. Unbar the door to return the village again.
The Village[edit]
Since you've left this area, villagers have decided to come back and populate it again. This fight won't be as difficult as the first one here; there are fewer enemies and you should be better equipped now. Most of the villagers will attack in a group as you enter, so it's a good time to use a grenade or two, but watch for two stragglers waiting on rooftops. There are no items to find unless you left some behind the last time, so if you want you can just run past all the villagers to get to your destination. If you're low on health items then you may want to make a quick trip to the farm and check for eggs.
There is a building to the east with a locked door decorated with the symbol that you saw in the Chief's House. Use the 'Insignia Key' to unlock it and go inside.
The Locked Building[edit]
You'll find yourself inside the once locked building. Look around for a number of items to add to inventory, and if you feel like it, use the typwriter to save. Head through the door.
In this room there are a few more items to collect. You should also notice the lamp hanging from the ceiling. Stand away from it and take a shot at it. It'll burst a reveal a 'Spinel' for you to collect. Now head through the hole in the floor.
Underground Tunnel[edit]
Get the box on the stove and Handgun Ammo from the cabinet. Save you game if you want to and go into the back room. Get the barrel here, then shoot the lamp hanging from the ceiling being careful not to be underneath it. The lamp drops a Spinel. Open the trap door and drop down.
Follow the tunnel to a wide area lit by a lamp. Get the box in the corner here, then shoot the lamp. This time the lamp doesn't drop anything but you can now see sparkling objects in the ceiling; shoot these to get two Spinels and the Elegant Headdress.
Continue through the tunnel and you'll come across the Merchant again. Do not sell the Beerstein, Catseye or Elegant Mask, but anything else is fair game. Go out the door to the left, follow the tunnel to a ladder, then go up the ladder to the next area.
Cemetery[edit]
Before going on, check above you to see a bird's nest hidden among the leaves; it drops a Hand Grenade. A bit further on is a second nest which drops Rifle Ammo. Beyond this the path opens into the graveyard.
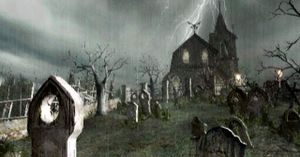
There are crows near the entrance and you can shoot them if you want, but there are also villagers scattered around and they will notice the sound. There is a shack on the right with Handgun Ammo and two boxes.
Continue up the path to find more villagers waiting in front of the church; at least one of them throws dynamite. Check the door of the church, the whole reason for coming here, and you'll find it's locked. This triggers a call to Hunnigan where she tells you you need to find a way in somehow (obviously). Note, if you try to go past the church without checking the door then Hunnigan will call you and you'll have to tell her you got sidetracked; she will not be impressed.
Circle behind the church to find two more villagers waiting. There isn't a back door as you might be hoping, but there is a pedestal with dial on it. There is a puzzle to solve to open it and get the prize inside. This is actually much harder than getting into Mendez's bedroom. First, the inscription says something about three family insignias of dead ringers, which means you need to find the symbols for three sets of twins. Go back to the graveyard to find three double tombstones and make a note of their symbols; they resemble an M, a Z and a V. Go back and check the pedestal again to see that symbols are at position 0, 2 and 3 if you 0 at the top and number clockwise. You can turn the dial in increments of 3 or 4 and with each turn the a light goes on or off where the dial lands. You must turn on the lights at the positions of the three symbols (and only those three) to solve the puzzle.
There are 128 combinations of lights, which is not so much that it's impossible to do by trial and error, but the 4 shortest solutions are
- 3334443
- 3433344
- 3344333
- 3433433
When the puzzle is solved the pedestal will open and you get the Green Casteye. Combine this with the Beerstein.
Go back and take the rightmost path near the church. This leads to a rickety looking ledge next to a cliff. Jump over the gaps and fight a few more villagers here. About half way there is a shack on the left.
About now most guides will tell you that you need to stop just opening boxes with your knife because there may be snakes hiding inside. Instead to should shoot the box from a distance and quickly shoot again if there's a snake. Slashing twice with your knife might work too but it doesn't seem to be as effective. It turns out though, when it actually comes down to it, no one remembers to do this when it counts, so we're just going to tell you where the snakes are. In this case the snake is in the box on the left. Get the other box and "Closure of the Church" which mentions that the key you need is on the other side of a lake.
Follow the ledge to the end to find a door to the next area. Before continuing on though, this area contains the remaining blue medallions needed to complete that side quest. See the Side Quests page for details.
The Holding Area[edit]
You hear a growling noise coming from somewhere, but there is no need to worry about it ... yet.
Get he barrel on the right, then continue forward and, to the left of the group of small shacks, there is a large gathering of crows. (Supposedly such a gathering should be called a "murder of crows", but nobody ever does.) You can try to take them all out with your handgun, but that's incredibly hard. The commonly accepted method is to throw a Flash Grenade at them to get piles of cash and your grenade back. Now check the shacks for items; there is a Spinel and Handgun Ammo in the first, nothing in the second, and more Handgun Ammo in the third. Check the wagon on the left to get another Spinel. Cross to the other side of the area, get two more barrels, then take the door at the bottom of the short flight of stairs.
Underground Dock[edit]
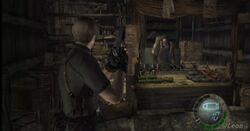
Follow the passage over a ledge and collect Handgun Ammo from the corner. There is a dock nearby, but there are no boats at the moment. Follow the passage right, past a barrel, to find the Merchant waiting in his very own shop. If you’ve completed the Blue Medallion side quest then you can collect your reward now, the Punisher. This gun has stats nearly identical to the Handgun you already have; what makes it different is that you can shoot through one enemy to hit another. That's assuming they're nice enough to line up for you.
There's a typewriter across from the merchant so you can save your game, recommended since it's been a while. Follow the ledge to the left of the Merchant to find another barrel.
Go back to the previous area and take the other exit, now on the right.
Swamp[edit]
You enter a narrow canyon which slopes downward. Check the shack on the right for Handgun Ammo and a barrel, then continue down the path. The red sign and the canyon should remind you of something, and your suspicions will be confirmed when villagers roll another rock toward you just like when you left the farm. Follow the same procedure here to escape, but keep in mind that the button combination at the end may be different this time.
Just after you've evaded the rolling rock, look up and shoot a sparkle in the overhanging cliff for a Spinel.
You now enter a swampy area with boardwalks to help get around. There are several villagers in the area to fight. There are also a few tripwire mines scattered around and you can often lure the resident villagers into setting them off. The first mine is across the boardwalk near the entrance, but the villager here turns out to be in front of it. Fight him as usual and maybe the commotion will cause others to follow him and trip the mine. Eventually the scene will become to chaotic for this type of game, so just fight the enemies as you can. Reinforcements come in from where you entered to keep things interesting.
Items to find in this area include:
- Hand Grenade to the left of the first boardwalk
- Two boxes and a barrel in the shack connected to this; snake in the right box
- Incendiary Grenade on a bench, right side of second boardwalk.
- Antique Pipe, nest in tree to the right of the second boardwalk.
- Handgun ammo in the shack on the far side of the swamp
- Box in the same shack; snake in the box
You may occasionally see a snake just swimming around, these will probably leave you alone but you can be bitten if you stumble upon one.
Follow the path on the far side of the swamp to the gate to the next area.
The Lake[edit]
Follow the path and go left when you come the fork. This takes you to bluff overlooking a lake and a cutscene begins.
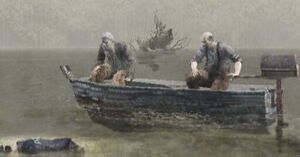
Two villagers take a motorboat to the middle of the lake and dump the body of one of the police officers. They leave in a hurry while you watch the body. Something big eats it but you don't get a good look because the field of vision in your binoculars is too small. Now you have an idea what you are up against.
There is a red herb hidden next to the tree near the ledge where the cutscene occurs. Head back and go left to follow the path that you passed previously. Get the Gold Bangle w/ Pearls from the nest in a tree on the left. Then check the shack on the right to get Handgun Ammo and a box with a Yellow Herb inside.
Continue to a cabin at the end of the path. Get a barrel and Green Herb inside, then definitely save your game at the typewriter since we're coming up on the end of Part 1 and that means it's boss fight time.
Head to the small dock and jump into the motorboat which awaits you. You control the motorboat more or less the same way you control Leon, except for the fact that you can't equip a knife or do a turn-around. The boat is equipped with an unlimited supply of harpoons and you use them the same way you use a gun on land. Stay close to the dock and get used to the feel of things. Then head out into the middle of the lake to start a cutscene.
Del Lago spots you from under the water. It is a whale sized fish that tries to capsize your boat, but somehow your anchor gets hooked on it and it starts to drag you around the water.
Once you rid yourself of that rope, this boss battle comes to an end. There is a cutscene where you land the boat and pass out in an abandoned house.
