Speak to the gate attendants to receive 30 Safari Balls. To catch any wild Pokémon you find, toss Safari Balls at them. Often you'll have to throw food or rocks to distract certain Pokémon, so try many different combinations when a particular Pokémon keeps escaping. When you run out of Safari Balls, or walk 500 paces, you'll warp back to the gate automatically.
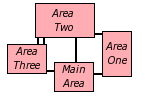
Catching safari Pokémon[edit]
The nice thing about the Safari Zone is that you don't have to fight with Pokémon before you can catch them. Unfortunately, you can only catch them with the weak Safari Balls they provide you.
But you do have a few new options: you can throw rocks at Pokémon, making them angry. This makes them easier to catch, but they run away more quickly. Or you can toss out some bait, which makes them stick around longer, but they'll be harder to catch, despite the idea that they are distracted while eating food.
To make matters worse, the rarer the Pokémon, the harder they are to catch! You may see a Chansey only one time in twenty, but when you do, you'll probably need to nail her with two rocks before you can snare her in a Safari Ball. That's not to say you couldn't snare a Chansey, or any Safari Zone Pokémon, for that matter, without throwing rocks, but it makes it much, much more likely. And since she runs at a hair trigger, it may take ten or twenty tries until you can catch her, so be patient - really patient. Here's the icing on the cake: you only get 500 paces (steps) and 30 Safari Balls.
It is also smart to save your game before entering the Safari Zone. This way, if you don't happen to have any luck catching Pokémon, you can restart your game without losing ![]() 500. Additionally, there is a glitch that allows you to Catch Safari Zone Pokémon easily!.
500. Additionally, there is a glitch that allows you to Catch Safari Zone Pokémon easily!.
Learn how to Surf[edit]
You'll be able to get around a lot better if you can cross the many ponds here, so your top priority should be to get to the Secret House (containing HM 03) in the northwest corner of Area 3.
This is more complicated than it sounds, especially in under 500 steps. From the main entrance, Head right to the wall then go up and right into Area 1. In Area 1, continue forward and in the patch of grass go up onto the cliff then go left and down the cliff. Go right then up and left around the cliff then continue forward to Area 2. In Area 2, go up the cliff in the patch of grass then go left and down to get off the cliff. Go left then up through 2 patches of grass then go right. At the house in the corner go left and follow the path to Area 3.
The house is just ahead, but don't forget to grab the Gold Teeth while you're in the neighborhood (see below). HM 03's Surf can be taught to just about any Water Pokémon, and is a surprisingly strong Water attack when used in battle.
Don't forget the fish[edit]
Fishing is a great way to pick up some rare Pokémon, especially since it doesn't count against your "time." You need the Super Rod to catch high-level Pokémon, but the Super Rod can also catch a Dratini (or in Yellow, a Dragonair), the best of the fishing lot. He may be dangling at the end of your rod, but you'll still need to use some stones to seal the deal.
Safari Zone[edit]
Main area[edit]
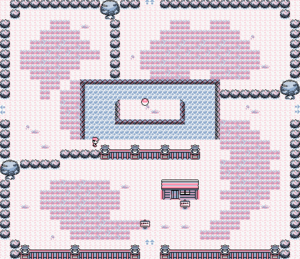
The Main Area contains an island, and if you can reach it, you can claim a valuable Nugget.
| Red | |||
|---|---|---|---|
| Pokémon | Level | Rate | |
| Nidorina | 31 | 5% | |
| Nidoran♂ | 22 | 25% | |
| Nidorino | 31 | 10% | |
| Parasect | 30 | 5% | |
| Venonat | 22 | 15% | |
| Exeggcute | 24,25 | 20% | |
| Rhyhorn | 25 | 15% | |
| Chansey | 23 | 1% | |
| Scyther | 23 | 4% | |
| Blue | |||
|---|---|---|---|
| Pokémon | Level | Rate | |
| Nidoran♀ | 22 | 25% | |
| Nidorina | 31 | 10% | |
| Nidorino | 31 | 5% | |
| Parasect | 30 | 5% | |
| Venonat | 22 | 15% | |
| Exeggcute | 24,25 | 20% | |
| Rhyhorn | 25 | 15% | |
| Chansey | 23 | 1% | |
| Pinsir | 23 | 4% | |
| Yellow | |||
|---|---|---|---|
| Pokémon | Level | Rate | |
| Nidoran♀ | 36 | 15% | |
| Nidoran♂ | 14 | 25% | |
| Nidorino | 23 | 10% | |
| Paras | 27 | 5% | |
| Parasect | 27,32 | 15% | |
| Exeggcute | 24 | 15% | |
| Rhyhorn | 20 | 10% | |
| Chansey | 7 | 1% | |
| Tangela | 22 | 4% | |
Return here later with the super rod to catch some new Pokémon.
| Red and Blue | |||||
|---|---|---|---|---|---|
| Pokémon | Level | Old Rod | Good Rod | Super Rod | |
| Magikarp | 5 | 100% | - | - | |
| Poliwag | 10 | - | 50% | - | |
| Goldeen | 10 | - | 50% | - | |
| Psyduck | 15 | - | - | 25% | |
| Slowpoke | 15 | - | - | 25% | |
| Krabby | 15 | - | - | 25% | |
| Dratini | 15 | - | - | 25% | |
| Yellow | |||||
|---|---|---|---|---|---|
| Pokémon | Level | Old Rod | Good Rod | Super Rod | |
| Magikarp | 5 | 100% | - | - | |
| Poliwag | 10 | - | 50% | - | |
| Goldeen | 10 | - | 50% | - | |
| Magikarp | 5,10 | - | - | 70% | |
| Dratini | 10 | - | - | 20% | |
| Dragonair | 15 | - | - | 10% | |
Area 1[edit]
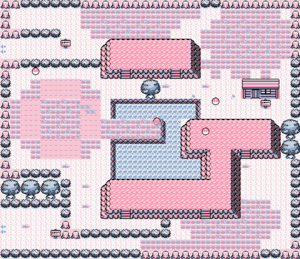
In Area 1, the Poké Ball on the ledge contains a Carbos. To the left of the house nearby, you will find a Full Restore. On the patch of ground that extends into the lake, a TM 37 can be found in the grass. And close to the entrance to Area 2 there's a Max Potion on the ground.
| Red | |||
|---|---|---|---|
| Pokémon | Level | Rate | |
| Nidoran♀ | 24 | 5% | |
| Nidoran♂ | 24 | 25% | |
| Nidorino | 33 | 10% | |
| Paras | 22 | 15% | |
| Parasect | 25 | 5% | |
| Doduo | 26 | 15% | |
| Exeggcute | 23,25 | 20% | |
| Kangaskhan | 25 | 4% | |
| Scyther | 28 | 1% | |
| Blue | |||
|---|---|---|---|
| Pokémon | Level | Rate | |
| Nidoran♀ | 24 | 25% | |
| Nidorina | 33 | 10% | |
| Nidoran♂ | 24 | 5% | |
| Paras | 22 | 15% | |
| Parasect | 25 | 5% | |
| Doduo | 26 | 15% | |
| Exeggcute | 23,25 | 20% | |
| Kangaskhan | 25 | 4% | |
| Pinsir | 28 | 1% | |
| Yellow | |||
|---|---|---|---|
| Pokémon | Level | Rate | |
| Nidoran♀ | 29 | 25% | |
| Nidorina | 32 | 10% | |
| Nidoran♂ | 14 | 15% | |
| Exeggcute | 22,26 | 20% | |
| Cubone | 19 | 10% | |
| Marowak | 24 | 5% | |
| Chansey | 24 | 4% | |
| Scyther | 15 | 1% | |
| Tauros | 22 | 10% | |
Return here later with the super rod to catch some new Pokémon.
| Red and Blue | |||||
|---|---|---|---|---|---|
| Pokémon | Level | Old Rod | Good Rod | Super Rod | |
| Magikarp | 5 | 100% | - | - | |
| Poliwag | 10 | - | 50% | - | |
| Goldeen | 10 | - | 50% | - | |
| Psyduck | 15 | - | - | 25% | |
| Slowpoke | 15 | - | - | 25% | |
| Krabby | 15 | - | - | 25% | |
| Dratini | 15 | - | - | 25% | |
| Yellow | |||||
|---|---|---|---|---|---|
| Pokémon | Level | Old Rod | Good Rod | Super Rod | |
| Magikarp | 5 | 100% | - | - | |
| Poliwag | 10 | - | 50% | - | |
| Goldeen | 10 | - | 50% | - | |
| Magikarp | 5,10,15 | - | - | 90% | |
| Dratini | 15 | - | - | 10% | |
Area 2[edit]
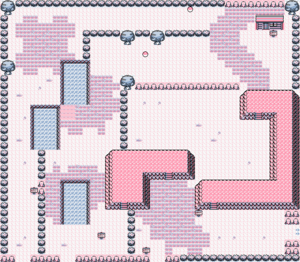
There are just two treasures to find in Area 2: a TM 40 between two trees, and Protein to the left of the house.
| Red | |||
|---|---|---|---|
| Pokémon | Level | Rate | |
| Nidorina | 30 | 5% | |
| Nidoran♂ | 22 | 25% | |
| Nidorino | 30 | 10% | |
| Paras | 23 | 15% | |
| Venomoth | 32 | 5% | |
| Exeggcute | 25,27 | 20% | |
| Rhyhorn | 26 | 15% | |
| Chansey | 26 | 4% | |
| Tauros | 28 | 1% | |
| Blue | |||
|---|---|---|---|
| Pokémon | Level | Rate | |
| Nidoran♀ | 22 | 25% | |
| Nidorina | 30 | 10% | |
| Nidorino | 30 | 5% | |
| Paras | 23 | 15% | |
| Venomoth | 32 | 5% | |
| Exeggcute | 25,27 | 20% | |
| Rhyhorn | 26 | 15% | |
| Chansey | 26 | 4% | |
| Tauros | 28 | 1% | |
| Yellow | |||
|---|---|---|---|
| Pokémon | Level | Rate | |
| Nidoran♀ | 14 | 15% | |
| Nidorina | 23 | 10% | |
| Nidoran♂ | 36 | 25% | |
| Exeggcute | 20 | 15% | |
| Cubone | 16 | 5% | |
| Rhyhorn | 25 | 10% | |
| Kangaskhan | 28,33 | 15% | |
| Scyther | 25 | 4% | |
| Pinsir | 15 | 1% | |
Return here later with the super rod to catch some new Pokémon.
| Red and Blue | |||||
|---|---|---|---|---|---|
| Pokémon | Level | Old Rod | Good Rod | Super Rod | |
| Magikarp | 5 | 100% | - | - | |
| Poliwag | 10 | - | 50% | - | |
| Goldeen | 10 | - | 50% | - | |
| Psyduck | 15 | - | - | 25% | |
| Slowpoke | 15 | - | - | 25% | |
| Krabby | 15 | - | - | 25% | |
| Dratini | 15 | - | - | 25% | |
| Yellow | |||||
|---|---|---|---|---|---|
| Pokémon | Level | Old Rod | Good Rod | Super Rod | |
| Magikarp | 5 | 100% | - | - | |
| Poliwag | 10 | - | 50% | - | |
| Goldeen | 10 | - | 50% | - | |
| Magikarp | 5,10,15 | - | - | 90% | |
| Dratini | 15 | - | - | 10% | |
Area 3[edit]
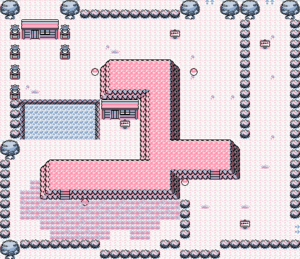
Searching Area 3 is vital in order to find the Gold Teeth which lies just to the south of the left entrance to Area 2. To the left of the teeth, you will find TM 32, while south of the teeth, you can collect a Max Revive. In front of the Secret House is a statue that seems a bit out of place compared to the others: examine it for a Revive. Make it all the way to the bottom-left corner of Area 3 to find a Max Potion.
| Red | |||
|---|---|---|---|
| Pokémon | Level | Rate | |
| Nidoran♀ | 25 | 5% | |
| Nidoran♂ | 25 | 25% | |
| Nidorino | 33 | 10% | |
| Venonat | 23 | 15% | |
| Venomoth | 31 | 5% | |
| Doduo | 26 | 15% | |
| Exeggcute | 24,26 | 20% | |
| Kangaskhan | 28 | 1% | |
| Tauros | 26 | 4% | |
| Blue | |||
|---|---|---|---|
| Pokémon | Level | Rate | |
| Nidoran♀ | 25 | 25% | |
| Nidorina | 33 | 10% | |
| Nidoran♂ | 25 | 5% | |
| Venonat | 23 | 15% | |
| Venomoth | 31 | 5% | |
| Doduo | 26 | 15% | |
| Exeggcute | 24,26 | 20% | |
| Kangaskhan | 28 | 1% | |
| Tauros | 26 | 4% | |
| Yellow | |||
|---|---|---|---|
| Pokémon | Level | Rate | |
| Nidoran♀ | 21 | 15% | |
| Nidoran♂ | 29 | 25% | |
| Nidorino | 32 | 10% | |
| Exeggcute | 22,26 | 20% | |
| Cubone | 19 | 10% | |
| Marowak | 24 | 5% | |
| Tangela | 27 | 1% | |
| Pinsir | 25 | 4% | |
| Tauros | 21 | 10% | |
Return here later with the super rod to catch some new Pokémon.
| Red and Blue | |||||
|---|---|---|---|---|---|
| Pokémon | Level | Old Rod | Good Rod | Super Rod | |
| Magikarp | 5 | 100% | - | - | |
| Poliwag | 10 | - | 50% | - | |
| Goldeen | 10 | - | 50% | - | |
| Psyduck | 15 | - | - | 25% | |
| Slowpoke | 15 | - | - | 25% | |
| Krabby | 15 | - | - | 25% | |
| Dratini | 15 | - | - | 25% | |
| Yellow | |||||
|---|---|---|---|---|---|
| Pokémon | Level | Old Rod | Good Rod | Super Rod | |
| Magikarp | 5 | 100% | - | - | |
| Poliwag | 10 | - | 50% | - | |
| Goldeen | 10 | - | 50% | - | |
| Magikarp | 5,10,15 | - | - | 90% | |
| Dratini | 15 | - | - | 10% | |
Lost teeth and HM 04[edit]
Seems like you just got a new HM, doesn't it? Well, there's one more in Fuchsia City, and then you'll have the whole set.
It's HM 04, which the Warden will hand you when you return the Gold Teeth you found in Area 3. Use this on one of your larger Pokémon, and he'll learn Strength, a technique that lets you bat aside boulders like the one on the right side of the warden's office.
Use Strength on the boulder in the Warden's house to get at the Rare Candy that's just beyond your reach, and make sure you have easy access to the Pokémon you taught it to, since it will be a necessary item in later dungeons.
In battle, Strength doubles as a basic attack, comparable in power and accuracy to Tri Attack and Drill Peck. Like all HMs, it can't be unlearned, so give it to a Pokémon who needs a source of damage and doesn't get a lot of good skills, like your brand new Tauros.
New Pokémon[edit]

Red and Blue players can fish up one of these Water-type Pokémon if they really want to. Psyducks start with nothing in the way of viable attacks and don't get good stuff like Fury Swipes and Hydro Pump until much later. They can do some damage with Surf, but their stats are just too low, even after evolving into Golduck.
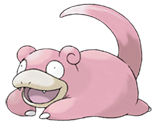
Slowpokes, on the other hand, grow to be strong. Water and Psychic makes for a weird combo, but Slowpoke (and its evolved form Slowbro) learns some strong techniques in both, and have good enough stats to make good use of them. Most notably, Slowbro is the best user of Amnesia, which is monstrous in Red and Blue because it gives a simultaneous, and tremendous boost to Slowbro's offensive and defensive abilities!
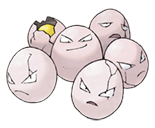
Exeggcute evolves into the powerful Exeggutor, who has high stats and great resistances, including the rare Ground one. Like Drowzee, it can learn Hypnosis, which is useful when combined with Dream Eater. Teaching it Psychic (via TM) is recommended, as it is a very powerful STAB attack when combined with Exeggutor's great Special stat. In competitive gaming, Exeggutor is regarded as a staple in most teams due to it being a reliable sleeper and the number one Ground-type counter. Unfortunately, appearing at a very low level and having a very slow experience curve makes it very hard to make Exeggcute useful in-game. Consider other Grass- or Psychic-types to help you beat the remaining gym leaders and Elite Four.
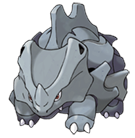
Rhyhorn's low level, low Speed and Special, late evolution, lack of non-TM STAB moves, and many weaknesses mean Rhyhorn can't really shine in game. However, its evolved form is a true staple of competitive Pokemon. Rhydon has some of the most impressive stats in the game, with an outrageous Attack and Defense, and great HP to boot. Rock + Ground is an extremely destructive attacking combo, and is essential defensively too to stop powerful Electric-types like Zapdos and Jolteon, as well as check Normal-types like Tauros and Snorlax. It might not be impressive against the Elite Four, but raise one up to trounce your friends in link cable battles.
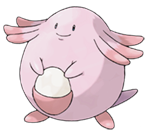
Chanseys are really rare in every version, and they're a pain to catch, since you need to nail them with a couple of rocks before you stand a chance of snagging one with a Safari Ball.
But you may find it worth your trouble of grabbing one. Here are some of Chansey's highlights. She may look absolutely ridiculous, but her Hit Points are literally off the scale, and best of all, she's the only Pokémon in the game who can learn Softboiled. That obscure skill comes from TM 41, (get it by surfing across that pool in Celadon City), and can heal your other fighters outside of battle! That's an incredible ability... It's too bad Chansey's so weak in battle, with the lowest Attack and Defense in the game (but an OK Special). Low Speed and offensive abilities make her a poor choice for the in-game adventure. Despite these failings in-game, Chansey is a staple of the competitive environment. Her incredible Special bulk makes her irreplaceable when dealing with Special Attackers like Starmie, Alakazam, and Lapras. If it is attacking on the Special side, you can at least switch in Chansey and Paralyze it with Thunder Wave, making fearsome enemies much easier to deal with.

Grass Pokémon are good against Water, Ground, and Rock, and fairly resistant to a couple of other types. So they're pretty good in some situations, but Tangela is nothing special. They appear really late, and don't have stats to rival even Victreebel or Vileplume, and are far inferior to stronger Grass-types like Exeggcutor and Venusaur.
You can only get one this early in Yellow, and Yellow has an added bonus, since that's the only version in which Tangela can learn Vine Whip.
Tangelas are hard to get here, though. They appear extremely infrequently, and it takes a couple of rocks to soften them up to the point where they can be captured.
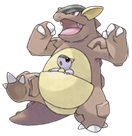
If you like goofy-looking Pokémon, you will definitely like Kangaskhan. Her attacks aren't great, but at least she can use a lot of Hitmonchan's Normal attacks (including the built-in Comet Punch) without having to deal with her general feebleness in other areas. But for a normal Pokémon, Tauros certainly has better stats.
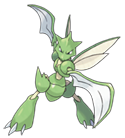
Instead of the Pinsir in Blue, Red players get Scyther (Yellow players can get both). Scyther is part Bug and part Flying, an unfortunate mixture in that it leaves him vulnerable to six different attack types.
He's quick, sturdy and strong on the attack, but like Pinsir comes with no Bug-type attacks. His weaknesses make him a little risky to use under normal circumstances, but he sure looks cool.
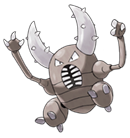
Pinsir, available only in Blue and Yellow, is the strongest of the straight Bug-type Pokémon. This is isn't really notable since Pinsir gets no Bug-type attacks, but still is vulnerable to all four of Bug-type's weaknesses. Pinsir has decent stats, but it is basically a late-to-appear, low-level Normal-type with no STAB and more weaknesses. Not worth the effort to hunt down outside the Pokedex.
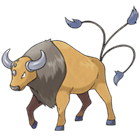
Yet another Safari Zone Pokemon built for competitive battles, rather than in-game battles. Tauros come at a low level, and are extremely difficult to capture, making adding one to your team quite the challenge. Furthermore, they don't learn anything but Normal-type attacks on their own. However, Tauros has a fantastic Attack stat, and is one of the fastest Pokemon around (which means it also has one of the highest critical hit rates around). Awesome Speed and power, combined with its high chance to get critical hits and the sheer power of Body Slam and Hyper Beam make tauros king of competitive battles. It also gets Earthquake and Blizzard, making it a fearsome foe even to Ghost- and Rock-type enemies.
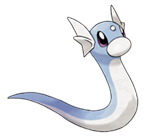
The Dratini family are the only Dragon-type Pokémon in the game. As types go, Dragon gives good defensive bonuses because it has resistances to Fire, Water, Thunder and Grass, and is weak only to Ice. On the downside, there aren't really any Dragon-type attacks for them to take advantage of (except for Dragon Rage, which does 40 damage, no matter what type the user is). Coming so late and at such a low level, Dratini are not much use in-game, but the fully evolved Dragonite can be a real nuisance in competitive matches by using its bulk to set up Agility and abuse Wrap.