No edit summary |
GloverMist (talk | contribs) (Cleanup) |
||
| Line 5: | Line 5: | ||
[[File:AAIME Prosecutors Badge.png|right]] | [[File:AAIME Prosecutors Badge.png|right]] | ||
[[File:AAIME Office Key.png|right]] | [[File:AAIME Office Key.png|right]] | ||
Edgeworth walks towards his office, musing about the previous days. As he opens his office door, he finds that it | Edgeworth walks towards his office, musing about the previous days and having been gone for a month since [[Phoenix Wright: Ace Attorney - Trials and Tribulations/Episode 5: Bridge to the Turnabout|his last case]]. As he opens his office door, he finds that it is unlocked. He enters his office to find... a body. Suddenly, someone emerges behind him with a gun drawn. After a brief conversation, he shoots the framed jacket in the room and leaves. | ||
[[File:AAIME Case 01 Logic 01.png|right]] | [[File:AAIME Case 01 Logic 01.png|right]] | ||
Sometime later, forensics officers have arrived at the scene. Suddenly, a detective bursts in. Anybody who has played an Ace Attorney game before will recognize him as Detective Dick Gumshoe! After a little conversation, Edgeworth will wonder why the crime happened in his office, giving you the '''Crime scene: My office''' logic. Afterwards, Gumshoe will say that '''The office key''' was with him the whole time. You will be introduced to a new mechanic in this game called the logic system. Press {{ds|L}} or the "Logic" icon with {{ds|stylus}} to enter Logic mode, where you must match two pieces of logic that have a connection. | |||
However, if you make a wrong connection your "truth meter" (the green health bar) will decrease, and if it empties, the truth will be lost forever (and the game is over). For now, there are only two pieces of logic. Connect '''Crime scene: My office''' with '''The office key'''. Congratulations! You have connected the first two pieces of logic in the game. Edgeworth will deduce that the murder in his office was no coincidence, but why did the killer pick here | However, if you make a wrong connection, your "truth meter" (the green health bar) will decrease, and if it empties, the truth will be lost forever (and the game is over). For now, there are only two pieces of logic. Connect '''Crime scene: My office''' with '''The office key'''. Congratulations! You have connected the first two pieces of logic in the game. Edgeworth will deduce that the murder in his office was no coincidence, but why did the killer pick here? '''The killer's goal''' is currently unclear.{{-}} | ||
==Investigation== | ==Investigation== | ||
[[File:AAIME Crime01 Scene Notes.png|right]] | [[File:AAIME Crime01 Scene Notes.png|right]] | ||
You can now freely walk around Edgeworth's office with | You can now freely walk around Edgeworth's office with {{ds|neutral|dpad}} or holding the map icon in the direction you wish to move (hold {{ds|B}} or the arrows around the map icon to run) and you can consult Gumshoe by pressing {{ds|Y}} or the "Partner" icon. For now, '''Examine''' the '''Revolver''' that the murderer dropped by approaching it and pressing {{ds|A}} or the "Examine" icon. Gumshoe recognizes it as the guns used by the precinct. | ||
Now, approach to the dead body and '''examine''' it. You will enter a subscreen that allows you a closer look at the crime scene. '''Examine''' the black object next to the body. It's a badge that identifies the body as Detective Buddy Faith; looks like the '''Victim was a detective'''. Now '''examine''' the body itself. The victim was fatally shot once through his abdomen. The body was found at 2:05 AM by Edgeworth. The '''Crime Scene Notes''' will be stored in the Organizer, which Edgeworth will introduce you to, and you can refer to it at any time by pressing {{ds|R}} or the "Organizer" icon to check the evidence you've collected, along with profiles of people you've met thus far. '''Examine''' the toppled files at the top of the screen. Looks like '''Signs of a struggle'''. | Now, approach to the dead body and '''examine''' it. You will enter a subscreen that allows you a closer look at the crime scene. '''Examine''' the black object next to the body. It's a badge that identifies the body as Detective Buddy Faith; looks like the '''Victim was a detective'''. Now '''examine''' the body itself. The victim was fatally shot once through his abdomen. The body was found at 2:05 AM by Edgeworth. The '''Crime Scene Notes''' will be stored in the Organizer, which Edgeworth will introduce you to, and you can refer to it at any time by pressing {{ds|R}} or the "Organizer" icon to check the evidence you've collected, along with profiles of people you've met thus far. '''Examine''' the toppled files at the top of the screen. Looks like '''Signs of a struggle'''. | ||
| Line 20: | Line 20: | ||
Now go into Logic mode and connect '''Revolver''' with '''Victim was a detective'''. Since the revolver is assigned to the detectives of the precinct and the victim is a detective, that means the gun was the victim's! Further examination of the body reveals an empty gun holster! The '''Victim's Revolver''' will be added to the Organizer. '''Examine''' the barrel of the gun to check the chamber. Looks like only one shot was fired from this gun. | Now go into Logic mode and connect '''Revolver''' with '''Victim was a detective'''. Since the revolver is assigned to the detectives of the precinct and the victim is a detective, that means the gun was the victim's! Further examination of the body reveals an empty gun holster! The '''Victim's Revolver''' will be added to the Organizer. '''Examine''' the barrel of the gun to check the chamber. Looks like only one shot was fired from this gun. | ||
Bad Ending 1: If your logic runs out here, Gumshoe thinks that Edgeworth is too tired, | Bad Ending 1: If your logic runs out here, Gumshoe thinks that Edgeworth is too tired, so he takes over. As days go by, the case remains unresolved. | ||
[[File:AAIME crime01a.png|right]] | [[File:AAIME crime01a.png|right]] | ||
Suddenly, someone bursts into the room. He looks like the murderer! After wrongly accusing Edgeworth and Gumshoe of killing "Jim" (which is what he calls his now-late partner Buddy Faith) he introduces himself as Jacques Portsman. After some more conversation, he will request that the officer dusting the framed jacket to take some pictures of him. | Suddenly, someone bursts into the room. He looks like the murderer! After wrongly accusing Edgeworth and Gumshoe of killing "Jim" (which is what he calls his now-late partner Buddy Faith) he introduces himself as Jacques Portsman. After some more conversation, he will request that the officer dusting the framed jacket to take some pictures of him with his former friend. | ||
[[File:AAIME Secret Safe.png|right]] | [[File:AAIME Secret Safe.png|right]] | ||
Now you can '''examine''' the framed jacket that the officer was dusting. Immediately, Edgeworth will notice a contradiction! He will now introduce you to the '''Deduce''' function. '''Highlight''' the '''bullet hole''' on the frame and press | Now you can '''examine''' the framed jacket that the officer was dusting. Immediately, Edgeworth will notice a contradiction! He will now introduce you to the '''Deduce''' function. '''Highlight''' the '''bullet hole''' on the frame and press {{ds|X}} or the "Deduce" icon, then present the '''Victim's Revolver'''. Only one bullet was fired from the gun, so how are there two bullet holes at the crime scene? There could only be '''Another handgun'''! Edgeworth will then remove the frame to reveal a '''Secret Safe'''! This is added to the Organizer. '''Examine''' the panel on the safe. Looks like someone used it and wiped the fingerprints clean! This gives you the '''Wiped fingerprints''' logic, and the '''Secret Safe''' will be updated in the Organizer. | ||
[[File:AAIME Case 01 Logic 03.png|left]] | [[File:AAIME Case 01 Logic 03.png|left]] | ||
[[File:AAIME Case 01 Logic 04.png|left]] | [[File:AAIME Case 01 Logic 04.png|left]] | ||
[[File:AAIME crime01b.png|right]] | [[File:AAIME crime01b.png|right]] | ||
Go into Logic mode and connect '''The killer's goal''' with '''Wiped fingerprints'''. Since the fingerprints on the safe | Go into Logic mode and connect '''The killer's goal''' with '''Wiped fingerprints'''. Since the fingerprints on the safe were wiped off, the murderer might be trying to steal something! This gives you the '''Motive: Theft (?)''' logic. Now connect '''Signs of a struggle''' with '''Motive: Theft (?)'''. The mess of files might be the result of the killer searching the files, not a struggle between the killer and the victim! Gumshoe will rearrange the files with the help of Portsman. | ||
Now '''deduce''' the '''bullet hole''' in the bottom right of the files | Now '''deduce''' the '''bullet hole''' in the bottom right of the files and present the '''Crime Scene Notes'''. The victim was shot in the abdomen, and he was standing at the time based on the bloody handprints, so the bullet hole couldn't have been where the files are! When prompted, select '''The order of the files'''. The files must have been arranged wrongly at the time of the crime. However, Edgeworth says that the files are arranged as he left it, even though the name of the files are in the wrong order. So that means the files are arranged incorrectly by someone else at the time of the murder! | ||
[[File:AAIME Stolen File.png|right]] | [[File:AAIME Stolen File.png|right]] | ||
After rearranging the files, looks like Edgeworth's assumption was right! You will receive the '''Files in | After rearranging the files, looks like Edgeworth's assumption was right! You will receive the '''Files in disarray''' logic. However, there will now be another thing that will catch your eye... '''Examine''' the '''bloody files''' at the bottom right previously concealed by the body, where you'll find the word "Gumshoe" written upside-down in blood! Or, at least, most of it; one of the files is stolen, too! The '''Stolen File''' will be added to the Organizer. | ||
And with that, your investigation is complete! | And with that, your investigation is complete! | ||
| Line 39: | Line 39: | ||
==Confrontation== | ==Confrontation== | ||
Now Portsman will once again accuse Gumshoe of killing Faith. Edgeworth decides to cross-examine Portsman, as done in court. Gumshoe will ask how he does it. If you're an Ace Attorney veteran, you should know how to do this, so pick '''Maybe some other time'''. If this is your first time playing | Now Portsman will once again accuse Gumshoe of killing Faith. Edgeworth decides to cross-examine Portsman, as done in court. Gumshoe will ask how he does it. If you're an Ace Attorney veteran, you should know how to do this, so pick '''Maybe some other time'''. If this is your first time playing an Ace Attorney game, pick '''Might as well''', and Edgeworth will explain how it works to Gumshoe (scroll through statements with {{ds|neutral|dpad}} or the arrow icons; present evidence on statements by pressing {{ds|R}} or the "Present" icon, selecting evidence that contradicts the statement with {{ds|neutral|dpad}} or {{ds|stylus}}, then pressing {{ds|X}} or the "Present" icon again; press a statement for more info by pressing {{ds|L}} or the "Press" icon). | ||
==Argument: Jacques Portsman== | ==Argument: Jacques Portsman== | ||
| Line 54: | Line 54: | ||
==Rebuttal: Mr. Portsman's Logic== | ==Rebuttal: Mr. Portsman's Logic== | ||
Present the '''Stolen File''' at '''statement 4'''. If Gumshoe | Present the '''Stolen File''' at '''statement 4'''. If Gumshoe stole the file, he could have seen his name! The missing letters in Gumshoe's name also mean that the file was stolen after the murder! | ||
Mr. Portsman is left speechless, but he still has something up his sleeve! He calls for a young lady of the | Mr. Portsman is left speechless, but he still has something up his sleeve! He calls for a young lady of the building's security to be escorted here. Gumshoe starts to get mad at this. Looks like it's none other than Maggey Byrde, the security guard on shift that night. (Phoenix Wright fans should recognize her too!) She could have used the master key that opens all the building's doors to get in! It's time for another cross-examination. | ||
Who's Maggie Byrde? Without spoiling anything, play | Who's Maggie Byrde? Without spoiling anything, play [[Phoenix Wright: Ace Attorney - Justice For All]] and [[Phoenix Wright: Ace Attorney - Trials and Tribulations|Trials and Tribulations]] to know the story behind her bad luck-stricken character. | ||
Bad Ending 3: If you can't counter this argument, Portsman will arrest Gumshoe on the spot, leaving Edgeworth in despair. | Bad Ending 3: If you can't counter this argument, Portsman will arrest Gumshoe on the spot, leaving Edgeworth in despair. | ||
| Line 77: | Line 77: | ||
==Rebuttal: Reason for Suspicion== | ==Rebuttal: Reason for Suspicion== | ||
'''Press''' the '''first statement'''. Maggey will say that she wasn't able to use the master key! Select '''Ask for more details''' when given the chance. She will say that the master key wasn't at the booth | '''Press''' the '''first statement'''. Maggey will say that she wasn't able to use the master key! Select '''Ask for more details''' when given the chance. She will say that the master key wasn't at the booth at 1 AM. Maggey will say that the key disappeared at 1 AM then magically reappeared after that! Portsman will add a statement into his testimony: | ||
*Her intent? From the messed-up shelves to the wiped-down safe, I'd say thievery. | *Her intent? From the messed-up shelves to the wiped-down safe, I'd say thievery. | ||
Latest revision as of 10:13, 20 September 2020
Prologue[edit]


Edgeworth walks towards his office, musing about the previous days and having been gone for a month since his last case. As he opens his office door, he finds that it is unlocked. He enters his office to find... a body. Suddenly, someone emerges behind him with a gun drawn. After a brief conversation, he shoots the framed jacket in the room and leaves.
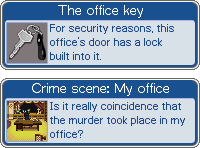
Sometime later, forensics officers have arrived at the scene. Suddenly, a detective bursts in. Anybody who has played an Ace Attorney game before will recognize him as Detective Dick Gumshoe! After a little conversation, Edgeworth will wonder why the crime happened in his office, giving you the Crime scene: My office logic. Afterwards, Gumshoe will say that The office key was with him the whole time. You will be introduced to a new mechanic in this game called the logic system. Press ![]() or the "Logic" icon with
or the "Logic" icon with ![]() to enter Logic mode, where you must match two pieces of logic that have a connection.
to enter Logic mode, where you must match two pieces of logic that have a connection.
However, if you make a wrong connection, your "truth meter" (the green health bar) will decrease, and if it empties, the truth will be lost forever (and the game is over). For now, there are only two pieces of logic. Connect Crime scene: My office with The office key. Congratulations! You have connected the first two pieces of logic in the game. Edgeworth will deduce that the murder in his office was no coincidence, but why did the killer pick here? The killer's goal is currently unclear.
Investigation[edit]

You can now freely walk around Edgeworth's office with ![]() or holding the map icon in the direction you wish to move (hold
or holding the map icon in the direction you wish to move (hold ![]() or the arrows around the map icon to run) and you can consult Gumshoe by pressing
or the arrows around the map icon to run) and you can consult Gumshoe by pressing ![]() or the "Partner" icon. For now, Examine the Revolver that the murderer dropped by approaching it and pressing
or the "Partner" icon. For now, Examine the Revolver that the murderer dropped by approaching it and pressing ![]() or the "Examine" icon. Gumshoe recognizes it as the guns used by the precinct.
or the "Examine" icon. Gumshoe recognizes it as the guns used by the precinct.
Now, approach to the dead body and examine it. You will enter a subscreen that allows you a closer look at the crime scene. Examine the black object next to the body. It's a badge that identifies the body as Detective Buddy Faith; looks like the Victim was a detective. Now examine the body itself. The victim was fatally shot once through his abdomen. The body was found at 2:05 AM by Edgeworth. The Crime Scene Notes will be stored in the Organizer, which Edgeworth will introduce you to, and you can refer to it at any time by pressing ![]() or the "Organizer" icon to check the evidence you've collected, along with profiles of people you've met thus far. Examine the toppled files at the top of the screen. Looks like Signs of a struggle.
or the "Organizer" icon to check the evidence you've collected, along with profiles of people you've met thus far. Examine the toppled files at the top of the screen. Looks like Signs of a struggle.
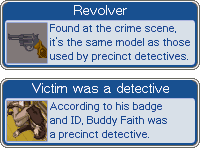

Now go into Logic mode and connect Revolver with Victim was a detective. Since the revolver is assigned to the detectives of the precinct and the victim is a detective, that means the gun was the victim's! Further examination of the body reveals an empty gun holster! The Victim's Revolver will be added to the Organizer. Examine the barrel of the gun to check the chamber. Looks like only one shot was fired from this gun.
Bad Ending 1: If your logic runs out here, Gumshoe thinks that Edgeworth is too tired, so he takes over. As days go by, the case remains unresolved.
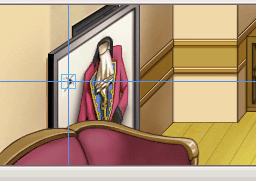
Suddenly, someone bursts into the room. He looks like the murderer! After wrongly accusing Edgeworth and Gumshoe of killing "Jim" (which is what he calls his now-late partner Buddy Faith) he introduces himself as Jacques Portsman. After some more conversation, he will request that the officer dusting the framed jacket to take some pictures of him with his former friend.

Now you can examine the framed jacket that the officer was dusting. Immediately, Edgeworth will notice a contradiction! He will now introduce you to the Deduce function. Highlight the bullet hole on the frame and press ![]() or the "Deduce" icon, then present the Victim's Revolver. Only one bullet was fired from the gun, so how are there two bullet holes at the crime scene? There could only be Another handgun! Edgeworth will then remove the frame to reveal a Secret Safe! This is added to the Organizer. Examine the panel on the safe. Looks like someone used it and wiped the fingerprints clean! This gives you the Wiped fingerprints logic, and the Secret Safe will be updated in the Organizer.
or the "Deduce" icon, then present the Victim's Revolver. Only one bullet was fired from the gun, so how are there two bullet holes at the crime scene? There could only be Another handgun! Edgeworth will then remove the frame to reveal a Secret Safe! This is added to the Organizer. Examine the panel on the safe. Looks like someone used it and wiped the fingerprints clean! This gives you the Wiped fingerprints logic, and the Secret Safe will be updated in the Organizer.
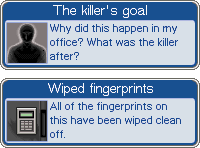
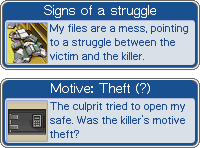
Go into Logic mode and connect The killer's goal with Wiped fingerprints. Since the fingerprints on the safe were wiped off, the murderer might be trying to steal something! This gives you the Motive: Theft (?) logic. Now connect Signs of a struggle with Motive: Theft (?). The mess of files might be the result of the killer searching the files, not a struggle between the killer and the victim! Gumshoe will rearrange the files with the help of Portsman.
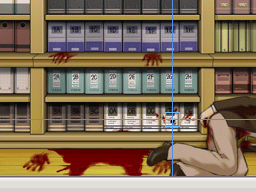
Now deduce the bullet hole in the bottom right of the files and present the Crime Scene Notes. The victim was shot in the abdomen, and he was standing at the time based on the bloody handprints, so the bullet hole couldn't have been where the files are! When prompted, select The order of the files. The files must have been arranged wrongly at the time of the crime. However, Edgeworth says that the files are arranged as he left it, even though the name of the files are in the wrong order. So that means the files are arranged incorrectly by someone else at the time of the murder!

After rearranging the files, looks like Edgeworth's assumption was right! You will receive the Files in disarray logic. However, there will now be another thing that will catch your eye... Examine the bloody files at the bottom right previously concealed by the body, where you'll find the word "Gumshoe" written upside-down in blood! Or, at least, most of it; one of the files is stolen, too! The Stolen File will be added to the Organizer.
And with that, your investigation is complete!
Bad Ending 2: If you run out of logic here, Portsman claims he found the culprit and forces Edgeworth to vacate the crime scene.
Confrontation[edit]
Now Portsman will once again accuse Gumshoe of killing Faith. Edgeworth decides to cross-examine Portsman, as done in court. Gumshoe will ask how he does it. If you're an Ace Attorney veteran, you should know how to do this, so pick Maybe some other time. If this is your first time playing an Ace Attorney game, pick Might as well, and Edgeworth will explain how it works to Gumshoe (scroll through statements with ![]() or the arrow icons; present evidence on statements by pressing
or the arrow icons; present evidence on statements by pressing ![]() or the "Present" icon, selecting evidence that contradicts the statement with
or the "Present" icon, selecting evidence that contradicts the statement with ![]() or
or ![]() , then pressing
, then pressing ![]() or the "Present" icon again; press a statement for more info by pressing
or the "Present" icon again; press a statement for more info by pressing ![]() or the "Press" icon).
or the "Press" icon).
Argument: Jacques Portsman[edit]

- Detective Gumshoe. You stole Jim's gun from him and shot him dead.
- Further, you messed up the files to look like you have committed theft instead.
- That's when you moved Jim's body that was sitting in front of the bookshelf!
- But thanks to that, you didn't notice the bloody letters his body was hiding.
- And it will be by his final words that you will be brought to justice.
Rebuttal: Mr. Portsman's Logic[edit]
Present the Stolen File at statement 4. If Gumshoe stole the file, he could have seen his name! The missing letters in Gumshoe's name also mean that the file was stolen after the murder!
Mr. Portsman is left speechless, but he still has something up his sleeve! He calls for a young lady of the building's security to be escorted here. Gumshoe starts to get mad at this. Looks like it's none other than Maggey Byrde, the security guard on shift that night. (Phoenix Wright fans should recognize her too!) She could have used the master key that opens all the building's doors to get in! It's time for another cross-examination.
Who's Maggie Byrde? Without spoiling anything, play Phoenix Wright: Ace Attorney - Justice For All and Trials and Tribulations to know the story behind her bad luck-stricken character.
Bad Ending 3: If you can't counter this argument, Portsman will arrest Gumshoe on the spot, leaving Edgeworth in despair.
Argument: Jacques Portsman[edit]

- It's pretty obvious that Ms. Byrde snuck into your room using the master key.
- I mean if Detective Gumshoe isn't the one who opened the door...
- ...then that leaves Ms. Byrde as our prime suspect.
- On top of which, she knows our good detective, doesn't she?
- Making it all the more probable that she was the one who faked the dying message.

After this, the Master Key will be added to the Organizer.
Rebuttal: Reason for Suspicion[edit]
Press the first statement. Maggey will say that she wasn't able to use the master key! Select Ask for more details when given the chance. She will say that the master key wasn't at the booth at 1 AM. Maggey will say that the key disappeared at 1 AM then magically reappeared after that! Portsman will add a statement into his testimony:
- Her intent? From the messed-up shelves to the wiped-down safe, I'd say thievery.
Present the Secret Safe at this statement. Only prosecutors know about the safe, so Maggey couldn't have been the thief! She couldn't have found it by accident either, as, going by the bookshelf and the safe, the thief knew exactly where to look. Looks like Portsman is cornered here. However, he suddenly claims that he told Faith about the safes, and comes up with a new theory: Faith was the thief, and Maggey was just going to stop him, being a security guard. The victim stole the key, went into the office, got shot by Maggey in self-defense, and Maggey took the key back with her! Portsman will thus force Edgeworth and Gumshoe out of the crime scene.
You can choose to save if you wish.
Bad Ending 4: Between this second argument and fourth argument on "Part 1-2 - End", Portsman arrests Byrde, claiming victory for Jim's soul. Before Edgeworth can speak, Portsman says that no one would listen to him as the case is closed.
