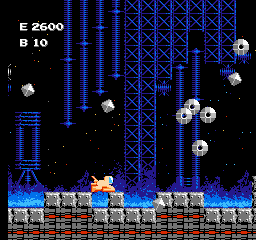
You will almost immediately be attacked by the straight flying rotating cubes. Before they even finish, the slowly retreating enemies will appear in two sets. They will be followed up with one set of wave-motion enemies.
Energy items will begin to appeared, scatted around the platforms and boulders, followed by some bomb items. No enemies will attack you, so just focus on staying safe while you collect the items.
After one low energy item appears, another energy item will be found near the bottom. At that time, you will be attacked by a variety of enemies, including rotating cubes, fast retreating enemies, triangular drifters, followed by more fast retreating enemies, and then more cubes.
While the second wave of cubes attack, you will encounter hatch enemies, followed almost immediately by a large two beam-ship. Slip in between the beams and destroy it before Enterprise-shaped enemies appear. As soon as you finish them off, another large twin-beam ship will appear.
After the second ship, wave motion enemies will appear, making large sweeps. Then barriers will appear amidst lug-wrench enemies. Then another set of wave motion enemies will show up, just before two low energy items appear. When you reach the items, another twin-beam ship will arrive, flying in below the first boulder.
Beyond the second boulder, slow retreating enemies will show up. This is followed by barriers blocking access to four energy items between platforms.
After some boulders, a set of fast retreating enemies will appear before a group of lug-wrench enemies. You will see two energy items before hatch enemies appear. Enterprise enemies will appear before you see four barriers surrounding one energy item.
After you collect the energy item, two twin-beam ships will appear. Concentrate on destroying the lower one before a wave of lug-wrench enemies appear. Some slow retreating enemies will arrive as well. After a very long period of nothing, you will finally reach the entrance.
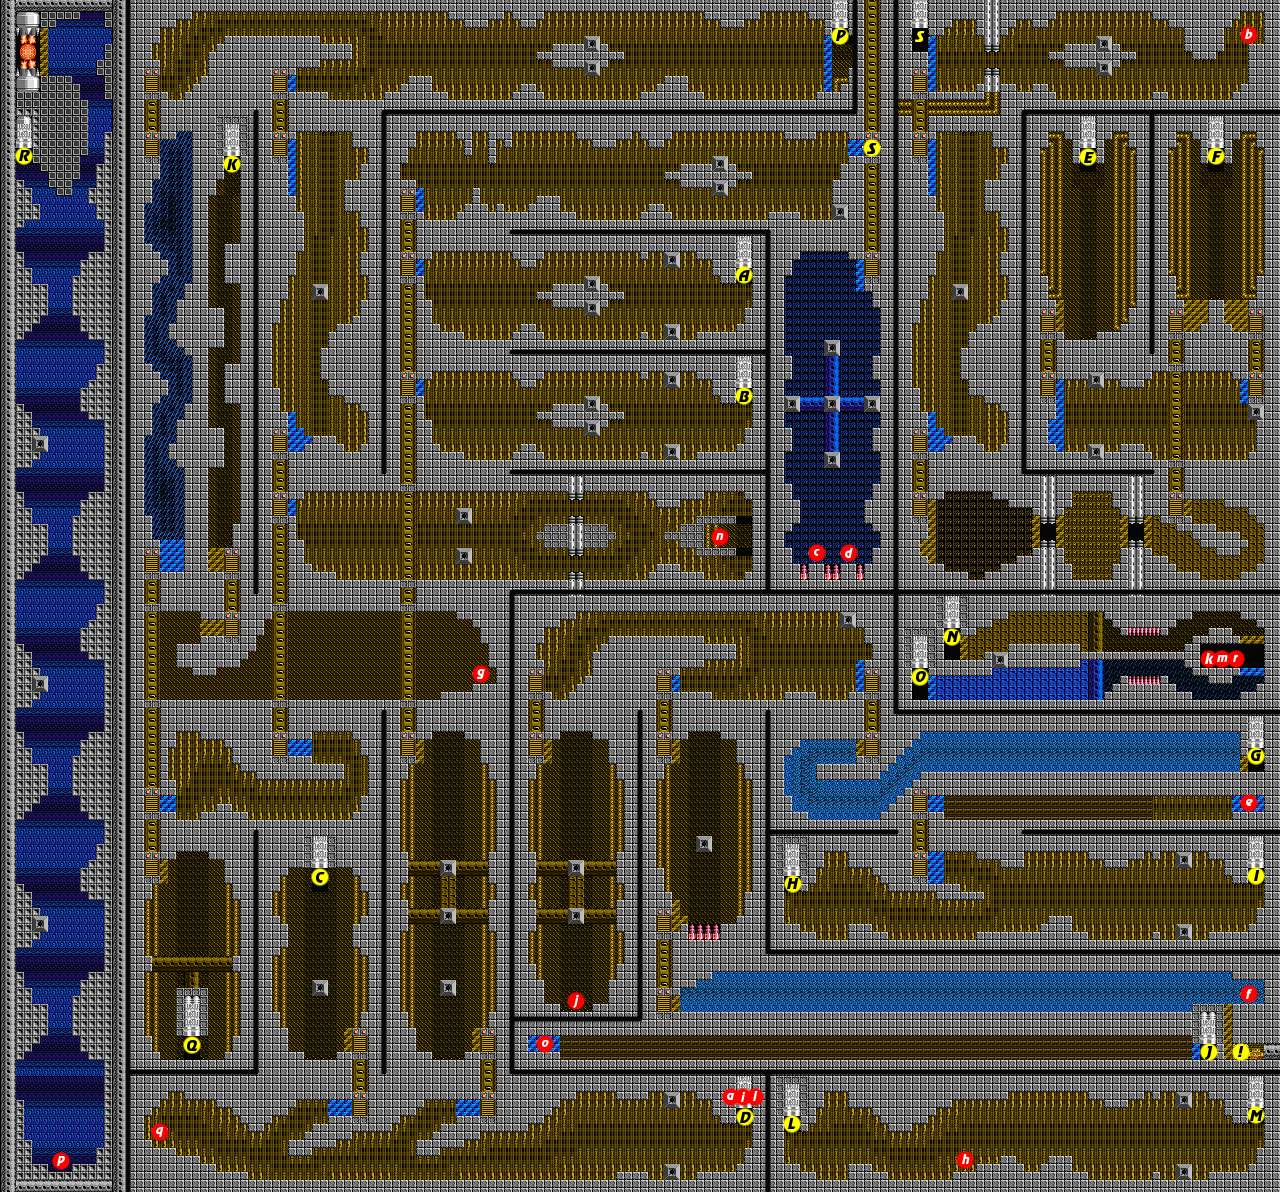
Fortress interior
This fortress is the largest in the game and, as you might expect, will take considerable effort to clear. Furthermore, if you attempt to go from the core to the Lightspeeder without clearing the path first, you may have difficulty making your escape before the fortress blows up. Choose your path wisely.
Start by exiting to the left, and remove the blue robot. Take either path to the left, then remove the blue robot and energy-wave shooter on the ceiling. At that point, a red clone will appear. Bomb it and continue. Make your way to the elevator in the lower left.
Take the elevator down two floors, and exit to the right. You may have some difficult among all the bullets. Clear out the blue robots and take either path around. As you get close to chute B, watch out for a flame orb to appear. Lure it away from the chute, then watch out for the pink blob that leaves harmful waste behind. Go up chute B.
You will arrive in the upper right corner of the fortress. Head left, take out the blue robots, use either path, and continue until you see the mini-core. Destroy and proceed to the elevator in the back. (Note that the chute here will return you to the starting point.)
Ride the elevator down, and step out. Watch out for the flame orb that will appear as you fight the blue robots. Destroy it before you proceed to drop to the bottom. Stay to the left as you fall, and duck into the elevator before the gray clone waiting for you at the bottom has a chance to attack.
Take the elevator down, step out, and destroy the enemies before the mini-core. Then destroy the first mini-core and proceed right. You may wish to bomb the hopping sentry that waits between the mini-cores, and then bomb the second mini-core. Destroy the two blue robots before luring the purple clone out and destroying him. Then fly up to the elevator above.
Ride the elevator up, and take out the four blue robots. But instead of floating up to the top of the room, cross over to the right, and take the next elevator back down. Exit the elevator, and head to the left. Shoot the cubes and ignore the robots and cannons as you fly to the elevator in the back.
Take this elevator up, and begin floating up. There is a gray clone that will attack you on your way to chute E at the top. Avoid him if you can out maneuver him, or simply take him out, then head up chute E.
After you arrive, head down the small corridor at the bottom. Eventually, you will encounter a very large robot shooting large explosions at you. Alternate between shooting your bombs and your regular guns to destroy this robot as quickly as possible before continuing on to the left.
Take the elevator down, drop down to the floor, and head to the chute to the left. Stay low in anticipation of the purple clone that will arrive to attack you. Bomb it to remove it and continue left. Rise up chute H.
As soon as you arrive, you should see a flame orb to your left. Start heading up and to the right (shoot the orb if you have plenty of bombs). Get ready to fight with another purple clone. Defeat it and make your way to chute I at the end.
From here, the faster route is to take the upper path to chute N, but the recommended strategy is to take the lower route to chute O so that you have an opportunity to clear out your escape path before the fortress start to self destruct. Therefore, head down and start taking the lower path to the left, clearing the single blue robot before flying up chute O.
You will arrive at the left end of another small low corridor with a giant robot in it. Defeat it the same was you as did the first one, and then continue on and fly up chute J.
When you arrive, begin flying up. Clear out the two blue robots on your way to the elevator above. Take the elevator up, destroy the three blue robots on the ceiling and head right. Take out the flame orb that you will encounter over the lower elevator. Continue to the right to the farther elevator in the back, avoiding or destroying the hopping sentry if possible.
Take the elevator down, and fly down and around to the upper pathway on the right. As you fly through here, stay low to be on guard for tiny saucers that zip left and then right. These saucer enemies will always provide items like butterflies, but they are much harder to hit. You will encounter two clones. Ignore the saucers, but destroy the clones as quickly as possible, and then proceed to chute G in the back.
When you arrive, begin flying left. You will soon encounter two clones and a hopping sentry near simultaneously. Do your best to destroy all three as quickly as possible before continuing on. Slip past the wall cannon and take the elevator up. After you get off, climb the narrow tunnel on the right, shooting out the two blue robots on the way to chute K. This will take you back to the place you started from in step 11. This time, instead of going down, go up and to the left to reach chute N.
From your arrival, head around the wall to the left. Take either the upper or lower path, and destroy the blue robot and mini-core that you encounter, then continue left. Pass the cannons and stay high to avoid dealing with the hopping sentry, and reach the elevator.
Take the elevator up, and exit out. Start flying up and be careful of the flame orb that awaits you mid-way. Reach the top and hop in the elevator.
Take the elevator up to the next room, and head to the right past the blue robot. Another small saucer enemy will zip to the left. As you pass it, a clone will appear. Deal with the clone and continue right. Take either path, but stay low after in order to duck below the two pink blobs and fire orb that stand between you and the chute. When you reach the end, fly up chute P.
You are now at the bottom of a very long shaft, and at the top awaits the core. Begin ascending to the top. Needless to say, you will encounter lots of enemies on your way up. Rather than recount all of them, simply be prepared for everything. Go slow to ensure your safety and stop to clear any menaces that you encounter. You will meet at least four clones. Stick to the outer edges so they don't take you by surprise and catch you in the center. When the path branches, head to the right to reach the core. Destroy the blue robots and take out the wall cannons if you can afford to before attacking the core.
As soon as the core is destroyed, begin moving down immediately to the branch in the tunnel, and take the left path the chute R. This will return you once more to the familiar location from step 11. Once again, you will take the lower path to chute O. If you already cleared this region out, you should be able to fly (don't walk) quickly to chute J.
Hold up so that you begin flying up through this passage as soon as you arrive. Make it to the top and head up through the elevator. Exit the elevator and head right. This time when you are able to drop to the floor, double back and head to the left and go down the first elevator.
Start dropping down to the bottom of this room. You will encounter a flame orb and a clone on your way down but ignore them both and go straight to the elevator. Take the elevator down and head to the right. If you're making good time, then the lights should not start flickering until after you exit the elevator. The only thing standing between you and the escape Lightspeeder is a clone and a hopping sentry. Defeat the clone with a bomb, and fly up to the ceiling to completely avoid the sentry (it will fire a few shots at you as you fly over.) When you reach the end of the passage, drop down and shoot out the walls that block your access the Lightspeeder, and hop on to escape the destruction of the final fortress.