You begin facing the fast retreating circular enemies. After they leave, one barrier will be blocking the left side of a passage containing three energy items. Collect them and destroy the barriers on the other side to collect two more energy items.
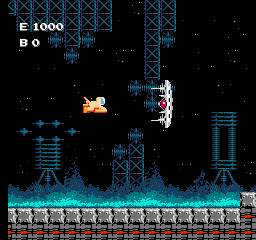
Another wave of fast retreating enemies will appear, and then you will face a new enemy, a large flat ship that comes in from the right, stops around midscreen and fires twin beams to the left. You'll need to position yourself between the beams in order to shoot at it and destroy it.
After two barriers, you will encounter four waves of different enemies, including the straight flying rotating cubes, the slower drifting triangular ships, the Enterprise-shaped enemies, and the lug-wrench shaped enemies.
Between two sets of wave-motion enemies, a fleet of slower retreating ships will attack you as well. Carefully collect the energy item near the bottom of the screen.
When you see a barrier near the top of the screen, another twin-laser ship will appear. Stay between the beams and destroy it. Then collect the energy item below.
Another set of slow retreating enemies will appear, then an energy item will appear in the space between two platforms as a set of wave enemies appear.
Finally, three sets of fast retreating circular enemies will appear to attack you before you arrive at the entrance.
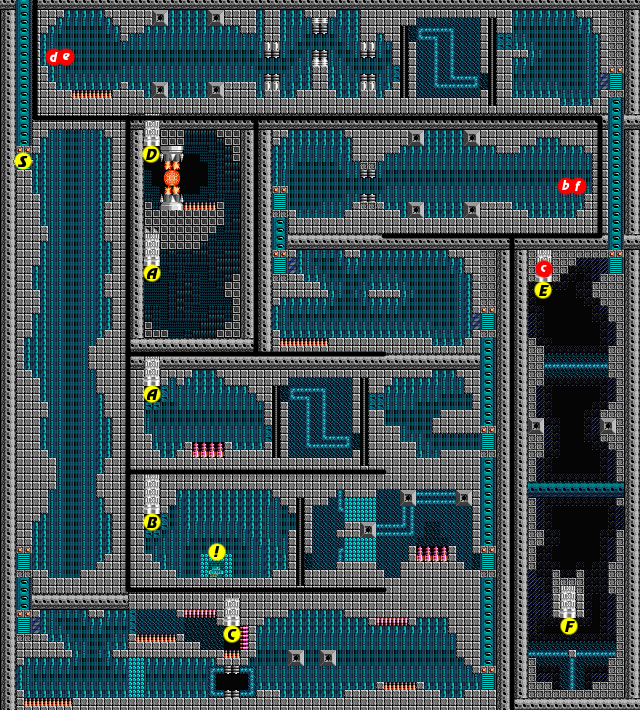
Fortress interior
As complex as this fortress may appear, you don't actually need to explore very much of it to succeed. Fall down to the bottom of the room that you arrive in. Shoot out any of the robots that you can as you pass, and take the elevator down to the next room.
When you arrive, ignore the wall cannon on the left below you, and head to the right. Drop down to the lower level, and watch out for the hopping turret sentry. Destroy it, and then proceed to the right. Drop to the floor and shoot the lower beam shooter, then fly below the two square cannons, and avoid the two flame shooting orbs as you make your way to the elevator on the right.
Take the elevator up two floors. You will see a clone waiting to attack you. Lure the clone down to your level and then bomb it. Then bomb the wall cannon behind it. Pass the cylinder, avoid the two flame orbs that follow and pass the next cylinder. Then fly over the floor magnets and past the two robots to chute A.
Pass through chute A, and when you arrive, be prepared to dodge the orb and hopping sentry that await you. Fly up to the chamber above and take out at least the lower of the two wall cannons. If you have more than four bombs, you can bomb them. Then take out the main core.
When the lights go out, you've been trained to head beyond the core and take whatever path you find there, but that would be a big mistake in this case. Instead, simply fly back down to chute A and head through. When you return to the previous room, fly all the way back to the elevator on the right. This path should be clear of enemies, and much safer as a result.
Take the elevator down one flight, and head to the left. Avoid the shots fired by the square cannons and blast out a path through the lower barrier. Pass the cylinder, and shoot your way to the escape Lightspeeder. Ignore any of the enemies waiting beyond the speeder and hop in.