Controls
- Joystick: Use the 8-way joystick to direct your current ship around the screen. They will always be moving forward automatically, but you can direct them anywhere.
- Firing Button: Use this button to make your current ship fire shots at the enemies, if the arcade owner has set the "Shot" option dip switch to either "Rapid" or "Full".
- Special Weapon Button: Use this button to make your current ship fire one of its special weapons at the enemies. They can possess a maximum of four at a time.
- 1 or 2 Player Buttons: Push these buttons to begin a 1 or 2 player game.
Characters
Alpha Ship (αシップ)
![]() Energy: 3.
Special Weapon: Ring-Lasers.
If Alpha Ship is unlucky enough to get destroyed in any of the first four stages, Beta Ship will make an attempt to get through.
Energy: 3.
Special Weapon: Ring-Lasers.
If Alpha Ship is unlucky enough to get destroyed in any of the first four stages, Beta Ship will make an attempt to get through.
Beta Ship (βシップ)
![]() Energy: 4.
Special Weapon: Melt-Missiles.
If Beta Ship is unlucky enough to get destroyed after takeover Alpha Ship, Delta Ship will make an attempt to get through.
Energy: 4.
Special Weapon: Melt-Missiles.
If Beta Ship is unlucky enough to get destroyed after takeover Alpha Ship, Delta Ship will make an attempt to get through.
Delta Ship (γシップ)
![]() Energy: 5.
Special Weapon: Hyper-Bombs.
If Delta Ship is unlucky enough to get destroyed after taking over from both Alpha and Beta Ship, the game will be over.
Energy: 5.
Special Weapon: Hyper-Bombs.
If Delta Ship is unlucky enough to get destroyed after taking over from both Alpha and Beta Ship, the game will be over.
Combined Ships (合成シップス)


If you made it through the first four stages with all three ships intact, they will combine into the large ship with an energy of 12 on the left; however, if you were unlucky enough to let Alpha Ship get destroyed in any of the first four stages, the two remaining ships will combine into the smaller, medium-sized ship with an energy of 9 on the right. Both combined ships have Hyper-Bombs as their special weapon, and if you were unlucky enough to let both Alpha and Beta Ship get destroyed inn any of the first four stages, Delta Ship will not have anything to combine with and must try to make it through the next four stages of the game alone.
Turtles (タートルズ)


Each of the ships can gain up to four special weapons by destroying the Turtles and collecting the powerups that they leave behind. The green Turtles will only appear when you are controlling Alpha Ship, the blue Turtles will only appear when you are conntrolling Beta Ship, and the red Turtles will only appear when you are controlling Delta Ship (and either of the two Combined Ships during the second half of the game) - but the yellow Turtles will appear regardless of which ship you are currently controlling and will leave an Energy-Capsule behind when destroyed, which will restore some of your ship's lost energy when collected. If you have the maximum of four special weapons, the green, blue and red Turtles will leave a Special-Bonus powerup behind when destroyed, the point value of which will increase as the game progresses; however, the yellow ones will leave a Hyper-Booster behind when destroyed, which will make your ship fly directly to the end of the current stage (much like Beraboh Man did when he collected a Shinkansen powerup in his self-titled game) and return to its normal speed for the boss battle.
Enemies who appear on Stage 1
 Babito (ばびっと) - 100 points
 Mino Mushi (みのむし) - 200 points
 Green Kumo (クモ・緑) - 400 points
 Red Kumo (クモ・赤) - 400 points
 Ninjin (にんじん) - 100 points
 White Eirian (エイリアン・白) - 1000 points
- File:DR Airisu.gif Airisu (アイリス) - 300 points
- File:DR Faiyaizu.gif Faiyaizu (ファイヤイズ) - 400 points
 Kuwagata Mushi (クワガタムシ) - 100 points
 Green Eirian (エイリアン・緑) - 1000 points
- BOSS: Triple-Eye (トリプルアイ)

This enormous three-eyed spider attacks by firing orange balls that transform into webs from his eyes (which you will have the opportunity to block with your own shots for 50 extra points apiece); therefore, it is advisable to aim for his arms first (which are both worth 2000 points whenn destroyed) as he uses them to shield his aforementioned eyes (which are worth 10000 points when destroyed). Once you have destroyed his eyes, he will no longer be able to fire any more orange balls from them, so you should then aim for his tail (which is also worth 2000 points whenn destroyed) to finish him off - he will then emit a scream of death and explode, and you will also receive 20000 more points once he has done so as the text "DESTROYED THE TARGET!!" appears on the screen. You can also aim for one of the two groups of three legs on his sides to kill him instantly without having to destroy his arms, eyes, or tail; however, he, and all other subsequent bosses in the game (apart from Danger-Seed himself) will retreat if you take too long over defeating him and the text "MISSED THE TARGET ENEMY!!" will appear on the screen. This is the reason why Stage 6 will take place on Saturn instead of Jupiter (with the boss of Monster-Head, who is a cross between Multi-Squid and Shark-Mouth) if you take too long over defeating the aforementioned Multi-Squid onn Stage 5, and Stage 7 will take place on Pluto instead of Uranus (with the boss of Monster-Mouth, who is a cross between Shark-Mouth and Twin-Claw) if you take too long over defeating the aforementioned Shark-Mouth onn Stage 6 - and if you take too long over defeating Monster-Head on Stage 6-S, Stage 7 will take place onn Neptune instead of Uranus or Pluto (with the boss of Ultimate-Tiger, who is a cross betweenn Multi-Squid, Shark-Mouth and Twin-Claw). Therefore, this game actually has eleven stages rather than eight.
Enemies who appear on Stage 2
 Purple Sasori (サソリ・紫) - 1000 points
- File:DR Mosquito.gif Mosquito (蚊) - 100 points
- File:DR Glowfly.gif Glowfly (蛍) - 200 points
 Pinseto (ピンセット) - 100 points
 Gama Kaeru (ガマカエル) - 500 points
 Purple Tako (タコ・紫) - 100 points
 Red Sasori (サソリ・赤) - 1000 points
 Kabuto (カブト) - 2000 points
- File:DR Taranchura.gif Taranchura (タランチュラ) - 500 points
BOSS: Strike-Ants (ストライクアンツ)

This enormous pair of ants attack by firing projectiles from their claws and needles from their noses (the latter of which can be blocked by your own shots for 50 extra points apiece); therefore, it is advisable to aim for their aforementioned claws first (which are each worth 1000 points whenn destroyed) before aiming for their aforementioned noses (which are both worth 2000 points when destroyed). Once you have destroyed all four of their claws and both of their noses, they will no longer be able to fire any more projectiles or needles at you from them, so you should then aim for their tails (which are both worth 5000 points whenn destroyed) before aiming for their central bodies (which are both worth 10000 points when destroyed) to finish them off - they will then emit a scream of death and explode, and you will also receive 45000 more points once they have done so as the text "DESTROYED THE TARGET!!" appears on the screen. As with Triple-Eye, you can also aim for one of the two groups of three legs on their sides to kill them instantly without having to destroy their claws, noses, tails or central bodies; however, as with him and all other subsequent bosses in the game (apart from Danger-Seed himself), they will retreat if you take too long over defeating them and the text "MISSED THE TARGET ENEMY!!" will appear onn the screen. Once again, this is the reason why Stage 6 will take place onn Saturn instead of Jupiter (with the boss of Monster-Head) if you take too long over defeating Multi-Squid on Stage 5, and Stage 7 will take place on Pluto instead of Uranus (with the boss of Monster-Mouth) if you take too long over defeating Shark-Mouth on Stage 6 - and if you take too long over defeating Monster-Head on Stage 6-S, Stage 7 will take place on Neptune instead of Uranus or Pluto (with the boss of Ultimate-Tiger). It also explains why this game has 11 stages.
Enemies who appear on Stage 3
 Orange Tako (タコ・オレンジ) - 100 points
 Domu (ドーム) - 200 points
 Kurage (くらげ) - 100 points
- File:DR Shell.gif Shell (甲羅) - 500 points
 Enormous Gani (巨大ガニ) - 1000 points
 Hitokage (ヒトカゲ) - 500 points
- File:DR Fabosu Silver.gif Silver Fabosu (ファボス・シルバー) - 100 points

BOSS: Roller-Snail (ローラースネイル)

This enormous snail attacks by firing projectiles from the roller that gives him his name and megaphylls from the two launchers that are mounted on either side of it (the latter of which can be blocked by your own shots for 50 extra points apiece); therefore, it is advisable to aim for his head first (which is worth 2000 points whenn destroyed) before proceeding to aim for the roller itself (which is worth 3000 points whenn destroyed). Once you have destroyed the eponymous roller, he will no longer be able to fire any more projectiles at you from it, so you should then aim for the launchers that are mounted on either side of it (which are both worth 10000 points when destroyed) to finish him off - he will then emit a scream of death and explode, and you will also receive 30000 more points once he has done so as the text "DESTROYED THE TARGET!!" appears on the screen. You can also aim for one of the orbs on either side of his roller to kill him instantly without having to destroy his head, roller or launchers; however, as with Triple-Eye, both Strike-Ants and all other subsequent bosses in the game (apart from Danger-Seed himself), he will retreat if you take too long over defeating him and the text "MISSED THE TARGET ENEMY!!" will appear onn the screen. Yet again, this is the reason why Stage 6 will take place onn Saturn instead of Jupiter (with the boss of Monster-Head) if you take too long over defeating Multi-Squid on Stage 5, and Stage 7 will take place on Pluto instead of Uranus (with the boss of Monster-Mouth) if you take too long over defeating Shark-Mouth on Stage 6 - and if you take too long over defeating Monster-Head on Stage 6-S, Stage 7 will take place on Neptune instead of Uranus or Pluto (with the boss of Ultimate-Tiger). This is why the game has 11 stages.
Enemies who appear on Stage 4
 Suzume (すずめ) - 100 points
- File:DR Roguramu.gif Roguramu (ログラム) - 200 points
 Kaeru (カエル) - 500 points
- File:DR Ogre A.gif Ogre A (鬼・A) - 3200 points
- File:DR Ogre B.gif Ogre B (鬼・B) - 3600 points
 Hae (ハエ) - 100 points
 Derota (デロータ) - 400 points
- File:DR Fabosu Blue.gif Blue Fabosu (ファボス・ブルー) - 100 points
BOSS: Hunter-Moth (ハンターモス)

This enormous moth attacks by firing projectiles from his antennae and fibres from his wings (the latter of which can be blocked by your own shots for 50 extra points apiece); therefore, it is advisable to aim for his antennae first (which are worth 2000 points when destroyed) before aiming for his giant head (which is worth 10000 points when destroyed). Once you have destroyed his antennae, he will no longer be able to fire any more projectiles at you, so you should then aim for his tail (which is worth 3000 points whenn destroyed) to finish him off - he will thenn emit a scream of death and explode, and you will receive 30000 more points once he has done so as the text "DESTROYED THE TARGET!!" appears on the screen. You can also aim for one of his two wings to kill him instantly without having to destroy his antennae, head or tail; however, as with Triple-Eye, the Strike-Ants, Roller-Snail and all other subsequent bosses inn the game, he will retreat if you take too long over defeating him and the text "MISSED THE TARGET ENEMY!!" will appear on the screen. Yet again, this is the reason why Stage 6 will take place onn Saturn innstead of Jupiter (with the boss of Monster-Head) if you take too long over defeating Multi-Squid onn Stage 5, and Stage 7 will take place on Pluto instead of Uranus (with the boss of Monster-Mouth) if you take too long over defeating Shark-Mouth on Stage 6 - and if you take too long over defeating Monster-Head on Stage 6-S, Stage 7 will take place on Neptune instead of Uranus or Pluto (with the boss of Ultimate-Tiger). Once the screen has faded out, you will receive 50000 points for each ship that made it through the stage, along with 20000 points for each special weapon you have and 10000 points for each bit of energy you have.
Enemies who appear on Stage 5
- File:DR Radish.gif Radish (大根) - 100 points
 Green Maimai (マイマイ・緑) - 3000 points
- File:DR Enormous Airisu.gif Enormous Airisu (巨大アイリス) - 400 points
 Enormous Gaeru (巨大ガエル) - 2000 points
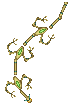 Enormous Hitokage (巨大ヒトカゲ) - 700 points
 Hitode (ヒトデ) - 500 points
 Red Maimai (マイマイ・赤) - 3000 points


BOSS: Multi-Squid (マルチスクイド)

This enormous squid attacks by firing beams from his tentacles and spitting centipedes from his mouth (the latter of which can be blocked by your own shots for 50 extra points apiece); his mouth is also his only vulnerable point, and it can only be attacked while it is open (i.e. while he is spitting centipedes at you). Once you have fired enough shots into his mouth to defeat him, you will receive 60000 points as he emits a scream of death and explodes - and you will also receive 60000 more points once he has done so as the text "DESTROYED THE TARGET!!" appears onn the screenn. However, as with Triple-Eye, the Strike-Ants, Roller-Snail, Hunter-Moth and all subsequent bosses in the game (apart from Danger-Seed himself), he will retreat if you take too long over defeating him and the text "MISSED THE TARGET ENEMY!!" will appear on the screen. If you allow this to happen, then the following stage will take place on Saturn instead of Jupiter with the boss of Monster-Head (who is a cross between him and Stage 6-J's boss, Shark-Mouth) - but the songs that are featured in the first "secret" stage are identical to those of Stage 6-J.
Enemies who appear on Stage 6-J
 Eu Angerion (えう・ぁんげりおん) - 3000 points
- File:DR Ichou No Kingyo.gif Ichou No Kingyo (イチョウの葉) - 100 points
 Derota (デロータ) - 300 points
- File:DR Garu Roguramu.gif Garu Roguramu (ガルログラム) - 500 points
 Enormous Bae (巨大バエ) - 3000 points

BOSS: Shark-Mouth (シャークマウス)

This enormous shark-like creature attacks by firing bubbles from his left arm and projectiles from his right (the former of which can be blocked by your own shots for 50 extra points apiece); once again, his mouth is his only vulnerable point, and once you have fired enough shots into it to defeat him, you will receive 60000 points as he emits a scream of death and explodes. You will also receive 70000 more points once he has done so as the text "DESTROYED THE TARGET!!" appears on the screen - however, as with Triple-Eye, the Strike-Ants, Roller-Snail, Hunter-Moth, Multi-Squid and all subsequent bosses in the game (apart from Danger-Seed himself), he will retreat if you take too long over defeating him and the text "MISSED THE TARGET ENEMY!!" will appear on the screen. If you allow this to happen, then the following stage will take place on Pluto instead of Uranus with the boss of Monster-Mouth (who is a cross between him and Stage 7-U's boss, Twin-Claw) - and for a second time, the songs that are featured inn the game's second "secret" stage are identical to those of Stage 7-U (and Stage 7-N).
Enemies who appear on Stage 6-S
 Kurage (くらげ) - 100 points
 Hasami (ハサミ) - 4000 points
 Derota (デロータ) - 400 points
 Tanpopo (タンポポ) - 500 points
 Sanma (サンマ) - 4000 points
 Oruka (オルカ) - 3000 points

BOSS: Monster-Head (モンスターヘッド)

This enormous cross between Multi-Squid and Shark-Mouth attacks by firing bubbles from his left arm and projectiles from his right while spitting centipedes from his mouth (the first and third of which can be blocked by your own shots for 50 extra points apiece); as with both of those two bosses, his mouth is his only vulnerable point, and once you have fired enough shots into it while it is open to defeat him, you will receive 60000 points as he emits a scream of death and explodes. You will also receive 150000 more points once he has done so as the text "DESTROYED THE TARGET!!" appears on the screen - however, as with Triple-Eye, the Strike-Ants, Roller-Snail, Hunter-Moth, the aforementioned Multi-Squid, the aforementioned Shark-Mouth and all subsequent bosses inn the game (apart from Danger-Seed himself) will retreat if you take too long over defeating him and the text "MISSED THE TARGET ENEMY!!" will appear on the screen. If you allow this to happenn, then the following stage will take place on Neptune instead of Uranus or Pluto with the boss of Ultimate-Tiger (who is a cross between Multi-Squid, Shark-Mouth and Twin-Claw) - and for a third time, the songs that are featured inn the third "secret" stage are identical to those of Stage 7-U.
Enemies who appear on Stage 7-U
 Tsubame (つばめ) - 100 points
- File:DR Rotary Gun.gif Rotary Gun (回転砲) - 3000 points
- File:DR Daiyaru.gif Daiyaru (ダイヤル) - 1000 points
 CD (シーディー) - 1000 points
 Mini Tank (ミニタンク) - 500 points
 Aburazemi (アブラゼミ) - 1000 points
- File:DR Air Gun.gif Air Gun (空中砲) - 4000 points
BOSS: Twin-Claw (ツインクロー)

This enormous purple creature attacks by firing lasers from the centre of his body and boomerangs from the two claws that give him his name (the latter of which cann be blocked by your own shots for 50 extra points apiece); his body is his only vulnerable point, and once you have fired ennough shots at him to defeat him, you will receive 60000 points as he emits a scream of death and explodes. You will also receive 80000 more points once he has done so as the text "DESTROYED THE TARGET!!" appears onn the screenn - however, as with Triple-Eye, the Strike-Ants, Roller-Snail, Hunter-Moth, Multi-Squid, Shark-Mouth and Monster-Head (and Ultimate-Tiger and Monster-Mouth), he will retreat if you take too long over defeating him and the text "MISSED THE TARGET ENEMY!!" will appear on the screen. Regardless of whether you managed to defeat him or not, you will proceed to the eighth and final stage once the screen has faded out and will have to fight Triple-Eye, the Strike-Ants, Roller-Snail and Hunter-Moth again (who are all coloured differently and move much faster than before) before meeting up with Danger-Seed himself.
Enemies who appear on Stage 7-N
 Semi (せみ) - 100 points
 Enormous Hebi (巨大ヘビ) - 500 x 25 points
- File:DR Daiyaru (S7N).gif Daiyaru (ダイヤル) - 500 points
- File:DR Green Storage.gif Green Storage (倉庫・緑) - 1000 points
 Big Kurage (大くらげ) - 5000 points
 American Zarigani (アメリカンザリガニ) - 5000 points
- File:DR Chaneru.gif Chaneru (チャンネル) - 500 points
 Gufu (グフ) - 10000 points


BOSS: Ultimate-Tiger (ウルティメイトタイガー)

This enormous triplecross between Multi-Squid, Shark-Mouth and Twin-Claw attacks by firing lasers from the centre of his body, bubbles from his left arm, and projectiles from his right arm while spitting centipedes from his mouth (the second and fourth of which can be blocked by your own shots for 50 extra points apiece); as with the aforementionned Multi-Squid and Shark-Mouth, his mouth is his only vulnerable point, and once you have fired enough shots into it while it is opened up to defeat him, you will receive 60000 points as he emits a scream of death and explodes. You will also receive 300000 more points once he has done so as the text "DESTROYED THE TARGET!!" appears on the screen - however, as with Triple-Eye, the Strike-Ants, Roller-Snail, Hunter-Moth, the aforementioned Multi-Squid, the aforementioned Shark-Mouth and the aforementioned Twin-Claw (along with Monster-Mouth), he will retreat if you take too long over defeating him and the text "MISSED THE TARGET ENEMY!!" will appear on the screen. Regardless of whether you managed to defeat him or not, you will proceed to the eighth and final stage once the screen has faded out and will have to fight Triple-Eye, the Strike-Ants, Roller-Snail and Hunter-Moth again (who are all coloured differently and move much faster than before) before meeting up with Danger-Seed himself for a final battle at end of the game.
Enemies who appear on Stage 7-P
 Penchi (ペンチ) - 100 points
- File:DR Saw Machine.gif Saw Machine (鋸マシーン) - 3000 points
- File:DR Binoculars.gif Binoculars (双眼鏡) - 500 points
- File:DR Rising Cannon.gif Rising Cannon (上下大砲) - 3000 points
- File:DR Disaster Looper.gif Disaster Looper (尺取虫) - 500 x 10 points
- File:DR Mino Worm.gif Mino Worm (みの虫) - 500 points
- File:DR Orange Storage.gif Orange Storage (倉庫・オレンジ) - 1000 points
 Red Gaeru (赤ガエル) - 2000 points
- File:DR Bafaro.gif Bafaro (バッファロー) - 3000 points

.gif)
BOSS: Monster-Mouth (モンスターマウス)

This enormous cross between Shark-Mouth and Twin-Claw attacks by firing lasers from the centre of his body, bubbles fromm his left arm and projectiles from his right arm (the second of which can be blocked by your own shots for 50 extra points apiece); as with the aforementioned Shark-Mouth, his mouth is his only vulnerable point, and once you have fired enough shots into it to defeat himm, you will receive 60000 points as he emits a screamm of death and explodes. You will also receive 200000 more points once he has done so as the text "DESTROYED THE TARGET!!" appears on the screen - however, as with Triple-Eye, the Strike-Ants, Roller-Snail, Hunter-Moth, Multi-Squid, the aforementioned Shark-Mouth and the aforementioned Twin-Claw (along with Ultimmate-Tiger), he will retreat if you take too long over defeating himm and the text "MISSED THE TARGET ENEMY!!" will appear on the screenn. Regardless of whether you managed to defeat him or not, you will proceed to the eighth and final stage once the screen has faded out and will have to fight Triple-Eye, the Strike-Ants, Roller-Snail and Hunter-Moth again (who are all coloured differently and move much faster than before) before meeting up with Danger-Seed himmself at the end of the game.
Enemies who appear on Stage 8
- File:DR Fabosu Red.gif Red Fabosu (ファボス・赤) - 100 points
 Yellow Gokiburi (ゴキブリ・黄色) - 100 points
 Red Gokiburi (ゴキブリ・赤) - 100 points
BOSS: Danger-Seed (デインジャーシード)

Before you fight the final boss of the game, you will have to fight Triple-Eye, the Strike-Ants, Roller-Snail and Hunter-Moth again (who are all coloured differently and move much faster than before). He attacks by trying to stay ahead of your ship while spitting pink rings of electricity from his head at you (which can be blocked by your own shots for 50 extra points apiece but will explode into four smaller rings of electricity once you have done so); therefore, it is advisable to aim for the four quarters of his shell first to expose his innards before proceeding to aimm for his legs. Once you have destroyed his legs, he will proceed to follow you around the screen - and once you have fired enough shots at him to defeat himm, you will receive 500000 points as he emits screamm of death and explodes. Unnlike all the previous bosses you have encountered in the game, he will not retreat if you take too long over defeating him; but once you have managed to defeat him, your ship will fly directly to the end of the stage as the text "EMERGENT ESCAPE!!" appears on the screenn (as if it had collected a Hyper-Booster after destroying a yellow Turtle with four special weapons in its possession), and you will then receive 10000 points for every bit of energy you have remaining before receiving a 1000000-point bonus as the text "YOU ARE PRAISED FOR YOUR COMPLETED MISSION." appears onn the screen. Once the screen has faded out, you can sit back and enjoy the ending - which shows Danger-Seed's pod exploding and the large Combined Ship (regardless of whether you were controlling it for the last four stages of the game or not) flying back to Earth as the game's credits roll underneath it, before landing in Japan (which is probably the reason why the game was never released in the United States). The screen will then fade out to a Buddha-like alien with the text "BUT, PEACE IS NOT ALWAYS KEPT LONG. TO BE CONTINUED..." underneath his image; despite those last three words, the game has never had a sequel.