*'''Where Found''':Starter Deck, Mystery Data in ACDC and SciLab Mainframe, 3-Chip trader at Higsby's
*'''Where Found''':Starter Deck, Mystery Data in ACDC and SciLab Mainframe, 3-Chip trader at Higsby's
*'''Rating''':1 Star
*'''Rating''':1 Star
Line 314:
Line 314:
===Chip #141 - Recover 30===
===Chip #141 - Recover 30===
[[Image:MMBN5 Standard 141.gif|right|Recover 30]]
[[Image:MMBN5 Standard 141.gif|right|Recover 30]]
*'''Description''' : Recovers 30 HP
*'''rarity''' : 1 star
*'''Element''' : Recovery
{{-}}
{{-}}
===Chip #142 - Recover 50===
===Chip #142 - Recover 50===
[[Image:MMBN5 Standard 142.gif|right|Recover 50]]
[[Image:MMBN5 Standard 142.gif|right|Recover 50]]
*'''Description''' : Recovers 50 HP
*'''rarity''' : 1 star
*'''Element''' : Recovery
{{-}}
{{-}}
===Chip #143 - Recover 80===
===Chip #143 - Recover 80===
[[Image:MMBN5 Standard 143.gif|right|Recover 80]]
[[Image:MMBN5 Standard 143.gif|right|Recover 80]]
*'''Description''' : Recovers 80 HP
*'''rarity''' : 2 stars
*'''Element''' : Recovery
{{-}}
{{-}}
===Chip #144 - Recover 120===
===Chip #144 - Recover 120===
[[Image:MMBN5 Standard 144.gif|right|Recover 120]]
[[Image:MMBN5 Standard 144.gif|right|Recover 120]]
*'''Description''' : Recovers 120 HP
*'''rarity''' : 2 stars
*'''Element''' : Recovery
{{-}}
{{-}}
===Chip #145 - Recover 150===
===Chip #145 - Recover 150===
[[Image:MMBN5 Standard 145.gif|right|Recover 150]]
[[Image:MMBN5 Standard 145.gif|right|Recover 150]]
*'''Description''' : Recovers 150 HP
*'''rarity''' : 3 stars
*'''Element''' : Recovery
{{-}}
{{-}}
===Chip #146 - Recover 200===
===Chip #146 - Recover 200===
[[Image:MMBN5 Standard 146.gif|right|Recover 200]]
[[Image:MMBN5 Standard 146.gif|right|Recover 200]]
*'''Description''' : Recovers 200 HP
*'''rarity''' : 4 stars
*'''Element''' : Recovery
{{-}}
{{-}}
===Chip #147 - Recover 300===
===Chip #147 - Recover 300===
[[Image:MMBN5 Standard 147.gif|right|Recover 300]]
[[Image:MMBN5 Standard 147.gif|right|Recover 300]]
*'''Code(s)''': '''Y'''
*'''Code(s)''': '''Y'''
*'''Description''': Recover 300 Hp
*'''Description''': Recovers 300 Hp
*'''Where Found''': Bugfrag Trader in Nebula Area 6, Mystery Data in Nebula Area 2
*'''Where Found''': Bugfrag Trader in Nebula Area 6, Mystery Data in Nebula Area 2
*'''Rating''': 5 Stars
*'''Rating''': 5 Stars
Line 340:
Line 358:
===Chip #148 - Panel Grab===
===Chip #148 - Panel Grab===
[[Image:MMBN5 Standard 148.gif|right|Panel Grab]]
[[Image:MMBN5 Standard 148.gif|right|Panel Grab]]
*'''Code(s)''' : '''*'''
*
{{-}}
{{-}}
===Chip #149 - Area Grab===
===Chip #149 - Area Grab===
[[Image:MMBN5 Standard 149.gif|right|Area Grab]]
[[Image:MMBN5 Standard 149.gif|right|Area Grab]]
*'''Code(s)''' : '''A''', '''L''',
{{-}}
{{-}}
===Chip #150 - Meta Gel===
===Chip #150 - Meta Gel===
Line 367:
Line 388:
===Chip #156 - Death Match/Geddon 3===
===Chip #156 - Death Match/Geddon 3===
*'''Code(s)''':
*'''Code(s)''':
*'''Description 1''':"Changes all Panels to swamp!"
*'''Description 1''':Changes all Panels to swamp!
*'''Description 2''':Changes all the panels on the field to poison, damaging everyone, including Megaman. Can be negated with OmniShoes Program, or Gyro/Shadow Shoes
*'''Description 2''':Changes all the panels on the field to poison, damaging everyone, including Megaman. Can be negated with OmniShoes Program, or Gyro/Shadow Shoes
*'''Where Found''':10-Chip Trader
*'''Where Found''':10-Chip Trader
Line 391:
Line 412:
===Chip #174 - Anti-Navi===
===Chip #174 - Anti-Navi===
===Chip #175 - Anti-Recover===
===Chip #175 - Anti-Recover===
*'''Description 1''' : Damages enemy in recovery
*'''Description 2''' : causes you enemy to receive damage equal to the HP it was trying to recover
*'''Rarity''' : 3 stars
*'''Element''' : None
===Chip #176 - Copy Damage===
===Chip #176 - Copy Damage===
*'''Description 1''' : Duplicate damage to 2nd enemy
*'''Description 2''' : makes the first enemy in Megaman's row receive the damage of other enemies
*'''Rarity''' : 2 stars
*'''Element''' : Cursor
===Chip #177 - Life Sync===
===Chip #177 - Life Sync===
*'''Description 1''' : Makes HP same as enemy
*'''Description 2''' :makes the HP of all enemies the same as the one 2 squares ahead of Megaman
*'''Rarity''' : 2 stars
*'''Element''' : Cursor
===Chip #178 - Attack + 10===
===Chip #178 - Attack + 10===
*'''Code(s)''':'''*'''
*'''Code(s)''':'''*'''
*'''Description 1''' : +10 for selected atk chip
*'''Description 2''' : adds +10 attack to the previously selected battlechip
*'''Description 1''' :adds 20 attack to the previously selected chip if it is a Navi Chip.
*'''Rarity''' : 3 stars
*'''Element''' : +/-
===Chip #180 - Colour Point===
===Chip #180 - Colour Point===
*'''Description 1''' :+10 for next chip attack
*'''Description 2''' :sacrifices one column of your area, but adds 10 attack per square to your next chip.
*'''Rarity''' : 2 stars
*'''Element''' : +/-
==Mega Chips==
==Mega Chips==
===Chip #001 - SuperVulcan===
===Chip #001 - SuperVulcan===
Revision as of 19:49, 2 June 2009
wikify
This page needs to be wikified
It needs to be re-written with wikimarkup and laid out correctly according to the editing guidelines. If you can wikify this page, please edit it, or help by discussing possible changes on the talk page.
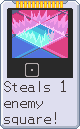
This page needs to be wikified
It needs to be re-written with wikimarkup and laid out correctly according to the editing guidelines. If you can wikify this page, please edit it, or help by discussing possible changes on the talk page.
Description 2: Fires a cannon at the closest enemy in your row.
Where to find: Starter Deck, Green Mystery Data of ACDC area, Scilab mainframe.
Rarity: 1 Star
Element: None
Chip #002 - HiCannon
Hi-Cannon
Code(s): D, E, F
Power: 80
Description 1: "Cannon for 1 enmy(enemy)"
Description 2: Fires a cannon at the closest enemy in your row.
Where to find:...
Rarity: 2 Stars
Element: None
Chip #003 - M-Cannon
M-Cannon
Code(s): F, G, H
Power: 120
Description 1: "Cannon for 1 enmy(enemy)"
Description 2: Fires a cannon at the closest enemy in your row.
Where to find: ??
Rarity: 3 Stars
Element: None
Chip #004 - AirShot
AirShot
Code(s): *
Power: 20
Description 1: "Knock Enemy Back 1 Square"
Description 2: fires a blast of air at the first enemy in the row and knocks it back 1 square, but does not make the enemy flinch.
Where To Find:Starter Deck, 3-Chip Trader, Green Mystery data in ACDC areas.
Rarity: 2 Stars
Element: Wind
Chip #005 - Vulcan 1
Vulcan 1
Code(s): C, D, E, *
Power:10x3
Description 1: "3-shot to pierce 1 panel!"
Description 2: fires a 3 shot machine gun hitting the first opponent in the row and the square directly behind it.
Where to Find:Starter Deck, Mystery Data in ACDC, Higsby's Shop, 3-Chip Trader
Rarity: 1 star
Element:None
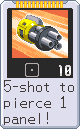
Chip #006 - Vulcan 2
Vulcan 2
Code(s): A, B, C
Power:10x5
Description 1: "5-shot to pierce 1 panel!"
Description 2: fires a 5 shot machine gun hitting the first opponent in the row and the square directly behind it.
Where to Find:NetStores, Higsby's Shop
Rarity: 2 stars
Element:None
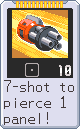
Chip #007 - Vulcan 3
Vulcan 3
Code(s): L, M, N
Power:10x7
Description 1: "7-shot to pierce 1 panel!"
Description 2: fires a 7 shot machine gun hitting the first opponent in the row and the square directly behind it.
Where to Find:NetStores
Rarity: 3 stars
Element:None
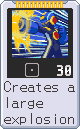
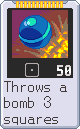
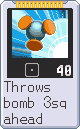
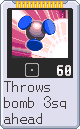
Chip #008 - Spreader
Spreader
Code(s): L, M, N, *
Power:30
Description 1: "Creates a Large Explosion"
Description 2: Fires a blast at the nearest object or enemy in the row. if it hits, there is a 1-square radius around the impact zone, hitting a max of 9 squares if the opponent is at the centre of their row and columns.
Where to Find:Mystery Data in ACDC, NetStores, Higsby's Shop
Rarity: 2 stars
Element:None
Chip #009 - MarkCannon 1
Code(s): K, M, S
Power:?
Description 1: DoomerEX locks onto 3 panels
Description 2: a cursor is fired that sweeps the 3 panels in front of you moving outwards. it will lock onto the first enemy it targets
Where to Find:chip from DoomerEX, Mystery Data in ACDC
Rarity: ? stars
Element:Cursor
Chip #010 - MarkCannon 2
Code(s): D, F, Z
Power:?
Description 1: DoomerEX locks onto 3 panels
Description 2: a cursor is fired that sweeps the 3 panels in front of you moving outwards. it will lock onto the first enemy it targets
Where to Find:chip from DoomerEX 2
Rarity: ? stars
Element:Cursor
Chip #011 - MarkCannon 3
Code(s): E, R, Y
Power:?
Description 1: DoomerEX locks onto 3 panels
Description 2: a cursor is fired that sweeps the 3 panels in front of you moving outwards. it will lock onto the first enemy it targets
Where to Find:chip from DoomerEX 3
Rarity: ? stars
Element:Cursor
Chip #012 - Pulsar/Bat Shot 1
Chip #013 - Pulsar/Bat Shot 2
Chip #014 - Pulsar/Bat Shot 3
Chip #015 - Tank Cannon/BigTank 1
Chip #016 - Tank Cannon/BigTank 2
Chip #017 - Tank Cannon/BigTank 3
Chip #018 - WideShot 1
Chip #019 - WideShot 2
Chip #020 - WideShot 3
Chip #021 - ElecReel 1
Chip #022 - ElecReel 2
Chip #023 - ElecReel 3
Chip #024 - SabotenBall/CactusBall 1
Chip #025 - SabotenBall/CactusBall 2
Chip #026 - SabotenBall/CactusBall 3
Chip #027 - GunDelSol 1
Chip #028 - GunDelSol 2
Chip #029 - GunDelSol 3
Chip #030 - Elemental Arm/Elemantal Rage
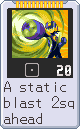
Chip #031 - Thunder
Chip #032 - Tornado
Tornado
Code(s):D, L, R
Power: 20x8
Description 1:...
Description 2:Fires an 8-hitting Tornado 2 squares ahead
Where Found:Starter Deck, Mystery Data in ACDC and SciLab Mainframe, 3-Chip trader at Higsby's
Rating:1 Star
Element: Recovery
Chip #141 - Recover 30
Recover 30
Description : Recovers 30 HP
rarity : 1 star
Element : Recovery
Chip #142 - Recover 50
Recover 50
Description : Recovers 50 HP
rarity : 1 star
Element : Recovery
Chip #143 - Recover 80
Recover 80
Description : Recovers 80 HP
rarity : 2 stars
Element : Recovery
Chip #144 - Recover 120
Recover 120
Description : Recovers 120 HP
rarity : 2 stars
Element : Recovery
Chip #145 - Recover 150
Recover 150
Description : Recovers 150 HP
rarity : 3 stars
Element : Recovery
Chip #146 - Recover 200
Recover 200
Description : Recovers 200 HP
rarity : 4 stars
Element : Recovery
Chip #147 - Recover 300
Recover 300
Code(s): Y
Description: Recovers 300 Hp
Where Found: Bugfrag Trader in Nebula Area 6, Mystery Data in Nebula Area 2
Rating: 5 Stars
Element:Recovery
Chip #148 - Panel Grab
Panel Grab
Code(s) : *
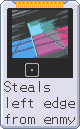
Chip #149 - Area Grab
Area Grab
Code(s) : A, L,
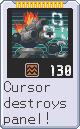
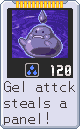
Chip #150 - Meta Gel
Meta Gel
Chip #151 - Grab Banish
Chip #152 - Grab Revenge
Chip #153 - Panel Return
Chip #154 - Death Match/Geddon 1
Code(s):
Description:"Cracks All Panels!"
Where Found:3-Chip Trader
Rating: 2 Stars
Element:None
Chip #155 - Death Match/Geddon 2
Code(s):
Description 1: Makes all empty Sq. Hole
Description 2:Breaks all unoccupied squares on both sides of the field.Panels regenerates after. Effect on MegaMan can be negated with AirShoes and OmniShoes Programs, or GyroShoes.
Where Found:Undernet Market, 10-Chip Trader
Rating: 3 Stars
Element:None
Chip #156 - Death Match/Geddon 3
Code(s):
Description 1:Changes all Panels to swamp!
Description 2:Changes all the panels on the field to poison, damaging everyone, including Megaman. Can be negated with OmniShoes Program, or Gyro/Shadow Shoes
Where Found:10-Chip Trader
Rating: 4 Stars
Element:None
Chip #157 - Slow Gauge
Chip #158 - Fast Gauge
Chip #159 - Buster Up
Chip #160 - Blinder
Chip #161 - North Wind
Chip #162 - Holy Panel
Chip #163 - Invis
Chip #164 - Barrier
Chip #165 - Barrier 100
Chip #166 - Barrier 200
Chip #167 - Bubble Wrap
Chip #168 - Anti-Fire
Chip #169 - Anti-Water
Chip #170 - Anti-Electricity/Anti-Elec
Chip #171 - Anti-Wood
Chip #172 - Anti-Damage
Chip #173 - Anti-Sword
Chip #174 - Anti-Navi
Chip #175 - Anti-Recover
Description 1 : Damages enemy in recovery
Description 2 : causes you enemy to receive damage equal to the HP it was trying to recover
Rarity : 3 stars
Element : None
Chip #176 - Copy Damage
Description 1 : Duplicate damage to 2nd enemy
Description 2 : makes the first enemy in Megaman's row receive the damage of other enemies
Rarity : 2 stars
Element : Cursor
Chip #177 - Life Sync
Description 1 : Makes HP same as enemy
Description 2 :makes the HP of all enemies the same as the one 2 squares ahead of Megaman
Rarity : 2 stars
Element : Cursor
Chip #178 - Attack + 10
Code(s):*
Description 1 : +10 for selected atk chip
Description 2 : adds +10 attack to the previously selected battlechip


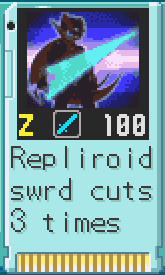


 and input
  and
and  on the third slash (HeroSword).