Jump to navigation
Jump to search
Cannon 
Hi-Cannon 
M-Cannon 
AirShot 
Vulcan 1 
Vulcan 2 
Vulcan 3 
Spreader 
GunDelSol 1 
GunDelSol 2 
GunDelSol 3 
Tornado 
Static 
Minibomb 
EnergyBomb 
MegaEnergyBomb 
BugBomb 
CannonBall 
BlackBomb 
Ol' faithful. 
Sword 
WideSword 
LongSword File:MMBN5 Standard 054.gifWideBlade
File:MMBN5 Standard 055.gifLongBlade

Custom Sword 
Slasher 
Wind Racket 
Magnum 
Mine 
RockCube 
Wind 
VacuumFan 
Fanfare 
Discord 
Timpani 
Silence 
VDoll 
Guard 1 
Crack Out 
Double Crack Out 
Triple Crack Out 
Recover 10 
Recover 30 
Recover 50 
Recover 80 
Recover 120 
Recover 150 
Recover 200 
Recover 300 
Panel Grab 
Area Grab 
Meta Gel
Z-Sabre
(removed table wrong game and added new table) |
|||
| Line 549: | Line 549: | ||
==Dark Chips== | ==Dark Chips== | ||
==Program Advances== | ==Program Advances== | ||
{|border="1" cellpadding="2" cellspacing="0" style="background:#f9f9f9;" | {|border="1" cellpadding="2" cellspacing="0" style="background:#f9f9f9;" | ||
| Line 558: | Line 555: | ||
|- | |- | ||
|style="background:cyan"|'''Name''' | |style="background:cyan"|'''Name''' | ||
|style="width:240px"| | |style="width:240px"|Giga Cannon 1 | ||
Giga Cannon 1 | |||
|style="background:cyan; width:60px"|'''Reduced name'''||GigaCan1 | |style="background:cyan; width:60px"|'''Reduced name'''||GigaCan1 | ||
|style="background:cyan; width:60px"|'''Damage'''|| | |style="background:cyan; width:60px"|'''Damage'''||400 | ||
|- | |- | ||
|style="background:cyan"|'''Battle Chips''' | |style="background:cyan"|'''Battle Chips''' | ||
| Line 567: | Line 563: | ||
|- | |- | ||
|style="background:cyan"|'''Explanation''' | |style="background:cyan"|'''Explanation''' | ||
|colspan="5"|MegaMan pulls out a large cannon and fires it. | |colspan="5"|MegaMan pulls out a large cannon and fires it. Only hits one enemy. | ||
|- | |- | ||
|rowspan="4"|02 | |rowspan="4"|02 | ||
| Line 574: | Line 570: | ||
|style="background:cyan"|'''Name'''||Giga Cannon 2 | |style="background:cyan"|'''Name'''||Giga Cannon 2 | ||
|style="background:cyan"|'''Reduced name'''||GigaCan2 | |style="background:cyan"|'''Reduced name'''||GigaCan2 | ||
|style="background:cyan"|'''Damage'''|| | |style="background:cyan"|'''Damage'''||500 | ||
|- | |- | ||
|style="background:cyan"|'''Battle Chips''' | |style="background:cyan"|'''Battle Chips''' | ||
|colspan="5"|Hi-Cannon x3 ( | |colspan="5"|Hi-Cannon x3 (D+E+F) | ||
|- | |- | ||
|style="background:cyan"|'''Explanation''' | |style="background:cyan"|'''Explanation''' | ||
|colspan="5"|MegaMan pulls out a large cannon and fires it. | |colspan="5"|<span style="font-style: normal; ">MegaMan pulls out a large cannon and fires it. Only hits one enemy.</span> | ||
|- | |- | ||
|rowspan="4"|03 | |rowspan="4"|03 | ||
| Line 587: | Line 583: | ||
|style="background:cyan"|'''Name'''||Giga Cannon 3 | |style="background:cyan"|'''Name'''||Giga Cannon 3 | ||
|style="background:cyan"|'''Reduced name'''||GigaCan3 | |style="background:cyan"|'''Reduced name'''||GigaCan3 | ||
|style="background:cyan"|'''Damage'''|| | |style="background:cyan"|'''Damage'''||600 | ||
|- | |- | ||
|style="background:cyan"|'''Battle Chips''' | |style="background:cyan"|'''Battle Chips''' | ||
|colspan="5"|Mega Cannon x3 ( | |colspan="5"|Mega Cannon x3 (F+G+H) | ||
|- | |- | ||
|style="background:cyan"|'''Explanation''' | |style="background:cyan"|'''Explanation''' | ||
|colspan="5"|MegaMan pulls out a large cannon and fires it. | |colspan="5"|<span style="font-style: normal; ">MegaMan pulls out a large cannon and fires it. Only hits one enemy.</span> | ||
|- | |- | ||
|rowspan="4"|04 | |rowspan="4"|04 | ||
|rowspan="4"| | |rowspan="4"| | ||
|- | |- | ||
|style="background:cyan"|'''Name'''|| | |style="background:cyan"|'''Name'''||Infinite Vulcan 1 | ||
|style="background:cyan"|'''Reduced name'''|| | |style="background:cyan"|'''Reduced name'''||InfVulc1 | ||
|style="background:cyan"|'''Damage'''|| | |style="background:cyan"|'''Damage'''||20 | ||
|- | |- | ||
|style="background:cyan"|'''Battle Chips''' | |style="background:cyan"|'''Battle Chips''' | ||
|colspan="5"| | |colspan="5"|Vulcan1 x3 (C+D+E) | ||
|- | |- | ||
|style="background:cyan"|'''Explanation''' | |style="background:cyan"|'''Explanation''' | ||
|colspan="5"| | |colspan="5"|MegaMan pulls out a Vulcan and fires it 20 times. | ||
|- | |- | ||
|rowspan="4"|05 | |rowspan="4"|05 | ||
|rowspan="4"| | |rowspan="4"| | ||
|- | |- | ||
|style="background:cyan"|'''Name'''|| | |style="background:cyan"|'''Name'''||Infinite Vulcan 2 | ||
|style="background:cyan"|'''Reduced name'''|| | |style="background:cyan"|'''Reduced name'''||InfVulc2 | ||
|style="background:cyan"|'''Damage'''|| | |style="background:cyan"|'''Damage'''||20 | ||
|- | |- | ||
|style="background:cyan"|'''Battle Chips''' | |style="background:cyan"|'''Battle Chips''' | ||
|colspan="5"| | |colspan="5"|Vulcan2 x3 (A+B+C) | ||
|- | |- | ||
|style="background:cyan"|'''Explanation''' | |style="background:cyan"|'''Explanation''' | ||
|colspan="5"| | |colspan="5"|MegaMan pulls out a Vulcan and fires it 24 times. | ||
|- | |- | ||
|rowspan="4"|06 | |rowspan="4"|06 | ||
|rowspan="4"| | |rowspan="4"| | ||
|- | |- | ||
|style="background:cyan"|'''Name'''|| | |style="background:cyan"|'''Name'''||Infinite Vulcan 3 | ||
|style="background:cyan"|'''Reduced name'''|| | |style="background:cyan"|'''Reduced name'''||InfVulc3 | ||
|style="background:cyan"|'''Damage'''|| | |style="background:cyan"|'''Damage'''||20 | ||
|- | |- | ||
|style="background:cyan"|'''Battle Chips''' | |style="background:cyan"|'''Battle Chips''' | ||
|colspan="5"| | |colspan="5"|Vulcan3 x3 (L+M+N) | ||
|- | |- | ||
|style="background:cyan"|'''Explanation''' | |style="background:cyan"|'''Explanation''' | ||
|colspan="5"| | |colspan="5"|MegaMan pulls out a Vulcan and fires it 28 times. | ||
|- | |- | ||
|rowspan="4"|07 | |rowspan="4"|07 | ||
|rowspan="4"| | |rowspan="4"| | ||
|- | |- | ||
|style="background:cyan"|'''Name'''|| | |style="background:cyan"|'''Name'''||Boxer 1 | ||
|style="background:cyan"|'''Reduced name'''|| | |style="background:cyan"|'''Reduced name'''||Boxer1 | ||
|style="background:cyan"|'''Damage'''|| | |style="background:cyan"|'''Damage'''||100 | ||
|- | |- | ||
|style="background:cyan"|'''Battle Chips''' | |style="background:cyan"|'''Battle Chips''' | ||
|colspan="5"| | |colspan="5"|FirePunch1 x3 (O+P+Q) | ||
|- | |- | ||
|style="background:cyan"|'''Explanation''' | |style="background:cyan"|'''Explanation''' | ||
|colspan="5"| | |colspan="5"|Launches a barrage of random fire punches. | ||
|- | |- | ||
|rowspan="4"|08 | |rowspan="4"|08 | ||
|rowspan="4"| | |rowspan="4"| | ||
|- | |- | ||
|style="background:cyan"|'''Name'''|| | |style="background:cyan"|'''Name'''||Boxer 2 | ||
|style="background:cyan"|'''Reduced name'''|| | |style="background:cyan"|'''Reduced name'''||Boxer2 | ||
|style="background:cyan"|'''Damage'''|| | |style="background:cyan"|'''Damage'''||150 | ||
|- | |- | ||
|style="background:cyan"|'''Battle Chips''' | |style="background:cyan"|'''Battle Chips''' | ||
|colspan="5"| | |colspan="5"|FirePunch2 x3 (H+I+J) | ||
|- | |- | ||
|style="background:cyan"|'''Explanation''' | |style="background:cyan"|'''Explanation''' | ||
|colspan="5"| | |colspan="5"|Launches a barrage of random fire punches. | ||
|- | |- | ||
|rowspan="4"|09 | |rowspan="4"|09 | ||
|rowspan="4"| | |rowspan="4"| | ||
|- | |- | ||
|style="background:cyan"|'''Name'''|| | |style="background:cyan"|'''Name'''||Boxer 3 | ||
|style="background:cyan"|'''Reduced name'''|| | |style="background:cyan"|'''Reduced name'''||Boxer3 | ||
|style="background:cyan"|'''Damage'''|| | |style="background:cyan"|'''Damage'''||200 | ||
|- | |- | ||
|style="background:cyan"|'''Battle Chips''' | |style="background:cyan"|'''Battle Chips''' | ||
|colspan="5"| | |colspan="5"|FirePunch3 x3 (E+F+G) | ||
|- | |- | ||
|style="background:cyan"|'''Explanation''' | |style="background:cyan"|'''Explanation''' | ||
|colspan="5"| | |colspan="5"|Launches a barrage of random fire punches. | ||
|- | |- | ||
|rowspan="4"|10 | |rowspan="4"|10 | ||
|rowspan="4"| | |rowspan="4"| | ||
|- | |- | ||
|style="background:cyan"|'''Name'''|| | |style="background:cyan"|'''Name'''||Super Spread 1 | ||
|style="background:cyan"|'''Reduced name'''|| | |style="background:cyan"|'''Reduced name'''||SuprSpr1 | ||
|style="background:cyan"|'''Damage'''|| | |style="background:cyan"|'''Damage'''||100 | ||
|- | |- | ||
|style="background:cyan"|'''Battle Chips''' | |style="background:cyan"|'''Battle Chips''' | ||
|colspan="5"| | |colspan="5"|WideShot1 x3 (L+M+N) | ||
|- | |- | ||
|style="background:cyan"|'''Explanation''' | |style="background:cyan"|'''Explanation''' | ||
|colspan="5"| | |colspan="5"|Launches 3 WideShots that pierce through obstacles. | ||
|- | |- | ||
|rowspan="4"|11 | |rowspan="4"|11 | ||
|rowspan="4"| | |rowspan="4"| | ||
|- | |- | ||
|style="background:cyan"|'''Name'''|| | |style="background:cyan"|'''Name'''||Super Spread 2 | ||
|style="background:cyan"|'''Reduced name'''|| | |style="background:cyan"|'''Reduced name'''||SuprSpr2 | ||
|style="background:cyan"|'''Damage'''|| | |style="background:cyan"|'''Damage'''||120 | ||
|- | |- | ||
|style="background:cyan"|'''Battle Chips''' | |style="background:cyan"|'''Battle Chips''' | ||
|colspan="5"| | |colspan="5"|WideShot2 x3 (E+F+G) | ||
|- | |- | ||
|style="background:cyan"|'''Explanation''' | |style="background:cyan"|'''Explanation''' | ||
|colspan="5"| | |colspan="5"|Launches 3 WideShots that pierce through obstacles. | ||
|- | |- | ||
|rowspan="4"|12 | |rowspan="4"|12 | ||
|rowspan="4"| | |rowspan="4"| | ||
|- | |- | ||
|style="background:cyan"|'''Name'''|| | |style="background:cyan"|'''Name'''||Super Spread 3 | ||
|style="background:cyan"|'''Reduced name'''|| | |style="background:cyan"|'''Reduced name'''||SuprSpr3 | ||
|style="background:cyan"|'''Damage'''|| | |style="background:cyan"|'''Damage'''||140 | ||
|- | |- | ||
|style="background:cyan"|'''Battle Chips''' | |style="background:cyan"|'''Battle Chips''' | ||
|colspan="5"| | |colspan="5"|WideShot3 x3 (S+T+U) | ||
|- | |- | ||
|style="background:cyan"|'''Explanation''' | |style="background:cyan"|'''Explanation''' | ||
|colspan="5"| | |colspan="5"|Launches 3 WideShots that pierce through obstacles. | ||
|- | |- | ||
|rowspan="4"|13 | |rowspan="4"|13 | ||
|rowspan="4"| | |rowspan="4"| | ||
|- | |- | ||
|style="background:cyan"|'''Name'''|| | |style="background:cyan"|'''Name'''||Shake Parade 1 | ||
|style="background:cyan"|'''Reduced name'''|| | |style="background:cyan"|'''Reduced name'''||ShakPar1 | ||
|style="background:cyan"|'''Damage'''|| | |style="background:cyan"|'''Damage'''||80 | ||
|- | |- | ||
|style="background:cyan"|'''Battle Chips''' | |style="background:cyan"|'''Battle Chips''' | ||
|colspan="5"| | |colspan="5"|SpShake1 x3 (G+H+I) | ||
|- | |- | ||
|style="background:cyan"|'''Explanation''' | |style="background:cyan"|'''Explanation''' | ||
|colspan="5"| | |colspan="5"|Launches 3 Satellites from the back column of MegaMan's field. They zigzag across all 3 rows, passing through obstacles along the way. | ||
|- | |- | ||
|rowspan="4"|14 | |rowspan="4"|14 | ||
|rowspan="4"| | |rowspan="4"| | ||
|- | |- | ||
|style="background:cyan"|'''Name'''|| | |style="background:cyan"|'''Name'''||Shake Parade 2 | ||
|style="background:cyan"|'''Reduced name'''|| | |style="background:cyan"|'''Reduced name'''||ShakPar2 ||style="background:cyan"|'''Damage'''||110 | ||
|style="background:cyan"|'''Damage'''|| | |||
|- | |- | ||
|style="background:cyan"|'''Battle Chips''' | |style="background:cyan"|'''Battle Chips''' | ||
|colspan="5"| | |colspan="5"|SpShake2 x3 (B+C+D) | ||
|- | |- | ||
|style="background:cyan"|'''Explanation''' | |style="background:cyan"|'''Explanation''' | ||
|colspan="5"|3 | |colspan="5"|Launches 3 Satellites from the back column of MegaMan's field. They zigzag across all 3 rows, passing through obstacles along the way. | ||
|- | |- | ||
|rowspan="4"|15 | |rowspan="4"|15 | ||
|rowspan="4"| | |rowspan="4"| | ||
|- | |- | ||
|style="background:cyan"|'''Name'''|| | |style="background:cyan"|'''Name'''||Shake Parade 3 | ||
|style="background:cyan"|'''Reduced name'''|| | |style="background:cyan"|'''Reduced name'''||ShakPar3 ||style="background:cyan"|'''Damage'''||140 | ||
|style="background:cyan"|'''Damage'''|| | |||
|- | |- | ||
|style="background:cyan"|'''Battle Chips''' | |style="background:cyan"|'''Battle Chips''' | ||
|colspan="5"| | |colspan="5"|SpShake3 x3 (S+T+U) | ||
|- | |- | ||
|style="background:cyan"|'''Explanation''' | |style="background:cyan"|'''Explanation''' | ||
|colspan="5"| | |colspan="5"|Launches 3 Satellites from the back column of MegaMan's field. They zigzag across all 3 rows, passing through obstacles along the way. | ||
|- | |- | ||
|rowspan="4"|16 | |rowspan="4"|16 | ||
|rowspan="4"| | |rowspan="4"| | ||
|- | |- | ||
|style="background:cyan"|'''Name'''|| | |style="background:cyan"|'''Name'''||Cactus Dance 1 | ||
|style="background:cyan"|'''Reduced name'''|| | |style="background:cyan"|'''Reduced name'''||CacDanc1 | ||
|style="background:cyan"|'''Damage'''|| | |style="background:cyan"|'''Damage'''||30 | ||
|- | |- | ||
|style="background:cyan"|'''Battle Chips''' | |style="background:cyan"|'''Battle Chips''' | ||
|colspan="5"| | |colspan="5"|CactBal1 x3 (H+I+J) | ||
|- | |- | ||
|style="background:cyan"|'''Explanation''' | |style="background:cyan"|'''Explanation''' | ||
|colspan="5"| | |colspan="5"|Drops several CactusBalls into the enemy area. If not landing on enemies, CactusBalls roll and deal more damage. | ||
|- | |- | ||
|rowspan="4"|17 | |rowspan="4"|17 | ||
|rowspan="4"| | |rowspan="4"| | ||
|- | |- | ||
|style="background:cyan"|'''Name'''|| | |style="background:cyan"|'''Name'''||Cactus Dance 2 | ||
|style="background:cyan"|'''Reduced name'''|| | |style="background:cyan"|'''Reduced name'''||CacDanc2 | ||
|style="background:cyan"|'''Damage'''|| | |style="background:cyan"|'''Damage'''||40 | ||
|- | |- | ||
|style="background:cyan"|'''Battle Chips''' | |style="background:cyan"|'''Battle Chips''' | ||
|colspan="5"| | |colspan="5"|CactBal2 x3 (Q+R+S) | ||
|- | |- | ||
|style="background:cyan"|'''Explanation''' | |style="background:cyan"|'''Explanation''' | ||
|colspan="5"| | |colspan="5"|Drops several CactusBalls into the enemy area. If not landing on enemies, CactusBalls roll and deal more damage. | ||
|- | |- | ||
|rowspan="4"|18 | |rowspan="4"|18 | ||
|rowspan="4"| | |rowspan="4"| | ||
|- | |- | ||
|style="background:cyan"|'''Name'''|| | |style="background:cyan"|'''Name'''||Cactus Dance 3 | ||
|style="background:cyan"|'''Reduced name'''|| | |style="background:cyan"|'''Reduced name'''||CacDanc3 | ||
|style="background:cyan"|'''Damage'''|| | |style="background:cyan"|'''Damage'''||50 | ||
|- | |- | ||
|style="background:cyan"|'''Battle Chips''' | |style="background:cyan"|'''Battle Chips''' | ||
|colspan="5"| | |colspan="5"|CactBal3 x3 (L+M+N) | ||
|- | |- | ||
|style="background:cyan"|'''Explanation''' | |style="background:cyan"|'''Explanation''' | ||
|colspan="5"| | |colspan="5"|Drops several CactusBalls into the enemy area. If not landing on enemies, CactusBalls roll and deal more damage. | ||
|- | |- | ||
|rowspan="4"|19 | |rowspan="4"|19 | ||
| Line 795: | Line 789: | ||
|style="background:cyan"|'''Name'''||Hyper Burst | |style="background:cyan"|'''Name'''||Hyper Burst | ||
|style="background:cyan"|'''Reduced name'''||H-Burst | |style="background:cyan"|'''Reduced name'''||H-Burst | ||
|style="background:cyan"|'''Damage'''|| | |style="background:cyan"|'''Damage'''||50 | ||
|- | |- | ||
|style="background:cyan"|'''Battle Chips''' | |style="background:cyan"|'''Battle Chips''' | ||
|colspan="5"| | |colspan="5"|Spreader x3 (C+D+E) | ||
|- | |- | ||
|style="background:cyan"|'''Explanation''' | |style="background:cyan"|'''Explanation''' | ||
|colspan="5"|Acts like a | |colspan="5"|Acts like a 6-hit SpreaderGun. | ||
|- | |- | ||
|rowspan="4"|20 | |rowspan="4"|20 | ||
|rowspan="4"| | |rowspan="4"|[[File:MegaEXESword.png|center|B]] | ||
|- | |- | ||
|style="background:cyan"|'''Name'''||Life Sword | |style="background:cyan"|'''Name'''||Life Sword | ||
| Line 811: | Line 805: | ||
|- | |- | ||
|style="background:cyan"|'''Battle Chips''' | |style="background:cyan"|'''Battle Chips''' | ||
|colspan="5"|Sword + WideSwrd + LongSwrd | |colspan="5"|Sword S + WideSwrd S + LongSwrd S or<br />Sword L + WideBlde L + LongBlde L | ||
|- | |- | ||
|style="background:cyan"|'''Explanation''' | |style="background:cyan"|'''Explanation''' | ||
|colspan="5"|MegaMan | |colspan="5"|MegaMan slashes the area of 3x2 in front of him with a huge sword. | ||
|- | |- | ||
|rowspan="4"|21 | |rowspan="4"|21 | ||
| Line 824: | Line 818: | ||
|- | |- | ||
|style="background:cyan"|'''Battle Chips''' | |style="background:cyan"|'''Battle Chips''' | ||
|colspan="5"|YoYo x3 ( | |colspan="5"|YoYo x3 (D+E+F) | ||
|- | |- | ||
|style="background:cyan"|'''Explanation''' | |style="background:cyan"|'''Explanation''' | ||
| Line 833: | Line 827: | ||
|- | |- | ||
|style="background:cyan"|'''Name'''||Pit Hockey | |style="background:cyan"|'''Name'''||Pit Hockey | ||
|style="background:cyan"|'''Reduced name'''|| | |style="background:cyan"|'''Reduced name'''||PitHoky | ||
|style="background:cyan"|'''Damage'''||100 | |style="background:cyan"|'''Damage'''||100 | ||
|- | |- | ||
|style="background:cyan"|'''Battle Chips''' | |style="background:cyan"|'''Battle Chips''' | ||
|colspan="5"| | |colspan="5"|AirHoc x3 (Q+R+S) | ||
|- | |- | ||
|style="background:cyan"|'''Explanation''' | |style="background:cyan"|'''Explanation''' | ||
| Line 850: | Line 844: | ||
|- | |- | ||
|style="background:cyan"|'''Battle Chips''' | |style="background:cyan"|'''Battle Chips''' | ||
|colspan="5"| | |colspan="5"|BugBomb A + Geddon3 A + Anubis A | ||
|- | |- | ||
|style="background:cyan"|'''Explanation''' | |style="background:cyan"|'''Explanation''' | ||
| Line 858: | Line 852: | ||
|rowspan="4"| | |rowspan="4"| | ||
|- | |- | ||
|style="background:cyan"|'''Name'''|| | |style="background:cyan"|'''Name'''||Cosmo Prison | ||
|style="background:cyan"|'''Reduced name'''|| | |style="background:cyan"|'''Reduced name'''||CsmoPris | ||
|style="background:cyan"|'''Damage'''|| | |style="background:cyan"|'''Damage'''||60 | ||
|- | |- | ||
|style="background:cyan"|'''Battle Chips''' | |style="background:cyan"|'''Battle Chips''' | ||
|colspan="5"| | |colspan="5"|Astroid3 C + Astroid3 C + CosmMnSP/DS C | ||
|- | |- | ||
|style="background:cyan"|'''Explanation''' | |style="background:cyan"|'''Explanation''' | ||
|colspan="5"| | |colspan="5"|[[CosmoMan.EXE|CosmoMan]] appears and shoots Asteroids on all columns in front of him. Enemies on the same row are hit 9 times. All other rows are hit 6 times. | ||
|- | |- | ||
|rowspan="4"|25 | |rowspan="4"|25 | ||
|rowspan="4"| | |rowspan="4"| | ||
|- | |- | ||
|style="background:cyan"|'''Name'''|| | |style="background:cyan"|'''Name'''||Wild Bird | ||
|style="background:cyan"|'''Reduced name'''|| | |style="background:cyan"|'''Reduced name'''||WildBird | ||
|style="background:cyan"|'''Damage'''|| | |style="background:cyan"|'''Damage'''||200 | ||
|- | |- | ||
|style="background:cyan"|'''Battle Chips''' | |style="background:cyan"|'''Battle Chips''' | ||
|colspan="5"| | |colspan="5"|Katana1 S + Katana1 S + LarkMnSP/DS S | ||
|- | |- | ||
|style="background:cyan"|'''Explanation''' | |style="background:cyan"|'''Explanation''' | ||
|colspan="5"| | |colspan="5"|[[SwallowMan.EXE|SwallowMan]] appears, disappears, and then swoops up from the panel under MegaMan. He hits the panels vertically adjacent and hits 3 times on the two columns ahead. | ||
|- | |- | ||
|rowspan="4"|26 | |rowspan="4"|26 | ||
|rowspan="4"| | |rowspan="4"| | ||
|- | |- | ||
|style="background:cyan"|'''Name'''|| | |style="background:cyan"|'''Name'''||Football | ||
|style="background:cyan"|'''Reduced name'''|| | |style="background:cyan"|'''Reduced name'''||Football ||style="background:cyan"|'''Damage'''||180 | ||
|style="background:cyan"|'''Damage'''|| | |||
|- | |- | ||
|style="background:cyan"|'''Battle Chips''' | |style="background:cyan"|'''Battle Chips''' | ||
|colspan="5"| | |colspan="5"|MrkCan2 F + MrkCan2 F + GridMnSP/DS F | ||
|- | |- | ||
|style="background:cyan"|'''Explanation''' | |style="background:cyan"|'''Explanation''' | ||
|colspan="5"| | |colspan="5"|[[GridMan.EXE|GridMan]] appears and kicks 4 FootBalls into the enemy area. They land on the intersections of the panels and hit the 4 panels around that intersection. Corner panels are hit once each, panels on the side are hit twice, and the central panel is hit 4 times. | ||
|- | |- | ||
|rowspan="4"|27 | |rowspan="4"|27 | ||
|rowspan="4"| | |rowspan="4"| | ||
|- | |- | ||
|style="background:cyan"|'''Name'''|| | |style="background:cyan"|'''Name'''||Big Noise | ||
|style="background:cyan"|'''Reduced name'''|| | |style="background:cyan"|'''Reduced name'''||BigNoise | ||
|style="background:cyan"|'''Damage'''|| | |style="background:cyan"|'''Damage'''||400 | ||
|- | |- | ||
|style="background:cyan"|'''Battle Chips''' | |style="background:cyan"|'''Battle Chips''' | ||
|colspan="5"| | |colspan="5"|Pulsar3 S + Pulsar3 S + ShadeManSP/DS S | ||
|- | |- | ||
|style="background:cyan"|'''Explanation''' | |style="background:cyan"|'''Explanation''' | ||
|colspan="5"| | |colspan="5"|ShadeMan appears and does a SoundStorm that hits one panel ahead and then 3x3 area following that. Pierces invincibility. Paralyzes enemies. | ||
|- | |- | ||
|rowspan="4"|28 | |rowspan="4"|28 | ||
|rowspan="4"| | |rowspan="4"| | ||
|- | |- | ||
|style="background:cyan"|'''Name'''|| | |style="background:cyan"|'''Name'''||Time Bomb + | ||
|style="background:cyan"|'''Reduced name'''|| | |style="background:cyan"|'''Reduced name'''||TimeBom+ | ||
|style="background:cyan"|'''Damage'''|| | |style="background:cyan"|'''Damage'''||600 | ||
|- | |- | ||
|style="background:cyan"|'''Battle Chips''' | |style="background:cyan"|'''Battle Chips''' | ||
|colspan="5"| | |colspan="5"|TimeBom1 H + TimeBom2 H + TimeBom3 H | ||
|- | |- | ||
|style="background:cyan"|'''Explanation''' | |style="background:cyan"|'''Explanation''' | ||
|colspan="5"| | |colspan="5"|MegaMan creates a count bomb that has a very high duration. | ||
|- | |- | ||
|rowspan="4"|29 | |rowspan="4"|29 | ||
|rowspan="4"| | |rowspan="4"| | ||
|- | |- | ||
|style="background:cyan"|'''Name'''|| | |style="background:cyan"|'''Name'''||Body Guard | ||
|style="background:cyan"|'''Reduced name'''|| | |style="background:cyan"|'''Reduced name'''||BodyGrd | ||
|style="background:cyan"|'''Damage'''|| | |style="background:cyan"|'''Damage'''||70 | ||
|- | |- | ||
|style="background:cyan"|'''Battle Chips''' | |style="background:cyan"|'''Battle Chips''' | ||
|colspan="5"| | |colspan="5"|AntiDmg M + AntiNavi M + Muramasa M | ||
|- | |- | ||
|style="background:cyan"|'''Explanation''' | |style="background:cyan"|'''Explanation''' | ||
|colspan="5"| | |colspan="5"|Shurikens rain down from the sky and chase after the enemy. 10 Shurikens. | ||
|- | |- | ||
|rowspan="4"|30 | |rowspan="4"|30 | ||
|rowspan="4"| | |rowspan="4"| | ||
|- | |- | ||
|style="background:cyan"|'''Name''' | |style="background:cyan"|'''Name'''||Pile Driver | ||
| | |style="background:cyan"|'''Reduced name'''||PileDrvr | ||
|style="background:cyan"|'''Reduced name'''|| | |style="background:cyan"|'''Damage'''||30 | ||
|style="background:cyan"|'''Damage'''|| | |||
|- | |- | ||
|style="background:cyan"|'''Battle Chips''' | |style="background:cyan"|'''Battle Chips''' | ||
|colspan="5"| | |colspan="5"|GunDelS3 D + GunDelS3 D + DjangoSP/DS D | ||
|- | |- | ||
|style="background:cyan"|'''Explanation''' | |style="background:cyan"|'''Explanation''' | ||
|colspan="5"| | |colspan="5"|A reflective mirror appears in front of MegaMan, firing a huge beam of sunlight at the enemy. Hits up to 10 times. | ||
|} | |} | ||
{{Footer Nav|game=Mega Man Battle Network 5|prevpage=Enemies|nextpage=Getting Started}} | |||
Revision as of 00:07, 13 April 2013
Standard Chips
Chip #001 - Cannon

- Code(s) : A, B, C, *
- Power: 40
- Description 1: "Cannon for 1 enmy(enemy)"
- Description 2: Fires a cannon at the closest enemy in your row.
- Where to find: Starter Deck, Green Mystery Data of ACDC area, Scilab mainframe.
- Rarity: 1 Star
- Element: None
Chip #002 - HiCannon

- Code(s): D, E, F
- Power: 80
- Description 1: "Cannon for 1 enmy(enemy)"
- Description 2: Fires a cannon at the closest enemy in your row.
- Where to find:...
- Rarity: 2 Stars
- Element: None
Chip #003 - M-Cannon

- Code(s): F, G, H
- Power: 120
- Description 1: "Cannon for 1 enmy(enemy)"
- Description 2: Fires a cannon at the closest enemy in your row.
- Where to find: ??
Rarity: 3 Stars
- Element: None
Chip #004 - AirShot

- Code(s): *
- Power: 20
- Description 1: "Knock Enemy Back 1 Square"
- Description 2: fires a blast of air at the first enemy in the row and knocks it back 1 square, but does not make the enemy flinch.
- Where To Find:Starter Deck, 3-Chip Trader, Green Mystery data in ACDC areas.
- Rarity: 2 Stars
- Element: Wind
Chip #005 - Vulcan 1

- Code(s): C, D, E, *
- Power:10 x 3
- Description 1: "3-shot to pierce 1 panel!"
- Description 2: fires a 3 shot machine gun hitting the first opponent in the row and the square directly behind it.
- Where to Find:Starter Deck, Mystery Data in ACDC, Higsby's Shop, 3-Chip Trader
- Rarity: 1 star
- Element:None
Chip #006 - Vulcan 2

- Code(s): A, B, C
- Power:10 x 5
- Description 1: "5-shot to pierce 1 panel!"
- Description 2: fires a 5 shot machine gun hitting the first opponent in the row and the square directly behind it.
- Where to Find:NetStores, Higsby's Shop
- Rarity: 2 stars
- Element:None
Chip #007 - Vulcan 3

- Code(s): L, M, N
- Power:10 x 7
- Description 1: "7-shot to pierce 1 panel!"
- Description 2: fires a 7 shot machine gun hitting the first opponent in the row and the square directly behind it.
- Where to Find:NetStores
- Rarity: 3 stars
- Element:None
Chip #008 - Spreader

- Code(s): L, M, N, *
- Power:30
- Description 1: "Creates a Large Explosion"
- Description 2: Fires a blast at the nearest object or enemy in the row. if it hits, there is a 1-square radius around the impact zone, hitting a max of 9 squares if the opponent is at the centre of their row and columns.
- Where to Find:Mystery Data in ACDC, NetStores, Higsby's Shop
- Rarity: 2 stars
- Element:None
Chip #009 - MarkCannon 1
- Code(s): K, M, S
- Power:?
- Description 1: DoomerEX locks onto 3 panels
- Description 2: a cursor is fired that sweeps the 3 panels in front of you moving outwards. it will lock onto the first enemy it targets
- Where to Find:chip from DoomerEX, Mystery Data in ACDC
- Rarity: ? stars
- Element:Cursor
Chip #010 - MarkCannon 2
- Code(s): D, F, Z
- Power:?
- Description 1: DoomerEX locks onto 3 panels
- Description 2: a cursor is fired that sweeps the 3 panels in front of you moving outwards. it will lock onto the first enemy it targets
- Where to Find:chip from DoomerEX 2
- Rarity: ? stars
- Element:Cursor
Chip #011 - MarkCannon 3
- Code(s): E, R, Y
- Power:?
- Description 1: DoomerEX locks onto 3 panels
- Description 2: a cursor is fired that sweeps the 3 panels in front of you moving outwards. it will lock onto the first enemy it targets
- Where to Find:chip from DoomerEX 3
- Rarity: ? stars
- Element:Cursor
Chip #012 - Pulsar/Bat Shot 1
Chip #013 - Pulsar/Bat Shot 2
Chip #014 - Pulsar/Bat Shot 3
Chip #015 - Tank Cannon/BigTank 1
Chip #016 - Tank Cannon/BigTank 2
Chip #017 - Tank Cannon/BigTank 3
Chip #018 - WideShot 1
Chip #019 - WideShot 2
Chip #020 - WideShot 3
Chip #021 - ElecReel 1
Chip #022 - ElecReel 2
Chip #023 - ElecReel 3
Chip #024 - SabotenBall/CactusBall 1
Chip #025 - SabotenBall/CactusBall 2
Chip #026 - SabotenBall/CactusBall 3
Chip #027 - GunDelSol 1

Chip #028 - GunDelSol 2

Chip #029 - GunDelSol 3

Chip #030 - Elemental Arm/Elemantal Rage
Chip #031 - Thunder
Chip #032 - Tornado

- Code(s):D, L, R
- Power: 20 x 8
- Description 1:...
- Description 2:Fires an 8-hitting Tornado 2 squares ahead
- Where To Find:Chip Trader, NetShop, Mystery Data
- Rarity: 3 Stars
- Element: Wind
Chip #033 - NoiseStorm/Static

Chip #034 - MiniBomb

Chip #035 - EnergyBomb

Chip #036 - MegaEnergyBomb

Chip #037 - CrackBomb
Chip #038 - Paralyse Bomb
Chip #039 - ResetBomb
Chip #040 - Quake 1
Chip #041 - Quake 2
Chip #042 - Quake 3
Chip #043 - BugBomb

Chip #044 - CannonBall

Chip #045 - BlackBomb

Chip #046 - Geyser

Chip #047 - MagmaSeed
Chip #048 - SeaSeed/WaterSeed
Chip #049 - IceSeed
Chip #050 - GrassSeed
Chip #051 - Sword

Chip #052 - WideSword

Chip #053 - LongSword

Chip #054 - WideBlade
Chip #055 - LongBlade
Chip #056 - Custom Sword

Chip #057 - Variable Sword
Chip #058 - Slasher

Chip #059 - Wind Racket

Chip #060 - Kunai/MoonBlade 1
Chip #061 - Kunai/MoonBlade 2
Chip #062 - Kunai/MoonBlade 3
Chip #063 - SamuraiSword/Katana 1
Chip #064 - SamuraiSword/Katana 2
Chip #065 - SamuraiSword/Katana 3
Chip #066 - Yoyo
Chip #067 - DrillArm 1
Chip #068 - DrillArm 2
Chip #069 - DrillArm 3
Chip #070 - Air Hockey Puck
Chip #071 - SkullChain/Skully 1
Chip #072 - SkullChain/Skully 2
Chip #073 - SkullChain/Skully 3
Chip #074 - WaterTornado/AquaWhirl 1
Chip #075 - WaterTornado/AquaWhirl 2
Chip #076 - WaterTornado/AquaWhirl 3
Chip #077 - AirWheel/Hurricane 1
Chip #078 - AirWheel/Hurricane 2
Chip #079 - AirWheel/Hurricane 3
Chip #080 - Fire Punch 1
Chip #081 - Fire Punch 2
Chip #082 - Fire Punch 3
Chip #083 - BodyBurn 1
Chip #084 - BodyBurn 2
Chip #085 - BodyBurn 3
Chip #086 - Side Bubble 1
Chip #087 - Side Bubble 2
Chip #088 - Side Bubble 3
Chip #089 - CustomBolt 1
Chip #090 - CustomBolt 2
Chip #091 - CustomBolt 3
Chip #092 - Boomer
Chip #093 - Asteroid/Meteors 1
Chip #094 - Asteroid/Meteors 2
Chip #095 - Asteroid/Meteors 3
Chip #096 - Satellite 1
Chip #097 - Satellite 2
Chip #098 - Satellite 3
Chip #099 - InazumaKing 1
Chip #100 - InazumaKing 2
Chip #101 - InazumaKing 3
Chip #102 - WoodNose 1
Chip #103 - WoodNose 2
Chip #104 - WoodNose 3
Chip #105 - Lance
Chip #106 - TsumaniBall/Wave
Chip #107 - RedTsumaniBall/LavaWave
Chip #108 - MudTsumaniBall/MudWave
Chip #109 - ComeOnRain/Rainy Day
Chip #110 - Snake
Chip #111 - Magnum

Chip #112 - CircGun
Chip #113 - TimeBomb 1
Chip #114 - TimeBomb 2
Chip #115 - TimeBomb 3
Chip #116 - BoyBomb 1
Chip #117 - BoyBomb 2
Chip #118 - BoyBomb 3
Chip #119 - Mine

Chip #120 - RockCube

Chip #121 - Wind

Chip #122 - Fan

Chip #123 - Fanfare

Chip #124 - Discord

Chip #125 - Timpani

Chip #126 - Silence

Chip #127 - RedFruit 1
Chip #128 - RedFruit 2
Chip #129 - RedFruit 3
Chip #130 - Voodoo Doll

Chip #131 - Guard 1

Chip #132 - Guard 2
Chip #133 - Guard 3
Chip #134 - CurseShield/CrushShield 1
Chip #135 - CurseShield/CrushShield 2
Chip #136 - CurseShield/CrushShield 3
Chip #137 - Crack Out

Chip #138 - Double Crack Out

- Code(s):*
Chip #139 - Triple Crack Out

Chip #140 - Recover 10

- Code(s): A,L,*
- Description:Recovers 10 Hp
- Where Found:Starter Deck, Mystery Data in ACDC and SciLab Mainframe, 3-Chip trader at Higsby's
- Rating:1 Star
- Element: Recovery
Chip #141 - Recover 30

- Description : Recovers 30 HP
- Rarity : 1 star
- Element : Recovery
Chip #142 - Recover 50

- Description : Recovers 50 HP
- Rarity : 1 star
- Element : Recovery
Chip #143 - Recover 80

- Description : Recovers 80 HP
- Rarity : 2 stars
- Element : Recovery
Chip #144 - Recover 120

- Description : Recovers 120 HP
- Rarity : 2 stars
- Element : Recovery
Chip #145 - Recover 150

- Description : Recovers 150 HP
- Rarity : 3 stars
- Element : Recovery
Chip #146 - Recover 200

- Description : Recovers 200 HP
- Rarity : 4 stars
- Element : Recovery
Chip #147 - Recover 300

- Code(s): Y
- Description: Recovers 300 Hp
- Where Found: Bugfrag Trader in Nebula Area 6, Mystery Data in Nebula Area 2
- Rating: 5 Stars
- Element:Recovery
Chip #148 - Panel Grab

- Code(s) : *
Chip #149 - Area Grab

- Code(s) : A, L, S, *
Chip #150 - Meta Gel

Chip #151 - Grab Banish
Chip #152 - Grab Revenge
Chip #153 - Panel Return
Chip #154 - Death Match/Geddon 1
- Code(s):
- Description:"Cracks All Panels!"
- Where Found:3-Chip Trader
- Rating: 2 Stars
- Element:None
Chip #155 - Death Match/Geddon 2
- Code(s):
- Description 1: Makes all empty Sq. Hole
- Description 2:Breaks all unoccupied squares on both sides of the field.Panels regenerates after. Effect on MegaMan can be negated with AirShoes and OmniShoes Programs, or GyroShoes.
- Where Found:Undernet Market, 10-Chip Trader
- Rating: 3 Stars
- Element:None
Chip #156 - Death Match/Geddon 3
- Code(s):
- Description 1:Changes all Panels to swamp!
- Description 2:Changes all the panels on the field to poison, damaging everyone, including Megaman. Can be negated with OmniShoes Program, or Gyro/Shadow Shoes
- Where Found:10-Chip Trader
- Rating: 4 Stars
- Element:None
Chip #157 - Slow Gauge
Chip #158 - Fast Gauge
Chip #159 - Buster Up
Chip #160 - Blinder
Chip #161 - North Wind
Chip #162 - Holy Panel
Chip #163 - Invis
Chip #164 - Barrier
Chip #165 - Barrier 100
Chip #166 - Barrier 200
Chip #167 - Bubble Wrap
Chip #168 - Anti-Fire
Chip #169 - Anti-Water
Chip #170 - Anti-Electricity/Anti-Elec
Chip #171 - Anti-Wood
Chip #172 - Anti-Damage
Chip #173 - Anti-Sword
Chip #175 - Anti-Recover
- Description 1 : Damages enemy in recovery
- Description 2 : causes you enemy to receive damage equal to the HP it was trying to recover
- Rarity : 3 stars
- Element : None
Chip #176 - Copy Damage
- Description 1 : Duplicate damage to 2nd enemy
- Description 2 : makes the first enemy in Megaman's row receive the damage of other enemies
- Rarity : 2 stars
- Element : Cursor
Chip #177 - Life Sync
- Description 1 : Makes HP same as enemy
- Description 2 :makes the HP of all enemies the same as the one 2 squares ahead of Megaman
- Rarity : 2 stars
- Element : Cursor
Chip #178 - Attack + 10
- Code(s):*
- Description 1 : +10 for selected atk chip
- Description 2 : adds +10 attack to the previously selected battlechip
- Location : Starting deck, ACDC mystery data, 3-chip trader
- Rarity : 1 Star
- Element : +/-
- Code(s): *
- Description 1 :+ 20 for selected Navichip
- Description 1 :adds 20 attack to the previously selected chip if it is a Navi Chip.
- Rarity : 3 stars
- Element : +/-
Chip #180 - Colour Point
- Code(s): *
- Description 1 :+10 for next chip attack
- Description 2 :sacrifices one column of your area, but adds 10 attack per square to your next chip.
- Rarity : 2 stars
- Element : +/-
Mega Chips
Chip #001 - SuperVulcan
- Code(s):
- Power : 10 x 12
- Description: 12 shot Vulcan Cannon
- Rarity: 4 Stars
- Element: None
Chip #002 - NeoVariableSword
- Code(s): V
- Power: 240
- Description: A Magical Shifting Sword
- Description2: the sword an change shape depending on the input command when the chip is activated.
- Rarity: 5 Stars
- Element: Sword
Chip #003 - Meteors
Chip #004 - NumberBall
Chip #005 - Guardian
Chip #006 - Jealousy
Chip #007 - Poltergeist
Chip #008 - BugFix
Chip #009 - FullCustom
Chip #010 - LifeAura
Chip #011 - Sanctuary
Chip #012 - Attack +30
- Code (s) : *
- Description: adds +30 attack to selected chip
Chip #013 - DoublePoint
Chip #014 - MuraMasa
Chip #015 - Anubis
Chip #016 - BlackWing
Chip #017 - JusticeOne
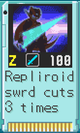
Chip #018 - Z-Saver/Z-Sabre

- Code(s): Z
- Power: 100 x 3
- Description 1: Repliroid Swrd (Reploid Sword) cuts 3 times
- Description 2: Slashes 3 Swords, LongSword, WideSword and HeroSword(not in this game, a 3-panel LongSword), each doing 100 Damage.
- Where to find: Liberation Mission 6(DarkProto/DarkColonel), and completing it in 8 turns or less.
- Rarity : 5 Stars
- Secret : to release a fourth sword attack, a Boom-Slash, or Sonicboom, hold
 and input
  and
and  on the third slash (HeroSword).
 - Element : Sword
Chip #019 - Roll
- Code(s): R
- Power: 20 x 3
- Description: Attacks an Enemy, then Heals you
- Description 2: attacks the nearest enemy to MegaMan in stoptime, then heals the same amount of Hp to Megaman.
- Where To Find: Maylu Gives you the Chip.
- Rarity : 3 Stars
- Element: Recovery
Chip #020 - RollSP
- Code(s): R
- Power: ??? (base = 30) x 3
- Description: Attacks an Enemy, then Heals you
- Description 2: attacks the nearest enemy to MegaMan in stoptime, then heals the same amount of Hp to Megaman.
- Where To Find: Maylu gives you the Chip.
- Rarity : 4 Stars
- Secret : the attack Power of RollSP is dependent on the number of Holy Panels on MegaMan's side of the field.This chip can only be used by Light MegaMan.
- Element: Recovery
Chip #021 - RollDS
- Code(s): R
- Power: ??? x 3
- Description: Attacks an Enemy, then Heals you
- Description 2: attacks the nearest enemy to MegaMan in stoptime, then heals the same amount of Hp to Megaman.
- Where To Find: Undernet 2.
- Secret: this chip can only be used by Dark MegaMan. the attack power of the chip is dependant on DarkMega's own evil power.
- Rarity : 4 Stars
- Element: Recovery
Chip #022C - Colonel
Chip #023C - Colonel SP
Chip #024C - Colonel DS
Chip #025C - ShadowMan
Giga Chips
Dark Chips
Program Advances
| 01 | |||||
| Name | Giga Cannon 1 | Reduced name | GigaCan1 | Damage | 400 |
| Battle Chips | Cannon x3 (A+B+C) | ||||
| Explanation | MegaMan pulls out a large cannon and fires it. Only hits one enemy. | ||||
| 02 | |||||
| Name | Giga Cannon 2 | Reduced name | GigaCan2 | Damage | 500 |
| Battle Chips | Hi-Cannon x3 (D+E+F) | ||||
| Explanation | MegaMan pulls out a large cannon and fires it. Only hits one enemy. | ||||
| 03 | |||||
| Name | Giga Cannon 3 | Reduced name | GigaCan3 | Damage | 600 |
| Battle Chips | Mega Cannon x3 (F+G+H) | ||||
| Explanation | MegaMan pulls out a large cannon and fires it. Only hits one enemy. | ||||
| 04 | |||||
| Name | Infinite Vulcan 1 | Reduced name | InfVulc1 | Damage | 20 |
| Battle Chips | Vulcan1 x3 (C+D+E) | ||||
| Explanation | MegaMan pulls out a Vulcan and fires it 20 times. | ||||
| 05 | |||||
| Name | Infinite Vulcan 2 | Reduced name | InfVulc2 | Damage | 20 |
| Battle Chips | Vulcan2 x3 (A+B+C) | ||||
| Explanation | MegaMan pulls out a Vulcan and fires it 24 times. | ||||
| 06 | |||||
| Name | Infinite Vulcan 3 | Reduced name | InfVulc3 | Damage | 20 |
| Battle Chips | Vulcan3 x3 (L+M+N) | ||||
| Explanation | MegaMan pulls out a Vulcan and fires it 28 times. | ||||
| 07 | |||||
| Name | Boxer 1 | Reduced name | Boxer1 | Damage | 100 |
| Battle Chips | FirePunch1 x3 (O+P+Q) | ||||
| Explanation | Launches a barrage of random fire punches. | ||||
| 08 | |||||
| Name | Boxer 2 | Reduced name | Boxer2 | Damage | 150 |
| Battle Chips | FirePunch2 x3 (H+I+J) | ||||
| Explanation | Launches a barrage of random fire punches. | ||||
| 09 | |||||
| Name | Boxer 3 | Reduced name | Boxer3 | Damage | 200 |
| Battle Chips | FirePunch3 x3 (E+F+G) | ||||
| Explanation | Launches a barrage of random fire punches. | ||||
| 10 | |||||
| Name | Super Spread 1 | Reduced name | SuprSpr1 | Damage | 100 |
| Battle Chips | WideShot1 x3 (L+M+N) | ||||
| Explanation | Launches 3 WideShots that pierce through obstacles. | ||||
| 11 | |||||
| Name | Super Spread 2 | Reduced name | SuprSpr2 | Damage | 120 |
| Battle Chips | WideShot2 x3 (E+F+G) | ||||
| Explanation | Launches 3 WideShots that pierce through obstacles. | ||||
| 12 | |||||
| Name | Super Spread 3 | Reduced name | SuprSpr3 | Damage | 140 |
| Battle Chips | WideShot3 x3 (S+T+U) | ||||
| Explanation | Launches 3 WideShots that pierce through obstacles. | ||||
| 13 | |||||
| Name | Shake Parade 1 | Reduced name | ShakPar1 | Damage | 80 |
| Battle Chips | SpShake1 x3 (G+H+I) | ||||
| Explanation | Launches 3 Satellites from the back column of MegaMan's field. They zigzag across all 3 rows, passing through obstacles along the way. | ||||
| 14 | |||||
| Name | Shake Parade 2 | Reduced name | ShakPar2 | Damage | 110 |
| Battle Chips | SpShake2 x3 (B+C+D) | ||||
| Explanation | Launches 3 Satellites from the back column of MegaMan's field. They zigzag across all 3 rows, passing through obstacles along the way. | ||||
| 15 | |||||
| Name | Shake Parade 3 | Reduced name | ShakPar3 | Damage | 140 |
| Battle Chips | SpShake3 x3 (S+T+U) | ||||
| Explanation | Launches 3 Satellites from the back column of MegaMan's field. They zigzag across all 3 rows, passing through obstacles along the way. | ||||
| 16 | |||||
| Name | Cactus Dance 1 | Reduced name | CacDanc1 | Damage | 30 |
| Battle Chips | CactBal1 x3 (H+I+J) | ||||
| Explanation | Drops several CactusBalls into the enemy area. If not landing on enemies, CactusBalls roll and deal more damage. | ||||
| 17 | |||||
| Name | Cactus Dance 2 | Reduced name | CacDanc2 | Damage | 40 |
| Battle Chips | CactBal2 x3 (Q+R+S) | ||||
| Explanation | Drops several CactusBalls into the enemy area. If not landing on enemies, CactusBalls roll and deal more damage. | ||||
| 18 | |||||
| Name | Cactus Dance 3 | Reduced name | CacDanc3 | Damage | 50 |
| Battle Chips | CactBal3 x3 (L+M+N) | ||||
| Explanation | Drops several CactusBalls into the enemy area. If not landing on enemies, CactusBalls roll and deal more damage. | ||||
| 19 | |||||
| Name | Hyper Burst | Reduced name | H-Burst | Damage | 50 |
| Battle Chips | Spreader x3 (C+D+E) | ||||
| Explanation | Acts like a 6-hit SpreaderGun. | ||||
| 20 | |||||
| Name | Life Sword | Reduced name | LifeSrd | Damage | 400 |
| Battle Chips | Sword S + WideSwrd S + LongSwrd S or Sword L + WideBlde L + LongBlde L | ||||
| Explanation | MegaMan slashes the area of 3x2 in front of him with a huge sword. | ||||
| 21 | |||||
| Name | Great Yo-Yo | Reduced name | GreatYo | Damage | 100 |
| Battle Chips | YoYo x3 (D+E+F) | ||||
| Explanation | MegaMan launches 3 Yo-Yos on all three rows. Each Yo-Yo goes all the way back to the enemy's back column before traveling back. The last column takes 3 hits while the other panels take 2 hits. | ||||
| 22 | |||||
| Name | Pit Hockey | Reduced name | PitHoky | Damage | 100 |
| Battle Chips | AirHoc x3 (Q+R+S) | ||||
| Explanation | Fires an AirPuck that bounces in the enemy area 18 times before disappearing. | ||||
| 23 | |||||
| Name | Poison Pharaoh | Reduced name | PoisPhar | Damage | Poison |
| Battle Chips | BugBomb A + Geddon3 A + Anubis A | ||||
| Explanation | A purple PharaohMan appears and uses poison in the opponent's area. It goes on until either the statue is destroyed or the enemies are all destroyed. Poison is twice as fast as PoisonAnubis. | ||||
| 24 | |||||
| Name | Cosmo Prison | Reduced name | CsmoPris | Damage | 60 |
| Battle Chips | Astroid3 C + Astroid3 C + CosmMnSP/DS C | ||||
| Explanation | CosmoMan appears and shoots Asteroids on all columns in front of him. Enemies on the same row are hit 9 times. All other rows are hit 6 times. | ||||
| 25 | |||||
| Name | Wild Bird | Reduced name | WildBird | Damage | 200 |
| Battle Chips | Katana1 S + Katana1 S + LarkMnSP/DS S | ||||
| Explanation | SwallowMan appears, disappears, and then swoops up from the panel under MegaMan. He hits the panels vertically adjacent and hits 3 times on the two columns ahead. | ||||
| 26 | |||||
| Name | Football | Reduced name | Football | Damage | 180 |
| Battle Chips | MrkCan2 F + MrkCan2 F + GridMnSP/DS F | ||||
| Explanation | GridMan appears and kicks 4 FootBalls into the enemy area. They land on the intersections of the panels and hit the 4 panels around that intersection. Corner panels are hit once each, panels on the side are hit twice, and the central panel is hit 4 times. | ||||
| 27 | |||||
| Name | Big Noise | Reduced name | BigNoise | Damage | 400 |
| Battle Chips | Pulsar3 S + Pulsar3 S + ShadeManSP/DS S | ||||
| Explanation | ShadeMan appears and does a SoundStorm that hits one panel ahead and then 3x3 area following that. Pierces invincibility. Paralyzes enemies. | ||||
| 28 | |||||
| Name | Time Bomb + | Reduced name | TimeBom+ | Damage | 600 |
| Battle Chips | TimeBom1 H + TimeBom2 H + TimeBom3 H | ||||
| Explanation | MegaMan creates a count bomb that has a very high duration. | ||||
| 29 | |||||
| Name | Body Guard | Reduced name | BodyGrd | Damage | 70 |
| Battle Chips | AntiDmg M + AntiNavi M + Muramasa M | ||||
| Explanation | Shurikens rain down from the sky and chase after the enemy. 10 Shurikens. | ||||
| 30 | |||||
| Name | Pile Driver | Reduced name | PileDrvr | Damage | 30 |
| Battle Chips | GunDelS3 D + GunDelS3 D + DjangoSP/DS D | ||||
| Explanation | A reflective mirror appears in front of MegaMan, firing a huge beam of sunlight at the enemy. Hits up to 10 times. | ||||