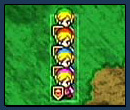
Id have to Admit. I use this formation more than 65% of the time. It is very helpful when pushing and pulling large blocks, But more importantly it closes the links closer together and when one on one combat attacks are too weak having three extra swords hitting the target with the same force can be very effective.
In this Formation the four links are back to back, while in this posistion they can easily and effectivily fend of enemies and when slashing the Four links Spin quickly leaving a lasting impression on your enemies.
In this Formation the four links are back to back, while in this posistion they can easily and effectivily fend of enemies and when slashing the Four links Spin quickly leaving a lasting impression on your enemies.
Id have to Admit. I use this formation more than 65% of the time. It is very helpful when pushing and pulling large blocks, But more importantly it closes the links closer together and when one on one combat attacks are too weak having three extra swords hitting the target with the same force can be very effective.
Back-to-Back
In this Formation the four links are back to back, while in this posistion they can easily and effectivily fend of enemies and when slashing the Four links Spin quickly leaving a lasting impression on your enemies.