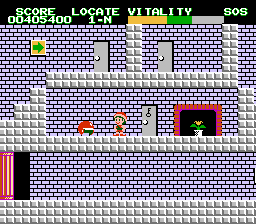
From the castle, walk right to the green wall. Jump on the block immediately following the steps to remove it and continue on your way.
1-N
Walk along the platforms, and watch out for the Hedgehogs that appear on certain levels.
1-O
Deal with the Dragonflies and Snakes in this section. The second trunk has a star, as does the first tall tree under the canopy.
1-P
Walk past the trees and up to the water. Then double back and jump on top of the trunks. The first tall tree trunk that you arrive on has a star (squat down if you land in the canopy). When you reach the green blocks, the short tree trunk also contains a star.
Ride the cloud to collect this doll.
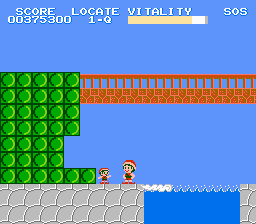
1-Q
Jump over the water and stay on the ground. When you reach the tree trunk, use it to climb up to the highest platform. Then jump up to the column to the right, and leap across each gap until you clear the tallest column. Then fall down and collect the sign post. Jump up the steps, and watch out for Scorpions while you cross the bridge. When you are past it, fall down and double back to the left. Use the cloud to ferry you over the water, and shoot the wall to the left to discover another Hao Doll. Then cross the water again and use the platforms to jump over the column.
1-R
Jump over the columns. From the highest column, you can reach the top of the wall with a candle on the other side. Shoot the candle to make a star appear. The shortest trunk also contains a star, as does the second trunk after the two mountains (with a mole in between).
1-S
Run past the town and jump up the trunks. Drop down to the second trunk in the middle of the canopy to reveal a star. The short trunk below the canopy also has a star.
1-T
The last tree trunk of the canopy also has a star which you can collect if you didn't drop down to the floor. Climb the steps and take either the top level or bottom level of the platforms to proceed.
1-U
Collect the sign post before the town. The middle trunk after the town has a star. Jump up to the top of the wall and proceed.
1-V
You can use the cloud to go over the water, but it will only take you so far. You'll need to use to blocks to completely avoid the water. From the step or from the floor, jump to the bounce wall to the right. When you hit it, hit and hold right to make it to the remainder of the steps. Then pass through the tunnel.
Break the blocks to reveal a lamp.
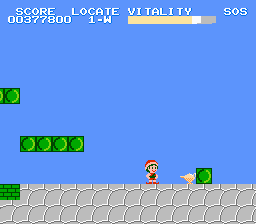
1-W
You can use the cloud to get over the second pool of water, but you can make the leap to the platform beyond it without the cloud. Jump through the platforms to reach the small staircase beyond. Shoot the staircase to find a lamp. Collect the lamp and run to the right.
1-X
Whether you collected the lamp or not, all you need to do is run continuously to the right. If you're not invincible, be mindful of the enemies.
1-Y
The tallest trunk before the pools of water has a star. Carefully leap over the pools.
Simply proceed to the right, using any pathway that's available. Some of the barriers that divide certain pathways can be shot down. When you arrive at the first door, you will see two. The right one deposits you in a dead-end room. Use the left door.
Back layer of door 1
If you already have a key, you can jump beneath the highest ceiling fan to shortcut your way to the exit door. If not, you'll have to continue left until you face this castle's mini-boss, a large beetle. Destroy the beetle, and follow the path way until it wraps around to the lower level and back to the exit door. There is a moon hidden in the wall to the right of the exit.
Front layer to door 2
Continue to the right. If you really want to shoot the flowers above you, you can climb the first steps, and shoot out the steps to your left. There is a 10,000 point broom hidden in the other steps on the other side of this first staircase. The highest level is safest, but you can also take the middle layer and jump across the gaps to avoid falling on the health draining spikes. Soon you will reach asecond set of doors. This time, the left door will deposit you in an empty room. Use the right door.
Kick the Hao Doll to the left.
Back layer of door 2
Walk to the left, drop down, and walk back to the right, climb up the steps. The stairs to the left of the ceiling fan can be shot, and the ground below the fan can be jumped on to create a shortcut to the exit, but you'll likely need a key first. Take the top level and jump over the difficult gap to reach the castle mini-boss. There is a moon in the steps to the right of this shortcut, and you must collect it now or you will not be able to get it again. Defeat the beetle and collect the key. Continue all the way to the right until you see a ceiling fan in the middle layer. Jump beneath the fan and land to the right of a column. Run left, into the column, and you should kick a Hao Doll out from behind. As long as you did not shoot the steps to the left, the doll should come to a stop so that you can collect it. Do so, and shoot out the steps to continue. Jump back up to the middle layer and walk to the left. It will drop you down to the lowest level where you will find the exit.
Front layer to door 3
Once again, you can shoot the flower above you if you climb the steps and shoot the wall to your left. In this next case, you're better off jumping beneath the blocks in the middle row below the ceiling fan to access the lower route, and safely taking that until you reach the stairs to the third pair of doors. You can only access the left one, so take it.
Back layer of door 3
In here, you will be presented with the key and the exit door quite easily. Pick them up and use the door. You will find the Power Helmet in the front layer. Collect it, and use it to break the bricks above the flower. You'll be able to use the mantle to stand on while you jump up to the right door. Use it to proceed. Drop down to the bottom, to the right of the pool of water, and head right. The safest way to fight the mini-boss and collect the key is to drop all the way down to the bottom by jumping on the bricks above the exit door, and face th beetle on the lowest level. There is a moon hidden in the highest blocks to the right. After that, you must double back to the exit.
The Power Helmet will break blocks above you.
Front layer to door 4
Proceed to the right. You'll have to zig zag around from the lower level to the middle level to the top level in a large "S" to get to the next door, but you can find short cuts by jumping up where the small blocks rise out of the ground. The Power Helmet will help you break holes in the floor above. Although the right door puts you in an empty room, you can actually access the rest of the area by shooting out the left wall and jumping on the floor beneath it. The left door is the regular door.
(Alternate method to door 4)
When you are in the back layer of door 3 after collecting the Power Helmet, you can jump to the left side of the water and shoot out the wall to gain immediate access to the back layer behind door 4. A beetle will be present to repel you, but if you shoot out enough of the blocks, you can proceed in far enough without getting bounced back. If you do get hit, and you don't have an SOS stored, you are likely to die from falling in the water.
Back layer of door 4
While the top layer is the safer layer, not only left can you proceed through the middle layer by shooting the barriers between the spikes, there is a moon to collect on the far right side of the middle layer. Beyond the moon, you will find the beetle mini-boss. Defeat it to collect the key, and continue right until you drop down to the lower level. Head back to the left until you reach the door. Head through it and collect the Health symbol, then return through the door, and continue left until you see the castle exit.

 and hold right to make it to the remainder of the steps. Then pass through the tunnel.

