Trig Jegman (talk | contribs) mNo edit summary |
|||
| (44 intermediate revisions by 8 users not shown) | |||
| Line 1: | Line 1: | ||
{{Header Nav|game=Half-Life}} | {{Header Nav|game=Half-Life}} | ||
{{floatingtoc}} | |||
Half-Life's weapons are quite varied, and in some cases are a little difficult to use unless you know the tricks of the trade. Many of them are better suited to certain situations (and enemies) than others. | Half-Life's weapons are quite varied, and in some cases are a little difficult to use unless you know the tricks of the trade. Many of them are better suited to certain situations (and enemies) than others. | ||
==Category 1: Melee and Special Weapons== | ==Category 1: Melee and Special Weapons== | ||
===Crowbar=== | ===Crowbar=== | ||
[[File: | [[File:HLbs crowbar.png|200px|left]] | ||
*'''Primary Fire''': Swing Crowbar | *'''Primary Fire''': Swing Crowbar | ||
*'''Damage''': | *'''Damage''': 10 per swing | ||
The crowbar is the first weapon you find. It comes in handy for destroying glass, crates, or other obstacles that aren't worth wasting valuable ammunition on. The upsides of the crowbar are that you can swing it quickly and it doesn't require ammo. On the flip side, you have to literally be in an enemy's face in order to use it. It is good for use against swarms of weaker enemies, such as [[Half-Life/Enemies#Hagworm|hagworms]] or [[Half-Life/Enemies#Headcrab|headcrabs]], or slower enemies, like [[Half-Life/Enemies#Zombie|mawmen]]. The crowbar is also a good choice in close quarters or when ammunition is limited. | The crowbar is the first weapon you find. It comes in handy for destroying glass, crates, or other obstacles that aren't worth wasting valuable ammunition on. The upsides of the crowbar are that you can swing it quickly and it doesn't require ammo. On the flip side, you have to literally be in an enemy's face in order to use it. It is good for use against swarms of weaker enemies, such as [[Half-Life/Enemies#Hagworm|hagworms]] or [[Half-Life/Enemies#Headcrab|headcrabs]], or slower enemies, like [[Half-Life/Enemies#Zombie|mawmen]]. The crowbar is also a good choice in close quarters or when ammunition is limited. | ||
| Line 13: | Line 15: | ||
==Category 2: Handguns== | ==Category 2: Handguns== | ||
===9mm Pistol=== | ===9mm Pistol=== | ||
[[File: | [[File:HLbs 9mm.png|200px|left]] | ||
[[File: | [[File:HLbs 9mmAmmo.png|75px|right]] | ||
*'''Damage''': | *'''Damage''': 8 per shot | ||
*'''Max Ammo''': | *'''Max Ammo''': 17 in gun (18 in [[Half-Life: Day One]] and [[Half-Life: Source]]), 250 in reserve | ||
The 9mm pistol, a Glock 17, isn't very powerful, but it is useful for taking out weaker enemies, like [[Half-Life/Enemies#Houndeye|houndeyes]] or [[Half-Life/Enemies#Headcrab|headcrabs]], from a distance. Primary fire shoots slowly but accurately, while secondary fire shoots faster but sacrifices accuracy. In addition, the pistol is one of only two ranged weapons in the game that works underwater. If you have the High-Definition Pack installed, the pistol takes the shape of a Beretta 92FS - it behaves exactly the same, however. | The 9mm pistol, a Glock 17, isn't very powerful, but it is useful for taking out weaker enemies, like [[Half-Life/Enemies#Houndeye|houndeyes]] or [[Half-Life/Enemies#Headcrab|headcrabs]], from a distance. Primary fire shoots slowly but accurately, while secondary fire shoots faster but sacrifices accuracy. In addition, the pistol is one of only two ranged weapons in the game that works underwater. If you have the High-Definition Pack installed, the pistol takes the shape of a Beretta 92FS - it behaves exactly the same, however. | ||
===Colt Python .357 Magnum=== | ===Colt Python .357 Magnum=== | ||
[[File: | [[File:HLbs magnum.png|200px|left]] | ||
[[File: | [[File:Hlbs magnumAmmo.png|125px|right]] | ||
*'''Damage''': | *'''Damage''': 40 per shot | ||
*'''Max Ammo''': | *'''Max Ammo''': 6 in gun, 36 in reserve | ||
The magnum is a much more powerful handgun than the pistol, capable of killing [[Half-Life/Enemies#Zombie|zombies]], [[Half-Life/Enemies#Alien Slave|vortigaunts]], or [[Half-Life/Enemies#Human Grunt|marines]] with a single well-placed shot to the head. Because it delivers damage in one solid hit, it is useful in situations where you must duck out of cover, fire a shot, then duck back into cover. The magnum is one of the most accurate long-range weapons, along with the pistol, and is effective against distant targets, like [[Half-Life/Enemies#Xen Master|Xen Masters]], as well as close range targets. In deathmatch mode, the magnum sports a lasersight which enables you to zoom in with the alternate fire key. | The magnum is a much more powerful handgun than the pistol, capable of killing [[Half-Life/Enemies#Zombie|zombies]], [[Half-Life/Enemies#Alien Slave|vortigaunts]], or [[Half-Life/Enemies#Human Grunt|marines]] with a single well-placed shot to the head. Because it delivers damage in one solid hit, it is useful in situations where you must duck out of cover, fire a shot, then duck back into cover. The magnum is one of the most accurate long-range weapons, along with the pistol, and is effective against distant targets, like [[Half-Life/Enemies#Xen Master|Xen Masters]], as well as close range targets. In deathmatch mode, the magnum sports a lasersight which enables you to zoom in with the alternate fire key. | ||
| Line 31: | Line 33: | ||
==Category 3: Anti-Personnel Weapons== | ==Category 3: Anti-Personnel Weapons== | ||
===MP5 (Submachine Gun)=== | ===MP5 (Submachine Gun)=== | ||
[[File: | [[File:Hlbs mp5.png|200px|left]] | ||
<div style="float:right">[[File: | <div style="float:right">[[File:Hlbs mp5ammo.png|55px]][[File:Hlbs mp5nade.png|85px]]</div> | ||
*'''Damage (bullets)''': 5 per bullet | *'''Damage (bullets)''': 5 per bullet | ||
*'''Damage (grenade)''': 100 if hit is direct | *'''Damage (grenade)''': 100 if hit is direct | ||
| Line 40: | Line 42: | ||
===Assault Shotgun=== | ===Assault Shotgun=== | ||
[[File: | [[File:HLbs shotgun.png|200px|left]] | ||
[[File: | [[File:HLbs shotgunAmmo.png|125px|right]] | ||
*'''Damage''': 5 per pellet (not per shot) | *'''Damage''': 5 per pellet (not per shot) | ||
*'''Max Ammo''': 8 shells in gun, 125 in reserve | *'''Max Ammo''': 8 shells in gun, 125 in reserve | ||
| Line 48: | Line 50: | ||
===Crossbow=== | ===Crossbow=== | ||
[[File:HL Crossbow. | [[File:HL Crossbow Model.jpg|200px|left]] | ||
[[File:HL Crossbow | [[File:HL Crossbow Ammunition Model.jpg|125px|right]] | ||
*'''Damage''': 50 per shot | *'''Damage''': 50 per shot | ||
*'''Max Ammo''': 5 bolts in crossbow, 50 in reserve | *'''Max Ammo''': 5 bolts in crossbow, 50 in reserve | ||
| Line 58: | Line 60: | ||
==Category 4: Heavy Weapons== | ==Category 4: Heavy Weapons== | ||
===Rocket Propelled Grenade Launcher (RPG)=== | ===Rocket Propelled Grenade Launcher (RPG)=== | ||
[[File: | [[File:Hlbs rpg.png|200px|left]] | ||
[[File: | [[File:Hlbs rpgAmmo.png|75px|right]] | ||
*'''Damage''': 100 per rocket | *'''Damage''': 100 per rocket | ||
*'''Max Ammo''': 1 rocket in launcher, 5 in reserve. | *'''Max Ammo''': 1 rocket in launcher, 5 in reserve. | ||
| Line 66: | Line 68: | ||
===Tau Cannon=== | ===Tau Cannon=== | ||
[[File:HL Taucannon. | [[File:HL Taucannon Model.jpg|200px|left]] | ||
[[File:HL Gluon | [[File:HL Gluon Ammunition Model.jpg|125px|right]] | ||
*'''Damage''': 20 per shot | *'''Damage''': 20 per shot | ||
*'''Max Ammo''': 100 units of Uranium | *'''Max Ammo''': 100 units of Uranium | ||
| Line 74: | Line 76: | ||
===Gluon Gun=== | ===Gluon Gun=== | ||
[[File:HL | [[File:HL Gluon Model.jpg|200px|left]] | ||
[[File:HL Gluon | [[File:HL Gluon Ammunition Model.jpg|125px|right]] | ||
*'''Damage''': 14 per unit of Uranium | *'''Damage''': 14 per unit of Uranium | ||
*'''Max Ammo''': 100 units of Uranium | *'''Max Ammo''': 100 units of Uranium | ||
| Line 82: | Line 84: | ||
===Hivehand=== | ===Hivehand=== | ||
[[File:HL Hivehand. | [[File:HL Hivehand Model.jpg|200px|left]] | ||
*'''Damage''': 8 per hornet | *'''Damage''': 8 per hornet | ||
*'''Max Ammo''': 8 in reserve | *'''Max Ammo''': 8 in reserve | ||
| Line 90: | Line 92: | ||
==Category 5: Disposable Weapons== | ==Category 5: Disposable Weapons== | ||
===Hand Grenade=== | ===Hand Grenade=== | ||
[[File: | [[File:HLbs grenade.png|125px|left]] | ||
*'''Damage''': 100 at ground zero, less with distance | *'''Damage''': 100 at ground zero, less with distance | ||
*'''Max Ammo''': 10 grenades | *'''Max Ammo''': 10 grenades | ||
| Line 99: | Line 100: | ||
===Satchel Charge=== | ===Satchel Charge=== | ||
[[File: | [[File:HLbs satchel.png|125px|left]] | ||
*'''Damage''': 150 at ground zero, less with distance | *'''Damage''': 150 at ground zero, less with distance | ||
*'''Max Ammo''': 5 charges | *'''Max Ammo''': 5 charges | ||
| Line 112: | Line 113: | ||
===Snarks=== | ===Snarks=== | ||
[[File: | [[File:HLbs snark.png|125px|left]] | ||
[[File: | [[File:HLbs snarkNest.png|150px|right]] | ||
*'''Damage''': 10 per attack | *'''Damage''': 10 per attack | ||
*'''Max Ammo''': 15 Snarks | *'''Max Ammo''': 15 Snarks | ||
Snarks are little aliens that would love to peck your face off. While they are seen in the single-player game as enemies, you can also pick up a pack of your own to throw at the human enemies. Be careful in using them, as, much like the [[#Laser Tripmine|laser mines]], they don't distinguish between friend and foe. If you throw one when there are no enemies around or they run out of enemies, they will not hesitate to turn on you. Snarks have almost no health and die after taking the least amount of damage or on their own after 15 seconds. They are most devastating when unleashed in groups and are one of the more effective weapons against [[Half-Life/Enemies#Assassin|assassins]]. When encountered in the game, because of their incredible speed and small size, the best strategy is to run and wait for their 15 seconds of life to expire, at which point they explode into little green chunks. There's a small glitch with snarks in which you can stack them underneath yourself to create a short platform. By aiming directly under your feet and firing, you'll create them underneath yourself, thus lifting you upwards slightly. | Snarks are little aliens that would love to peck your face off. While they are seen in the single-player game as enemies, you can also pick up a pack of your own to throw at the human enemies. Be careful in using them, as, much like the [[#Laser Tripmine|laser mines]], they don't distinguish between friend and foe. If you throw one when there are no enemies around or they run out of enemies, they will not hesitate to turn on you. Snarks have almost no health and die after taking the least amount of damage or on their own after 15 seconds. They are most devastating when unleashed in groups and are one of the more effective weapons against [[Half-Life/Enemies#Assassin|assassins]]. When encountered in the game, because of their incredible speed and small size, the best strategy is to run and wait for their 15 seconds of life to expire, at which point they explode into little green chunks. There's a small glitch with snarks in which you can stack them underneath yourself to create a short platform. By aiming directly under your feet and firing, you'll create them underneath yourself, thus lifting you upwards slightly. | ||
{{Footer Nav|game=Half-Life|prevpage=Secrets}} | |||
Latest revision as of 20:33, 1 October 2021
Half-Life's weapons are quite varied, and in some cases are a little difficult to use unless you know the tricks of the trade. Many of them are better suited to certain situations (and enemies) than others.
Category 1: Melee and Special Weapons
Crowbar

- Primary Fire: Swing Crowbar
- Damage: 10 per swing
The crowbar is the first weapon you find. It comes in handy for destroying glass, crates, or other obstacles that aren't worth wasting valuable ammunition on. The upsides of the crowbar are that you can swing it quickly and it doesn't require ammo. On the flip side, you have to literally be in an enemy's face in order to use it. It is good for use against swarms of weaker enemies, such as hagworms or headcrabs, or slower enemies, like mawmen. The crowbar is also a good choice in close quarters or when ammunition is limited.
Category 2: Handguns
9mm Pistol
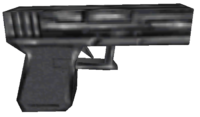

- Damage: 8 per shot
- Max Ammo: 17 in gun (18 in Half-Life: Day One and Half-Life: Source), 250 in reserve
The 9mm pistol, a Glock 17, isn't very powerful, but it is useful for taking out weaker enemies, like houndeyes or headcrabs, from a distance. Primary fire shoots slowly but accurately, while secondary fire shoots faster but sacrifices accuracy. In addition, the pistol is one of only two ranged weapons in the game that works underwater. If you have the High-Definition Pack installed, the pistol takes the shape of a Beretta 92FS - it behaves exactly the same, however.
Colt Python .357 Magnum
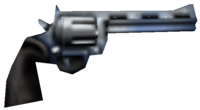
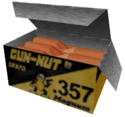
- Damage: 40 per shot
- Max Ammo: 6 in gun, 36 in reserve
The magnum is a much more powerful handgun than the pistol, capable of killing zombies, vortigaunts, or marines with a single well-placed shot to the head. Because it delivers damage in one solid hit, it is useful in situations where you must duck out of cover, fire a shot, then duck back into cover. The magnum is one of the most accurate long-range weapons, along with the pistol, and is effective against distant targets, like Xen Masters, as well as close range targets. In deathmatch mode, the magnum sports a lasersight which enables you to zoom in with the alternate fire key.
Category 3: Anti-Personnel Weapons
MP5 (Submachine Gun)
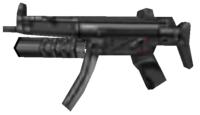
- Damage (bullets): 5 per bullet
- Damage (grenade): 100 if hit is direct
- Max Ammo: 50 in gun, 250 bullets & 10 grenades in reserve
The Heckler & Koch MP5, also known as the Submachine Gun (SMG), assault rifle, and combat rifle, is a rapid-fire weapon that uses the same 9mm ammunition as the pistol. It is a good weapon to use if you don't know what the situation ahead is. It is almost as accurate as the pistol at long distances, and the attached grenade launcher is extremely effective at taking out hordes of small enemies or single larger enemies. If you have the High-Definition Pack installed, this weapon becomes an M4 Carbine with grenade launcher, yet, strangely, still uses the same ammunition as the pistol.
Assault Shotgun


- Damage: 5 per pellet (not per shot)
- Max Ammo: 8 shells in gun, 125 in reserve
The shotgun fires a group of small pellets that scatter over distance. For this reason, the shotgun is only effective in close-range situations. The primary fire shoots out of only one barrel, while secondary fire mode shoots with both barrels at once. The major disadvantages of this weapon are that it is ineffective at long ranges and it takes longer than other weapons to reload. A common tactic for the shotgun is to peep out from around a corner and let the enemy see you before sinking back behind a wall, then shoot the enemy as it rounds the corner. It can be very powerful if used properly, and is especially effective against medium range enemies, like bullsquids and grunts.
Crossbow
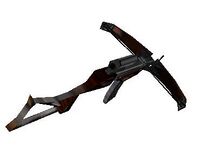

- Damage: 50 per shot
- Max Ammo: 5 bolts in crossbow, 50 in reserve
The crossbow serves as Half-Life's sniper weapon. It's silent, it has a scope, and deals more damage in a single shot than the magnum. Using the secondary fire mode will enable you to look through the scope, though it doesn't cause it to fire any differently. Although the crossbow is powerful, ammo is limited compared to other weapons available in the game and it has an eternally long reload time. On the bright side, the crossbow is one of the few weapons that works underwater, along with the pistol and grenades, and is therefore essential for taking out Ichthyosaurs. In multiplayer, the crossbow's darts will explode on contact if you're not using the scope.
Category 4: Heavy Weapons
Rocket Propelled Grenade Launcher (RPG)
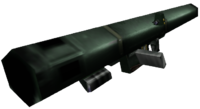

- Damage: 100 per rocket
- Max Ammo: 1 rocket in launcher, 5 in reserve.
The RPG is a very powerful rocket launcher with a laser-guide feature. In primary fire mode, the rocket will fly in a straight line. This is useful when you need to shoot at a relatively stationary target, such as a tank, then run back into cover. The secondary fire mode will turn on the laser guiding system. This will cause the launched rocket to follow the laser after being fired, making it easier to hit highly mobile targets, such as Apache Helicopters. The RPG is more powerful than a standard grenade and is much easier to control and can reach longer distances than a thrown grenade. On the downside, it takes a long time to reload and you must reload after each shot. In addition, ammo for the RPG is scarce.
Tau Cannon
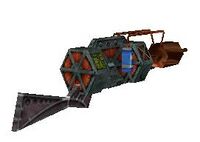

- Damage: 20 per shot
- Max Ammo: 100 units of Uranium
The Tau Cannon is an experimental energy rifle whose shots are capable of penetrating solid walls. Though it doesn't look like it is very damaging, it can fire very rapidly and doesn't ever need to be reloaded. It's secondary fire mode, when fully charged, will fire an extremely damaging beam of energy, knocking you back. This is very effective in taking down heavily armored enemies, like Apache Helicopters or gun emplacements. In multiplayer, the secondary fire is also used to make extremely high jumps or survive long falls. When charged to its fullest, aim down, and release to launch yourself into the air or to break a long fall.
Gluon Gun
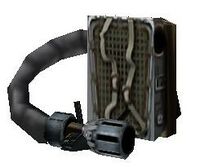

- Damage: 14 per unit of Uranium
- Max Ammo: 100 units of Uranium
The Gluon Gun is the last weapon you'll run into during the game. When fired, it sends a constant stream of extremely damaging energy which can vaporize just about anything in a matter of seconds. Be wary, though, as the Gluon Gun is notorious for burning through energy. It is useful when you are facing a singular great enemy or many small enemies that you must destroy quickly. Otherwise, it's rate of ammo depletion makes the Tau Cannon a much more efficient use of uranium energy.
Hivehand
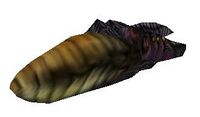
- Damage: 8 per hornet
- Max Ammo: 8 in reserve
The hivehand is basically the severed arm of an alien grunt, but you won't get one for yourself until after you have taken many of them down. The hivehand's primany fire mode shoots homing hornets at enemies. The secondary fire mode shoots faster non-homing hornets in rapid succession. The hivehand constantly regenerates ammunition (as long as it is equipped) and, because it has homing capabilities, it more effective than the pistol at taking out smaller, bothersome foes as well as constantly regenerating ones, such as the xen masters of later levels. Although the hivehand is very useful during single-player mode, in multiplayer mode, the hivehand tends to lag games and leaves an orange trail, revealing your position. Because of this and the fact that it is one of the weaker weapons in the game, it should be avoided in multiplayer games whenever possible.
Category 5: Disposable Weapons
Hand Grenade
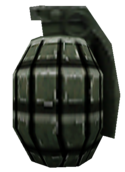
- Damage: 100 at ground zero, less with distance
- Max Ammo: 10 grenades
Fragmentation grenades are very useful is used correctly, but it may take some practice to master using them. Because it doesn't use a crosshair and the fact that it can bounce around before detonating, grenades can be hard to aim. The delay and ability to bounce around before detonating, however, are what make the hand grenade so valuable. It can be lobbed over obstacles or around corners to flush out an enemy or to take out an unseen laser mine. Grenades require creativity and skill to use, especially in multiplayer matches.
Satchel Charge
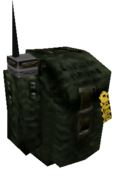
- Damage: 150 at ground zero, less with distance
- Max Ammo: 5 charges
Satchel charges are small packages of explosives that can be detonated on command. Primary fire will allow you to throw one, while secondary fire will allow you to throw multiple charges before detonating. Generally, they are easier to use than the other explosives available in the game, if only for the manual detonation. There are several areas of the game where it is necessary to send a charge to detonate trip mines blocking the path that cannot be cleared any other way. In multiplayer matches, these are the most useful of the explosives because they can be triggered on command. They work well placed around blind corners or among satchel charges that spawn naturally, as unwary players may not distinguish the active charges from the spawned charges.
Laser Tripmine
- Damage: 150 at ground zero, less with distance
- Max Ammo: 5 mines
Laser tripmines are exactly what their name implies: laser triggered explosives. These explosives, recognizable by their tell-tale blue-green laser, make their first appearance in "We've Got Hostiles!". To use a laser mine, simply place it on any surface. The tripmine will make a distinctive series of beeping sounds before it engages its laser. When the blue-green laser appears, the mine is active and will not differentiate between friend or foe, so be very careful around them. To disarm a tripmine, you can either shoot the mine or detonate an explosive next to it (it is never advisable to try and bash it off with your crowbar). Laser mines are most effective against enemies that will chase you when they see you, like assassins or marines. In earlier versions of Half-Life, you could use these as stairs in deathmatch by placing them on walls and jumping on top of them. However, recent Steam versions have "fixed" this by disabling collision detection on the tripmines.
Snarks
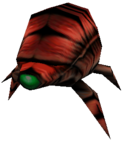
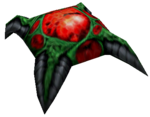
- Damage: 10 per attack
- Max Ammo: 15 Snarks
Snarks are little aliens that would love to peck your face off. While they are seen in the single-player game as enemies, you can also pick up a pack of your own to throw at the human enemies. Be careful in using them, as, much like the laser mines, they don't distinguish between friend and foe. If you throw one when there are no enemies around or they run out of enemies, they will not hesitate to turn on you. Snarks have almost no health and die after taking the least amount of damage or on their own after 15 seconds. They are most devastating when unleashed in groups and are one of the more effective weapons against assassins. When encountered in the game, because of their incredible speed and small size, the best strategy is to run and wait for their 15 seconds of life to expire, at which point they explode into little green chunks. There's a small glitch with snarks in which you can stack them underneath yourself to create a short platform. By aiming directly under your feet and firing, you'll create them underneath yourself, thus lifting you upwards slightly.

