There are a wide variety of enemies you will face in the game, both alien and human. This is a comprehensive list of all the enemies featured in the game as well as their health, damage infliction, and a description. The damage and health are given in the form of three sets of numbers. This is to show the value at the three difficulties. For example, the headcrab's attack is given as 10/10/20. This means that at on easy and medium difficulty, a headcrab attack does 10 damage, while it does 20 on hard difficulty. They are presented in more or less the order in which they are encountered.
Early Game Enemies[edit]
Barnacle[edit]
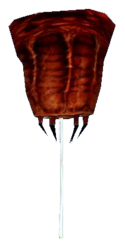
- Health: 10/10/10
- Damage: Instant death if it manages to pull you up to the top where its mouth is. Occasionally it only bites once when you reach its mouth, giving an opportunity to kill it.
Barnacles are stationary aliens that attach to ceilings. They have extremely long and sticky tongues that they hang down from the ceiling. These can be hard to see, especially if the barnacle is stationed up on a high ceiling. If something wanders under the barnacle and touched its tongue, the barnacle will immediately begin reeling it in. If you wander into a barnacle's tongue, the same will happen to you. If you do not kill the barnacle by the time you are sucked into its jaws, you will be instantly killed. Thankfully, however, it only takes one swipe of the crowbar to kill a barnacle, so if you do get caught by one, simply swipe the barnacle when you reach its mouth. This will not save you from falling damage, however. Barnacles will not distinguish between you and an enemy, and can be used as traps to snag marines. The pistol, crowbar, or hivehand when you're further into the game are recommended for taking out barnacle- anything more powerful is a waste of ammo.
Headcrab[edit]
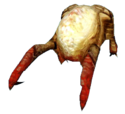
- Health: 10/10/20
- Damage: Jump Attack: 10/10/20
Headcrabs are the first enemy encountered in the game. They're rather weak, but can be dangerous in groups. Headcrabs are usually found hiding in damp or dark areas, waiting for prey to ambush. When attacking, they launch themselves at their intended victim's head, making a screeching sound. If they successfully attach to an NPC's head, they will dig into its brain and turn it into a zombie (see below). Headcrabs are best taken out at a distance with the pistol or, later in the game, the hivehand from a distance. If you are good at dodging their jump attacks or are encountering them in close quarters, you may also choose run up and hit them with the crowbar.
Zombie[edit]
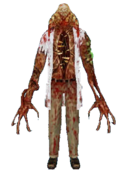
- Health: 50/50/100
- Damage: Single Swing: 10/20/20
- Damage: Double Swing: 25/40/40
Zombies, or mawmen, are humans that have fallen victim to headcrabs (see above). The infestation has mutated their hands into long, sharp claws, and there is a giant gaping hole in their torsos. Zombies are usually found standing around or feeding on corpses, but are sometimes found on the floor, feigning death until they are shot or someone approaches. They only have one form of melee attack and no form of long distance attack. Zombies are rather slow and can easily be taken out with a crowbar if you step back after each few crowbar swings to avoid the zombie's pathetically slow claw swipes. Alternatively, you can use the pistol at long range or if you need to take them out quickly a shotgun blast to the head will do.
Alien Slave[edit]
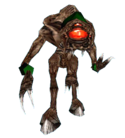
- Health: 30/30/60
- Damage: Side Swipe: 8/10/10
- Damage: Overhead Swipe: 25/25/25
- Damage: Electricity: 10/10/15
Alien Slaves, also referred to as vortigaunts, are slaves from the alien planet Xen ordered by their master (whoever that may be) to kill anything that isn't from Xen, specifically humans. At long range, they attack by an electrical charge. When met at close range, they attack with their claws, causing more damage than their electric bolt. You will know when a vortigaunt is about to attack because they will charge up their bolt for a couple of seconds, emitting green electricity into the air. When this happens, it is best to find cover because, even if you are moving, a vortigaunt's electric attack hardly ever misses a target in its range. Vortigaunts are best taken on with the shotgun at close range or with the pistol at longer ranges. If one is badly wounded, it will choose to run until cornered or finding another vortigaunt to help.
On Hard difficulty Alien Slaves are able to execute their electrical charge attack much faster, but can be prevented from doing so if shot couple of times before completing their charge sequence using either the MP5 or the Shotgun or Magnum, although it's often preferable to take cover.
Houndeye[edit]
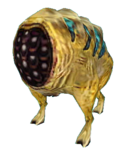
- Health: 20/20/30
- Damage: Wave Attack: 10/15/15
Houndeyes are small, yellow and green striped dog-like creatures that balance on three legs. When one is in range of a target, it will charge up an attack, making a distinctive whine before unleashing a wave of energy. A houndeye's attack isn't terribly damaging, especially for the amount of time it takes to prepare, but when several attack at the same time, the waves enhance each other, creating a stronger, more damaging wave of energy. When facing a pack of Houndeyes, the best strategy is to find a bottleneck or corner where they must come at you one at a time. Recommended weapons for dealing with Houndeyes are the crowbar if there is only one or two of them, and the shotgun or pistol when dealing with a pack.
Bullsquid[edit]
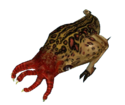
- Health: 40/40/120
- Damage: Acid Spit: 10/15/15
- Damage: Tail Whip: 25/35/35
- Damage: Head Butt: 15/25/25
Bullsquid are violent Xen creatures that are hostile to many creatures, including other bullsquid. At long range, it will spit acid with decent accuracy, but slow enough that it can be easily avoided. At close range, it is more dangerous, attacking by either slashing you with its tail or knocking you across the room. If there are other enemies around, like headcrabs or marines, they will often attack these enemies before attacking you. You can use this to your advantage to inflict damage to it while it is not focused on you. At long ranges, a bullsquid doesn't present much of a threat as long as you dodge its slow moving projectile spit, so the pistol should be all that is required. At close range, however, the bullsquid is much more dangerous, and may require a few shots from the shotgun or magnum.
Mid-game Enemies[edit]
HECU [Hazardous Environment Combat Unit][edit]
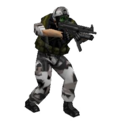
- Health: 50/50/80
- Damage: Shotgun: 3/5/6
- Damage: Assault Rifle: 3/4/5
- Damage: Kick: 5/10/10
HECU Millitary, also referred to as "grunts", "marines", or simply "the military", are a special military task force dispatched by the U.S. Government to contain the incident at Black Mesa by killing everything, including the facility personnel. Grunts are the most common human enemy, and utilize a variety of weapons, vehicles and tactics against you. Grunts are usually armed with an assault rifle and hand grenades, but it is not uncommon to run into one with a shotgun. Human grunts aren't the strongest enemy, but they are crafty and use cover and tactics well. The weapon of choice depends mostly on the situation. At long distance, it is best to use the magnum or crossbow. At medium range, the all-around assault rifle is most likely the best weapon. You could also make one chase you around the corner, then equip the shotgun for when he rounds the corner.
On Hard difficulty Human grunts are able to throw grenades more often, so It's recommended to constantly move and change cover more often to avoid explosions.
Hagworm[edit]
- Health: 2/2/2
- Damage: Bite: 2/2/2
Hagworms are small swimming worms, similar in appearance to a leech, that appear in several different underwater parts of the game. They don't do much damage, but they can get in your way as you try to swim and, in numbers, their bites can add up. To solve this, it is usually wise to wildly swing the crowbar as you swim through hagworm-infested waters.
Ichthyosaur[edit]
- Health: 200/200/400
- Damage: Bite: 20/35/50
Ichthyosaurs are giant shark-like aliens with powerful jaws that will spin you around and disorient you if they get you. To make things worse, if you happen to fall in the water with an ichthyosaur the only weapons you can use on it are ones that work underwater. These weapons are the crowbar (not recommended), the pistol, the crossbow, and grenades. Sometimes it will break the surface and be visible from land, but unless you're fast, you won't have much time to damage it this way. The best strategy for dealing with an Ichthyosaur is to swim backwards firing crossbow bolts at it, though it is good to have an exit strategy in reserve if it gets too close.
Assassins[edit]
- Health: 30/50/50
- Damage: 8/10/10
Commonly known as "Black Ops", assassins are elite female operatives skillful in stealth and close combat. They utilize silenced pistols, grenades and a variety of martial arts kicks and jabs at close range. They have been confirmed to work independently of the military and have their own objectives to complete, one of which is eliminating you. Assassins are extremely fast and agile and can leap considerable distances, making them very hard to target. Often the only valid tactic is to back into a corner so they can only come at you from one or two directions. If you have any, snarks are extremely effective against assassins, even if they don't kill them outright. When an assassin encounters snarks they will usually ignore you to fire wildly at the creatures, giving you a clear shot. Otherwise, a quick and powerful weapon, like the magnum, should be used.
On Hard difficulty it's even less recommended to take them head on due to the fact that they can use their cloaking behavior in this mode making it even harder to spot them.
Late-Game Enemies[edit]
Alien Grunt[edit]
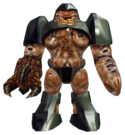
- Health: 60/90/120
- Damage: Hornets: 4/5/8
- Damage: Punch: 10/20/20
Alien Grunts are formidable alien foes covered in armor and equipped with a hivehand. Shooting an alien grunt in the shoulders, back, or back of the head will do little to no damage. Your best chance is a stream of bullets to the gut. It is hard to avoid their attacks completely, even behind cover, because the hivehand fires homing hornets. If you can, engage alien grunts from a distance with a heavy hitting weapon, such as the magnum or crossbow, or with a stream of bullets from the assault rifle.
Alien Controller[edit]
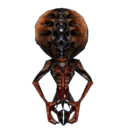
- Health: 60/60/100
- Damage: Energy Ball: 15/25/35
Alien Controllers are flying alien creatures that shoot streams of energy balls at you. They are very agile and have a lot of health, so small or slow weapons should be avoided when fighting Xen Masters. On the bright side, they aren't very accurate if you are continually moving or use cover. If there's only one, the hivehand is a good choice because the Alien Controller's attacks are fairly easy to avoid and the hornets home in on their target. If there are swarms of Alien Controllers, it is probably better to use the magnum.
Heavy Duty Enemies[edit]
Apache Helicopter[edit]
- Health: 150/200/250
- Damage: Machine Gun: 8/10/10 (It fires 10 rounds per second)
- Damage: Missile: 150/150/150
The Apache attack helicopter makes appearances during some parts of levels that occur on the surface. They can best be taken down by the RPG or the Tau Cannon; other weapons will work but only after a lot of well-aimed shots at the rotors or engines (watch for small puffs or thick trails of black smoke when you score a weak or strong hit). Apaches are equipped with machine guns and, in some cases, air to surface missiles. The weak spots of the Apache attack helicopter are the cockpit and the engine.
Gargantua[edit]
- Health: 800/800/1000
- Damage: Punch: 10/30/30
- Damage: Flame: 25 at first, but increases the longer you stay in it
- Damage: Stomp: 50/100/100
The Gargantua is a large blue armored creature that appears several times in the game. Each time, it requires an unorthodox method to kill. Although it is possible to kill a gargantua with conventional weapons, it is usually a waste of ammunition. It attacks by slashing you or shooting jets of flame from its hands at close range and by stomping, causing a shockwave of red energy to fly at you at long range. Gargantuas can run as fast as you can and are ruthless enemies. There are four different ones in the game, two of which must be killed and two of which you are better off sneaking past. If you have caught the attention of a Gargantua, many times it is best to enter a small opening where it cannot reach you until it has lost interest in you.
Gonarch[edit]
- Health: 2100/3150/4200
- Damage: Kick: 50/60/70
- Damage: Acid: 100/120/160
The Gonarch is a four legged creature with a large egg sack that hangs down below where its legs meet. As the second to last boss, Gonarch can only be found once during the game and it takes a large amount of damage to kill. The sack is Gonarch's weak point, and it can only be harmed when Gonarch isn't progressing farther into its lair between battles. The Gonarch can attack in a variety of different ways. It will release small baby gonarches to attack or fire acid in your general direction when you're at a distance. If you're out in the open, it will run up to you and kick you, knocking you back and giving you a great deal of damage.
Nihilanth[edit]
The boss of the game.