Making the guide linear[edit]
Eggerland Meikyuu no Fukkatsu is almost completely linear, unlike its predecessor Eggerland 2. In fact, (1) most rooms only have one entrance and one exit door; (2) when a room has one entrance and two exits, one directions leads always to a dead end with a large key (or other special item), and the other direction leads to a double-lock door, where the large key should be used.
Therefore, the walkthrough can be linearized following the game progress. Below is a temporary TC with the old and new pages. --Abacos (talk) 11:02, 2 September 2015 (UTC)
Link map[edit]
One table to rule them all, One table to find them, One table to bring them all and in the darkness bind them...
Rooms with special items or sub-dungeons are highlighted in green (map, bell, 9 large keys, 4 hints, 4 guardian gods). Rooms with special solutions are highlighted in red.
| A | B | C | D | E | F | G | H | I | J | K | L | M | N | O | P | |
|---|---|---|---|---|---|---|---|---|---|---|---|---|---|---|---|---|
| 1 | A-1 | B-1 | C-1 | D-1 | E-1 | F-1 | G-1 | H-1 | I-1 | J-1 | K-1 | L-1 | M-1 | GOD | KEY | P-1 |
| 2 | KEY | hint | C-2 | D-2 | E-2 | KEY | G-2 | H-2 | I-2 | J-2 | K-2 | L-2 | M-2 | N-2 | KEY | P-2 |
| 3 | A-3 | KEY | C-3 | D-3 | E-3 | exit | G-3 | H-3 | hint | J-3 | K-3 | L-3 | M-3 | N-3 | O-3 | P-3 |
| 4 | A-4 | B-4 | C-4 | D-4 | E-4 | KEY | G-4 | H-4 | KEY | K + G | K-4 | L-4 | M-4 | N-4 | O-4 | P-4 |
| 5 | A-5 | B-5 | C-5 | D-5 | E-5 | F-5 | G-5 | H-5 | I-5 | J-5 | K-5 | L-5 | M-5 | N-5 | BELL | P-5 |
| 6 | A-6 | B-6 | C-6 | D-6 | E-6 | F-6 | G-6 | H-6 | I-6 | hint | K-6 | L-6 | M-6 | N-6 | MAP | P-6 |
| 7 | A-7 | K + G | C-7 | D-7 | E-7 | F-7 | G-7 | H-7 | I-7 | J-7 | K-7 | L-7 | M-7 | N-7 | O-7 | P-7 |
| 8 | A-8 | B-8 | C-8 | D-8 | E-8 | F-8 | G-8 | GOD | hint | J-8 | K-8 | L-8 | M-8 | N-8 | O-8 | P-8 |
Linear walkthrough[edit]
In Eggerland 2, 80% of the rooms had three or more doors, and only 20% were "linear" (one entrance door and one exit door). There were no dead-end rooms at all.
Not so in Eggerland: Revival of the Labyrinth, where 80% of the rooms are linear. The remaining ones are either "dead-ends" (one door only) or "forks" (one entrance door and two exits). No room has more than two exit doors. Furthermore, each single fork room is connected (directly or through some rooms) to one dead-end room, and in each dead end a special item can be found.
The walkthrough is organized so that every guide page includes one fork and ends with the corresponding one dead end (with one exception, that is a loop). In every dead end Lolo gets an important item or two, that give the title to the guide page.
|
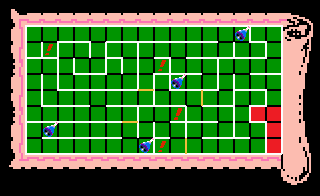
Lolo starts in the south-east corner of the labyrinth. After few rooms, there is the first fork: to the north, the labyrinth continues; to the west, there is the first dead end with the map. |
|
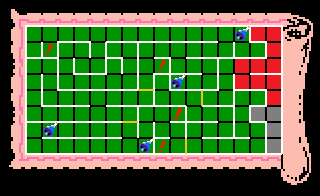
From the first fork, let's take the north exit. After some rooms, there is the second fork: to the west, Lolo will get to a double-locked gate; to the east, he will reach a second dead end with the 1st big key. |
|
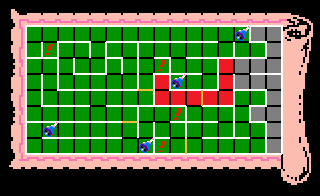
From the second fork, let's take the west exit. After some rooms, there is the third fork: to the south, the labyrinth continues; to the west, Lolo will reach the third dead end with the 2nd big key. |
|
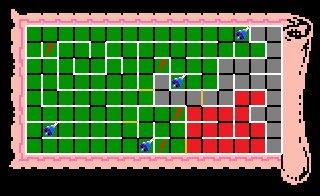
From the third fork, let's take the south exit. After some rooms, there is the fourth fork: to the west, the labyrinth continues; to the east, Lolo will reach the fourth dead end with the bell. |
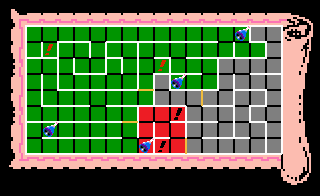
|
From the fourth fork, let's take the west exit. After some rooms, the bell will ring: this is the fifth fork. To the west, the labyrinth continues; in the secret door, Lolo will reach the fifth dead end with the South god. |
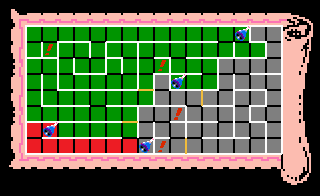
|
From the fifth fork, let's take the west exit. In the next room there is the sixth fork: to the north, the labyrinth continues; to the west, Lolo will enter a loop that leads to the 3rd big key and the East god, that is in the sixth dead end. |
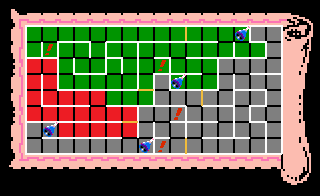
|
From the end of the loop, let's take the north exit. After some rooms there is the seventh fork: to the east, the labyrinth continues; to the west, Lolo will enter another loop (replacing the seventh dead end) that leads to the 4th big key. |
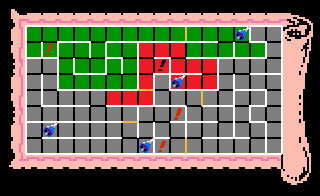
|
From the seventh fork, let's take the east exit. After some rooms, there is the eighth fork: to the west, the labyrinth continues; to the east, Lolo will reach the eighth dead end with the 5th big key and the North god. |
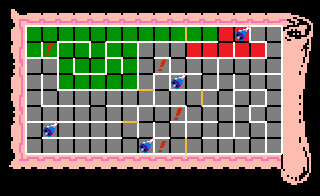
|
From the eighth fork, let's take the west exit. After some rooms, there is the ninth fork: to the west, the labyrinth continues; to the east, Lolo will reach the ninth dead end with the 6th big key and the West god. |
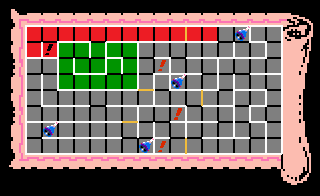
|
From the ninth fork, let's take the west exit. After some rooms, there is the tenth fork: to the south, the labyrinth continues; to the west, Lolo will reach the tenth dead end with the 7th big key. |
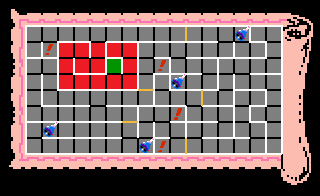
|
From the tenth fork, let's take the south exit. After some rooms, there is the eleventh fork: to the north, the labyrinth continues; to the east, Lolo will reach the eleventh dead end thus collecting the 8th and 9th big keys. After that, Lolo can go back to the eleventh fork and continue to King Egger Rooms. |