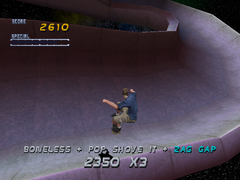
Gaps (sometimes called transfers) are special landmarks where skating at a certain spot or object will earn you extra points. A lot of levels have ramps, rails, funboxes, ledges, and even walls that potentially have gaps to find. If a gap is found, the name of the gap will show up in blue text in your combo list along with a camera click sound. However, your skater has to not bail for the gap to count as found. Locating all gaps in the levels (except for Chopper Drop and Skate Heaven) will unlock Private Carrera in the Playstation and PC versions.
Rollin Gap (100 points): Air over the space where your skater enters the level from one quarterpipe to the other.
Chopper Hop (100 points): Launch over the wall that divides the two rooms of the hangar.
Halfpipe Grind: Grind one of the curved rails over the halfpipe.
Flyin' High (250 points): In the wind tunnel room, launch from one quarterpipe to the other over the entrance.
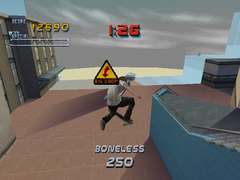
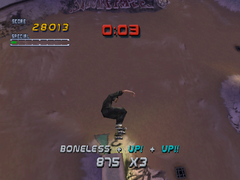
It's Cold Up Here (250 points): At the outside area where the secret tape is, launch up the quarterpipe as high as your skater can. Use a Boneless if necessary.
Halfpipe Hangtime (500 points): Ollie over the halfpipe with the ramps.
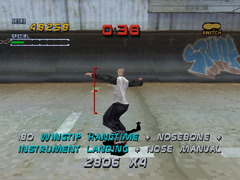
Wingtip Hangtime (500 points): Ollie over the broken plane using the wing, the ramp, or the stairs.
Skycrane Hangtime (500 points): Ollie from one ramp to the other in the chopper room. The chopper doesn't have to be there for it to count.
Air Over the Door (500 points): In the chopper room, launch from one quarterpipe to the other while passing over the small wooden quarterpipe that's near the door that leads to outside.
Grind Gaps
Rail-Guided Missile (100 points): In the main room, grind the long triangle kicker and then jump to the wall dividing the hangar and grind that. This gap also works in reverse: grind the wall, ollie, and then grind the kicker.
Raildrop (100 points): There are rails above the quarterpipes hugging the walls of the hangar. Air off the ramp, grind one of these rails, drop down and grind the edge of the quarterpipe.
Lil' Light Hopper (250 points): In the halfpipe, gain speed and then launch forward, heading toward one of the light fixtures above. Grind the light for the gap.
Big Light Hopper (500 points): In the chopper room, grind the chopper's blades to cause it to start flying out of the room. With it out of the way, you can now use the wooden quarterpipes in the room to gain speed. Once you have enough speed, angle your skater toward the middle of the quarterpipe against the dividing wall. Lean forward and ollie just before you launch off the edge for a massive boost. If done right, you should be able to grind the light above. If you grind the light all the way, you can also gain the Lil' Light Hopper gap.
Instrument LandingLight Corner (500 points): While performing the Lil' Light Hopper gap, keep grinding until you see another light near your skater. Hop off and grind that light for this gap.
Manual Gaps
Instrument Landing (500 points): After performing the Wingtip Hangtime gap (launch your skater from the broken plane), land in a manual.
Lip Gaps
High Steppin'High Steppin' (100 points): There are rails above the quarterpipes hugging the walls of the hangar. Lip the rails for this gap.
One Half Pipe Lip (100 points): Lip the halfpipe closer to the skater's starting point.
The Other Half Pipe Lip (100 points): Lip the halfpipe farther from the skater's starting point.
Wind Tunnel Back Wall (100 points): In the wind tunnel, do a lip on the long quarterpipe.
Downwind Lip (100 points): In the wind tunnel, do a lip trick on the short quarterpipe close to the fan.
Upwind Lip (100 points): In the wind tunnel, do a lip trick on the short quarterpipe far from the fan.
TC'S Roof Gap (250 points): In the Gonz Rail area, there are two short buildings with ramps leading up to their rooftops. Jump off the ramp to one of the buildings and then ollie from one roof to the other.
Table Transfer (250 points): Near the bottom of the Nightmare Rail are two lunch tables, both propped up by dumpsters. Grind or air from one table to the other.
Leap Of Faith!!!Over the Wall... (250 points): At the secret Carlsbad area, there is a ramp that's angled toward a large wall. Use the lone quarterpipe across the path to get some speed and then ollie off the ramp near the wall. If done correctly, you should leap over the wall itself.
Leap of Faith!!! (500 points): At the starting point, head toward the Nightmare Rail, but don't grind the rail. Instead, ollie over the fencing to the left of the rail and land on the ground without bailing. Remember to hit the ollie button just before you land if you see the Big Drop warning.
Drop Out Roof Gap! (500 points): At the start, wallride at the right to blue awning above. Skate forward until you see a glass window. Ollie out through the window and land on the roof ahead.
Awning Hop (500 points): At the stage area, you should see two angled planters with two awnings near them. Ollie off one of the planters, wallride the building, and land on the awning.
Overhang Air (500 points): At the gymnasium entrance, use the bank that leads up to the entrance to ollie above the overhang.
And Down the Bank! (500 points): At the secret Carlsbad area, there is a ramp that's angled toward a large wall. Use the lone quarterpipe across the path to get some speed and then ollie off the ramp near the wall. Your skater has to not only jump over the wall, but the sloped bank as well.
Carlsbad 11 Set (500 points): At Carlsbad, there's a stairset your skater can jump over. Clear the entire set for this to count.
3 Points!!! (500 points): In the gym's basketball court, there is a basketball hoop that's in between two quarterpipes. Transfer from one QP to the other.
Carlsbad Gap (750 points): At Carlsbad, ollie over the grassy hill to the left of the Carlsbad 11 set.
Crazy Roof Gap!! (750 points): At the start, wallride at the right to blue awning above. Skate forward until you see a glass window. Ollie out through the window and land on the roof ahead. On this roof, there should be a steep box with one end of a rail on it. Launch off the box and land on the rail.
2 Da Roof!!! (750 points): At the stage area, use the quarterpipe resting the middle to get some speed. Skate toward some skid marks on the concrete to go down a ramp and up a planter. Ollie off the planter for a large boost and get to the roof.
Huge Transfer!!! (750 points): At the Gonz Rail area, there are two small quarterpipes resting against the wall of the gymnasium. With lots of speed, transfer from one to the other.
Suicidal Roof Gap!!! (1000 points): After completing the Drop Out Roof Gap and Crazy Roof Gap, you should be on another roof with a large air duct on top. West of the building is one of the short buildings for TC's Roof Gap. Ollie from the air duct roof to TC's roof. A Boneless is highly recommended.
Mad Skeelz Roof Gap!!! (1000 points): At the stage area, use the quarterpipe resting the middle to get some speed. Skate toward some skid marks on the concrete to go down a ramp and up a planter. Ollie off the planter for a large boost and get to the roof. Once there, go toward a ramp resting on the roof and jump to the other roof, going over the flags.
Balcony 2 Awning!!! (1000 points): To the left of the Leap of Faith, there is a small ramp past the fencing. Jump over the fence, launch off the ramp, and land on the awning below.
Are You Serious?!! (2500 points): At Carlsbad, there is a small ramp that points toward a curved rail above. Using the quarterpipe to get some speed, launch off the ramp and grind the rail above. After that, hop over the wall and land on the roof of the building. You'll need really good stats for this gap.
Grind Gaps
Roll Call! Gonz Rail! (250 points): Past TC's Roof, there is a long rail with two short stairsets. You can either ollie up the stairs or use the small kicker to grind the rail down to the bottom.
Gym Rail 2 Rail (250 points): At the gym's entrance, there are two rails with some space between them. Grind one, ollie, and grind the other.
Overhang Stomp! (250 points): At the gymnasium entrance, grind one of the rails and then hop toward the overhang, grinding that as well.
Rack 'Em Up (250 points): Head to the bank that's past the Opunsezmee Rail and you'll see two bike racks by a ledge resting against a wall. Grind both bike racks in one go.
Pole Stomp! (250 points): There is a large pole near Bendy's Curb. Bump into the pole to topple it over. Then grind Bendy's Curb, ollie, and grind the pole.
Roll Call! Opunsezmee Rail! (250 points): Near the bank area, there is a rail situated between a set of stairs and a large ramp. Grind the entire rail for this gap. Incidentally, if you complete the gap while the bell rings (the first time should be around 1:40), the gymnasium will open.
Big Rancho Bench Gap (500 points): At the stage area, there's a set of three flat ledges, a big gap, and another set of two ledges. Grind one of the sets, jump over the large gap, and land in a grind on the other set.
Pole 2 Brix! (500 points): There is a large pole near Bendy's Curb. Bump into the pole to topple it over. Then grind Bendy's Curb, ollie, grind the pole, ollie again, and grind the edge of the brick planter.
Bank 2 Ledge (500 points): At the bank, start at the bottom and go up, ollie over the bike racks, and land in a grind on the long ledge against the wall.
Bendy's CurbRoll Call! Nightmare Rail! (500 points): At the start, past the large planter, there is a large rail to the left of some stairs. Grind the entire rail to the bottom.
Bendy's Curb (500 points): At the Gonz Rail area, there's a curbed ledge that has a dumpster on top of it. Grind the entire ledge.
Flyin' The Flag! (750 points): At the stage area, use the quarterpipe resting the middle to get some speed. Skate toward some skid marks on the concrete to go down a ramp and up a planter. Ollie off the planter for a large boost and get to the roof. Once there, go toward a ramp resting on the roof and jump toward one of the flagpoles in front of you, grinding it for the gap.
Stage Rail 2 Rail (750 points): At the stage area, there are rails resting in the middle. Grind one rail and ollie over to the other rail. Use the quarterpipe if you need some extra speed.
Kicker 2 Hook (750 points): At Carlsbad, there is a small ramp that points toward a curved rail above. Using the quarterpipe to get some speed, launch off the ramp and grind the rail above.
Backboard Dance! (1000 points): In the gymnasium, head to the basketball area. There should be a kicker angled toward a basketball hoop. Launch off that kicker and grind the backboard of the hood to get this gap. Use the quarterpipes in the room if you need extra speed.
Manual Gaps
Planter on Edge (250 points): At the start of the level, there's a planter resting on top of a ledge in front of you. Ollie to the ledge and manual to the end.
2 Wheelin' TC's Roof (500 points): At TC's roof, when you ollie off the ramp to land on a roof, immediately manual. Ollie to the other roof and do a manual there as well. This has to be done in one combo.
Ledge on Edge (500 points): Go to the bank area where the bike racks are. There is a long ledge resting against the wall separating the bank from the Carlsbad area. Jump on the ledge and manual the entire way.
Bendy's Flat (500 points): At the Gonz Rail area, there's a curbed ledge that has a dumpster on top of it. Manual from one end to the other.
Lip Gaps
Arch Extension (500 points): At the start, go to the left to find a school entrance with a quarterpipe placed right by it. Air off the pipe and lip the top of the entrance for the gap.
Starting Blocks Extension!!! (500 points): In the gym's pool, lip the starting blocks.
Lil' Guppy Extension! (1000 points): In the gym's pool, lip the lowest diving board.
Mid Squid Extension!! (2500 points): In the gym's pool, lip the middle diving board.
High Dive Extension!!! (5000 points): In the gym's pool, lip the highest diving board.
Other Gaps
Rock the Bells! (500 points): Wallride any of the five bells located in the level.
Over the Lil' 4 (100 points): From the starting point, there should be a set of stairs with four steps and a rail. Ollie over it from top to bottom.
Shorty Dumpster Pop (150 points): Ollie over the short side of a dumpster.
Shorty Table Pop (150 points): Ollie over the short side of a table.
Dumpster Pop (200 points): Ollie over the long side of a dumpster.
Over the Gate (250 points): There is a crossbar with triangular flags hanging under it with a small bowl nearby. Use the bowl to air over the crossbar.
Table Pop (250 points): Ollie over the long side of a table.
2 the Box (250 points): Near the Lil' 4 is a curved rail with one end facing a tiny funbox. Grind the rail and ollie toward the funbox. Your skater has to land on the middle of it.
Over the Table (250 points): In the pool, there should be a picnic table propped up against it. Air over the table using the pool.
Box 2 Box Action (250 points): At the start, go slightly to the left to find two funboxes against a wall. You need to jump from one flat top to the other. Using the slopes of the funboxes will not count.
Up The Lil' 4 (250 points): From the starting point, there should be a set of stairs with four steps and a rail. Ollie over it from bottom to top.
Water Up Le Backside (250 points): In the secret fountain area, ollie over the fountain in the middle.
Up! (250 points): In the pool, there is a very narrow portion of the QP with a green arrow pointing up on it. Use a ramp to get some air, head toward the narrow QP while staying as straight as you can, and air up.
Over the Crossbar (500 points): You should see a large crossbar in the level with a banner that reads "Bienvenue À Marseille". From the starting point, go into the pool, under the banner, and get some speed in the left bowl. Then, face the right side of the crossbar while aiming toward a part of the bowl, ollie before the edge of the bowl, and you should air over the crossbar.
Big Ol' Stanky Gap (500 points): Get into the pool area to get some speed, then face the rectangular bowl that's near the two dumpsters. Air out of the pool and over the dumpsters.
Up!!Up!! (500 points): This gap is the same as "Up!" only it's higher. Make sure to get some speed and Boneless for extra height.
Freakin' Huge Hip (1000 points): This gap requires your skater to air from the right side of the pool, over the entire hip and crossbar, and into the right bowl (the one that has "youth against establishment" written on it) or vice versa. The rectangular pool or the right bowl can give you plenty of speed to prep for this gap.
Humptey Humps!!! (1000 points): Air from one of the humps in one of the bowls to the large hump under the crossbar or vice versa. Like the previous gap, you'll need a lot of speed and a perfectly timed ollie for this.
Big Mouth Gap (1000 points): In the pool, transfer from one side of the QP near the banner, air over the entire space that leads to the bowls, and come back down at the other side.
And Away!!! (1000 points): This gap is the same as "Up!" and "Up!!" but even higher than both of them. You'll need a lot of speed and high air and hangtime stats for this.
Grind Gaps
Rail 2 Rail (50 points): There is a wooden quarterpipe between two ramps with rails on them. Grind one of those rails and ollie to the other.
Rail 2 Ledge (250 points): Near the Lil' 4 is a curved rail and a funbox. Grind the rail at the end near the funbox, hop at the end, and grind the ledge in front of you.
Ledge 2 Rail (250 points): Same as "Rail 2 Ledge", except you're grinding the ledge and jumping toward the curved rail.
The Hidden 4 Kink! (500 points): When you enter the fountain area, you should see a long rail in front of you. Grind the entire thing.
Dumpster StompDumpster Stomp (1000 points): Go to the giant wooden wall with the two funboxes, air off one of the funboxes, wallride, and grind the top of the wall. Keep going until your skater suddenly turns toward the long dumpster below and grind it.
Kink Clank (1000 points): In the pool, face the rectangular part that's adjacent to the Lil' 4. With a lot of speed, air out while facing the rail of the Lil' 4 and grind the rail.
Kink Stomp (1000 points): Go to the giant wooden wall with the two funboxes, air off one of the funboxes, wallride, and grind the top of the wall. Keep going until your skater suddenly turns toward the quarterpipe with the two ramps and rails below and grind one of the rails.
Crossbar Stomp (1500 points): You should see a large crossbar in the level with a banner that reads "Bienvenue À Marseille". Using any part of the pool, air out of the bowl with a well-timed ollie and grind the crossbar. It will take a few tries as it's easy to under or overshoot it.
Lamp Stomp (2000 points): Air out from the pool or bowls toward a light pole and grind it. The easiest one to reach is near the bowls where a lamp post is erected between the rails.
Knucklin' Futs!!! (2000 points): In the wooden planter, you should see a broken lampost between the trees held up with a small bit of metal. Air out from the rectangular pool toward the top of the lamp post and grind it. Keep in mind that knocking over this lamp post to get to the secret area means you'll have to reset the level to put the lamp post back up.
Lip Gaps
Boomin' Extension (250 points): Near the edge of the large pool is a speaker that can be lipped for this gap.
Stanky Extension (250 points): Past the banner is a huge bowl with a dumpster at the edge. Do a lip on the dumpster.
U.U.A. Extension (250 points): Lip trick the green arrow that's used for the "Up!" gap.
Other Gaps
Wall Crawler (500 points): In the secret fountain area, go to the left or right side and skate up the ramp. Ollie at the top of the ramp and wallride the space between the ramp and the quarterpipe.
Kick It (50 points): From the starting point, skate ahead to find two kickers on the road. Jump from one to the other.
Rock It Air (50 points): In the park, launch off the big rock.
Pigeon Puddin' Gap (100 points): In the park, go to the statue and use the base to launch over it. Use the quarterpipe if you need extra speed.
Ramp to Park Gap (100 points): To the left of the park's entrance at 125th Street, there's a bunch of wooden boards laid against the park wall. Use the quarterpipe across the street to get some air, then launch off the ramp while angling yourself to the left. You must land on the statue area for this to count.
Awning Air (100 points): In the area where Joey's Sculpture is located, you should see three quarterpipes and two anwings between them. Air from one quarterpipe over an awning and land in another quarterpipe.
Over the Banks Barrier (100 points): In the banks, there's a low, grey barrier against a brick wall. Ollie over it.
Take It to the Bridge (150 points): In the banks, there is a grey path. To the right of the path is a quarterpipe against a wall and a large hump. Use the quarterpipe to gain speed, then ollie off the hump and land in the middle of the grey path.
Ramp to Statue Shorty Gap (250 points): To the left of the park's entrance at 125th Street, there's a bounch of wooden boards laid against the park wall. Use the quarterpipe across the street to get some air, then launch off the ramp while angling yourself to the left. You must land on the statue's octagonal base for this to count.
Pouncer Was Here (250 points): At the park's statue area, there is a huge brick quarterpipe. Get up speed and air up the quarterpipe. You'll need a high air stat for this one.
Over the Road (250 points): In the banks, there is a grey path. To the right of the path is a quarterpipe against a wall and a large hump. Use the quarterpipe to gain speed, then ollie off the hump and air over the grey path.
Big Air Out of the Banks (250 points): There is a kicker in the banks that points to the brick wall separating it from the rest of the level. Gain a lot of speed, jump off the kicker, and air over the entire wall to get back on the streets. If you touch the top of the wall, the gap won't count.
Pillar Air (500 points): At the end of the secret bank area, there are a few pillars placed on a slope. These pillars can actually be used as quarterpipes. Get some speed, air off one pillar and land on another.
Grind Gaps
Re-Rebar (50 points): In the banks, there's a grey path that leads up to an unfinished bridge with three rails sticking out. Those are the rebars. Grind one, then ollie to the left toward another rebar and grind that.
Bench-Hoppin (100 points): On the sidewalks surrounding Joey's Sculpture, there are benches. Grind one and hop to the other. You can also get this by grinding one of the blue benches in the park, then hopping to the left toward another blue bench right by the big rock.
Left Side Pit Rail Stomp (100 points): This gap is on the left side of Joey's Sculpture, Riverside Drive. Go up the ramp toward the benches and leap over the railing to your left. Land on the rail below in a grind.
Banks Spank (100 points): At the banks, go to the basketball count and grind the rail while facing toward the high chain-link fence. Jump over the first rail and grind the next rail.
Parking Meter Gap (100 points): At the starting point, just past the subway entrance, there's a bent parking meter you can grind. Go up the ramp on 125th Street's sidewalk and use the quarterpipe to gain some speed. When you come back down, grind the left rail, jump at the end, and grind the bent parking meter. Due to how small the parking meter is, this will take a few tries.
You're Next in Line (100 points): Enter the park by the entrance near Riverside's turn and go down the path until you see the guard rail by the river. Grind the rail, ollie toward the snack bar, and grind the counter.
The Easy Way (100 points): From the start, turn around and you should see a left turn in the road with some construction going on in one street. Go all the way to the end of the street and grind the rail while facing toward the park.
Joey's Sculpture (100 points): From the starting point, cross the street to the sidewalk and you'll see a giant triangular statue. Grind it from top to bottom.
Right Side Pit Rail Stomp (100 points): This gap is on the right side of Joey's Sculpture, 125th Street. Go up the ramp toward the benches and leap over the railing to your right. Land on the rail below in a grind.
Jamie's Steps (100 points): In the banks, near the basketball court, there are a set of steps with one rail on top and the other rail on the stairs. Grind both rails.
Banks Fence Gap (100 points): Go to the end of the banks and use the quarterpipes embedded in the walls to gain some speed. Use the bank to launch up toward the chain-link fence and grind the top of it.
Banks Road Gap (100 points): In the banks area, you should find a raised area with two benches and a rail near the grey path. Go to that area and grind the rail while facing away from the subway tracks. Jump over the gap at the end and grind the next rail.
Rebar to Rail Gap (100 points): In the banks, go up the grey path that leads to rebars sticking out at the end. Grind the middle rail, then hop to the left to grind another rebar on top of a pillar. After that, grind to the end and drop off to another rail below to get this gap.
Ride the Rails (100 points): Starting from the subway station, grind a subway track for almost the entire length.
Across the Pit (100 points): Get to the sidewalk around Joey's Sculpture (which side doesn't matter) and get to the end where you'll see the dark wall nearby a quarterpipe. Hop toward the dark wall, wallride it to the top, and grind until you get to the other side.
Corner Cut (100 points): While grinding the park's brick wall, you'll reach a corner. Hop to the left and grind the other side of the wall. You can also get this by grinding the wall along 125th Street then hop to the left at the end and grind the guard rail on the park's path.
Park Entrance Gap (100 points): Grind the brick wall surrounding Riverside Park and hop over any of the entrances before grinding the wall again.
Grab a Snack and Sit Down. (100 points): Continuing from "You're Next in Line", grind the snack bar's counter, ollie, and then grind the blue bench.
Buuurp! Now Go Skate. (100 points): Continuing from "Grab a Snack and Sit Down.", grind the blue bench near the snack bar, ollie, and then grind the guard rail near the park entrance toward 125th Street.
Path Less TraveledThe Hard Way (500 points): From the start, turn around and you should see a left turn in the road with some construction going on in one street. Grind the rail while facing away from the park until you reach the end of the street.
Path Less Traveled (500 points): Go to the park entrance on 125th Street and grind the rail on your left. Then hold right and ollie. If you jump at the right time, you should barely reach the blue bench to grind.
Slam Dunk (500 points): In the Banks, there is a basketball count with two hoops. Use a nearby wall to wallride, jump off the wall toward one of the backboards and grind it.
Sidewalk Bomb (1000 points): Go up to the station and grind the wall of the station while facing the construction site. Carefully jump off the wall and land in a grind on the construction site's awning.
Changin Trains (1000 points): At the subway station, grind one track, then hop to the other track and grind that.
Manual Gaps
The Bridge (250 points): Manual the bridge in Riverside Park.
Going Down (250 points): Manual down the subway station's escalator.
Lip Gaps
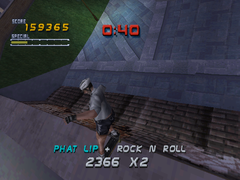
Phat LipPhat Lip (100 points): Lip trick the giant brick quarterpipe near the park's statue.
Waaaay Up There (100 points): Lip trick the giant granite quarterpipe that's across Joey's Sculpture.
Other Gaps
Banks Barrier Wallride (100 points): In the banks, there's a low, grey barrier against a brick wall. Use the brick wall to wallride over the barrier. Do not perform a wallie.
VB! Skinny Transfer (100 points): Beyond the table area, there is a triangular rooftop sandwiched between four quarterpipes. Use the quarterpipe close to the pointy end and transfer to the other.
Up!, Up!!, And Away!!! (100, 250, 500 points): At the start, go to the table area and turn right to go across the tables to the two ledges against the wall. Turn to the right to find a thin quarterpipe. Like the gap in Marseille, you have to air up the QP as high as you can. Use the ledges to gain some speed and perform a boneless for extra height.
Table Pop (200 points): Ollie over any of the tables in the table area.
Shorty Planter Pop (200 points): Ollie over the short side of any of the planters in the starting area.
Cake Transfer (250 points): All the way to the right from the starting point are three quarterpipes with two planters between them. Go to the middle quarterpipe and air to the left or right quarterpipes.
West Side Transfer (250 points): Past the Bluetorch Banner, there's some quarterpipes laid out. Go from the one in the middle of the path to the one against the wall.
Wee Lil' Roof Gap (250 points): At the wooden bowl, air out or wallride to reach the roof with the very long quarterpipe and the wires. Facing across the roof at a corner is another roof. Ollie from the roof, over the bowl, and to the other roof. This gap requires the shortest distance.
Canyon Jump (250 points): When you're on the rooftop with the long quarterpipe, face the other rooftop with the curved window on top. Ollie from one to the other, passing over the Seaside Handrail.
Ledge 9 Set (250 points): At the secret area, there's a set of stairs right by the Venice Ledge. Clear over them for this gap.
Tight Landing TransferMuska's Gap (500 points): On the rooftop near the "VB! Pit Transfer", you'll find a piece of the roof jutting out to the left, pointing toward the J-shaped air vent. Jump from that piece of the roof and clear the small gap.
Tight Landing Transfer (500 points): At the three quarterpipes at the right, air from the leftmost or rightmost quarterpipe and land in the middle quarterpipe.
Big Double 5 Set (500 points): At the starting position, go to your left and you should see two sets of stairs you have to air over. You can use a wallride for extra hangtime if you need it.
VB! Pit Transfer (500 points): Past the banner, you should see some quarterpipes up ahead. The two you need for this gap are across the "West Side Transfer" gap and have a section of the roof between them. Air from one to the other.
Nice Mid Size Roof Gap (500 points): This is the same as "Wee Lil' Roof Gap" except the distance required is farther than last time. Try to do a boneless from one roof to the other if you need extra distance.
Planter Pop (500 points): Ollie over the long side of any of the planters in the starting area.
Roof 2 Ramp (500 points): Get on the roof that's closest to the wire that holds the secret tape. You can get up there by using the "Vent 2 Roof Gap" or using the wooden bowl to air up to a lower roof adjacent to the roof you have to get to. You should see a small quarterpipe at the right edge of the roof. Air off that to the wooden quarterpipe back on the ground.
VB! Ledge Transfer (500 points): In the secret area, there are two wooden quarterpipes. Air from one, go over the Venice Ledge, and land in the other.
Lil' Vent Gap (500 points): On the roof near one of the QPs that make up the Pit Transfer is a small vent that can be used as a kicker. Jump off the vent, air over the QP, and land on the rooftop.
Ramp 2 Roof (750 points): This is the same as the "Ramp to Roof" gap, but in reverse. You have to air from the wooden quarterpipe on the ground to the small quarterpipe on the roof closest to the wire. You'll need a lot of speed and air for this one.
Uphill Canyon Jump (750 points): On the roof with the curved window is a small vent that you can use as a ramp. Jump off the vent while slanting to the right and land on the lower roof.
Vent 2 Roof Gap (750 points): On the roof with the curved window is a small vent that you can use as a ramp. Jump off the vent straight ahead to land on the higher roof.
VB! Huge Transfer!!! (1000 points): At the three quarterpipes at the right, air from the top quarterpipe at the right, over the middle one, and down the lowest one.
Massive 20 Set! (1000 points): At the Seaside Handrail, there is a large set of stairs. Ollie over the entire set.
Siiiiick Roof Gap!!! (1000 points): This is the same as "Wee Lil' Roof Gap" except the distance required is farther than that and "Nice Mid Size Roof Gap". To get this, use the quarterpipe on the rooftop to get some speed and then angle yourself toward the low pyramid. Ollie off it at just the right moment and you should be able to cover the large distance.
Huge Roof 2 Ramp (1000 points): At the rooftop with the candy cane vent, there is a curved, stone quarterpipe. Launch from that QP to the wooden QP at the right.
Fatty Transfer (1000 points): Beyond the table area, there is a triangular rooftop sandwiched between four quarterpipes. Use the quarterpipe close to the wide end and transfer to the other.
Big Vent Gap (1000 points): On the roof with the curved ceiling window, you'll find a small kicker that points toward the triangular rooftop. Use the kicker to jump toward it. If you think you won't make it, you can grind the edge of the rooftop to make it count.
Huge Ramp 2 Roof (1500 points): This is the same gap as "Huge Roof 2 Ramp", except your skater must launch from the wooden QP to the one on the roof. Speed and a high air stat can help a lot with this gap.
Grind Gaps
Seaside Handrail (200 points): From the start, go down to the table area and take a left to find a long rail that leads downward with a set of stairs to the left. Grind the entire rail.
The Venice Ledge (250 points): In the secret area, there is a ledge with "The Ledge" painted on it by a set of stairs. Grind the entire ledge.
Bench Trippin' (500 points): In the table area, there are three stone benches. Grind from one bench to the other. It doesn't have to be all three at once.
Ledge 2 Ledge (500 points): In the table area, there are two benches similar to the ones in "Bench Trippin'", except they're against a wall littered with graffiti. Grind them back to back.
10 Point Landing (500 points): Climb up to the roof that's closest to the wire in the table area. Turn your skater toward the Seaside Handrail below, then jump off the roof and grind that rail.
The High Wire (1000 points): In the table area, there is a wire high above and you need to grind it to get this gap. Go to the wooden bowl, air up to the roof with the long quarterpipe, then jump to the higher roof. You should see a kicker at the edge that points toward the wire. With enough speed, launch off the kicker and land on the wire with a grind. Alternatively, you can use the tables below the wire to jump up toward with a well timed ollie, but this will require a high ollie stat.
'Round The Horn!!! (2500 points): At the wooden bowl, you need to grind the entire rim. You will lose speed when you reach the end, so start the grind with a lot of speed. It helps to have a full special bar for this one.
Manual Gaps
He Could Go...He Could Go..., All The Way..., Touchdown! (250, 500, 1000 points): At the table area, you should see a set of tables with wooden planks placed on top of it. Starting from one end, jump up and manual the planks. The first gap is one-third of the way, the second gap is two-thirds, and the final gap is all the way.
Candy Cane Manual (750 points): On the rooftop past the banner and "VB! Pit Transfer" is a J-shaped air vent. Jump on the vent and manual the entire thing.
Over the Wall (10 points): At the short quarterpipes, there's a small brick wall wedged between them. Use the QPs to air over it.
Railing Hop (50 points): On the top of the Big Wave Quarterpipe, there's a railing near the Van Secret Area Key Rail. Jump over the railing and land on the ground.
Over the Bridge (50 points): Behind the halfpipe is a small alley with a kicker and a quarterpipe. Use the quarterpipe to get some speed, then ollie off the kicker for extra height. You should be able to clear the entire bridge.
HP to Bowl (100 points): Air out from the halfpipe into the Bullet Bowl.
Bowl to HP (100 points): Air out from the Bullet Bowl into the halfpipe.
Bullet Bowl Hop (100 points): Below the Bullet Bowl and near the hexagon pyramid is a quarter pipe. Air forward from it and land in the bowl.
Over the Deck (100 points): At the start, after you come down the rollin, you should see three wooden ledges that look like a wide set of stairs. At the side of this setup are some ramps. Use one and air over the entire deck.
Daaaaay Tripper (100 points): In the Van Secret Area, there is a hippy-dippy van between two kickers. Air over it using the kickers.
Gimme Gap Redux (100 points): At the short quarterpipes, you'll find an equally short halfpipe behind them. Launch from the short QP to the short HP. The inverse works as well.
Sodee Pop Gap (100 points): At the halfpipe, air out toward the bridge and cross it to go to an area with tables and chairs. Line yourself against the wall and wallride, then ollie from the eating area back to the halfpipe.
High StickerCut the Corner (100 points): Between the Wave Quarterpipe and the wooden wall is a huge pyramid. Go to the side near the wooden wall and you should see a more elevated ramp. Angle yourself to the left and jump off the ramp, landing on the pyramid's wide part.
High Sticker (100 points): At the corner of the skate park, right by the bowl, there is a huge wooden wall that can be used to air up with some stickers on one side. Aim for the side with the stickers and air up as high as you can.
Shoot the Gap (100 points): In the Rail Secret Area, there are two quarterpipes against a wall. Air from one to the other.
No Kidding Around (150 points): In the halfpipe, gain some speed and then face the side with the bridge while being close to wall. Angle yourself slightly toward the wall when you air out and then wallride. At the peak of your wallride, wallie off and try to land in the area with the tables and chairs.
Stairset (150 points): At the halfpipe, air out toward the eating area and cross the bridge. Take a right and you will see a stairset that leads down to the smaller halfpipe. Ollie over the entire set.
Hexbox Gap (150 points): There's a hexagonal funbox in the middle of Skatestreet that's easy to find. While you're barely on the box, ollie over the flat part and land at the end.
High Jumper (250 points): At the start, get down from the rollin and turn around to find a small ramp in front of the halfpipe. Air out of that ramp and over the D-shaped rail, then land on the halfpipe.
Grind Gaps
Rail Area Secret KeyRail Secret Area Key (50 points): Get to the Big Wave Quarterpipe and grind to the left. At the end of the QP, jump off and grind the suspended rail in front of you. This gap will open up the Rail Secret Area.
Rail to Rail (50 points): Right by the Bullet Bowl is a small fun box with a rail in the middle and a wall parallel to it. Grind the rail, ollie to the wall, and grind that.
Van Secret Area Key (100 points): The halfpipe has a D-shaped rail hanging from its edge. Grind the lip of the HP toward the rail to grind the entire rail. This will unlock the Van Secret Area.
Nail the Rail (100 points): In the bowl, air out toward the halfpipe and grind the lip of it.
HP to Railbox (100 points): In the halfpipe, face the side near the bowl and angle yourself to the left edge. Air to the left as far as you can and land in a grind on the funbox.
Wave Wall Minigap (100 points): Get to the Big Wave Quarterpipe and grind to the left. At the end of the QP, jump off and grind the suspended rail in front of you. This is the same as Rail Area Secret Key, except it's the gap between that counts instead of the suspended rail.
Surfin U.S.A. (100 points): You get this gap by grinding the Big Wave Quarterpipe's big hump. You'll need some speed to handle the bump's incline.
Skatin' on the Dock of the Bay (100 points): At the Van Secret Area, you'll find a grey quarterpipe near some garage doors. Grind the entire length of it.
Havin' a Picnic (100 points): At the Van Secret Area, there are two picnic tables angled toward each other. Grind both of them.
Extension Transfer (100 points): At the Bullet Bowl, there's a wall sticking up against its lip. Grind the wall, then drop down and grind the bowl.
Big Air Railing Grind (100 points): Behind the halfpipe is a small alley with a kicker and a quarterpipe. Use the quarterpipe to get some speed, then ollie off the kicker for extra height. Grind the railing of the bridge once you're up there.
Circle the Pool (500 points): At the Bullet Bowl, grind the bowl itself starting from one side of the raised wall to the other side.
Manual Gaps
Funbox Wheelie (100 points): There's a hexagonal funbox in the middle of Skatestreet that's easy to find. Manual the funbox.
Lip Gaps
Bowl Lip (100 points): Lip any part of the Bullet Bowl, except the wall.
HP Lip (100 points): Lip any part of the halfpipe.
Ride the Wave (100 points): Lip any part of the Big Wave Quarterpipe.
Gully Lip (100 points): At the wooden wall, lip the quarterpipe that's across the wall itself.
Bowl Envy (100 points): Lip the wall that's on the edge of the Bullet Bowl.
Mr. Small Lips (100 points): At the small quarterpipes, there's an equally small halfpipe behind them. Air into the halfpipe and lip either side of it.
Easy Post Ollie (10 points): Jump from a planter over a stone post. You'll find them at the fountain.
Post Ollie (50 points): Jump over a stone post. You'll find them at the fountain.
Statue Hop (50 points): Between the fountain and the blue awning are two curved ramps. Jump from one to the other.
Stair Set (100 points): At the start, go past the kickers to find a stair set to jump over.
Up the Small Step Set (100 points): At the fountain near the area where you find the letter A, there's a small set of stairs between two planters. Jump from the bottom to the top.
Bench Gap (100 points): To the left of the starting point is a long planter with a lot of benches wedged into it. Grind the edge of the planter and hop over a bench.
Phillyside HP TransferWorlds Most Obvious Gap (100 points): Near your starting point are two kickers facing each other. Simply jump from one to the other.
Phillyside Hop (100 points): When you enter Phillyside, you should see a wooden kicker. Leap off it and land in the bowl area.
Phillyside HP Transfer (250 points): Use the Phillyside halfpipe to air forward and land in the bowl area. The other way around also works.
Pillar Fight (250 points): In Phillyside, you should see a pillar colored red and blue with graffiti all over it. You can use it like a quarterpipe to fly up. Just air high for this gap.
THPS Fountain Gap (500 points): After the fountain is drained, go to the top of the fountain's steps and ollie over the set, landing in the fountain.
Chillin' on the Balcony (500 points): There is a building with a large balcony on top of a planter. Use the planter's slope to leap up to the balcony. Grind the rail down the nearby stairs for extra speed.
Grind Gaps
Track Smack (50 points): At the edges of Phillyside, there's a set of metal rails with different lengths. Grind a rail and ollie to another.
Hobo Grind (100 points): Near the Phillyside bowls, you should see a straight rail with a curved end that leads into the bowls. Grind the entire rail.
Planter Transfer (100 points): From the start, do a 180 into the road and grind the planter adjacent to the road. Keep going until you drop down to a smaller planter below to grind.
Railing to Planter (100 points): Grind the railing up on the balcony, ollie at the edge, and land in a grind on the planter below.
Pillar Hop (150 points): Go to the bowls in Phillyside and head for the Phillyside New Bowl by going past the blue humps. Grind the lip of the bowl toward the pillar, then ollie straight past it and land on a grind at the lip behind it.
Planter Double Pillar Gap (150 points): At the fountain, head toward the road and you should see two posts between two planters. Grind the higher planter, ollie over both posts, and grind the lower planter.
Just Visiting (150 points): From the start, go forward and grind the planter to your right. Keep grinding until your skater passes the first angle. Ollie just before the end and grind the planter below.
Short Stair (150 points): Near the fountain are sets of stairs with circular ledges. Grind the top ledge.
Telephone Co. Gap (250 points): At the balcony, there is a telephone wire connected to the building. You can either grind the balcony railing and leap toward the wire with a grind or get up to the roof of the building and drop down to it.
Funbox Transfer (250 points): In Phillyside, get to the fun with the ledge and grind the ledge. Then hop to the curved rail and grind that.
Medium Stair (250 points): Near the fountain are sets of stairs with circular ledges. Grind the middle ledge.
Little Corner GrindGrind Up Dem Stairs (500 points): At the balcony, go to the bottom of the stairset and grind up the rail.
Awning Grind (500 points): At the fountain, air off the right curved ramp toward the blue awning and grind it.
Little Corner Grind (500 points): On the road, behind the building with the balcony, there's a large, curved rail high up. Wallride and wallie to the rail and grind the entire thing.
Fly by Wire (500 points): On the balcony, wallride up to the roof and face toward the wire that passes over the fountain. Grind the entire length of the wire. You'll need a good rail balance stat to do this without falling.
Death From Above (500 points): On the balcony, wallride up to the roof and face toward the wire that passes over the fountain. Grind the wire and then ollie off toward the golden spout in the middle of the fountain to grind it.
Train Hard (500 points): In the Phillyside bowl area, head over to the Phillyside New Bowl. Grind one end of the bowl all the way to the pillar.
Long Stair (500 points): Near the fountain are sets of stairs with circular ledges. Grind the bottom ledge.
Worlds Second Most Obvious Gap (750 points): Get your special meter filled and build up speed. Once you're ready, head over to the "World's Most Obvious Gap" and ollie from the kicker toward the stairs. Grind the rail and land on the bottom.
Fountain Ping! (750 points): Launch from the kicker pointing to the fountain and grind the golden spout when you land. You can technically do it when the water isn't drained, but it's not recommended.
Grind of Faith (1500 points): After the fountain is drained, there are two rails with the fountain spout between them. Grind one rail, jump over the spout, and grind the other rail. You'll need a lot of speed to clear the spout or you'll end up grinding the edge of it.
Manual Gaps
Funbox Wheelie (100 points): Manual over the large funbox near the starting point.
Flatlands Techin' (500 points): Starting from the top of the stairs near the building with the balcony, manual the flat path, turn right past the funbox, and keep manualing until you reach the small set of stairs in front of the building with the blue railings. You can grind the stair rails at the beginning to get some speed and ollie while manualing if you're losing speed.
Manual Stimulation (500 points): At the bowls in Phillyside, there are some blue humps. Get some speed from the bowls, then manual over the humps.
Rockin' the Stairs (2500 points): Near the fountain are sets of stairs with circular ledges. Start from the bottom while hugging the planter wall, facing a small stairset. Manual, ollie over the stairs, and manual again. Repeat the process for the next three stairsets to reach the top and get the gap.
Lip Gaps
Phillyside New Bowl Lip (100 points): In Phillyside, lip the bowl that's past the blue humps.
Phillyside HP Lip (100 points): In Phillyside, lip either side of the halfpipe.
Phillyside Big Bowl Lip (100 points): In Phillyside, lip the bowl that has a humped edge (similiar to the Big Wave Quarterpipe in Skatestreet).
Phillyside Mid Bowl Lip (100 points): In Phillyside, lip the two U-shaped bowls that are closest to the halfpipe.
Wussy Rolling Gap (50 points): On the halfpipe, air over the rollin.
Plat Gap (100 points): On the halfpipe, go to the side closest to the loop and air off the part that's further back than the rest of the halfpipe to launch over the platform.
Gate Gap (150 points): Along the quarterpipe that surrounds arena are four unopenable gates. Air from the QP over the gate and land on the QP at the other side.
Launchin On Up (200 points): ): At one of gates, you should find a funbox. Facing the stands, launch off the funbox and land in the stands.
Launchin the Pipe (300 points): The fullpipe has a large ramp behind it. Use the ramp to launch high over the loop and land on the ground.
Rollin Gap (300 points): On the halfpipe, air over the rollin. You need to cover more distance than the wussy version of this gap.
Tight GapAir Toro (400 points): Behind the halfpipe and near the giant humps are two quarterpipes with the rollin's platform between them. Air from one QP to the other, going over the rollin's platform.
Big Enchilada Mama (600 points): Near the fullpipe and the rollins are two large humps. Launch from one hump to the other like two quarterpipes. You'll need to use a different quarterpipe to gain a lot of speed, but then then, it'll also require a perfect angle.
Tight Gap (1000 points): On the halfpipe, go up the rollin to find another rollin with some space between the two rollins. Clear the gap and land on the other rollin.
Jumpin Da Humps (1500 points): Near the fullpipe and the rollins are two large humps. Get on top of one hump and ollie to the top of the other hump. Like "Big Enchilada Mama", you'll need to use a quarterpipe to gain the necessary speed.
Grind Gaps
Lil Wee Wussy Gap (1 point): On the halfpipe, grind the side the that has the rollin, jump over the rollin, and grind the halfpipe again.
Enjoyin the View (250 points): Above the quarterpipe circling the arena, there are two banners with red, white, and green flags: one near the banana and the other near the humps. Use the quarterpipes to gain speed by going back and forth until you have enough to reach a banner and grind it. Keep grinding until you get to either edge of the banner.
Kink (400 points): On the halfpipe, go to the side closest to the loop and air off the part that's further back than the rest of the halfpipe to launch over the platform. You also have to land in a grind with the rail in front of you.
Grindin the Pipe (450 points): The fullpipe has a large ramp behind it. Use the ramp to air toward an edge of the pipe and grind it.
Don't Look Down (500 points): While grinding the wire above the stadium, you'll eventually break a light on the wire, giving you this gap.
Ramp Rail to Banana (500 points): Head toward the side of the halfpipe that doesn't have the loop and grind the lip, heading toward the right. Ollie off it and head toward a banana-shaped wooden ramp to grind it.
Box to Rail (500 points): At one of gates, you should find a funbox. Launch off the funbox and head toward another funbox with a long blue rail. Land with a grind.
Nice Friggin Ankles (500 points): Above the quarterpipe circling the arena, there are two banners with red, white, and green flags: one near the banana and the other near the humps. Use the quarterpipes to gain speed by going back and forth until you have enough to reach a banner and grind it. Drop down after grinding the banner to grind the ledge of the stands.
Nailin Da Rail (500 points): At the halfpipe, air to the right off the ramp that's across from the fullpipe. Land in a grind on the railing of the halfpipe.
Way to Go Amigo (500 points): When you're up in the stands, you should find a quarterpipe and a curved ramp across from each other. Use the quarterpipe to gain some speed, launch off the ramp with an ollie and land in a grind on the wire above the arena.
Ramp Rail to Rail (500 points): Head toward the side of the halfpipe that has the loop and grind the lip, heading toward the left. Ollie off it and head toward the funbox with the blue rail to grind it.
Takin the High Road (650 points): Above the quarterpipe circling the arena, there are two banners with red, white, and green flags: one near the banana and the other near the humps. Use the quarterpipes to gain speed by going back and forth until you have enough to reach a banner and grind it.
Rail Plat Gap (750 points): Near the ramp of the halfpipe that's across the fullpipe, there's a slope with a blue rail on it. Get some speed, then grind the rail until you reach the top. Ollie off and grind the triangular rail that leads back down.
Box to Banana (1000 points): At one of gates, you should find a funbox. Facing the banana, air off the funbox and grind the top of the banana.
Launch to Banana (1000 points): When you're up in the stands, you should find a quarterpipe and a curved ramp across from each other. Check to see if the ramp is near the banana before starting. If it is, use the quarterpipe to gain some speed and ollie off the ramp toward the top of the banana to grind it.
Clenchfest! (1500 points): Above the quarterpipe circling the arena, there are two banners with red, white, and green flags: one near the banana and the other near the humps. Use the quarterpipes to gain speed by going back and forth until you have enough to reach a banner and grind it. Keep grinding until you get to either edge of the banner and jump toward the wires with another grind.
Finesse Test (1500 points): When you're up in the stands, you should find a quarterpipe and a curved ramp across from each other. Launch from the side of the ramp and land in a grind on the stand's ledge.
Launch to Rail (2000 points): When you're up in the stands, you should find a quarterpipe and a curved ramp across from each other. Check to see if the ramp is near the funbox with the blue rail before starting. If it is, use the quarterpipe to gain some speed and ollie off the ramp toward the blue rail to grind it.
Other Gaps
Threadin' the NeedleUp to the Stands (50 points): Use the circular ramp surrounding the bullring to launch over the bull's pathway and up to the balcony where the stands are.
Threadin the Needle (2000 points): Behind the halfpipe and near the giant humps are two quarterpipes with the rollin's platform between them. Air from one QP to the other, going through the supports that hold up the rollin.
Way to Go Gringo!!! (5000 points): Ride through the loop right by the halfpipe.
70ft70ft, 80ft, 90ft (100, 200, and 300 points): At one end of the halfpipe, you should see a large rollin on one end and a ramp that leads to a dock at the other. Gain some speed, launch off the ramp and land on the dock. How far you go determines which gaps you get.
Into the Heli (500 points): Use the rollin to ollie up to the helicopter and get back in.
Grind Gaps
Heli Grind1 Potato (100 points): In front of the rollin and behind the halfpipe is a mast with several rungs. Grind the bottom rung.
2 Potato (200 points): In front of the rollin and behind the halfpipe is a mast with several rungs. Grind the rung above "1 Potato".
3 Potato (400 points): In front of the rollin and behind the halfpipe is a mast with several rungs. Grind the rung above "1 Potato" and "2 Potato".
Heli Grind (500 points): Use the rollin to ollie up to the helicopter and grind the edge of its platform. It has to be from the rollin to the heli for it to count.
Lip Gaps
Whoomah (500 points): Use the rollin to ollie up to the helicopter and lip the edge of its platform. You need to stay perfectly straight to lip it.
Down 2 Tonys Island (50 points): Jump from the Combi area to Tony's Island.
San Dieguito Hall 2 Sadlands (50 points): Ollie from the top of the San Dieguito stairset to the Sadlands.
Grassy Gap (50 points): At San Dieguito, there's a small patch of grass between it and the Sadlands. Jump over a narrow portion of it.
Weak Sauce Zig Gap (50 points): At the Snake Run, air over the edge of the top bend.
Weak Sauce Zag Gap (50 points): At the Snake Run, air over the edge of the middle bend.
Weak Sauce Wussy Snake Gap (50 points): At the Snake Run, air over the edge of the bottom bend.
San Dieguito Ten Set (100 points): Jump over the entire stairset at San Dieguito.
Dropping in on Tony (250 points): Jump from the Combi area to Tony's Island, but aim for the halfpipe. If your skater jumps over the entire platform, it should count.
Isle of Tony 2 Sadlands (300 points): Ollie from the edge of Tony's Island to the Sadlands.
Platform Gap (300 points): Get to the top of the largest ramp on Tony's Island and ollie to the right on the lower platform.
Airs Hole (300 points): At Tony's backyard, you should see two wooden quarterpipes with a corner gap between them. Launch from the ramp closest to San Dieguito while aiming to the left and your skater should curve over the corner gap and land in the other ramp.
Big Fat Grassy Gap (400 points): At San Dieguito, there's a small patch of grass between it and the Sadlands. Jump over a wider portion of it. Use the San Dieguito Rail to help you get speed for it.
House of Tony 2 Sadlands (500 points): At Tony's Island, get on the roof of Tony's House. Launch off the edge of the roof toward the Sadlands.
San Dieguito Window 2 Sadlands (500 points): Jump from the open window at the top of the San Dieguito stairs to the Sadlands.
Blowin It Out the Hole! (500 points): At the Animal Chin area, there is one section of the halfpipe that looks off. Use the HP to air over it and to get this gap and to have the section break.
Sadlands 2 San Dieguito Hall (500 points): From the Sadlands, ollie up to the top platform of San Dieguito. You'll need some speed and possibly a Boneless for this one.
The Holy Crail (500 points): At the Animal Chin area, go to the large halfpipe with the rollin and air over said rollin.
Gutter 2 San Dieguito Roof (800 points): Grind the gutter on Tony's roof and ollie just before you reach the kink to the roof of San Dieguito.
Wussy Snake Gap (800 points): At the Snake Run, air over the bottom bend. You have to cover greater distance than the Weak Sauce gap to get this one.
Sadlands Path Gap (800 points): In the Sadlands, go to the four-way intersection of the giant path. Near there, there's a path that leads into the intersection and the rocky sides the path is between can be used like ramps. Use them to air over the path with a lot of distance. You might have better luck using the right side as the Sadlands snake path is in the way of the left side.
Northwest Snake Gap (800 points): Near the Sadlands Path Gap and the four-way intersection of the snake path, there's an entrance to the Sadlands Snake Path. Use the ridge that's below the entrance like a vert ramp and air over the entrance.
Northeast Snake Gap (800 points): Across the Northwest Snake Gap at the other side of the pit is another entrance to the Sadlands Snake Path. Use the ridge that's below the entrance like a vert ramp and air over the entrance.
Up 2 Combi (1000 points): At Tony's Island, use the halfpipe to gain some speed, then air out of it toward the Combi bowl area.
Reverse Wussy Snake Gap (1000 points): At the snake run, air over the bottom bend, but from the lower part instead of the higher part.
Southern Snake Gap (1000 points): Near the giant hole at Sadlands, there's the southern entrance to the Sadlands Snake Path. Use the ridge surrounding the giant hole as a vert ramp and air to the right, over the path, and land on another rocky ridge below. It may take a few tries to land safely at the other side.
Sadlands Up 2 Isle of Tony (1000 points): At the Sadlands, go to the grey path that's near the giant pit. There should be a raised grassy edge that points toward Tony's Island. Use that edge to ollie toward Tony's Island.
Over the Dome (1000 points): ): At the Sadlands, there's a circular jungle gym. Use the ridge surrounding the jungle gym to ollie over it.
Clearing the Swings (1000 points): At the Sadlands, ride along the main gray path until you get near the two sets of curved rails. Using the slightly raised land right by the path, ollie at the very edge and clear over one set of curved rails. Use the nearby hub if you need some extra speed.
Jumpin Da Hub (1000 points): In the Sadlands, there's a wooden, pentagon-shaped hub in the middle of a path. Use one of its side to air over the entire hub.
Tunnel of Luvin (1000 points): At the Animal Chin area, after doing the "Blowin It Out the Hole!" gap, go through the hole in the halfpipe.
Zag GapZig Gap (1500 points): At the Snake Run, air over the top bend. You have to cover greater distance than the Weak Sauce gap to get this one.
Tight Landing (1500 points): Between the Wallows and the Sadlands, you should see a small kicker that's facing a sign and a small platform connected to the San Dieguito building. Use the kicker to air toward the small platform.
Zag Gap (2000 points): At the Snake Run, air over the middle bend. You have to cover greater distance than the Weak Sauce gap to get this one.
Reverse Zig Gap (2000 points): Starting from a lower part of the Snake Run, air over the top bend. Use the Snake Run to gain speed before you attempt this as you'll need a lot to clear it.
Reverse Zag Gap (2000 points): Starting from a lower part of the Snake Run, air over the middle bend. Like the Reverse Zig Gap, you'll need a lot of speed for this.
Feed Me!!! (2000 points): Air toward the volcano in the middle of the map. The best way to reach this is by going to the top area of the Wallows and using the slanted areas like a makeshift halfpipe to gain speed. Once you have enough, just air forward toward the volcano.
Pit O Doom!!! (4000 points): At the Sadlands, there is a huge hole near San Dieguito. After getting your special meter filled and some speed, use the edge of the platform to launch over the hole and land on the ground.
Grind Gaps
Rail 2 Snakerun (50 points): At the fullpipe, there's a grindable rail on the outside. Use the concrete ramp right by the entrance to the fullpipe to launch toward the rail. Grind all the way and ollie off the end to grind the edge of the Snake Run.
Ramp Rail Gap (75 points): At Tony's Island, there's a part of the large halfpipe that has a small notch. Grind the edge of the vert ramp, jump over the notch, and land in another grind on the vert ramp.
Southern Intersect Sad Gap (200 points): At the Sadlands Snake Path, there's a sharp bend in the path between the southern entrance and the four-way intersection. Enter through the southern entrance and grind the left side of the path. As soon as you see the bend, ollie off and grind the right side of the path.
Northern Intersect Sad Gap (200 points): At the Sadlands Snake Path, there's a three-way intersection between the northern entrance and the four-way intersection. Grind the ledge that has the intersection to jump over it and land in another grind.
Ramp 2 Rail (300 points): At Tony's Island, grind the platform rail closest to Tony's house, facing toward the fullpipe. Jump off at the end and grind the rail connecting Tony's gutter with the fullpipe rail.
90 Degree Sadlands Rail Gap (300 points): Enter the Sadlands Snake Path that's near the four-way intersection and the series of benches. Go in the entrance, turn around, and grind the right side of the Snake Path. When you reach the 90-degree bend, ollie and grind the left side of the Snake Path.
Northern Crossover Sad Gap (300 points): At the Sadlands Snake Path, there's a three-way intersection between the northern entrance and the four-way intersection. Enter the path through the northern entrance and grind the right side of the path. When you go just past the three-way intersection, ollie off and grind the left side of the path.
Southern Crossover Sad Gap (300 points): Enter the Sadlands Snake Path that's near the San Dieguito building. Go up the path then turn around and grind the right side of it. Just as you reach the final turn that leads to the main path, ollie and grind the left side of the Snake Run path.
Chen Rail Series (300 points): At the Animal Chin area, grind the side of the halfpipe that has the rollin. Ollie over the rollin and land in a grind.
Mid Intersect Sad Gap (350 points): At the Sadlands Snake Path, go to the four-way intersection of the path and grind the ledge of the path, jumping over the intersection before grinding again.
Radramp 2 Islands Edge (400 points): From the starting position, head to the right side of the glass halfpipe and grind the edge. Ollie at the end and land in a grind at the edge of Combi's island. Be careful when jumping off the edge.
Rimrail Gap (450 points): At the Sadlands, go to the area with the wooden pentagon hub. Surrounding the hub are rocky slopes that work like vert ramps. Grind the tip one slope, ollie over the path and grind the other slope.
90 Degree Ramp Rail Gap (500 points): Get to the top of the largest ramp on Tony's Island and jump to the right, grinding the lip of a lower vert ramp.
Fence 2 Radramp (500 points): Go to the top of The Wallows and grind the chain link fence while facing the glass halfpipe. At the end, jump off straight and grind the lip of the HP.
San Dieguito Hall 2 Edge (500 points): While at the top of San Dieguito, ollie toward the Sadlands and grind the edge of the island. Make sure to not jump into the abyss.
Gutter 2 San Dieguito Roof (600 points): Get on Tony's roof and grind the gutter while facing San Dieguito. Jump off after hitting the first bend and grind the edge of San Dieguito's roof.
Isle of Tony 2 Edge (600 points): Ollie from Tony's Island to the Sadlands and grind the edge of the island.
Top of Da World Ma!!! (700 points): At the Sadlands, there's a circular jungle gym. Ollie toward the jungle gym and grind the very top of it. Use the raised land surrounding the jungle gym to get extra height for your ollie.
Southern Swingrail (900 points): Near the giant pit in the Sadlands, there are two sets of curved rails. Grind the set that's closer to the pit until you reach the top.
Northern Swingrail (900 points): Near the giant pit in the Sadlands, there are two sets of curved rails. Grind the set that's further from the pit until you reach the top.
Up 2 Pipe Rail (1000 points): At the Snake Run, air out of it when you're at the final bend, facing toward the rail that's on the outside of the fullpipe. Land in a grind on that rail to get this gap.
Kicker 2 Railspan (1500 points): At the Wallows, there is a triangular kicker in the middle of the path. Air off that kicker and land in a grind on the rail that leads to the Sadlands.
Rail 2 Kicker 2 Rail 2 Bench (1500 points): At the Wallows, from the top, first grind the rail on the right side that leads to the triangular kicker. Then ollie off the kicker toward another rail that leads to the Sadlands. Finally, ollie off the rail when you see a lone bench and grind that.
San Dieguito Roof 2 Edge (1600 points): Jump from the roof of San Dieguito to the Sadlands, landing on a grind at the edge of the island.
Radramp 2 Snakerun (2000 points): At the glass halfpipe, grind one of lips of the HP while facing toward the Combi section. Leap off and grind the bleachers in front of you, then jump to grind more bleachers, and finally jump again to grind the edge of the Snake Run.
Longrail (2000 points): At Tony's Island, grind the entire gutter of the roof while facing the fullpipe and keep going past the bend and the fullpipe's rail. When you reach the end, jump off and grind the edge of the Snake Run.
Off the Roof 2 Rail (2000 points): Jump from the roof of Tony's house to the Sadlands, landing on a grind at the edge of the island.
Bench Gap (2000 points): There are two benches at Sadlands near the large pit and San Dieguito. Grind one bench, ollie, and grind the other.
Bench Gap SeriesSwinging the Set (2000 points): At the Sadlands, ride along the main gray path until you get near the two sets of curved rails. Using the slightly raised land right by the path, ollie at the very edge and land in a grind on one of the curved rails.
Time 2 Feed the Volcano!!! (4000 points): At Tony's Island, you need to grind the rail that's between the gutter of the roof and San Digeuito's roof. If you feel like your skater is losing speed, ollie and grind again.
Kicker 2 Rail (4000 points): At the Wallows, there's a small kicker that points to a rail leaning against the banks. Use the kicker to air toward the rail and grind it.
Bench Gap Series (5000 points): When you enter the Sadlands from The Wallows, head to the very left to find a row of benches on a path. Grind one bench to another for this gap.
Other Gaps
Woohooo Oh Ho Yeehee!!! (2500 points): One side of San Dieguito is a solid wall with a small concrete platform sticking out. Use the ramps at Tony's Island to gain speed, then go to the left of San Dieguito to wallride the building. You need to have enough speed to wallride and ollie to the small platform for this gap.
Cleaning the Pipes (5000 points): Do a full loop in the fullpipe. Unlike the loop in Bullring, you will fall off if you simply ride up. To prevent this, get Special and use the Snake Run's ramps to gain full speed. When you approach the tunnel to perform the gap, ollie just as you start to go up. The timing has to be just right or your skater will lose speed and bail.