Trig Jegman (talk | contribs) m (& moving a TC from Chapter 1 here to really cut down on some backtracking that comes up otherwise) |
Trig Jegman (talk | contribs) m (& added a map) |
||
| (2 intermediate revisions by the same user not shown) | |||
| Line 1: | Line 1: | ||
{{Header Nav|game=Paper Mario: The Thousand-Year Door}} | {{Header Nav|game=Paper Mario: The Thousand-Year Door}} | ||
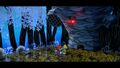
[[File:PMTTYD | [[File:PMTTYD Chapter 2 Title Card.jpg|center|500px]] | ||
{{-}} | |||
Chapter 2 has many new enemies and encounters. Having a few healing items and damage dealing items (like {{TTYD Item|Fire Flower}}s) is encouraged. Similar to Chapter 1, smacking trees with Mario's hammer can drop items and coins. If you want to collect everything possible, hit every tree you can! | Chapter 2 has many new enemies and encounters. Having a few healing items and damage dealing items (like {{TTYD Item|Fire Flower}}s) is encouraged. Similar to Chapter 1, smacking trees with Mario's hammer can drop items and coins. If you want to collect everything possible, hit every tree you can! | ||
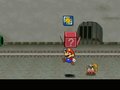
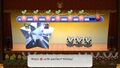
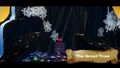
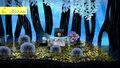
In order to begin Chapter 2, head to east Rogueport Sewers, in the room with the Airplane Panel and large staircase. You'll notice a creature scurry into a nearby hole. While in the area, jump as close to the screen as possible in front of the hole to reveal a hidden block with a {{TTYD Badge|Pretty Lucky}} badge. Follow the creature into the next room with Paper Mode. He reveals himself to be Punio, a member of the Punis. He explains that their tree is under attack, and needs help freeing his friends. As long as you promise not to eat him, Punio will lead you to Chapter 2. | In order to begin Chapter 2, head to east Rogueport Sewers, in the room with the Airplane Panel and large staircase. You'll notice a creature scurry into a nearby hole. While in the area, jump as close to the screen as possible in front of the hole to reveal a hidden block with a {{TTYD Badge|Pretty Lucky}} badge. Follow the creature into the next room with Paper Mode. He reveals himself to be Punio, a member of the Punis. He explains that their tree is under attack, and needs help freeing his friends. As long as you promise not to eat him, Punio will lead you to Chapter 2. | ||
<gallery> | |||
PMTTYD Sewers Pretty Lucky Badge.png|The hidden badge | |||
PMTTYD Scared Punio.jpg|Punio being scared by Mario (and his mustache) | |||
PMTTYD Damage Dodge Badge Location.jpg|Damage Dodge's location | |||
</gallery> | |||
After opening up the walkway, head into the tunnel and head left. A {{TTYD Badge|Damage Dodge}} badge is at the end. This is an extremely powerful badge, so equipping it is highly suggested. Then, head right into the special pipe going to Boggly Woods. | After opening up the walkway, head into the tunnel and head left. A {{TTYD Badge|Damage Dodge}} badge is at the end. This is an extremely powerful badge, so equipping it is highly suggested. Then, head right into the special pipe going to Boggly Woods. | ||
| Line 13: | Line 21: | ||
*Pale Piranha - 4 HP, 2 ATK, 0 DEF, spiked | *Pale Piranha - 4 HP, 2 ATK, 0 DEF, spiked | ||
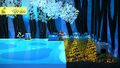
Save your game to the right and continue. Watch the scene with the Shadow Sirens (Three Shadows in the Nintendo Switch version) and continue on your way. Defeat the Pale Piranha and Cleft—be aware that Clefts have high defense and Pale Piranhas cannot be jumped on—use of the hammer or a {{TTYD Badge|Power Smash}} will be necessary. On the next screen, continue until Punio goes into the pipe. Follow him to the Great Tree. | Save your game to the right and continue. Watch the scene with the Shadow Sirens (Three Shadows in the Nintendo Switch version) and continue on your way. Defeat the Pale Piranha and Cleft—be aware that Clefts have high defense and Pale Piranhas cannot be jumped on—use of the hammer or a {{TTYD Badge|Power Smash}} will be necessary. This is a great opportunity to try out your new Special Move: Earth Tremor. Press A when each symbol lights up, and watch as the star gets larger. This move can deal up to 6 damage (ignoring defense!) to everything on screen with good execution, and is extremely helpful for many fights in the game. On the next screen, continue until Punio goes into the pipe. Follow him to the Great Tree. | ||
<gallery> | |||
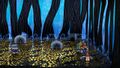
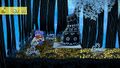
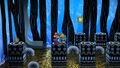
PMTTYD Boggly Woods Shadow Sirens.jpg|The Shadow Sirens plot to get Mario. | |||
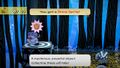
PMTTYD Small Earth Tremor.jpg|A small Earth Tremor won't do much damage... | |||
PMTTYD Using Earth Tremor.jpg|...but this big one sure will! | |||
PMTTYD The Great Tree Door.jpg|Who put this big metal door here? | |||
</gallery> | |||
Talk to Punio and you'll see that someone installed a door in front of the tree. Follow him up the tree's base and talk to him. He will state that the secret entrance is covered, and that he needs assistance of Madame Flurrie. Before leaving, go to the very right of the screen and go under a small waterfall to get the {{TTYD Badge|FP Plus}} badge. Now, go back toward the pipe to leave and Punio will point you to Madame Flurrie. | Talk to Punio and you'll see that someone installed a door in front of the tree. Follow him up the tree's base and talk to him. He will state that the secret entrance is covered, and that he needs assistance of Madame Flurrie. Before leaving, go to the very right of the screen and go under a small waterfall to get the {{TTYD Badge|FP Plus}} badge. Now, go back toward the pipe to leave and Punio will point you to Madame Flurrie. | ||
[[File:PMTTYD Boggly Woods Secret Passage.jpg|thumb|right|300px|The hidden wall Mario needs to hit the pipe-raising switch.]] | |||
When you're back in the main part of the screen, Punio will point rightward towards Madame Flurrie's house. Go in that direction. In the Nintendo Switch version, [[Paper Mario: The Thousand-Year Door/Shops#Charlieton (Boggly Woods)|Charleton]] is here to sell a few healing items if needed before progressing. On the next screen, defeat the Cleft and Dark Puff. Having a First Strike with Koops or the use of Mario's hammer may help swing the fight to be more in your favor. Continue to the ledge, and walk into the near side (closest to the screen) of the hill and go up and then left when you can't go up anymore. Follow the path, jumping on the seventh stump from the right to get a {{TTYD Badge|P-Down, D-Up P}} Badge, until you reach a blue switch. Hit it to raise an airplane platform, and get the nearby {{TTYD Star Piece|Boggly Woods 1}}. | |||
<gallery> | |||
PMTTYD P-Down, D-Up Badge Location.jpg|The location of the badge. This isn't very useful. | |||
TTYD Boggly Woods SP 1.png|The first Star Piece is right in the open. | |||
PMTTYDS SS Boggly Woods 1.jpg|The Shine Sprite location. | |||
PMTTYD Quake Hammer Badge Location.jpg|The Quake Hammer badge location. This has loads of uses and is highly encouraged to equip (when able). | |||
</gallery> | |||
Go back to the pipe at the beginning of this screen and enter it. Before you fly off, use Koops' shell to get the {{TTYD Shine Sprite|Boggly Woods 1}} to your left. Now, fly to the right until you're on top of the wall. In order to maximize your distance, you'll have to tilt right and left a few times. A {{TTYD Badge|Quake Hammer}} badge awaits you at the end. This badge is extremely useful for most of the game, but as of right now it helps to flip over those pesky Clefts. | |||
{{-}} | |||
[[File:PMTTYD Flurrie's House.jpg|thumb|right|300px|Madame Flurrie's house.]] | |||
Continue on into the next screen, and defeat the Dark Puff. Bash the third tree for a {{TTYD Star Piece|Boggly Woods 2}}, and continue until Punio announces the location of the house. You should see a thin hole in the fence, where you can slip through. If you head right, you can find a hidden {{TTYD Item|Volt Shroom}}. If you turn left and continue past the pipe and there'll be a {{TTYD Star Piece|Boggly Woods 3}} hidden on the wall. Go into the pipe and follow the path into the house. Inside, go up to the door and examine it for an introduction to Flurrie, and that she can't leave the room without her necklace. After the discussion, head all the way back left until you meet the Shadow Sirens again. When you get to them, a fight commences. | |||
{{-}} | |||
===Mini-Boss Fight=== | ===Mini-Boss Fight=== | ||
;The Shadow Sirens (The Three Shadows in the Switch version) | ;The Shadow Sirens (The Three Shadows in the Switch version) | ||
| Line 58: | Line 83: | ||
**Shade Fist | **Shade Fist | ||
**Fiery Jinx | **Fiery Jinx | ||
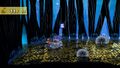
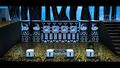
[[File:PMTTYD Boggly Woods Shadow Sirens Battle.jpg|thumb|right|300px|Battle against the Shadow Sirens/Three Shadows.]] | |||
First, attack everyone with Earth Tremor and any other attack that attacks all characters, such as Power Shell or items like a {{TTYD Item|Fire Flower}}. The more damage, the better. When or if you run out of FP and Star Power, attack Marilyn, since she is the strongest and can charge up a nasty lightning attack. After she's done, finish off Beldam (if she's still standing, because she doesn't have a lot of HP to begin with). When the both of them are done, take care of Vivian. This shouldn't be too hard if you attack hard and fast, guarding well. | |||
{{-}} | |||
When they disappear, pick up Flurrie's {{TTYD Important Thing|Necklace}} and go back to her house. Go to her door and watch the scene. Flurrie will join you and now you can go back to the Great Tree. You can also re-enter Flurrie's house for some collectibles, like the {{TTYD Badge|Super Appeal P}} badge. After completing Chapter 2, there is also a {{TTYD Star Piece|Flurrie's House}} in a hidden panel. | |||
<gallery> | |||
PMTTYD Flurrie Joins Mario.jpg|Flurrie joins the crew. | |||
PMTTYD Super Appeal P Badge Location.jpg|The Super Appeal P badge. | |||
</gallery> | |||
{{TTYD Area Summary | {{TTYD Area Summary | ||
| Line 85: | Line 115: | ||
*At the top of the warp pipe with the Airplane Panel. | *At the top of the warp pipe with the Airplane Panel. | ||
}} | }} | ||
==Gathering the troops== | ==Gathering the troops== | ||
*Mini-Yux (appears from Yux) - 1 HP, 0 ATK, 0 DEF | *Mini-Yux (appears from Yux) - 1 HP, 0 ATK, 0 DEF | ||
| Line 91: | Line 122: | ||
*X-Naut - 4 HP, 3 ATK, 0 DEF | *X-Naut - 4 HP, 3 ATK, 0 DEF | ||
*Yux - 3 HP, 2 ATK, 0 DEF | *Yux - 3 HP, 2 ATK, 0 DEF | ||
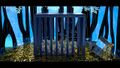
[[File:PMTTYD The Great Tree Secret Entrance.jpg|thumb|right|300px|The extremely secret entrance.]] | |||
Go up the big root to the left of the door. When you can't go further, go to the edge and use Flurrie's wind power to uncover the secret entrance (which ''is'' labeled that, contrary to what Punio said earlier). Watch the cutscene and press A near the door to enter. Go forward inside and you'll soon get attacked. | Go up the big root to the left of the door. When you can't go further, go to the edge and use Flurrie's wind power to uncover the secret entrance (which ''is'' labeled that, contrary to what Punio said earlier). Watch the cutscene and press A near the door to enter. Go forward inside and you'll soon get attacked. | ||
{{-}} | |||
===Mini-Boss=== | ===Mini-Boss=== | ||
;X-Naut x2 | ;X-Naut x2 | ||
| Line 108: | Line 139: | ||
Just attack them both (preferably the one that enlarges himself). It will be over shortly. Outside of boosting their attack occasionally, they don't have too many tricks. | Just attack them both (preferably the one that enlarges himself). It will be over shortly. Outside of boosting their attack occasionally, they don't have too many tricks. | ||
<gallery> | |||
PMTTYD The Great Tree Entrance.jpg|The first room in the Great Tree. | |||
PMTTYD The Great Tree Power Punch.jpg|The hidden Power Punch. If you don't want to use it, it sells for a lot at the shop. | |||
PMTTYD Blue and Red Cages.jpg|The Puni tribe in cages. | |||
</gallery> | |||
After the scene, save your game and heal. The door at the end is locked, so don't even bother. Instead, use the gray pipe nearby. When you emerge, ignore the pedestal and go to the other side to use the pipe there. Defeat the X-Naut in this room and check the lower right-most bush for a {{TTYD Item|Power Punch}}. Use the pipe on the other side and defeat the Yux. Continue upwards. You'll find the rest of the Punies trapped in cages. After this scene, enter the door to the left. Another encounter with Ms. Mowz will lead you to get into another battle. | After the scene, save your game and heal. The door at the end is locked, so don't even bother. Instead, use the gray pipe nearby. When you emerge, ignore the pedestal and go to the other side to use the pipe there. Defeat the X-Naut in this room and check the lower right-most bush for a {{TTYD Item|Power Punch}}. Use the pipe on the other side and defeat the Yux. Continue upwards. You'll find the rest of the Punies trapped in cages. After this scene, enter the door to the left. Another encounter with Ms. Mowz will lead you to get into another battle. | ||
| Line 121: | Line 158: | ||
**X-Naut-bomb | **X-Naut-bomb | ||
Same as last time, except there's one of them. Poor guy can't catch a break! | Same fight as last time, except there's only one of them. Poor guy can't catch a break! | ||
[[File:PMTTYD Using the Puni Orb.jpg|thumb|right|300px|Using the Puni Orb in a pedestal. You'll be doing this often.]] | |||
After the so-called mini-boss, you get the {{TTYD Important Thing|Red Key}}. Grab the {{TTYD Item|Ultra Shroom}} from the closed chest. Go back to the red cell and use the key to free the Puni Elder. After a ''very'' long lecture, you regain control. Return to the first room in the tree by using the series of pipes that got you here. After the cutscene, 10 Punies will join your party and you will receive the {{TTYD Important Thing|Puni Orb}}. Save, and lead your 11 Punies up the pipe to the second room. Place the Puni Orb on the pedestal in the center of the room, which will attract the Punies onto the platform. The pipe will emerge once 10 Punies are on the platform. Remove the Puni Orb and use the pipe. Defeat the X-Nauts guarding the door and press the control panel to unlock the door. | |||
{{-}} | |||
[[File:PMTTYD Bubble Pond.jpg|thumb|right|300px|Blowing Punies over the gap.]] | |||
You now need to get your 11 Punies across the gap. Put the orb in the pedestal to the right and use Flurrie to blow all Punies off the edge. Now, as soon as you see them come up in bubbles, blow them to the other side. If you miss, they will either land on your platform, or on the center. Jump down and grab the {{TTYD Shine Sprite|The Great Tree 1}} and the {{TTYD Item|Thunder Rage}} from the big bush to the right. Use the pipe to go back up, grab the Puni Orb, and hop across the pedestal to the other side. Go down the pipe. | |||
{{-}} | |||
<gallery> | |||
PMTTYDS SS The Great Tree 1.jpg|The first Shine Sprite in the bubble pond; Thunder Rage nearby. | |||
PMTTYD The Great Tree Plane Panel.jpg|The plane panel, hidden under a statue that Flurrie blows away. | |||
PMTTYDS SS The Great Tree 2.jpg|Shine Get! | |||
</gallery> | |||
On the next lower floor, watch out for the Pider that drops from the ceiling when you're crosing the ledge. These will scare the Punies. Change to Koops and hit it with his shell to allow the Punies to pass. Don't worry if some of them fall off, you will retrieve them later. After defeating the Pider, use Flurrie to blow off the large black vase to reveal an airplane panel. Use it to fly to the another one, then fly to the {{TTYD Shine Sprite|The Great Tree 2}}. Drop down, and go back up using the pipe on the left. Collect any lost Punis on this level. Go back down the pipe, defeat the two Pale Piranha Plants, and retrieve any Punis that dropped off from above. Head to the right and enter the pipe there. | |||
<gallery> | |||
PMTTYD Jabbi Hive.jpg|The large Jabbi hive. | |||
PMTTYD Damage Dodge P Badge Location.jpg|The Damage Dodge P badge. | |||
PMTTYD Pungent Shop Location.jpg|Pungent's Great Tree shop location is under the winding path. | |||
PMTTYD Jabble Location.jpg|Jabble is hidden in the shop. Don't hurt him! | |||
</gallery> | |||
You will spot the first Jabbi, which will flee to the right. Head after it with the 11 Punies, and engage them in combat. You can have Madame Flurrie use her ability to stun the Jabbis, but you otherwise can't do much in the battle. Once the Jabbi fortress is destroyed, you can enter and take the {{TTYD Important Thing|Blue Key}}. Head back to the left, but don't head up the pipe yet. Head left until you can reach the red block (taking out the Piders on the way). Throw Koops underneath the red block to reveal an invisible block. Jump on this hidden block to hit the red block, and get the {{TTYD Badge|Damage Dodge P}} badge (even if it falls down to the floor below). You can't progress to the left of the winding path, but you can still jump down, and use Madame Flurrie to blow open a secret passage on the left to reveal a [[Paper Mario: The Thousand-Year Door/Shops#Pungent's Great Tree Shop|shop]] (where you can stock up on any desired items). Hidden in the left of the shop, you can talk to a Jabbi and make him your ally if you promise to not hurt him. This gives a slight advantage in a later Jabbi battle. | |||
[[File:PMTTYD 101 Puni Army.jpg|thumb|right|300px|Hey, this isn't [[Pikmin]]!]] | |||
With the Blue Key, head back to the top floor. Unlock the jail, and after the freedom cutscene, you will now need to guide all 101 of them down below. When you reach the bubble gap, use the orb to collect the Punis, then blow them off the ledge, and collect all of them on the right side. Continue down until you reach the winding path, and proceed to the left. Make sure you have 101 Punis before proceeding—or 102, if you befriended Jabble the Jabbi. | |||
{{-}} | |||
==The Battle for the Great Tree== | |||
Now, lead your 101 Punies into the second hive room (which is left of the winding path), and begin the combat with the army of 100 Jabbis. After the Punies win, they'll destroy the last Jabbi hive. Ignore the pedestal here, as it won't do anything yet. Defeat the Pale Piranha and go down the warp pipe. Defeat another Pale Piranha, grab the {{TTYD Star Piece|The Great Tree 2}} from behind the pipe, and go into the next room. Put the orb into the weird pedestal. After getting trapped, grab the orb and use your paper mode to escape from the cage. Go down the pipe to the right that appeared when you were trapped. | |||
<gallery> | |||
PMTTYD Puni Cage.jpg|Despite all your rage, there's 101 Punies in this cage. | |||
PMTTYD Black Puni Switch.jpg|The switch under the cage room. | |||
PMTTYD White Puni Switches.jpg|The corresponding switches you need to press, where the Blue Key was located. | |||
PMTTYD Meet Toadette.jpg|Toadette will show you how to use the Super Boots. | |||
</gallery> | |||
Grab the {{TTYD Star Piece|The Great Tree 3}} from behind the pipe after the short cutscene. Hit the switch and remember the order of the symbols on the columns (Sun, Moon, Puni, and Star from left to right). Use the doors and pipes until you reach the first Punies vs. Jabbies room, and proceed to where you got the blue key. In this room, there are four new switches. Hit these switches until they're like the ones in the other room (Sun, Moon, Puni, and Star), to reveal a new doorway. Walk into the new room and grab the Super Boots. This starts a short tutorial showing the Spin Jump. Exit this room, and use the spin jump on the wooden panel to land in the room below. Carefully jump to the left and use Koops to grab the {{TTYD Badge|Charge}} badge. Then, carefully jump to the right, then up, then to the left, and grab the {{TTYD Shine Sprite|The Great Tree 3}}. | |||
<gallery> | |||
PMTTYD Charge Badge Location.jpg|The Charge badge. | |||
PMTTYDS SS The Great Tree 3.jpg|The third Shine Sprite. | |||
PMTTYD Stump Hole.jpg|The hole above the tree stump pipe. | |||
</gallery> | |||
With your Super Boots, retrace your steps to the caged room and slip through the bars. Spin Jump through the wooden panel near the center-left side of the cage. Keep the Punis in position with the orb, and use Flurrie to blow them down the hole. Sometimes, the Punis get stuck on the edges; This can be fixed by removing and re-placing the orb back in the pedestal. Retrieve the orb and jump down with the Punies. Go up the pipe and leave the room. Go up the pipe to the left and put the orb on the pedestal you ignored earlier. Spin Jump through the panel to land on the big tree stump. Now, blow the Punies all down the hole and enter the pipe. | |||
Go across the room (dealing with the X-Naut) and go down the pipe. Watch out for the Yux, who'll probably fire at you when you enter. Enter the next pipe to a large water area. Ignore this room for now, and go down next the pipe and jump across the panels. Head up to reach the other side of the water, and stand on the blue switch. Hold Koops to the left and step off the switch. When the blue switch surfaces, release him and the water will drain to the room below. Fall off the left and get the badge, and go behind the stairs to get a {{TTYD Item|Dizzy Dial}}. Go down the pipe and walk across the bridge of lily pads and platforms and lead your army to the other side, getting the {{TTYD Shine Sprite|The Great Tree 4}} on the way. Go down the warp pipe and you'll be very close to the Crystal Star. | |||
<gallery> | |||
PMTTYD Water Puzzle 1.jpg|Lowering the first switch lowers the second. | |||
PMTTYD Water Puzzle 2.jpg|This isn't a problem for Koops though! | |||
PMTTYDS SS The Great Tree 4.jpg|The final Shine Sprite in The Great Tree. | |||
</gallery> | |||
==Final Countdown== | ==Final Countdown== | ||
[[File:PMTTYD Elder Power Activate.jpg|thumb|right|300px|Elder Power activate!]] | |||
Put the orb on the pedestal. If you have all of your Punies, the platform will lower. Grab the {{TTYD Item|Mushroom}} from the lower left bush, heal, and save. As you wonder how Crump got all the way over here, put the orb on the pedestal and watch the cutscene. After Crump snatches the star, he starts the timer to an explosive. Quickly follow him up the pipe that drops when he leaves. Quickly defeat the two X-Nauts (or scurry by them in the GameCube version) and unlock the door by pressing {{gc|A}} next to the control panel. Before you leave, snag a {{TTYD Star Piece|The Great Tree 4}} in a bush. Go up through the series of pipes and hurry to the entrance of the tree (although there's no requirement to escort the Punies with you). There will be a humorous exchange between the characters lasting roughly 50 seconds, but Mario should still arrive with plenty of time to spare. Afterwards... | Put the orb on the pedestal. If you have all of your Punies, the platform will lower. Grab the {{TTYD Item|Mushroom}} from the lower left bush, heal, and save. As you wonder how Crump got all the way over here, put the orb on the pedestal and watch the cutscene. After Crump snatches the star, he starts the timer to an explosive. Quickly follow him up the pipe that drops when he leaves. Quickly defeat the two X-Nauts (or scurry by them in the GameCube version) and unlock the door by pressing {{gc|A}} next to the control panel. Before you leave, snag a {{TTYD Star Piece|The Great Tree 4}} in a bush. Go up through the series of pipes and hurry to the entrance of the tree (although there's no requirement to escort the Punies with you). There will be a humorous exchange between the characters lasting roughly 50 seconds, but Mario should still arrive with plenty of time to spare. Afterwards... | ||
| Line 158: | Line 230: | ||
Start off with Earth Tremor and then use your most powerful attacks against him. The item {{TTYD Item|Thunder Rage}} is also useful. Attack any X-Fist that he fires (could use Multibounce or Flurrie's Gale Force). He regenerates them every few turns, but not having to deal with them means Magnus' damage output remains fairly low. Keep attacking him until Magnus gives in. Use of {{TTYD Badge|Power Smash}} or the new Spin Jump attack are both useful options for Mario to deal more damage. | Start off with Earth Tremor and then use your most powerful attacks against him. The item {{TTYD Item|Thunder Rage}} is also useful. Attack any X-Fist that he fires (could use Multibounce or Flurrie's Gale Force). He regenerates them every few turns, but not having to deal with them means Magnus' damage output remains fairly low. Keep attacking him until Magnus gives in. Use of {{TTYD Badge|Power Smash}} or the new Spin Jump attack are both useful options for Mario to deal more damage. | ||
<gallery> | |||
PMTTYD Magnus Appears.jpg|Behold, Magnus von Grapple in all of its bright pink glory! | |||
PMTTYD Magnus Von Grapple.jpg|This fight is going to be a challenging one. | |||
PMTTYD Magnus Fists.jpg|Putting a whole new meaning to "fists are flying". Use items or Earth Tremor to take them out! | |||
PMTTYD Got the Emerald Star.jpg|You got the Crystal Star! | |||
</gallery> | |||
Watch the robot explode and this chapter is over. | Watch the robot explode and this chapter is over. | ||
| Line 179: | Line 258: | ||
|starpieces= | |starpieces= | ||
*In the bush to the right of the Save Block below the twisting path. | *In the bush to the right of the Save Block below the twisting path. | ||
*In the bush to the bottom-right of the Warp Pipe in the shortcut room. | *In the bush to the bottom-right of the Warp Pipe in the shortcut room, during the bomb sequence. | ||
*Behind | *Behind the warp pipe in the tree stump room. | ||
*Behind the | *Behind the warp pipe below the room with a cage trap. | ||
*In the second room with the first pedestal under a hidden panel. | *In the second room with the first pedestal under a hidden panel. | ||
*Under a panel in the blue jail cell. | *Under a panel in the blue jail cell. | ||
| Line 192: | Line 270: | ||
}} | }} | ||
Upon returning to The Great Tree, Jabble will be hiding in a bush, in the room where the Red Key was hidden (left of the cages) and will give a {{TTYD Item|Mushroom}} when found. Mario can also play Stump Petuni with Petuni to get a {{TTYD Item|Mystic Egg}}. | |||
{{-}} | |||
===Map of The Great Tree=== | |||
The Great Tree is a confusing place to navigate, with a lot of similarly shaped rooms and confusing, twisting paths. This map simplifies a lot of the rooms' positioning, as well as shows where each item, badge, Shine Sprite, and Star Piece are as well as major characters' locations. For the full-size map, press the image. | |||
[[File:PMTTYD The Great Tree Map.jpg|360px|center|The simplified map of The Great Tree]] | |||
{{-}} | |||
==Interlude== | ==Interlude== | ||
===Peach=== | ===Peach=== | ||
Watch the | [[File:PMTTYD Peach Dancing.jpg|thumb|right|300px|There's nothing to lose, and there's nothing to prove.]] | ||
Watch the cutscene and go to TEC's room (or you can take a shower again to have Peach hum a different tune). Once inside, you'll take part in a dancing mini-game. Just press the buttons as they appear on screen. | |||
{{-}} | |||
===Bowser=== | ===Bowser=== | ||
Watch the scene and you'll replay the first level of Super Mario Bros...AS BOWSER! Anyway, just go through the level, grabbing pieces of meat as you go. | Watch the scene and you'll replay the first level of Super Mario Bros...AS BOWSER! Anyway, just go through the level, grabbing pieces of meat as you go. | ||
Don't worry about dying, you have infinite lives. Afterwards, watch as the "king of guys who talk to posters" makes a fool of himself. | Don't worry about dying, you have infinite lives. Afterwards, watch as the "king of guys who talk to posters" makes a fool of himself. | ||
<gallery> | |||
PMTTYD Super Bowser 1.jpg | |||
PMTTYD King of Posters.jpg | |||
</gallery> | |||
==Intermission== | ==Intermission== | ||
Be on your way to Rogueport Sewers. You'll receive mail from Peach on the way there. As you leave the pipe from Boggly Woods, use a Spin Jump. There's a {{TTYD Star Piece|Rogueport Sewers 7}} here! | Be on your way to Rogueport Sewers. You'll receive mail from Peach on the way there. As you leave the pipe from Boggly Woods, use a Spin Jump. There's a {{TTYD Star Piece|Rogueport Sewers 7}} here! | ||
[[File:PMTTYD Happy Heart P Location.jpg|thumb|right|300px|The Happy Heart P badge]] | |||
Use the Spin Jump near the center of the first underground room when you enter from the pipe, near Professor Frankly's house. A piece of the room should pop up. Spin Jump near the edge of the piece and a {{TTYD Star Piece|Rogueport Sewers 10}} will come out of it. Once you're in the room before the Thousand-Year Door room, use Flurrie to blow off the piece of wall that sticks out. You'll get a {{TTYD Badge|Happy Heart P}} badge from inside the chest. Now go to the black chest room and look for the {{TTYD Star Piece|Rogueport Sewers 8}} from underground with the Spin Jump. Then go to the Thousand-Year Door room. There's also a hidden {{TTYD Star Piece|Rogueport Sewers 9}} in the front-center area of the room (towards the screen). Use the Spin Jump to uncover it. Now step on the pedestal and watch the scenes that follow. | Use the Spin Jump near the center of the first underground room when you enter from the pipe, near Professor Frankly's house. A piece of the room should pop up. Spin Jump near the edge of the piece and a {{TTYD Star Piece|Rogueport Sewers 10}} will come out of it. Once you're in the room before the Thousand-Year Door room, use Flurrie to blow off the piece of wall that sticks out. You'll get a {{TTYD Badge|Happy Heart P}} badge from inside the chest. Now go to the black chest room and look for the {{TTYD Star Piece|Rogueport Sewers 8}} from underground with the Spin Jump. Then go to the Thousand-Year Door room. There's also a hidden {{TTYD Star Piece|Rogueport Sewers 9}} in the front-center area of the room (towards the screen). Use the Spin Jump to uncover it. Now step on the pedestal and watch the scenes that follow. | ||
Start off by powering up your partners. By now, all of your current ones should be powered up. | Start off by powering up your partners with Merlon. By now, all of your current ones should be powered up. | ||
{{-}} | |||
Now, there's a few hidden Star Pieces to be found with your new move. One {{TTYD Star Piece|Rogueport 11}} is in front of the gallows of the plaza. There's another {{TTYD Star Piece|Rogueport 9}} in front of Frankly's place. A third {{TTYD Star Piece|Rogueport 12}} near the stairs in the docks. If you choose, you have new options at the Trouble Center. Going back to the Great Tree is a good move to collect a lot of stray Star Pieces, and helping Pine T. Jr. can help level Mario up a bit before the next chapter. More advanced players might use the Pine T. trouble to get to the Pit of 100 Trials' 30th floor for the {{TTYD Badge|Zap Tap}} badge, a very strong badge that hurts enemies that make contact. While difficult to obtain, it has a very strong payoff for the rest of the game. | Now, there's a few hidden Star Pieces to be found with your new move. One {{TTYD Star Piece|Rogueport 11}} is in front of the gallows of the plaza. There's another {{TTYD Star Piece|Rogueport 9}} in front of Frankly's place. A third {{TTYD Star Piece|Rogueport 12}} near the stairs in the docks. If you choose, you have new options at the Trouble Center. Going back to the Great Tree is a good move to collect a lot of stray Star Pieces, and helping Pine T. Jr. can help level Mario up a bit before the next chapter. More advanced players might use the Pine T. trouble to get to the Pit of 100 Trials' 30th floor for the {{TTYD Badge|Zap Tap}} badge, a very strong badge that hurts enemies that make contact. While difficult to obtain, it has a very strong payoff for the rest of the game. | ||
===Troubles unlocked=== | ===Troubles unlocked=== | ||
*Client: Koopook (Hooktail Castle) | *Client: Koopook (Hooktail Castle) | ||
*Title: Try to find me! | *Title: Try to find me! | ||
Latest revision as of 18:29, 12 June 2024

Chapter 2 has many new enemies and encounters. Having a few healing items and damage dealing items (like ![]() Fire Flowers) is encouraged. Similar to Chapter 1, smacking trees with Mario's hammer can drop items and coins. If you want to collect everything possible, hit every tree you can!
Fire Flowers) is encouraged. Similar to Chapter 1, smacking trees with Mario's hammer can drop items and coins. If you want to collect everything possible, hit every tree you can!
In order to begin Chapter 2, head to east Rogueport Sewers, in the room with the Airplane Panel and large staircase. You'll notice a creature scurry into a nearby hole. While in the area, jump as close to the screen as possible in front of the hole to reveal a hidden block with a ![]() Pretty Lucky badge. Follow the creature into the next room with Paper Mode. He reveals himself to be Punio, a member of the Punis. He explains that their tree is under attack, and needs help freeing his friends. As long as you promise not to eat him, Punio will lead you to Chapter 2.
Pretty Lucky badge. Follow the creature into the next room with Paper Mode. He reveals himself to be Punio, a member of the Punis. He explains that their tree is under attack, and needs help freeing his friends. As long as you promise not to eat him, Punio will lead you to Chapter 2.
-
The hidden badge
-
Punio being scared by Mario (and his mustache)
-

Damage Dodge's location

After opening up the walkway, head into the tunnel and head left. A ![]() Damage Dodge badge is at the end. This is an extremely powerful badge, so equipping it is highly suggested. Then, head right into the special pipe going to Boggly Woods.
Damage Dodge badge is at the end. This is an extremely powerful badge, so equipping it is highly suggested. Then, head right into the special pipe going to Boggly Woods.
Secret Entrance[edit]
- Cleft - 2 HP, 2 ATK, 2 DEF
- Dark Puff - 3 HP, 2 ATK, 0 DEF, sometimes flying
- Pale Piranha - 4 HP, 2 ATK, 0 DEF, spiked
Save your game to the right and continue. Watch the scene with the Shadow Sirens (Three Shadows in the Nintendo Switch version) and continue on your way. Defeat the Pale Piranha and Cleft—be aware that Clefts have high defense and Pale Piranhas cannot be jumped on—use of the hammer or a ![]() Power Smash will be necessary. This is a great opportunity to try out your new Special Move: Earth Tremor. Press A when each symbol lights up, and watch as the star gets larger. This move can deal up to 6 damage (ignoring defense!) to everything on screen with good execution, and is extremely helpful for many fights in the game. On the next screen, continue until Punio goes into the pipe. Follow him to the Great Tree.
Power Smash will be necessary. This is a great opportunity to try out your new Special Move: Earth Tremor. Press A when each symbol lights up, and watch as the star gets larger. This move can deal up to 6 damage (ignoring defense!) to everything on screen with good execution, and is extremely helpful for many fights in the game. On the next screen, continue until Punio goes into the pipe. Follow him to the Great Tree.
-
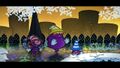
The Shadow Sirens plot to get Mario.
-
A small Earth Tremor won't do much damage...
-
...but this big one sure will!
-
Who put this big metal door here?


Talk to Punio and you'll see that someone installed a door in front of the tree. Follow him up the tree's base and talk to him. He will state that the secret entrance is covered, and that he needs assistance of Madame Flurrie. Before leaving, go to the very right of the screen and go under a small waterfall to get the ![]() FP Plus badge. Now, go back toward the pipe to leave and Punio will point you to Madame Flurrie.
FP Plus badge. Now, go back toward the pipe to leave and Punio will point you to Madame Flurrie.

When you're back in the main part of the screen, Punio will point rightward towards Madame Flurrie's house. Go in that direction. In the Nintendo Switch version, Charleton is here to sell a few healing items if needed before progressing. On the next screen, defeat the Cleft and Dark Puff. Having a First Strike with Koops or the use of Mario's hammer may help swing the fight to be more in your favor. Continue to the ledge, and walk into the near side (closest to the screen) of the hill and go up and then left when you can't go up anymore. Follow the path, jumping on the seventh stump from the right to get a ![]() P-Down, D-Up P Badge, until you reach a blue switch. Hit it to raise an airplane platform, and get the nearby
P-Down, D-Up P Badge, until you reach a blue switch. Hit it to raise an airplane platform, and get the nearby ![]() Star Piece.
Star Piece.
-
The location of the badge. This isn't very useful.
-

The first Star Piece is right in the open.
-

The Shine Sprite location.
-

The Quake Hammer badge location. This has loads of uses and is highly encouraged to equip (when able).


Go back to the pipe at the beginning of this screen and enter it. Before you fly off, use Koops' shell to get the ![]() Shine Sprite to your left. Now, fly to the right until you're on top of the wall. In order to maximize your distance, you'll have to tilt right and left a few times. A
Shine Sprite to your left. Now, fly to the right until you're on top of the wall. In order to maximize your distance, you'll have to tilt right and left a few times. A ![]() Quake Hammer badge awaits you at the end. This badge is extremely useful for most of the game, but as of right now it helps to flip over those pesky Clefts.
Quake Hammer badge awaits you at the end. This badge is extremely useful for most of the game, but as of right now it helps to flip over those pesky Clefts.

Continue on into the next screen, and defeat the Dark Puff. Bash the third tree for a ![]() Star Piece, and continue until Punio announces the location of the house. You should see a thin hole in the fence, where you can slip through. If you head right, you can find a hidden
Star Piece, and continue until Punio announces the location of the house. You should see a thin hole in the fence, where you can slip through. If you head right, you can find a hidden ![]() Volt Shroom. If you turn left and continue past the pipe and there'll be a
Volt Shroom. If you turn left and continue past the pipe and there'll be a ![]() Star Piece hidden on the wall. Go into the pipe and follow the path into the house. Inside, go up to the door and examine it for an introduction to Flurrie, and that she can't leave the room without her necklace. After the discussion, head all the way back left until you meet the Shadow Sirens again. When you get to them, a fight commences.
Star Piece hidden on the wall. Go into the pipe and follow the path into the house. Inside, go up to the door and examine it for an introduction to Flurrie, and that she can't leave the room without her necklace. After the discussion, head all the way back left until you meet the Shadow Sirens again. When you get to them, a fight commences.
Mini-Boss Fight[edit]
- The Shadow Sirens (The Three Shadows in the Switch version)
- Beldam
Goomballa's Tattle: That's Beldam. She's the oldest sister, the leader of the Shadow Sirens. She can make her partners big and make us tiny, and attacks with weird magic. The worst thing about her is that sinister snicker. She sounds so totally evil! I mean, she's just the sort of person you want to avoid like the plague, y'know?
- HP: 9
- ATK: 1
- DEF: 0
- Attacks:
- Long Range Blizzard (Does 2 Damage)
- Short Range Blizzard
- Enlarge (makes her or her sisters bigger and raises ATK)
- Mini (makes Mario or his partner smaller, lowering their attack)
- Marilyn
Goombella's Tattle: That's Marilyn. She's a Shadow Siren, Beldam's younger sister. She charges up her attacks occasionally. Says here she's the toughest of the sisters, so it might be best to defeat her first, huh? Other than that, she doesn't have any particularly outstanding characteristics.
- HP: 12
- ATK: 2
- DEF: 0
- Attack:
- Hand clap
- Charge up (raises attack once or more for lightning attack)
- Lightning attack
- Vivian
Goombella's Tattle:That's Vivian. She's the youngest of the three Shadow Sirens. She doesn't seem all that noteworthy. Uh... She is kind cute I guess... She might even be cuter than I am... I guess... ...Uh... What am I thinking?
- HP: 10
- ATK: 1
- DEF: 0
- Attacks:
- Shade Fist
- Fiery Jinx

First, attack everyone with Earth Tremor and any other attack that attacks all characters, such as Power Shell or items like a ![]() Fire Flower. The more damage, the better. When or if you run out of FP and Star Power, attack Marilyn, since she is the strongest and can charge up a nasty lightning attack. After she's done, finish off Beldam (if she's still standing, because she doesn't have a lot of HP to begin with). When the both of them are done, take care of Vivian. This shouldn't be too hard if you attack hard and fast, guarding well.
Fire Flower. The more damage, the better. When or if you run out of FP and Star Power, attack Marilyn, since she is the strongest and can charge up a nasty lightning attack. After she's done, finish off Beldam (if she's still standing, because she doesn't have a lot of HP to begin with). When the both of them are done, take care of Vivian. This shouldn't be too hard if you attack hard and fast, guarding well.
When they disappear, pick up Flurrie's ![]() Necklace and go back to her house. Go to her door and watch the scene. Flurrie will join you and now you can go back to the Great Tree. You can also re-enter Flurrie's house for some collectibles, like the
Necklace and go back to her house. Go to her door and watch the scene. Flurrie will join you and now you can go back to the Great Tree. You can also re-enter Flurrie's house for some collectibles, like the ![]() Super Appeal P badge. After completing Chapter 2, there is also a
Super Appeal P badge. After completing Chapter 2, there is also a ![]() Star Piece in a hidden panel.
Star Piece in a hidden panel.
-

Flurrie joins the crew.
-
The Super Appeal P badge.

- At the far end of the raised path in the Airplane Panel area.
- In the third tree from the entrance into the area with Flurrie's house.
- To the left of the Warp Pipe that leads to Flurrie's house.
- In a floor panel in Flurrie's bedroom, at the foot of the bed.
- At the top of the warp pipe with the Airplane Panel.
Gathering the troops[edit]
- Mini-Yux (appears from Yux) - 1 HP, 0 ATK, 0 DEF
- Pale Piranha - 4 HP, 2 ATK, 0 DEF, spiked
- Pider - 5 HP, 2 ATK, 0 DEF, sometimes flying
- X-Naut - 4 HP, 3 ATK, 0 DEF
- Yux - 3 HP, 2 ATK, 0 DEF

Go up the big root to the left of the door. When you can't go further, go to the edge and use Flurrie's wind power to uncover the secret entrance (which is labeled that, contrary to what Punio said earlier). Watch the cutscene and press A near the door to enter. Go forward inside and you'll soon get attacked.
Mini-Boss[edit]
- X-Naut x2
Goombella's Tattle: That's an X-Naut. Says here it's classified as an 'enemy combatant'. The description stinks... You think it means they're just low-level foot soldiers? They drink these potions that make them all big and burly and they attack! One's easy, but if there's two or more, better watch out! Use special moves and items!
- HP: 4
- ATK: 3
- DEF: 0
- Attacks:
- Body Slam
- Potion drink (makes them bigger)
- X-Naut Bomb (similar to Crump-a-bomb)
Just attack them both (preferably the one that enlarges himself). It will be over shortly. Outside of boosting their attack occasionally, they don't have too many tricks.
-

The first room in the Great Tree.
-
The hidden Power Punch. If you don't want to use it, it sells for a lot at the shop.
-

The Puni tribe in cages.


After the scene, save your game and heal. The door at the end is locked, so don't even bother. Instead, use the gray pipe nearby. When you emerge, ignore the pedestal and go to the other side to use the pipe there. Defeat the X-Naut in this room and check the lower right-most bush for a ![]() Power Punch. Use the pipe on the other side and defeat the Yux. Continue upwards. You'll find the rest of the Punies trapped in cages. After this scene, enter the door to the left. Another encounter with Ms. Mowz will lead you to get into another battle.
Power Punch. Use the pipe on the other side and defeat the Yux. Continue upwards. You'll find the rest of the Punies trapped in cages. After this scene, enter the door to the left. Another encounter with Ms. Mowz will lead you to get into another battle.
Mini-Boss[edit]
- X-Naut
- HP: 4
- ATK: 3
- DEF: 0
- Attacks:
- Body Slam
- Potion drink
- X-Naut-bomb
Same fight as last time, except there's only one of them. Poor guy can't catch a break!

After the so-called mini-boss, you get the ![]() Red Key. Grab the
Red Key. Grab the ![]() Ultra Shroom from the closed chest. Go back to the red cell and use the key to free the Puni Elder. After a very long lecture, you regain control. Return to the first room in the tree by using the series of pipes that got you here. After the cutscene, 10 Punies will join your party and you will receive the
Ultra Shroom from the closed chest. Go back to the red cell and use the key to free the Puni Elder. After a very long lecture, you regain control. Return to the first room in the tree by using the series of pipes that got you here. After the cutscene, 10 Punies will join your party and you will receive the ![]() Puni Orb. Save, and lead your 11 Punies up the pipe to the second room. Place the Puni Orb on the pedestal in the center of the room, which will attract the Punies onto the platform. The pipe will emerge once 10 Punies are on the platform. Remove the Puni Orb and use the pipe. Defeat the X-Nauts guarding the door and press the control panel to unlock the door.
Puni Orb. Save, and lead your 11 Punies up the pipe to the second room. Place the Puni Orb on the pedestal in the center of the room, which will attract the Punies onto the platform. The pipe will emerge once 10 Punies are on the platform. Remove the Puni Orb and use the pipe. Defeat the X-Nauts guarding the door and press the control panel to unlock the door.

You now need to get your 11 Punies across the gap. Put the orb in the pedestal to the right and use Flurrie to blow all Punies off the edge. Now, as soon as you see them come up in bubbles, blow them to the other side. If you miss, they will either land on your platform, or on the center. Jump down and grab the ![]() Shine Sprite and the
Shine Sprite and the ![]() Thunder Rage from the big bush to the right. Use the pipe to go back up, grab the Puni Orb, and hop across the pedestal to the other side. Go down the pipe.
Thunder Rage from the big bush to the right. Use the pipe to go back up, grab the Puni Orb, and hop across the pedestal to the other side. Go down the pipe.
-
The first Shine Sprite in the bubble pond; Thunder Rage nearby.
-
The plane panel, hidden under a statue that Flurrie blows away.
-
Shine Get!


On the next lower floor, watch out for the Pider that drops from the ceiling when you're crosing the ledge. These will scare the Punies. Change to Koops and hit it with his shell to allow the Punies to pass. Don't worry if some of them fall off, you will retrieve them later. After defeating the Pider, use Flurrie to blow off the large black vase to reveal an airplane panel. Use it to fly to the another one, then fly to the ![]() Shine Sprite. Drop down, and go back up using the pipe on the left. Collect any lost Punis on this level. Go back down the pipe, defeat the two Pale Piranha Plants, and retrieve any Punis that dropped off from above. Head to the right and enter the pipe there.
Shine Sprite. Drop down, and go back up using the pipe on the left. Collect any lost Punis on this level. Go back down the pipe, defeat the two Pale Piranha Plants, and retrieve any Punis that dropped off from above. Head to the right and enter the pipe there.
-
The large Jabbi hive.
-
The Damage Dodge P badge.
-
Pungent's Great Tree shop location is under the winding path.
-
Jabble is hidden in the shop. Don't hurt him!


You will spot the first Jabbi, which will flee to the right. Head after it with the 11 Punies, and engage them in combat. You can have Madame Flurrie use her ability to stun the Jabbis, but you otherwise can't do much in the battle. Once the Jabbi fortress is destroyed, you can enter and take the ![]() Blue Key. Head back to the left, but don't head up the pipe yet. Head left until you can reach the red block (taking out the Piders on the way). Throw Koops underneath the red block to reveal an invisible block. Jump on this hidden block to hit the red block, and get the
Blue Key. Head back to the left, but don't head up the pipe yet. Head left until you can reach the red block (taking out the Piders on the way). Throw Koops underneath the red block to reveal an invisible block. Jump on this hidden block to hit the red block, and get the ![]() Damage Dodge P badge (even if it falls down to the floor below). You can't progress to the left of the winding path, but you can still jump down, and use Madame Flurrie to blow open a secret passage on the left to reveal a shop (where you can stock up on any desired items). Hidden in the left of the shop, you can talk to a Jabbi and make him your ally if you promise to not hurt him. This gives a slight advantage in a later Jabbi battle.
Damage Dodge P badge (even if it falls down to the floor below). You can't progress to the left of the winding path, but you can still jump down, and use Madame Flurrie to blow open a secret passage on the left to reveal a shop (where you can stock up on any desired items). Hidden in the left of the shop, you can talk to a Jabbi and make him your ally if you promise to not hurt him. This gives a slight advantage in a later Jabbi battle.

With the Blue Key, head back to the top floor. Unlock the jail, and after the freedom cutscene, you will now need to guide all 101 of them down below. When you reach the bubble gap, use the orb to collect the Punis, then blow them off the ledge, and collect all of them on the right side. Continue down until you reach the winding path, and proceed to the left. Make sure you have 101 Punis before proceeding—or 102, if you befriended Jabble the Jabbi.
The Battle for the Great Tree[edit]
Now, lead your 101 Punies into the second hive room (which is left of the winding path), and begin the combat with the army of 100 Jabbis. After the Punies win, they'll destroy the last Jabbi hive. Ignore the pedestal here, as it won't do anything yet. Defeat the Pale Piranha and go down the warp pipe. Defeat another Pale Piranha, grab the ![]() Star Piece from behind the pipe, and go into the next room. Put the orb into the weird pedestal. After getting trapped, grab the orb and use your paper mode to escape from the cage. Go down the pipe to the right that appeared when you were trapped.
Star Piece from behind the pipe, and go into the next room. Put the orb into the weird pedestal. After getting trapped, grab the orb and use your paper mode to escape from the cage. Go down the pipe to the right that appeared when you were trapped.
-
Despite all your rage, there's 101 Punies in this cage.
-

The switch under the cage room.
-
The corresponding switches you need to press, where the Blue Key was located.
-
Toadette will show you how to use the Super Boots.


Grab the ![]() Star Piece from behind the pipe after the short cutscene. Hit the switch and remember the order of the symbols on the columns (Sun, Moon, Puni, and Star from left to right). Use the doors and pipes until you reach the first Punies vs. Jabbies room, and proceed to where you got the blue key. In this room, there are four new switches. Hit these switches until they're like the ones in the other room (Sun, Moon, Puni, and Star), to reveal a new doorway. Walk into the new room and grab the Super Boots. This starts a short tutorial showing the Spin Jump. Exit this room, and use the spin jump on the wooden panel to land in the room below. Carefully jump to the left and use Koops to grab the
Star Piece from behind the pipe after the short cutscene. Hit the switch and remember the order of the symbols on the columns (Sun, Moon, Puni, and Star from left to right). Use the doors and pipes until you reach the first Punies vs. Jabbies room, and proceed to where you got the blue key. In this room, there are four new switches. Hit these switches until they're like the ones in the other room (Sun, Moon, Puni, and Star), to reveal a new doorway. Walk into the new room and grab the Super Boots. This starts a short tutorial showing the Spin Jump. Exit this room, and use the spin jump on the wooden panel to land in the room below. Carefully jump to the left and use Koops to grab the ![]() Charge badge. Then, carefully jump to the right, then up, then to the left, and grab the
Charge badge. Then, carefully jump to the right, then up, then to the left, and grab the ![]() Shine Sprite.
Shine Sprite.
-
The Charge badge.
-
The third Shine Sprite.
-
The hole above the tree stump pipe.


With your Super Boots, retrace your steps to the caged room and slip through the bars. Spin Jump through the wooden panel near the center-left side of the cage. Keep the Punis in position with the orb, and use Flurrie to blow them down the hole. Sometimes, the Punis get stuck on the edges; This can be fixed by removing and re-placing the orb back in the pedestal. Retrieve the orb and jump down with the Punies. Go up the pipe and leave the room. Go up the pipe to the left and put the orb on the pedestal you ignored earlier. Spin Jump through the panel to land on the big tree stump. Now, blow the Punies all down the hole and enter the pipe.
Go across the room (dealing with the X-Naut) and go down the pipe. Watch out for the Yux, who'll probably fire at you when you enter. Enter the next pipe to a large water area. Ignore this room for now, and go down next the pipe and jump across the panels. Head up to reach the other side of the water, and stand on the blue switch. Hold Koops to the left and step off the switch. When the blue switch surfaces, release him and the water will drain to the room below. Fall off the left and get the badge, and go behind the stairs to get a ![]() Dizzy Dial. Go down the pipe and walk across the bridge of lily pads and platforms and lead your army to the other side, getting the
Dizzy Dial. Go down the pipe and walk across the bridge of lily pads and platforms and lead your army to the other side, getting the ![]() Shine Sprite on the way. Go down the warp pipe and you'll be very close to the Crystal Star.
Shine Sprite on the way. Go down the warp pipe and you'll be very close to the Crystal Star.
-

Lowering the first switch lowers the second.
-
This isn't a problem for Koops though!
-

The final Shine Sprite in The Great Tree.


Final Countdown[edit]

Put the orb on the pedestal. If you have all of your Punies, the platform will lower. Grab the ![]() Mushroom from the lower left bush, heal, and save. As you wonder how Crump got all the way over here, put the orb on the pedestal and watch the cutscene. After Crump snatches the star, he starts the timer to an explosive. Quickly follow him up the pipe that drops when he leaves. Quickly defeat the two X-Nauts (or scurry by them in the GameCube version) and unlock the door by pressing
Mushroom from the lower left bush, heal, and save. As you wonder how Crump got all the way over here, put the orb on the pedestal and watch the cutscene. After Crump snatches the star, he starts the timer to an explosive. Quickly follow him up the pipe that drops when he leaves. Quickly defeat the two X-Nauts (or scurry by them in the GameCube version) and unlock the door by pressing ![]() next to the control panel. Before you leave, snag a
next to the control panel. Before you leave, snag a ![]() Star Piece in a bush. Go up through the series of pipes and hurry to the entrance of the tree (although there's no requirement to escort the Punies with you). There will be a humorous exchange between the characters lasting roughly 50 seconds, but Mario should still arrive with plenty of time to spare. Afterwards...
Star Piece in a bush. Go up through the series of pipes and hurry to the entrance of the tree (although there's no requirement to escort the Punies with you). There will be a humorous exchange between the characters lasting roughly 50 seconds, but Mario should still arrive with plenty of time to spare. Afterwards...
Boss Fight[edit]
- Magnus Von Grapple
Goombella's Tattle: That's Magnus Von Grapple. It's a giant robot built by the X-Nauts. Lord Crump drives it. Its most effective attack is one that takes advantage of its size: a smothering stomp. It can also shoot out its fists, which do these super-gnarly rocket punches. Its fists are super powerful, so it's best to knock them down fast. The thing about this robot is I can't tell it looks cool, or really, REALLY stupid...
- HP: 30 (X-Fists' HP: 2)
- ATK: 2 (X-Fists' ATK: 4)
- DEF: 1
- Attacks:
- Magnus Von Punish (just a stomp attack)
- X-Fist Launch
- X-Fist Rocket Punch (occurs 1 round after they launch; has an attack of 4)
- Earthquake
Start off with Earth Tremor and then use your most powerful attacks against him. The item ![]() Thunder Rage is also useful. Attack any X-Fist that he fires (could use Multibounce or Flurrie's Gale Force). He regenerates them every few turns, but not having to deal with them means Magnus' damage output remains fairly low. Keep attacking him until Magnus gives in. Use of
Thunder Rage is also useful. Attack any X-Fist that he fires (could use Multibounce or Flurrie's Gale Force). He regenerates them every few turns, but not having to deal with them means Magnus' damage output remains fairly low. Keep attacking him until Magnus gives in. Use of ![]() Power Smash or the new Spin Jump attack are both useful options for Mario to deal more damage.
Power Smash or the new Spin Jump attack are both useful options for Mario to deal more damage.
-
Behold, Magnus von Grapple in all of its bright pink glory!
-
This fight is going to be a challenging one.
-
Putting a whole new meaning to "fists are flying". Use items or Earth Tremor to take them out!
-
You got the Crystal Star!


Watch the robot explode and this chapter is over.
- In the bush to the right of the Save Block below the twisting path.
- In the bush to the bottom-right of the Warp Pipe in the shortcut room, during the bomb sequence.
- Behind the warp pipe in the tree stump room.
- Behind the warp pipe below the room with a cage trap.
- In the second room with the first pedestal under a hidden panel.
- Under a panel in the blue jail cell.
- To the right of the bubble pond.
- On top of the pillar, reached by using Airplane Mode on a hidden panel.
- In the room under the Super Boots room, where
 Charge is located.
 - In the lilypads room.
Upon returning to The Great Tree, Jabble will be hiding in a bush, in the room where the Red Key was hidden (left of the cages) and will give a ![]() Mushroom when found. Mario can also play Stump Petuni with Petuni to get a
Mushroom when found. Mario can also play Stump Petuni with Petuni to get a ![]() Mystic Egg.
Mystic Egg.
Map of The Great Tree[edit]
The Great Tree is a confusing place to navigate, with a lot of similarly shaped rooms and confusing, twisting paths. This map simplifies a lot of the rooms' positioning, as well as shows where each item, badge, Shine Sprite, and Star Piece are as well as major characters' locations. For the full-size map, press the image.

Interlude[edit]
Peach[edit]

Watch the cutscene and go to TEC's room (or you can take a shower again to have Peach hum a different tune). Once inside, you'll take part in a dancing mini-game. Just press the buttons as they appear on screen.
Bowser[edit]
Watch the scene and you'll replay the first level of Super Mario Bros...AS BOWSER! Anyway, just go through the level, grabbing pieces of meat as you go.
Don't worry about dying, you have infinite lives. Afterwards, watch as the "king of guys who talk to posters" makes a fool of himself.


Intermission[edit]
Be on your way to Rogueport Sewers. You'll receive mail from Peach on the way there. As you leave the pipe from Boggly Woods, use a Spin Jump. There's a ![]() Star Piece here!
Star Piece here!

Use the Spin Jump near the center of the first underground room when you enter from the pipe, near Professor Frankly's house. A piece of the room should pop up. Spin Jump near the edge of the piece and a ![]() Star Piece will come out of it. Once you're in the room before the Thousand-Year Door room, use Flurrie to blow off the piece of wall that sticks out. You'll get a
Star Piece will come out of it. Once you're in the room before the Thousand-Year Door room, use Flurrie to blow off the piece of wall that sticks out. You'll get a ![]() Happy Heart P badge from inside the chest. Now go to the black chest room and look for the
Happy Heart P badge from inside the chest. Now go to the black chest room and look for the ![]() Star Piece from underground with the Spin Jump. Then go to the Thousand-Year Door room. There's also a hidden
Star Piece from underground with the Spin Jump. Then go to the Thousand-Year Door room. There's also a hidden ![]() Star Piece in the front-center area of the room (towards the screen). Use the Spin Jump to uncover it. Now step on the pedestal and watch the scenes that follow.
Star Piece in the front-center area of the room (towards the screen). Use the Spin Jump to uncover it. Now step on the pedestal and watch the scenes that follow.
Start off by powering up your partners with Merlon. By now, all of your current ones should be powered up.
Now, there's a few hidden Star Pieces to be found with your new move. One ![]() Star Piece is in front of the gallows of the plaza. There's another
Star Piece is in front of the gallows of the plaza. There's another ![]() Star Piece in front of Frankly's place. A third
Star Piece in front of Frankly's place. A third ![]() Star Piece near the stairs in the docks. If you choose, you have new options at the Trouble Center. Going back to the Great Tree is a good move to collect a lot of stray Star Pieces, and helping Pine T. Jr. can help level Mario up a bit before the next chapter. More advanced players might use the Pine T. trouble to get to the Pit of 100 Trials' 30th floor for the
Star Piece near the stairs in the docks. If you choose, you have new options at the Trouble Center. Going back to the Great Tree is a good move to collect a lot of stray Star Pieces, and helping Pine T. Jr. can help level Mario up a bit before the next chapter. More advanced players might use the Pine T. trouble to get to the Pit of 100 Trials' 30th floor for the ![]() Zap Tap badge, a very strong badge that hurts enemies that make contact. While difficult to obtain, it has a very strong payoff for the rest of the game.
Zap Tap badge, a very strong badge that hurts enemies that make contact. While difficult to obtain, it has a very strong payoff for the rest of the game.
Troubles unlocked[edit]
- Client: Koopook (Hooktail Castle)
- Title: Try to find me!
- Reward:
 Special Card (Let's you unlock the plane game in the Pianta Parlor)
Make your way to Hooktail Castle and work your way to the second green block room, near the storage room. When you get up to the walkway, jump down near the left door and talk to the Koopa there. Get your reward and slip through the bars to get a ![]() Life Shroom. While you're here, try to grab the
Life Shroom. While you're here, try to grab the ![]() Star Piece under a flippable panel to the left of the first jail cell where the blue skeleton is. This panel is inside the jail cell.
Star Piece under a flippable panel to the left of the first jail cell where the blue skeleton is. This panel is inside the jail cell.
- Client: Puni Elder (Great Tree)
- Title: Emergency shroom!
- Reward: 60 Coins
Either buy a ![]() Life Shroom from West Rogueport, or use the one you got from near Koopook (assuming you still have it). Now, go back to the Great Tree and give her the shroom to get your coins.
Life Shroom from West Rogueport, or use the one you got from near Koopook (assuming you still have it). Now, go back to the Great Tree and give her the shroom to get your coins.
- Client: Lahla (Rogueport)
- Title: Play with me!
- Reward: 10 Piantas (for use in the Pianta Parlor)
Go to Western Rogueport. Go into the Pianta Parlor and talk to the Boo behind the counter using Paper Mode.
- Client: Pine T. Jr. (Rogueport Sewers)
- Title: Help my daddy!
- Reward: Silver Card (for use in Pianta Parlor)
Go back down to the sewers after resting at the inn. Go to the Thousand-Year Door room. Make sure to save your game. Go back near the entrance and slip through the bars. Use the spring to get up to the ledge above. Fly to the other side, slip through and go through the door. Fight your way down to level 18, getting the ![]() Sleepy Stomp badge from the treasure chest at level 10. Do not use any shortcuts from Movers, or the toad will not appear. Once there, defeat the enemy and talk to the toad on the ground. He'll wake up and follow you down the pipe. Go to level 20 and he'll escape to the entrance. Open the treasure for a
Sleepy Stomp badge from the treasure chest at level 10. Do not use any shortcuts from Movers, or the toad will not appear. Once there, defeat the enemy and talk to the toad on the ground. He'll wake up and follow you down the pipe. Go to level 20 and he'll escape to the entrance. Open the treasure for a ![]() Fire Drive badge and go up the pipe to the entrance. Talk to Pine T. Jr. to get your reward.
Fire Drive badge and go up the pipe to the entrance. Talk to Pine T. Jr. to get your reward.
Additional Star Pieces[edit]
Rogueport Sewers has more to collect:
- Under a flippable panel south of the table next to Wonky in the juice bar, which is in the main square of the underground city (
 ).
).
Petalburg has two to collect:
- Under a flippable panel in the area with Bub-ulber ( ).
- Under a flippable panel to the south of the east gate ( ).
Hooktail Castle has one more ![]() Star Piece to collect, under a flippable panel to the left of the first jail cell with the blue Koopa skeleton. This panel is inside the jail cell. Don't go out of your way to get this—you'll return to Hooktail Castle later either through the Try to find me! or the Elusive Badge! troubles and can grab this on the way then.
Star Piece to collect, under a flippable panel to the left of the first jail cell with the blue Koopa skeleton. This panel is inside the jail cell. Don't go out of your way to get this—you'll return to Hooktail Castle later either through the Try to find me! or the Elusive Badge! troubles and can grab this on the way then.
Rogueport has others to collect:
- Under a flippable panel behind Zess T.'s house ( ).
- Under a flippable panel in front of the Pianta Parlor ( ).
- Under a flippable panel in front of the Excess Express ( ).