Onderduiker (talk | contribs) (First draft for DOS) |
Onderduiker (talk | contribs) m (Minor changes to language) |
||
| Line 7: | Line 7: | ||
Up to 14 agents can be created, after which Remove Agent must be selected to remove the highlighted agent from the list on the left of the Agent Menu before New Agent can be selected again. Select DOS to quit, or scroll up and down the agent list and then right to scroll up and down the list of missions assigned to the highlighted agent and select Begin Mission to begin the highlighted mission. Missions already completed are followed by a letter indicating difficulty level completed: (E)asy, (M)edium or (H)ard. | Up to 14 agents can be created, after which Remove Agent must be selected to remove the highlighted agent from the list on the left of the Agent Menu before New Agent can be selected again. Select DOS to quit, or scroll up and down the agent list and then right to scroll up and down the list of missions assigned to the highlighted agent and select Begin Mission to begin the highlighted mission. Missions already completed are followed by a letter indicating difficulty level completed: (E)asy, (M)edium or (H)ard. | ||
[[File:SWDF Screenshot Mission.png|center|frame| | [[File:SWDF Screenshot Mission.png|center|frame|Background, mission and objectives (DOS)]] | ||
Scroll through the mission briefing on the right of the screen for background and | Scroll through the mission briefing on the right of the screen for any background, mission and objectives, and select a difficulty level (Easy, Med(ium) or Hard) to the bottom left: there are more items and fewer enemies on Easy, and fewer items but more enemies on Hard. Select Cancel to return to the Agent Menu, or OK to load the mission. | ||
Press Esc at any time during a mission to pause it and open the main menu, selecting Abort Mission to return to the Agent Menu (replaced by Next Mission once all mission objectives are completed), Configuration, Quit to DOS, or Return to Game. | Press Esc at any time during a mission to pause it and open the main menu, selecting Abort Mission to return to the Agent Menu (replaced by Next Mission once all mission objectives are completed), Configuration, Quit to DOS, or Return to Game. | ||
| Line 27: | Line 27: | ||
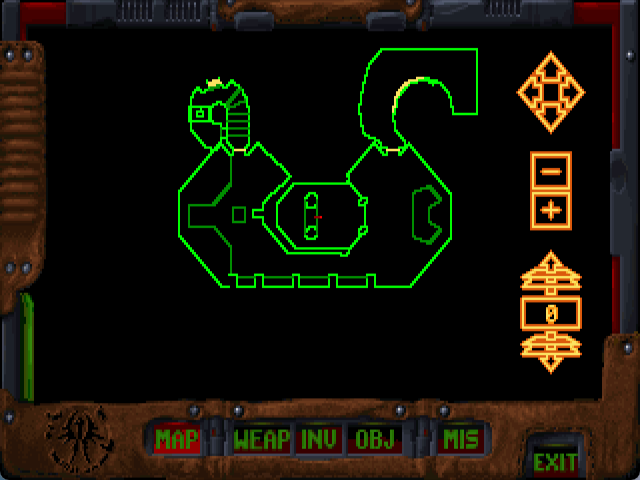
[[File:SWDF Screenshot Map.png|center|frame|Map screen (DOS)]] | [[File:SWDF Screenshot Map.png|center|frame|Map screen (DOS)]] | ||
The [[../Weapons/]] and [[../Items|Inventory]] screens show all weapons and inventory items available or picked up during the mission, while the Objectives screen shows a bulleted list of mission objectives and the percentage of | The [[../Weapons/]] and [[../Items|Inventory]] screens show all weapons and inventory items available or picked up during the mission, while the Objectives screen shows a bulleted list of mission objectives and the percentage of secrets found: the bullets and text light up once a mission objective is completed. | ||
[[File:SWDF Screenshot Objectives.png|center|frame|Objectives screen (DOS)]] | [[File:SWDF Screenshot Objectives.png|center|frame|Objectives screen (DOS)]] | ||
The Mission screen allows review of the background and | The Mission screen allows review of the background, mission and objectives given before the mission. | ||
==Status Display== | ==Status Display== | ||
| Line 39: | Line 39: | ||
; Bottom left | ; Bottom left | ||
The green number and arcs show your shield status: you always | The green number and arcs show your shield status: you always begin a mission with at least 100, but {{s|Items|Shield Units}} can be picked up to increase this to maximum 200, and restore shields lost as blast and crush damage is absorbed. Once shields are below 50 you begin taking some damage directly to your health as well, represented by the red oval and the number below it, and once shields are 0 then '''all''' damage is direct to health: you always begin with maximum 100. However, even if you always maintain sufficient shields (or enable Super Shield on the Configuration screen), damage inflicted by melee weapons, fists, fangs and falling bypass them to directly damage health, which can be restored by picking up {{s|Items|Medkits}}. Both shields and health can be restored to maximum by picking up a {{s|Items|Revive}}, although these are rare. | ||
The right red number shows how many lives you have: you always | The right red number shows how many lives you have: you always begin a mission with at least 3, but you can pick up [[../Items#Extra Life|extra ones]] up to maximum 9. Although you cannot save game during a mission, there are numerous checkpoints throughout: this means after losing a life, you can continue play (press Space) from the last checkpoint passed rather than right from the beginning (unless you lose your last life). | ||
; Bottom right | ; Bottom right | ||
The red number shows ammunition or amount for the mounted [[../Weapons|weapon]], and the smaller green number above shows | The red number shows ammunition or amount for the mounted [[../Weapons|weapon]], and the smaller green number above shows Missiles for the {{s|Weapons|Assault Cannon}}: numbers are replaced by dashes when there's no ammunition or amount. | ||
The green lights along the top show battery power, and these go out as battery power is drained by use of the {{s|Items|IR Goggles}}, {{s|Items|Gas Mask}} or {{s|Items|Headlight}}. The red light on top indicates when the headlight is on (this may be obvious in the dark, but less so in well-lit areas). | The green lights along the top show battery power, and these go out as battery power is drained by use of the {{s|Items|IR Goggles}}, {{s|Items|Gas Mask}} or {{s|Items|Headlight}}. The red light on top indicates when the headlight is on (this may be obvious in the dark, but less so in well-lit areas). | ||
{{Footer Nav|game=Star Wars: Dark Forces|prevpage=|nextpage=Controls}} | {{Footer Nav|game=Star Wars: Dark Forces|prevpage=|nextpage=Controls}} | ||
Latest revision as of 10:31, 11 May 2024
Once the opening titles, crawl and credits have played (press Esc or Enter to skip them), the Agent Menu opens. You're prompted to enter your name (maximum 18 characters) the first time you play, and whenever New Agent is selected (selections can be made using the mouse, or by pressing the underlined character on the keyboard).
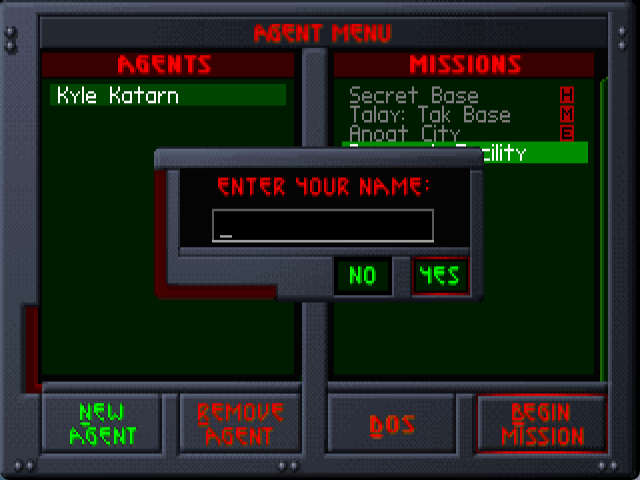
Up to 14 agents can be created, after which Remove Agent must be selected to remove the highlighted agent from the list on the left of the Agent Menu before New Agent can be selected again. Select DOS to quit, or scroll up and down the agent list and then right to scroll up and down the list of missions assigned to the highlighted agent and select Begin Mission to begin the highlighted mission. Missions already completed are followed by a letter indicating difficulty level completed: (E)asy, (M)edium or (H)ard.
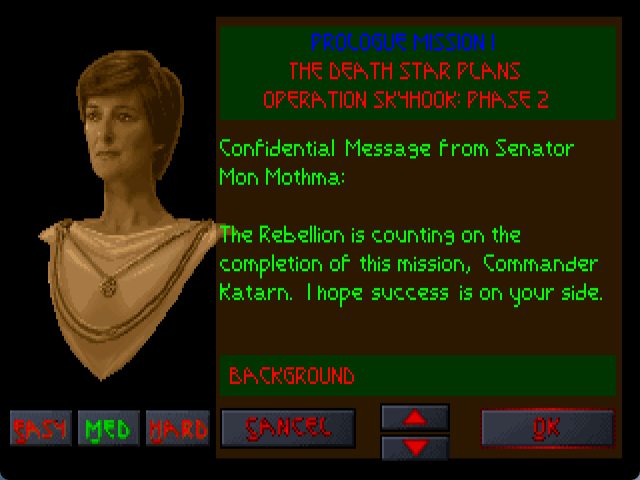
Scroll through the mission briefing on the right of the screen for any background, mission and objectives, and select a difficulty level (Easy, Med(ium) or Hard) to the bottom left: there are more items and fewer enemies on Easy, and fewer items but more enemies on Hard. Select Cancel to return to the Agent Menu, or OK to load the mission.
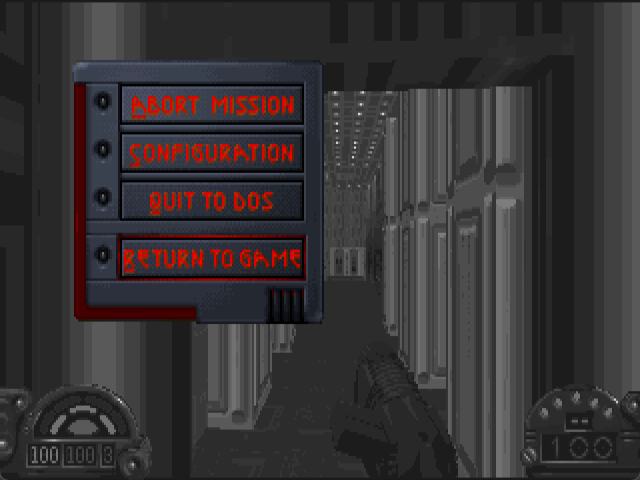
Press Esc at any time during a mission to pause it and open the main menu, selecting Abort Mission to return to the Agent Menu (replaced by Next Mission once all mission objectives are completed), Configuration, Quit to DOS, or Return to Game.
Configuration[edit]
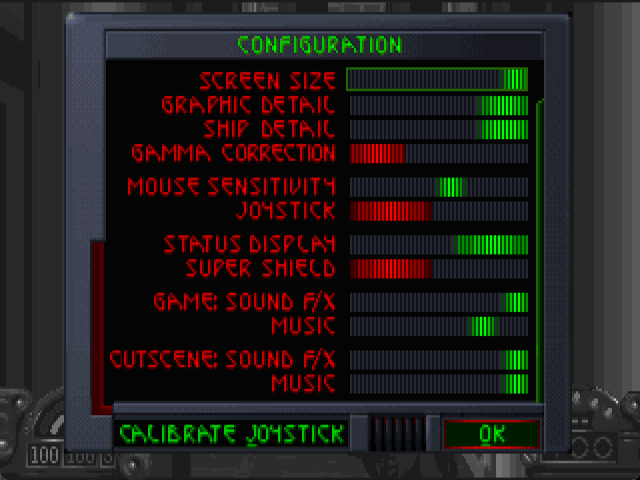
Select Configuration from the main menu to adjust a selection of slider bars and switches affecting display (screen size, graphic or ship detail, or gamma correction (brightness)), controls (mouse sensitivity, or (de)activate and calibrate joystick), gameplay ((de)activate Status Display or Super Shield (limitless shields)), and game or cutscene sound f/x or music volumes.
Personal Data Assistant[edit]
Press F1 at any time during a mission to pause it and toggle the Personal Data Assistant (PDA), which has five sections: Map, Weap(ons), Inv(entory), Obj(ectives) and Mis(sion). Pressing Esc will also exit it.
The Map screen shows all explored areas of the map, initially centered on your position (a circled red dot, with a line indicating your orientation). You can use a mouse to click on the control icons to the right to scroll around the map, zoom in or out, and move up or down levels. You can also use other controls, or toggle an overhead map which overlays an outline on the active game screen.
The Weapons and Inventory screens show all weapons and inventory items available or picked up during the mission, while the Objectives screen shows a bulleted list of mission objectives and the percentage of secrets found: the bullets and text light up once a mission objective is completed.
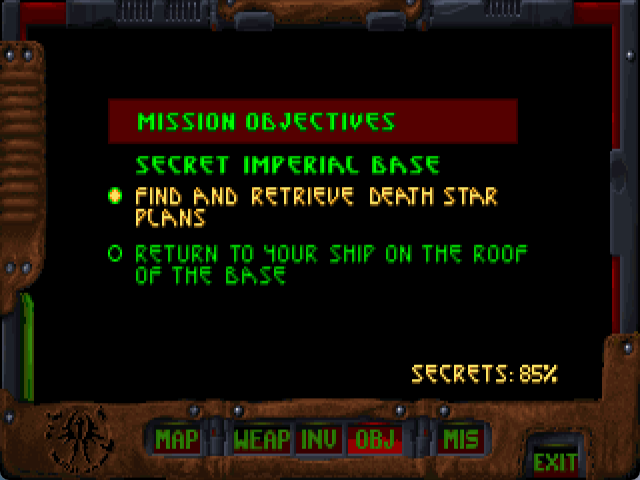
The Mission screen allows review of the background, mission and objectives given before the mission.
Status Display[edit]
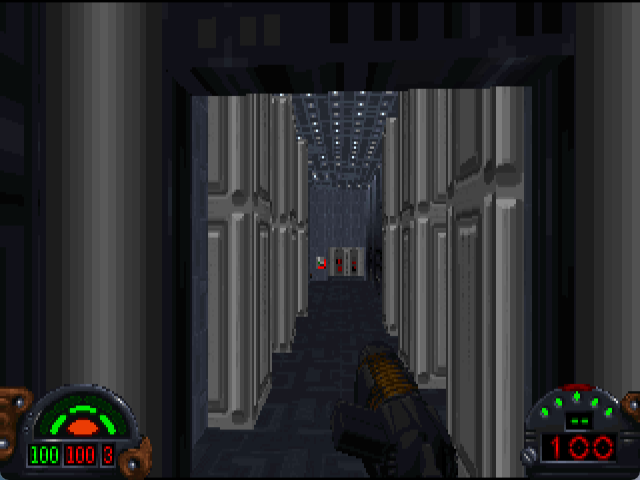
The Status or Heads Up Display (HUD) can be toggled off on the Configuration screen or using controls, but it shows important information about your character status in the bottom corners of the active game screen.
- Bottom left
The green number and arcs show your shield status: you always begin a mission with at least 100, but Shield Units can be picked up to increase this to maximum 200, and restore shields lost as blast and crush damage is absorbed. Once shields are below 50 you begin taking some damage directly to your health as well, represented by the red oval and the number below it, and once shields are 0 then all damage is direct to health: you always begin with maximum 100. However, even if you always maintain sufficient shields (or enable Super Shield on the Configuration screen), damage inflicted by melee weapons, fists, fangs and falling bypass them to directly damage health, which can be restored by picking up Medkits. Both shields and health can be restored to maximum by picking up a Revive, although these are rare.
The right red number shows how many lives you have: you always begin a mission with at least 3, but you can pick up extra ones up to maximum 9. Although you cannot save game during a mission, there are numerous checkpoints throughout: this means after losing a life, you can continue play (press Space) from the last checkpoint passed rather than right from the beginning (unless you lose your last life).
- Bottom right
The red number shows ammunition or amount for the mounted weapon, and the smaller green number above shows Missiles for the Assault Cannon: numbers are replaced by dashes when there's no ammunition or amount.
The green lights along the top show battery power, and these go out as battery power is drained by use of the IR Goggles, Gas Mask or Headlight. The red light on top indicates when the headlight is on (this may be obvious in the dark, but less so in well-lit areas).
