|
|
| (30 intermediate revisions by 15 users not shown) |
| Line 1: |
Line 1: |
| {{wip}} | | {{Header Nav|game=Atlantis no Nazo}} |
| | {{Game |
| | |completion=2 |
| | |image=Atlantis no Nazo FC box.jpg |
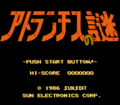
| | |title=Atlantis no Nazo |
| | |japanese=アトランチスの謎 |
| | |developer=[[Sunsoft]] |
| | |publisher=[[Sunsoft]] |
| | |year=1986 |
| | |systems={{syslist|nes|wii|3ds|wiiu|switch}} |
| | |ratings={{CERO|A}} |
| | |genre=[[Action]] |
| | |players=1 |
| | |modes=[[Single player]] |
| | }} |
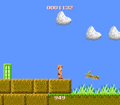
| | '''Atlantis no Nazo''' is an [[action]] game from [[Sunsoft]]. It's similar to [[Adventure Island]] but with a wider variety of settings and backgrounds, and less linear. Atlantis no Nazo is quite difficult, and if you're playing with an emulator, frequent state saving is recommended. |
|
| |
|
| {{sidebar2|title=imported GFDL content|contents=This guide has been released under the GNU Free Documentation License (see talk page for more). However it is still in text-only format. If you know how please convert it into wiki format and use subpages accordingly.}}
| | This game was never officially released in the United States. However, a prototype of the game does exist, as the planned sequel to [[Super Pitfall]]. It would have been released as Super Pitfall 2, but its release was canceled, due in part to the game's difficulty. |
| <br clear=all />
| |
| <br clear=all />
| |
|
| |
|
| ==Introduction==
| | <gallery> |
| Atlantis no Nazo is a pretty good action game from Sunsoft. I find it's similar | | File:Atlantis no Nazo title.png|Title screen |
| to Adventure Island but without the repetitive action and backgrounds. It's
| | File:Atlantis no Nazo screen.png|Screenshot |
| just as difficult though, maybe even more so, since this game throws all sorts
| | </gallery> |
| of stuff at you. If you want to play this game, I highly suggest you use an
| |
| emulator and make good use of save states because some of the levels are pure
| |
| hell.
| |
|
| |
|
| ==Walkthrough==
| | {{ToC}} |
| <pre>
| |
| ------
| |
| Zone 1
| |
| ------
| |
|
| |
|
| Treasure: 2
| | [[Category:Sunsoft]] |
| Doors: 2 (z2, z11)
| | [[Category:Action]] |
| | | [[Category:Single player]] |
| Once you drop from the balloon, head left and grab the treasure near the cliff.
| |
| Now go back to the right, avoiding the birds and their droppings, and there
| |
| will be another treasure along the way. Soon after that is a door, enter it to
| |
| go to zone 2. Further to the right there will be another door, but this one
| |
| will be locked. Use your bombs to open it. It will take you to zone 11.
| |
| | |
| ------
| |
| Zone 2
| |
| ------
| |
| | |
| Treasure: 3
| |
| Doors: 2 (z3, z9)
| |
| | |
| The Snails here are rather hard to kill, so just throw a bomb near them and
| |
| then move past them. Head to the right and there will be a treasure. Keep
| |
| heading right and you'll see some treasure on the bottom path and a door at the
| |
| top. The door here leads to zone 3 but if you keep going right there will be
| |
| more treasure and another door that leads to zone 9.
| |
| | |
| ------
| |
| Zone 3
| |
| ------
| |
| | |
| Treasure: 2
| |
| Doors: 2 (z4, z6)
| |
| | |
| Go left and get the treasure at the cliff. After that, head back to the right.
| |
| Use the bombs to avoid the Snails and jump as little as possible. When you have
| |
| to jump over a gap, be careful, since that when the Fish usually come flying
| |
| out. If you fall into the seventh hole from the door, you'll get sent to zone
| |
| 6. If you make it to the end of this zone, there's a treasure on top of the
| |
| door to zone 4. You have to jump on top of it and then you'll land in the door.
| |
| Just don't jump to far or you'll fly over it and into the chasm. Heh.
| |
| | |
| ------
| |
| Zone 4
| |
| ------
| |
| | |
| Treasure: 2
| |
| Doors: 1 (z7)
| |
| | |
| Now you're in a creepy cavern with Bats and Skeletons. You don't have to worry
| |
| about the Bats. They will fly just over your head but they won't kill you. The
| |
| Skeletons are a little troublesome but you can get rid of them by throwing a
| |
| bomb beside them. After four Skeletons and bunch of Bats, you'll find the door.
| |
| There's a chest on a tiny ledge beyond the door. You can get it by VERY
| |
| carefully falling down or even better, doing a small hop onto it. It's tough to
| |
| get and it might not be worth it. The powerup hanging higher is impossible to
| |
| get without dieing as far as I know.
| |
| | |
| ------
| |
| Zone 5
| |
| ------
| |
|
| |
| Never found this zone.
| |
| | |
| ------
| |
| Zone 6
| |
| ------
| |
| | |
| Treasure: 3
| |
| Doors: 1 (z8)
| |
| | |
| This is the first bonus room. Grab the treasure, jump over the Bat, and then
| |
| exit through the door on the far left.
| |
| | |
| ------
| |
| Zone 7
| |
| ------
| |
| | |
| Treasure:
| |
| Doors:
| |
| | |
| | |
| | |
| ------
| |
| Zone 8
| |
| ------
| |
| | |
| Treasure: 2
| |
| Doors: 2 (z10, z20)
| |
| | |
| A standard run, jump, and avoid the Snails zone. Be careful when you jump over
| |
| holes because the ledges are tiny. After awhile, you'll be at a spot where
| |
| there are two big holes and a platform that you have to jump onto. Carefully,
| |
| jump to the ledges closest to the platform, jump onto it, and then jump across
| |
| the larger hole ahead. You can make it and if you hit the ceiling, aim for the
| |
| tiny ledge below and then jump to the right. It's simple after this part. The
| |
| first door you find will take you to zone 10. The one further ahead takes you
| |
| to zone 20. I don't recommend going to zone 20 though.
| |
| | |
| ------
| |
| Zone 9
| |
| ------
| |
| | |
| A bonus room. Grab the treasure on the ledge and the powerup then exit where
| |
| you'll end up back in zone 8.
| |
| | |
| -------
| |
| Zone 10
| |
| -------
| |
| | |
| Treasure: 3
| |
| Doors: 1 (z12)
| |
| | |
| There aren't any enemies here but there's lots of jumping action. I find it's
| |
| easier if you jump over the double trees two at time and the single trees three
| |
| at a time. The only exceptions to this is the part right after the series of
| |
| single trees and two double trees with the larger hole between them. You can
| |
| still jump to the double tree at the far end, even with the larger hole. When
| |
| you encounter the spots where there are double trees followed by several single
| |
| trees, you should try to make it to the single tree closest to the double tree
| |
| on the right. If you have the foot-shaped powerup you can walk on the clouds
| |
| scattered here to make this zone a little easier. After while, you find some
| |
| actual solid ground and you'll find the door to zone 12.
| |
| | |
| -------
| |
| Zone 11
| |
| -------
| |
| | |
| Treasure: 2
| |
| Doors: 1 (z1)
| |
| | |
| This is another bonus room. Grab the treasure here and then exit through the
| |
| door.
| |
| | |
| -------
| |
| Zone 12
| |
| -------
| |
| | |
| Treasure: 2
| |
| Doors: 1 (z13)
| |
| | |
| Wait where you are until the Skeleton falls into the hole and the Bat passes
| |
| over before you jump across. Another Skeleton will appear on the second group
| |
| of blocks ahead. Wait for it to fall between the two masses of blocks and then
| |
| jump onto the wall ahead. After you fall back down another Skeleton will appear
| |
| on a group of blocks like before. Wait for it to fall and then continue on.
| |
| After you grab the second chest and fall down again, a Skeleton will appear.
| |
| Kill it, jump over the series of holes ahead, and kill the final Skeleton
| |
| waiting after the third hole. The door to zone 13 is below.
| |
| | |
| -------
| |
| Zone 13
| |
| -------
| |
| | |
| Treasure: 3
| |
| Doors: 1 (z16)
| |
| | |
| | |
| | |
| -------
| |
| Zone 16
| |
| -------
| |
| | |
| Treasure:
| |
| Doors:
| |
| | |
| | |
| | |
| -------
| |
| Zone 20
| |
| -------
| |
| | |
| Treasure: 0
| |
| Doors: 1 (z8)
| |
| | |
| This place is devoid of enemies and pretty much everything else except for the
| |
| large pyramid and the words, "key word Nagoya" hanging above it. The door is at
| |
| the far right. It will take you back to zone 8.
| |
| | |
| -------
| |
| Zone 21
| |
| -------
| |
| | |
| Treasure: 2
| |
| Doors: 1 (z23)
| |
| | |
| You'll drop from the door near the ceiling but there's another door that leads
| |
| to zone 23 right beside you. There's a treasure in each of the corners of this
| |
| zone but there are several Skeletons along the way.
| |
| | |
| -------
| |
| Zone 23
| |
| -------
| |
| | |
| Treasure: 1
| |
| Doors: 1 (z27)
| |
| | |
| This zone is similar to zone 4, except there are no Bats to be seen. Walk to
| |
| the left and kill the Skeletons. After you kill three of them, jump across the
| |
| hole, and then continue to the left. Kill any Skeleton you come across and
| |
| enter the door to zone 27.
| |
| | |
| -------
| |
| Zone 27
| |
| -------
| |
| | |
| Treasure: 4
| |
| Doors: 2 (z28, z29)
| |
| | |
| | |
| | |
| -------
| |
| Zone 28
| |
| -------
| |
| | |
| Treasure: 1
| |
| Doors:
| |
| | |
| It's pitch black here so I advise that you don't go here unless you have the
| |
| flash bomb powerup. You can carefully make your way through the zone and avoid
| |
| the holes by watching where the Snails fall.
| |
| | |
| -------
| |
| Zone 29
| |
| -------
| |
| | |
| Treasure: 2
| |
| Doors: 3 (z31, z32, z42)
| |
| | |
| A zone that's fairly simple. There are mainly Worms and Skeletons here, but
| |
| they appear somewhat randomly so I can't give you precise directions. Just jump
| |
| over the Worms when you see them and kill and/or jump over the Skeletons. When
| |
| you see the purple blocks, carefully jump onto them and then jump across the
| |
| hole. Keep going until you see three doors. Before you open them, jump onto the
| |
| purple blocks ahead and grab the treasure. The first door will lead to zone 32,
| |
| the middle one leads to zone 42 (avoid), and the last one leads to zone 31.
| |
| | |
| -------
| |
| Zone 31
| |
| -------
| |
| | |
| Treasure: 1
| |
| Doors: 1 (z29)
| |
| | |
| A bonus room. Grab the treasure and exit.
| |
| | |
| -------
| |
| Zone 32
| |
| -------
| |
| | |
| Treasure: 3
| |
| Doors: 1 (z33)
| |
| | |
| Carefully jump onto the higher pile of blocks and then jump across the hole.
| |
| You'll run into three groups of Skeletons altogether. Either destroy them or
| |
| jump over them but continue on and you'll find the door to zone 33 ahead.
| |
| | |
| -------
| |
| Zone 33
| |
| -------
| |
| | |
| Treasure: 3
| |
| Doors: 1 (z34)
| |
| | |
| A standard run and jump zone. Avoid the Mummies and the Scorpions and just run
| |
| to the right until you reach the door to zone 34. You should know you're
| |
| jumping limitations at this point in the game so don't jump if you don't think
| |
| you can make it. Kill the Mummies and Scorpions if you need to.
| |
| | |
| -------
| |
| Zone 34
| |
| -------
| |
| | |
| Treasure: 2
| |
| Doors: 2 (z36, z37 hidden)
| |
| | |
| | |
| | |
| -------
| |
| Zone 36
| |
| -------
| |
| | |
| Treasure: 3
| |
| Doors:
| |
| | |
| | |
| | |
| -------
| |
| Zone 37
| |
| -------
| |
| | |
| Treasure: 3
| |
| Doors: 1 (z38)
| |
| | |
| If you want some treasure, carefully make your way to the left and grab it from
| |
| the Snail. After that, head back to the right and avoid making crazy long jumps
| |
| like you did in zone 8 because of the Fish flying around. They usually appear
| |
| every 6 seconds so you should stop jumping and watch out when around that time.
| |
| Continue to the right and take it easy on the small ledges and you'll find the
| |
| door to zone 38.
| |
| | |
| -------
| |
| Zone 38
| |
| -------
| |
| | |
| Treasure:
| |
| Doors:
| |
| | |
| Here's another pitch black zone, except this one is harder. Be careful here.
| |
| | |
| -------
| |
| Zone 42
| |
| -------
| |
| | |
| Treasure: 0
| |
| Doors: 0
| |
| | |
| It's a black hole. You'll fall off the screen and die. Avoid this zone like the
| |
| plague.
| |
| </pre>
| |
| [[Category:NES]] | |