| Picture |
Name |
Criteria |
Tips |
Experience
|
 |
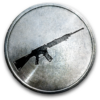
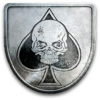
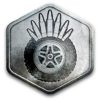
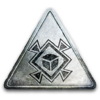
Assault Rifle Efficiency Pin |
In a round, kill 7 enemies with assault rifles |
Rather easy to achieve with the assault class. Since this doesn't have to be acquired in one life, a desperate player can simply charge into the middle of the enemy base and get at least one kill before dying. If repeated seven times, the pin can be yours. It's far more tactically sound, however, to simply play the game through. |
100
|
 |
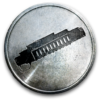
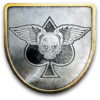
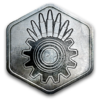
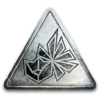
Grenade Launcher Efficiency Pin |
In a round, kill 4 enemies with grenade launchers. |
This can prove difficult as 40mm grenades are more often used for eliminating cover versus being an offensive weapon. That said, however, a single HE-Frag grenade can kill an enemy in a single direct hit. Even smoke grenades can kill if a lucky hit is scored. |
100
|
 |
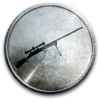
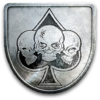
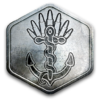
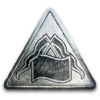
Sniper Rifle Efficiency Pin |
In a round, kill 7 enemies with sniper rifles. |
Easily gained if cover is used. Since it doesn't have to be done in a single life, counter-snipers aren't really an issue. To be sure you get a kill, aim for stationary or distracted players, compensating for bullet drop. A rifle that causes a lot of damage in a single shot - the M95, for example - can help greatly. |
100
|
 |
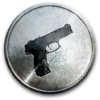
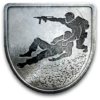
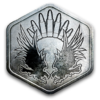
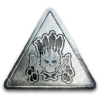
Handgun Efficiency Pin |
In a round, kill 4 enemies with handguns. |
Easily gained if you're forced to go into close-quarters fighting as a recon sniper. Be sure to select a pistol effective for your current fighting range; a fast-firing pistol for close quarters, for example. |
100
|
 |
Shotgun Efficiency Pin |
In a round, kill 4 enemies with shotguns. |
Easily gained by any class using a shotgun. Effective in close-quarters fights, or even as a sniper rifle if the 12 gauge slugs specialization is equipped. Since most players assume the recon class is used for sniping and is vulnerable at close quarters, it's quite easy to turn the tables on them by equipping the close-quarters shotguns and coaxing your adversaries in close. |
100
|
 |
Rocket Launcher Efficiency Pin |
In a round, kill 5 enemies with rocket launchers. |
Easy to do on any vehicle-centric map, as rocket launchers cause plenty of damage against vehicles. A lucky hit on a fully-loaded transport (A blackhawk or a HMMV, for example) will net you most or all of the necessary kills. Use tracer darts to help for targets further out or the more mobile helicopters. |
100
|
 |
Light Machine Gun Efficiency Pin |
In a round, kill 7 enemies with light machine guns. |
The LMG is in many ways similar to an assault rifle. It suffers poorly on the move, but simply set up in a spot and use fully automatic fire to mow enemies down. As a medic, you should throw down medkits to keep you healthy and help mitigate the amount of damage from return fire. Just be aware of snipers, as your LMG isn't the best in terms of accuracy. |
100
|
 |
Submachinegun Efficiency Pin |
In a round, kill 7 enemies with submachineguns. |
The SMG is similar in many ways to an assault rifle, but it also is far less accurate. Try to act with surprise when using the SMG, and engage enemies at short range and in short bursts. |
100
|
 |
Emplacement Efficiency Pin |
In a round, kill 5 enemies with stationary weapons. |
The trick here is to locate the emplacement right for you. A lot of people choose to leave the stationary weapons behind out of habit, as it makes them sitting targets for snipers. Bad Company 2, however, has some armoured turrets that are bulletproof from the front. These turrets, especially the ones sitting by the back, are the key to gaining this pin. If an enemy tank is closing in, try to use the stationary anti-tank weapons; they'll cause a lot of damage, and once it's destroyed you can switch to a nearby stationary machine gun to get the rest of the pin. It doesn't matter if you die, since usually you'll be on defence if you're using an emplacement. |
100
|
 |
Explosives Efficiency Pin |
In a round, kill 4 enemies with explosives. |
Although grenades work here, they're generally not the most efficient way to go. Instead, try using anti-tank mines on a vehicle-centric map. AT mines are often discounted by players who attempt to rush in with vehicles, thinking they're bulletproof. C4 also works, but only through judicious use; equipping the detonator makes you vulnerable to any attack not coming from within range of your set explosives. |
100
|
 |
Melee Efficiency Pin |
In a round, kill 4 enemies with melee weapons. |
Easy to do on maps with predictable sniper spots, such as Port Valdez while defending. Find a bush to hide behind and then simply stab the snipers as they start to snipe for you. In some situations, the knife can be more powerful than the gun, since most weapons don't kill in a single strike while the knife does. If low on ammo and in close quarters, it can sometimes pay off to simply rush at an enemy with your knife rather than try to shoot him. |
200
|
 |
Anti-Vehicle Efficiency Pin |
In a round, destroy 4 enemy vehicles. |
The explosives pouch and enhanced explosives specializations pay off here, as well as the tracer dart gun. Judicious use of rocket launchers can punch holes in enemy armour, especially if using the RPG-7, which causes more damage. The tracer dart helps on faster-moving targets, and can help you fire from behind cover. |
100
|
 |
Combat Efficiency Pin |
In a round, reach a kill streak of 6. |
Medics and recon usually get this pin, as medics can heal themselves and recon players simply snipe from cover or out of range (usually both). If you're a medic, work with a assault player to keep each other healed and stocked with ammo, respectively. Mutual cover can help considerably too. Since this is a kill streak pin, staying alive is more important than getting kills; if you die, after all, you'll have to start over again. If you're a recon, be sure to relocate after a few kills so your position isn't revealed to counter-snipers. |
100
|
 |
Combat Excellence Pin |
In a round, reach a kill streak of 8. |
Medics and recon usually get this pin, as medics can heal themselves and recon players fire from outside normal ranges. This requires a bit more skill and luck than the Combat Efficiency pin, but similar tactics apply. As with the Combat Efficiency pin, staying alive is more important than getting kills; if you die, you'll have to start over again. |
200
|
 |
Kill Assist Pin |
In a round, do 7 kill assists. |
This pin is easily achieved by almost any class and by any player of any skill level. Teamwork is what the game is all about, so killing an enemy who was wounded by one of your allies happens often enough on its own. The Saviour and Avenger pins also work alongside this pin. |
100
|
 |
Saviour Pin |
In a round, do 2 saviour kills. |
A saviour kill is achieved by killing an enemy who is firing on one of your allies. This pin can be gained easily enough by shooting at a distracted enemy. If you see an enemy engaging an ally, his attention is focused on his target. Use this opportunity to kill him. |
100
|
 |
Avenger Pin |
In a round, do 2 avenger kills. |
Remarkably similar to the saviour pin, except this pin is achieved by killing an enemy who has already killed an ally instead of killing an enemy who is simply attacking a friendly. A good method of gaining this pin is during rush, when an enemy sets a charge. Some players will rush in to disarm the charge, making them easy targets for the attackers who have set the charge. The attackers often camp in an area close to the M-COM. They'll often reveal themselves when they shoot at the defenders trying to disarm; take this opportunity to kill them in turn. |
100
|
 |
Headshot Pin |
In a round, do 5 headshots. |
This achievement can be gained by snipers, but it can be gained by other classes as well. Most players - especially new ones - will usually aim at the torso as it presents a larger target. Instead, be sure to run around with your weapon pointed at head level. Then fire when the situation presents itself. Just be sure to fire in bursts to compensate for recoil. As with getting kills in general, it's far easier if you have the element of surprise. |
100
|
 |
Ace Pin |
In a round, be the best player. |
The best player in this game is determined by points, not by kills. Therefore, this pin can be awarded to someone who has less than a 1:1 kill/death ratio. The major point-scoring actions are spotting enemies and by healing, resupplying, and reviving teammates. Throwing motion sensors into battle like party favours can also be effective, as motion sensor assists are worth considerably more than standard spotting. Also stick close to your squad; resurrecting a squadmate is far more valuable in points than resurrecting another player not in your squad. |
200
|
 |
Gold Squad Pin |
In a round, be part of the best squad. |
This pin can be gained through luck, or by frequenting a server and knowing who the best players are. Once you're in a squad, follow the strategy listed under the ace pin. Also aim for any other pin you can get; they are worth quite a few points as well. Note that you need to be part of the best squad, not be a one-man squad - stick close to them and support your squadmates whenever possible. |
200
|
 |
Nemesis Pin |
In a round, kill an enemy 5 times. |
Not easily gained, but bound to happen sometime. Since every player is different, making them your nemesis will be different every time as well. |
200
|
 |
Payback Pin |
In a round, kill your nemesis. |
This pin can be achieved semi-intentionally, by making yourself an easy target to a player you're certain you're going to kill. However, it's usually best to wait for this pin to come naturally to you. |
100
|
 |
Squad Member Pin |
In a round, obtain one attack and one defend order. |
This pin isn't easily gained by new players as the description of the pin is poorly worded. The trick to gaining this pin is to set the squad's objective, and then accomplish it. Since a defend and an attack order must be completed, it's best to get this pin on a conquest map. When the game starts, put your crosshair above the nearest objective and hit the socialize button (Q, back, or select for PC, Xbox, and PS3 respectively). When a red symbol appears next to the objective, you'll know the objective was set. Capture the objective to complete an attack order. Do the same on a friendly flag, and then kill an enemy who is standing near it to complete a defend order. |
200
|
 |
Wheels of Hazard Pin |
In a round, do 3 road kills with any vehicle. |
Quite difficult to gain, as road kills are difficult for different reasons; tanks are too slow and vulnerable up close (especially without a gunner or with the alternate weapon upgrade), quad bikes are fast but small and hard to aim, while HMMVs can easily be shot at with RPGs and TOWs as they come close. Helicopters are vulnerable at low altitude, and boats are only effective on enemies near the coast and tend to be uncontrollable once they leave the water. The best vehicle for roadkilling is usually the HMMV, which is big enough to plow through enemies and fast enough to catch them off-guard. Catching them off-guard is perhaps the key to success here, as is not hitting any solid obstacle. Once your HMMV hits a wall, your element of surprise is gone and so will your vehicle in a few seconds. Due to the difficulty of getting this pin, it's usually best to try and get this pin in multiple lives. |
200
|
 |
Car Warfare Pin |
In a round, kill 4 enemies with cars. |
As mentioned in the Wheels of Hazard pin, cars like the HMMV, the Cobra, and the Vodnik are generally too fragile for frontline combat. The gunner is also quite vulnerable to snipers or to flanking attacks. It's possible to get this pin along with the Wheels of Hazard pin, but the fragility of cars makes it tricky. If you want to use the machine gun, try using the car as a mobile machine gun nest. |
100
|
 |
Tank Warfare Pin |
In a round, kill 7 enemies with tanks. |
Tanks are the new artillery, so a tank gunning enemies from long range, raining death and confusion from afar, will get this pin easily enough. As will the gunner, especially against enemies who attempt to sneak up on the tank to C4 or use the repair tool on it. The tank gunner is inside the tank, so it's possible to use the tank as a mobile machine gun. Any tank specializations can help as well. |
100
|
 |
Naval Warfare Pin |
In a round, kill 2 enemies with sea vehicles. |
This pin is difficult due to the rarity of sea vehicles and the predictability of their movement patterns. With only two sea vehicles in the game - the personal watercraft and the PBL - the choice is obvious. Use the PBL's grenade launchers to rain death from afar on enemy positions. PBLs move quite predictably and are quite vulnerable to sniper fire, so it's best to work quickly and in multiple lives. |
100
|
 |
Air Warfare Pin |
In a round, kill 5 enemies with air vehicles. |
The best maps to get this on are ones where there air superiority is already yours. Valpariso is a good example; the Americans have access to a Blackhawk and a UAV while the Russians don't have anything similar. On maps like these, the biggest threats are tracer darts and guided missiles. Tracer darts can be removed with the smoke countermeasures package, so the Blackhawk pilot should always have this equipped (especially since the pilot is without a weapon and thus gains nothing from upgrades like the alternate weapon package). If the pilot is skilled at manipulating his heli and dodging enemy attacks, the gunners should be able to get this pin quite easily. |
100
|
 |
M-COM Attacker Pin |
In a round, blow up 4 M-COM stations. |
This objective can be tricky, as a lot of it hinges on your ability to get deep within the enemy base and ultimately blow the M-COM up. The hard parts are getting into the base and then protecting the M-COM until the explosive blows up the M-COM. Being on the forefront of the attack is an obvious must, and having a good squad watching your back is a very big plus. To increase your chances of blowing up the M-COM, try choosing a large map like Arica Harbour, Nelson Bay, or Isla Inocentes with only a few people in it. Tanks can also destroy M-COMs inside buildings by shelling the building and collapsing it on top of the M-COM. Avoid Squad Rush mode - there are too few M-COMs in that mode to obtain this pin. |
100
|
 |
M-COM Defender Pin |
In a round, defend 4 M-COM stations. |
Far easier than blowing up four M-COMs, this pin can be easily obtained by simply staying within a 40 metre radius of an M-COM and killing anyone who you can see. |
100
|
 |
Rush Winner Pin |
Win a Rush round. |
Simply win a round of Rush. |
100
|
 |
Conquest Winner Pin |
Win a Conquest round. |
Simply win a round of Conquest. |
200
|
 |
Squad Deathmatch Winner Pin |
Win a Squad Deathmatch round. |
Simply win a round of Squad Deathmatch. |
100
|
 |
Squad Rush Winner Pin |
Win a Squad Rush round. |
Finding a Squad Rush server can be tricky, due to it supporting only eight players. Once you're in, simply win the round. |
100
|
 |
Flag Attacker Pin |
In a round, capture 4 flags. |
On Conquest, simply stand near a flag to start capturing it. The capture bar is located at the right of the screen, close to the ticket count. If you're desperate, you can let the enemy capture flags, giving you an opportunity to grab them back. Be sure to hit the socialize button and you may obtain the Squad Member pin as well. |
100
|
 |
Flag Defender Pin |
In a round, defend 4 flags. |
On Conquest, simply kill any enemies who are currently capturing a friendly flag. Be sure to hit the socialize button and you may obtain the Squad Member pin as well. |
100
|
 |
Resupply Ops Pin |
In a round, do 7 resupplies. |
Although assault classes don't have the luxury of being able to see which friendlies are low on ammo, they can still drop ammo for friendlies. Usually the best places to put ammo are in front of snipers or near any point your team needs to hold down for a short while. |
100
|
 |
Surveillance Ops Pin |
In a round, do 5 motion mine assists. |
Motion sensors are best thrown into areas of suspected enemy activities. Throwing motion mines is far more efficient at spotting a missed sniper than running around for yourself. It's also a good idea to simply throw them into the enemy base. Any enemies who are killed in the radius of your motion sensor will net you a motion mine assist. |
100
|
 |
Medical Ops Pin |
In a round, do 5 revives. |
Teammates dying is inevitable on any map. As a medic, simply run around and start resurrecting friendlies using your defibrillator. To make yourself a dedicated resuscitator, equip the Lightweight Combat Pack to increase your sprinting speed to friendlies, and the Ceramic Armour to help mitigate damage. |
100
|
 |
Maintenance Ops Pin |
In a round, do 7 repairs. |
On any vehicle-centric map, simply whip out your repair tool and start fixing it up as it takes damage. Tanks are the most prone to damage, as cars often explode before you can repair them and Quad bikes are disposable. Repairing a UAV is also possible if it flies low enough. |
100
|

