Jump to navigation
Jump to search
(fix intro) |
m (Switch to two columns) |
||
| Line 5: | Line 5: | ||
At preselected levels you will learn a new spell. The first spell, '''Heal''', is learned as you rise from level two to level three. Each time you cast a spell your Magic Points (MP) will be reduced by a set amount. The charts below show both how many MP a spell costs and at which level you learn it. | At preselected levels you will learn a new spell. The first spell, '''Heal''', is learned as you rise from level two to level three. Each time you cast a spell your Magic Points (MP) will be reduced by a set amount. The charts below show both how many MP a spell costs and at which level you learn it. | ||
{{-}} | |||
__NOTOC__ | |||
{{col|2|begin}} | |||
=== Heal === | === Heal === | ||
[[Image:DW1 Spell Heal.png|left]] | [[Image:DW1 Spell Heal.png|left]] | ||
| Line 15: | Line 18: | ||
|} | |} | ||
{{-}} | {{-}} | ||
=== | === Sleep=== | ||
[[Image:DW1 Spell | [[Image:DW1 Spell Sleep.png|left]] | ||
{| border="1" cellspacing="0" cellpadding="2" style="background:#ffff00;" | {| border="1" cellspacing="0" cellpadding="2" style="background:#ffff00;" | ||
|- align="center" width="100px" | |- align="center" width="100px" | ||
|<big>'''Level<br /> | |<big>'''Level<br />7'''</big> | ||
|rowspan="2" style="background:# | |rowspan="2" style="background:#c0c0ff;" width="200px"|Sleep is used during a battle to put the enemy to sleep. It doesn't always work. | ||
|- align="center" | |- align="center" | ||
|<big>'''MP Cost<br />2'''</big> | |<big>'''MP Cost<br />2'''</big> | ||
|} | |} | ||
{{-}} | {{-}} | ||
=== | === Stopspell === | ||
[[Image:DW1 Spell | [[Image:DW1 Spell Stopspell.png|left]] | ||
{| border="1" cellspacing="0" cellpadding="2" style="background:#ffff00;" | {| border="1" cellspacing="0" cellpadding="2" style="background:#ffff00;" | ||
|- align="center" width="100px" | |- align="center" width="100px" | ||
|<big>'''Level<br /> | |<big>'''Level<br />10'''</big> | ||
|rowspan="2" style="background:#c0c0ff;" width="200px"| | |rowspan="2" style="background:#c0c0ff;" width="200px"|When you encounter an enemy who uses magic, cast this spell to protect yourself. | ||
|- align="center" | |- align="center" | ||
|<big>'''MP Cost<br />2'''</big> | |<big>'''MP Cost<br />2'''</big> | ||
|} | |} | ||
{{-}} | {{-}} | ||
=== | === Return === | ||
[[Image:DW1 Spell | [[Image:DW1 Spell Return.png|left]] | ||
{| border="1" cellspacing="0" cellpadding="2" style="background:#ffff00;" | |||
|- align="center" width="100px" | |||
|<big>'''Level<br />13'''</big> | |||
|rowspan="2" style="background:#c0c0ff;" width="200px"|Return whisks you back to Tantegel Castle from anywhere in the overworld of Alefgard. | |||
|- align="center" | |||
|<big>'''MP Cost<br />8'''</big> | |||
|} | |||
{{-}} | |||
=== Healmore === | |||
[[Image:DW1 Spell Healmore.png|left]] | |||
{| border="1" cellspacing="0" cellpadding="2" style="background:#ffff00;" | {| border="1" cellspacing="0" cellpadding="2" style="background:#ffff00;" | ||
|- align="center" width="100px" | |- align="center" width="100px" | ||
|<big>'''Level<br /> | |<big>'''Level<br />17'''</big> | ||
|rowspan="2" style="background:# | |rowspan="2" style="background:#c0c0ff;" width="200px"|More potent than Heal, Healmore restores up to 100 HP each time you chant it. | ||
|- align="center" | |- align="center" | ||
|<big>'''MP Cost<br /> | |<big>'''MP Cost<br />10'''</big> | ||
|} | |} | ||
{{-}} | {{-}} | ||
=== | {{col|2}} | ||
[[Image:DW1 Spell | === Hurt=== | ||
[[Image:DW1 Spell Hurt.png|left]] | |||
{| border="1" cellspacing="0" cellpadding="2" style="background:#ffff00;" | {| border="1" cellspacing="0" cellpadding="2" style="background:#ffff00;" | ||
|- align="center" width="100px" | |- align="center" width="100px" | ||
|<big>'''Level<br /> | |<big>'''Level<br />4'''</big> | ||
|rowspan="2" style="background:# | |rowspan="2" style="background:#c0ffc0;" width="200px"|Hurl magic fire balls at the enemy with Hurt. You can go far with this spell, damaging enemies by up to 15 HP. | ||
|- align="center" | |- align="center" | ||
|<big>'''MP Cost<br />2'''</big> | |<big>'''MP Cost<br />2'''</big> | ||
|} | |||
{{-}} | |||
=== Radiant === | |||
[[Image:DW1 Spell Light.png|left]] | |||
{| border="1" cellspacing="0" cellpadding="2" style="background:#ffff00;" | |||
|- align="center" width="100px" | |||
|<big>'''Level<br />9'''</big> | |||
|rowspan="2" style="background:#c0ffc0;" width="200px"|Did you forget to bring a torch into the cave? If you have Radiant, it doesn't matter. | |||
|- align="center" | |||
|<big>'''MP Cost<br />3'''</big> | |||
|} | |} | ||
{{-}} | {{-}} | ||
| Line 63: | Line 87: | ||
|- align="center" | |- align="center" | ||
|<big>'''MP Cost<br />6'''</big> | |<big>'''MP Cost<br />6'''</big> | ||
|} | |} | ||
{{-}} | {{-}} | ||
| Line 83: | Line 97: | ||
|- align="center" | |- align="center" | ||
|<big>'''MP Cost<br />2'''</big> | |<big>'''MP Cost<br />2'''</big> | ||
|} | |} | ||
{{-}} | {{-}} | ||
| Line 104: | Line 108: | ||
|<big>'''MP Cost<br />5'''</big> | |<big>'''MP Cost<br />5'''</big> | ||
|} | |} | ||
{{col|2|end}} | |||
{{Footer Nav|game=Dragon Warrior|prevpage=Items and Equipment|nextpage=Walkthrough}} | {{Footer Nav|game=Dragon Warrior|prevpage=Items and Equipment|nextpage=Walkthrough}} | ||
Revision as of 22:17, 1 February 2012

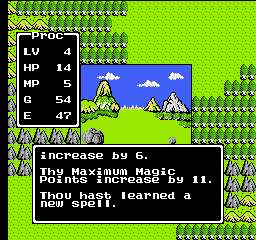
A strong arm and quick thinking alone are not enough to achieve your goal of freeing Alefgard. Since the beginning of time, Magic has been a force in this land, shaping its history and the beings who dwell here. As you gain experience and reach particular levels and achievement, you will learn new spells that will help you succeed in your perilous quests.
At preselected levels you will learn a new spell. The first spell, Heal, is learned as you rise from level two to level three. Each time you cast a spell your Magic Points (MP) will be reduced by a set amount. The charts below show both how many MP a spell costs and at which level you learn it.
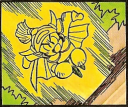
Heal

| Level 3 |
Your first spell is one of the most useful. If your HP is low, chant the Heal Spell to raise your HP. |
| MP Cost 4 |
Sleep

| Level 7 |
Sleep is used during a battle to put the enemy to sleep. It doesn't always work. |
| MP Cost 2 |
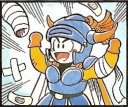
Stopspell

| Level 10 |
When you encounter an enemy who uses magic, cast this spell to protect yourself. |
| MP Cost 2 |
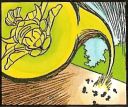
Return

| Level 13 |
Return whisks you back to Tantegel Castle from anywhere in the overworld of Alefgard. |
| MP Cost 8 |
Healmore

| Level 17 |
More potent than Heal, Healmore restores up to 100 HP each time you chant it. |
| MP Cost 10 |
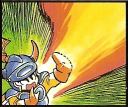
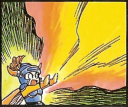
Hurt

| Level 4 |
Hurl magic fire balls at the enemy with Hurt. You can go far with this spell, damaging enemies by up to 15 HP. |
| MP Cost 2 |
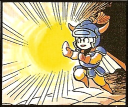
Radiant

| Level 9 |
Did you forget to bring a torch into the cave? If you have Radiant, it doesn't matter. |
| MP Cost 3 |
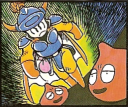
Outside

| Level 12 |
Deep in the underground caves and dungeons lurk terrible creatures. Escape from these places by chanting Outside. |
| MP Cost 6 |
Repel

| Level 15 |
Like sprinkling Fairy Water, Repel keeps monsters at a healthy distance when you are in the countryside. |
| MP Cost 2 |
Hurtmore

| Level 19 |
More devastating than Hurt, with Hurtmore you can challenge even the strongest dragons. |
| MP Cost 5 |