To start Chapter 4, begin by heading to Western Rogueport and use Paper Mode to slip through the metal grate in the center. Use Yoshi to float to the ledge to the left. Grab the ![]() Shine Sprite, and go into the door. Attempt to go down the pipe and it will reject you.
Shine Sprite, and go into the door. Attempt to go down the pipe and it will reject you.
-
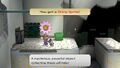
The Shine Sprite location.
-
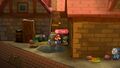
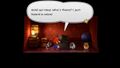
Darkly's hiding place.
-
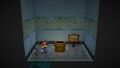
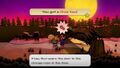
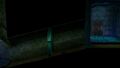
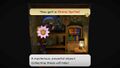
The pipe to Twilight Town.
-
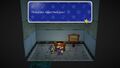
Hey, what gives?


Now, go out the door and go down the nearby pipe. Go across the moving platforms to the ![]() Star Piece and go back. Go back to Frankly's house and talk to him—he'll task you with finding a Twilighter named Darkly. Go around the secret wall next to Merlon's house and talk to Darkly (the guy with the yellow eyes). You'll then be able to access Twilight Town. Stock up on items, and go back to the brown pipe that rejected you earlier. You'll go through this time.
Star Piece and go back. Go back to Frankly's house and talk to him—he'll task you with finding a Twilighter named Darkly. Go around the secret wall next to Merlon's house and talk to Darkly (the guy with the yellow eyes). You'll then be able to access Twilight Town. Stock up on items, and go back to the brown pipe that rejected you earlier. You'll go through this time.

Dour times[edit | edit source]

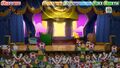
The people of Twilight Town are plagued with a curse that turns them into pigs. As tempting as it may be to enjoy the lifetime supply of free pork, that's not quite befitting of a hero.
As soon as you enter, a Twilighter will greet you and explain that their town has been cursed. After becoming more informed about the town's curse, leave the mayor's house and go right to the next screen. Hidden behind the barrels (look on the other side of the gate the barrels are on) is a ![]() Star Piece.
Star Piece.

Talk to the gatekeeper and go back to the mayor's house to get his permission to pass. Watch the short scene and go back in his house. Go near the mayor (now a pig) to watch another cutscene. Check the bushes for another ![]() Star Piece and a few coins. Go behind the left-most house for another
Star Piece and a few coins. Go behind the left-most house for another ![]() Star Piece. Now, head back towards the gatekeeper, but make a detour into the Item Shop and talk to the girl. Inspect the locked door and leave. If you wish, the leftmost house has a family with no food to eat—giving the struggling mother a food item (a
Star Piece. Now, head back towards the gatekeeper, but make a detour into the Item Shop and talk to the girl. Inspect the locked door and leave. If you wish, the leftmost house has a family with no food to eat—giving the struggling mother a food item (a ![]() Mushroom will suffice) will earn Mario a
Mushroom will suffice) will earn Mario a ![]() Shooting Star...before she becomes a pig herself. Make your way to the gatekeeper, which has been conveniently transformed into a pig. Now, open and go through the gate.
Shooting Star...before she becomes a pig herself. Make your way to the gatekeeper, which has been conveniently transformed into a pig. Now, open and go through the gate.
Key collector[edit | edit source]
Go into the nearby shack and get the ![]() Black Key. In the Nintendo Switch version, the entrance is hidden behind a boulder that needs to be pushed to the left. Continue going down the path, beating (or ignoring) the Hyper Goombas along the way. Jump while standing on the Coin Block for a
Black Key. In the Nintendo Switch version, the entrance is hidden behind a boulder that needs to be pushed to the left. Continue going down the path, beating (or ignoring) the Hyper Goombas along the way. Jump while standing on the Coin Block for a ![]() Super Shroom. When you reach the fallen tree, use Koops to get the key behind it. Go all the way back to Twilight Town.
Super Shroom. When you reach the fallen tree, use Koops to get the key behind it. Go all the way back to Twilight Town.
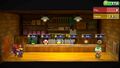
Go into the item shop and open the locked door. As well as finding some powerful items and a ![]() Defend Plus badge, you'll see another black chest. Give it the key and get the curse over with. There's an
Defend Plus badge, you'll see another black chest. Give it the key and get the curse over with. There's an ![]() Inn Coupon behind the shop points sign on the far right. Leave after taking what you want. Rest at the inn if you took any damage—you'll receive a
Inn Coupon behind the shop points sign on the far right. Leave after taking what you want. Rest at the inn if you took any damage—you'll receive a ![]() Peachy Peach for doing so. When you're ready, go back to Twilight Trail.
Peachy Peach for doing so. When you're ready, go back to Twilight Trail.
-

The rock obstructing the Black Key in the Switch version.
-
Key to the Shop room.
-
This routine never gets old! Ever!


 Boo's Sheet
 Inn Coupon
 Jammin' Jelly
 Life Shroom
 Shooting Star
 Fire Flower (Switch version only)
- In the bottom-left-most clump of grass next to a tree in the south of the first area.
- Behind the west house in the first area.
- Behind the fence next to the tree in the south of the second area.
The Dangerous Path to Creepy Steeple[edit | edit source]
The hyper enemies in this part, as well as the somewhat rare Amazy Dayzee, make this trail one of the most dangerous in the whole game. Always be careful when traveling here or you could find yourself using a Life Shroom, or worse...
Enemies:
| Amazy Dayzee — Tattle Entry #61 (GC) / #64 (Switch) | ||||

|
Max HP | Attack | Defense | Other notes |
|---|---|---|---|---|
| 20 | 20 | 1 | Flees battle | |
| Tattle: That's an Amazy Dayzee. This mystical Dayzee is like, the rarest thing ever. Max HP is 20, Attack is 20, and Defense is 1. Since it has such high HP and runs away really quickly, it's almost impossible to beat. Plus, its lullaby has massive Attack power, so if we're low on HP, we need to scram. You gotta think hard about whether to fight or bolt. | ||||
| Crazee Dayzee — Tattle Entry #60 (GC) / #63 (Switch) | ||||

|
Max HP | Attack | Defense | Other notes |
|---|---|---|---|---|
| 7 | 2 | 0 | Flees battle | |
| Tattle: That's a Crazee Dayzee. It may look totally cute, but it's a serious foe. Max HP is 7, Attack is 2, and Defense is 0. What you gotta worry about is its lullaby. That tune will totally zonk you out. If you manage to guard well, though, you might not pass out. Try to learn the timing. Oh, and when its HP runs low, it runs away, so try to KO it in one fell swoop. | ||||
| Hyper Cleft — Tattle Entry #82 (GC) / #85 (Switch) | ||||

|
Max HP | Attack | Defense | Other notes |
|---|---|---|---|---|
| 4 | 3 | 3 | Can charge to have +6 ATK, Spiked, Flippable | |
| Tattle: That's a Hyper Cleft. It's basically a Cleft that uses charged-up moves. Max HP is 4, Attack is 3, and Defense is 3. When it charges up, its Attack power rises to 9. Couple its rock-hardness with its ability to charge up... and things get scary. If you're confident, you may wanna try doing Superguards to send its attacks back... If you can't, you'd better use some items, or you'd better hightail it out of here. | ||||
| Hyper Goomba — Tattle Entry #4 | ||||

|
Max HP | Attack | Defense | Other notes |
|---|---|---|---|---|
| 8 | 2 | 0 | Can charge to have +6 ATK | |
| Tattle: That's a Hyper Goomba. Which means... Umm... It's a hyperactive Goomba. Duh! Max HP is 8, Attack is 2, and Defense is 0. But if this nut goes BIZZ-ZOW and charges up, his Attack power will be 8 next turn! So you'd better wipe it out between the time it charges up and the time it attacks! And if you can't beat him, then run away, OK? | ||||
| Hyper Paragoomba — Tattle Entry #4 | ||||

|
Max HP | Attack | Defense | Other notes |
|---|---|---|---|---|
| 8 | 2 | 0 | Can charge to have +6 ATK, Flying | |
| Tattle: That's a Hyper Paragoomba. It's basically just a Hyper Goomba with wings. Max HP is 8, Attack is 2, and Defense is 0. After charging up, you'll be dealing with moves that have an Attack power of 8. Once you damage it, it'll lose its wings and turn into a regular Hyper Goomba. Not that THAT'S all that cool. Even normal Hyper Goombas are dangerous. | ||||
| Hyper Spiky Goomba — Tattle Entry #4 | ||||

|
Max HP | Attack | Defense | Other notes |
|---|---|---|---|---|
| 8 | 3 | 0 | Can charge to have +6 ATK, Spiked | |
| Tattle: That's a Hyper Spiky Goomba. It's a Hyper Goomba with a spike on its head. Max HP is 8, Attack is 3, and Defense is 0. After charging up, its Attack power rises to an incredible level of 9! That's SCARY... Beat it before it attacks, or you'll be in peril before you know it, seriously. If only this book listed a way to dodge that attack... | ||||
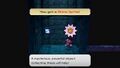
Go forward, defeating enemies as usual. When you get back to the fallen tree, use your new tube mode (hold R and rotate the left control stick) to turn into a tube. When you're past the tree, you'll probably see a ![]() Star Piece at the far end of it. Get it, and continue to the pile of straw. Use Flurrie to huff, puff, and blow it away. Grab the
Star Piece at the far end of it. Get it, and continue to the pile of straw. Use Flurrie to huff, puff, and blow it away. Grab the ![]() Star Piece behind the warp pipe, and use the pipe to trek deeper into the forest.
Star Piece behind the warp pipe, and use the pipe to trek deeper into the forest.
The Crazee Dayzees (which are sometimes accompanied by Amazy Dayzees) can be tricky. Defeat them as fast as possible (especially if there is a Hyper Cleft with them) as their only attack is to put you to sleep (which also damages you in the process). The attack is also hard to guard against. Dayzees tend to flee battle, especially if they have already taken damage, and have a high tendency to be put to sleep, burned, or be scared off with a ![]() Fright Mask. Despite these quirks, you should be able to easily defeat the Crazee Dayzee and slip between the two trees. Get the
Fright Mask. Despite these quirks, you should be able to easily defeat the Crazee Dayzee and slip between the two trees. Get the ![]() Earth Quake in the item block and defeat the other Crayzee Dayzee.
Earth Quake in the item block and defeat the other Crayzee Dayzee.
-

The break in the grass to slip through.
-

The fake tree stump.
-
The fake floor patch.
-

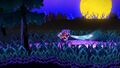
The extremely elusive Shine Sprite.


Continue on the next screen, which also contains a Crayzee Dayzee, until you see a tree that blocks your path. Use Flurrie to blow on the tree until a hole appears. Go through and continue deeper towards the Creepy Steeple. Continue until you see a darker spot on the ground. Have Flurrie blow on it and some wooden planks will appear. Have Mario Spin Jump through them and push the rock in the background until it stops. Go back and continue. Jump through the next hole and defeat the Hyper Cleft that you see, and jump while behind the right-most tree to get a hidden ![]() Shine Sprite. Continue on and you will see the Creepy Steeple.
Shine Sprite. Continue on and you will see the Creepy Steeple.
 Earth Quake
 Super Shroom (Two in the Switch version)
 Mushroom (Switch version only)
- Behind the fallen tree.
- Behind the warp pipe that leads to the forest.
- Behind the last tree in the forest.
- There is a secret coin block behind the first tree in the room with the rocks.
Creepy Steeple[edit | edit source]
This spooky mansion that contains many ghosts and bats. It is said that the Crystal Star and the monster responsible for the curse of Twilight Town are both inside.
Enemies:
| Boo — Tattle Entry #71 (GC) / #74 (Switch) | ||||

|
Max HP | Attack | Defense | Other notes |
|---|---|---|---|---|
| 7 | 3 | 0 | Levitating, sometimes Flying | |
| Tattle: That's a Boo. It's everyone's favorite ghost. ...Well, most everyone... Max HP is 7, Attack is 3, and Defense is 0. It's nothing to write home about on the Attack side, but it can turn invisible. If it turns invisible, we won't be able to hit it, so beat it while you can see it. Boos are kinda cute, but I sure wouldn't want to meet one in a dark alley. If I ran into one in the bathroom in the middle of the night, I'd... Well, never you mind what I'd do. | ||||
| Buzzy Beetle — Tattle Entry #31 (GC) / #32 (Switch) | ||||

|
Max HP | Attack | Defense | Other notes |
|---|---|---|---|---|
| 5 | 3 | 4 | Flippable, Fireproof, Explosion-proof | |
| Tattle: That's a Buzzy Beetle. Awww... It's kinda cute! Max HP is 5, Attack is 3, and Defense is 4. It's got pretty good Defense... and fire and explosions don't hurt it whatsoever. But, if you jump on it, you can flip it over and drop its Defense down to 0. Then it's at our mercy! Ha! Don't hesitate! Jump! Jump! Jump jump jump! | ||||
| Spike Top — Tattle Entry #32 (GC) / #33 (Switch) | ||||

|
Max HP | Attack | Defense | Other notes |
|---|---|---|---|---|
| 5 | 3 | 4 | Flippable, Spiked, Fireproof, Explosion-proof | |
| Tattle: | ||||
| Swooper — Tattle Entry #64 (GC) / #67 (Switch) | ||||

|
Max HP | Attack | Defense | Other notes |
|---|---|---|---|---|
| 6 | 3 | 0 | Flying | |
| Tattle: That's a Swooper. I bet they call it that 'cause of the way it swoops around. Wow! That's some AWESOME naming work. Seriously! It's pure naming genius!!! So, anyway... Max HP is 6, Attack is 3, and Defense is 0. Says here it hangs from the ceiling. If you can just damage it, it oughta drop off the ceiling. And then you can whack it! | ||||

Use the health block and the save block before continuing on. There's a small hole to the right of the locked gate. Use your Tube Mode to roll under it. Open the gate form the other side and go left. There's a ![]() Star Piece to the left of the gate. Hammering or inspecting the gate from the inside will open it. There is an invisible block on the staircase containing a sole coin. Now, go inside. You should see a small hole near where you enter (near the background). Inside, there will be a
Star Piece to the left of the gate. Hammering or inspecting the gate from the inside will open it. There is an invisible block on the staircase containing a sole coin. Now, go inside. You should see a small hole near where you enter (near the background). Inside, there will be a ![]() Star Piece behind the furniture, a
Star Piece behind the furniture, a ![]() Cookbook (for use in a trouble later on), a
Cookbook (for use in a trouble later on), a ![]() Shine Sprite, and the
Shine Sprite, and the ![]() Ice Smash badge.
Ice Smash badge.
Go back out and push the star-shaped statue at the other side of the hallway. You'll fall in a hole and end up in a small room. Have Flurrie blow down the different-shaded wall and go through. Turn right until you get to a different room with the ![]() Flower Saver badge. Go back and go into the door on the left. As much as you might not want to open the suspicious looking box, it is necessary to do so. Answer 200 to the Boo's question to get an
Flower Saver badge. Go back and go into the door on the left. As much as you might not want to open the suspicious looking box, it is necessary to do so. Answer 200 to the Boo's question to get an ![]() Ultra Shroom. Go back to the main hallway and talk to the Boo there. Answer no, and several boos will surround you. They won't do anything unless you stand still, so run left to the door that's towards the bottom of the screen. Defeat the two Swoopers and hit the switch once. Go in the nearby door and go up the stairs. Go along the upper hallway and use Koops or Yoshi to grab the Steeple Key at the end of the hallway.
Ultra Shroom. Go back to the main hallway and talk to the Boo there. Answer no, and several boos will surround you. They won't do anything unless you stand still, so run left to the door that's towards the bottom of the screen. Defeat the two Swoopers and hit the switch once. Go in the nearby door and go up the stairs. Go along the upper hallway and use Koops or Yoshi to grab the Steeple Key at the end of the hallway.
-
Blow this away...
-

...and the badge is yours.
-

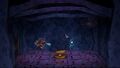
Where's Luigi when you need him?
-
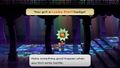
Getting the Lucky Start badge for defeating the Atomic Boo.


Jump down and now you have a decision to make. You can either fight an optional boss which is only as hard (if not easier) as the main boss here. Plus, you get the ![]() Lucky Start badge if you win. The only downside is that some of the Boos will become regular enemies the next time you enter the steeple. If not, then skip this next mini-boss section. It can only be fought during Chapter 4, so decide carefully. If you want to fight the Atomic Boo, then stand still while in the hallway and charge up your Super Hammer attack. When there's a few ghosts on you, let go. Do this two more times and the ghosts will get angry.
Lucky Start badge if you win. The only downside is that some of the Boos will become regular enemies the next time you enter the steeple. If not, then skip this next mini-boss section. It can only be fought during Chapter 4, so decide carefully. If you want to fight the Atomic Boo, then stand still while in the hallway and charge up your Super Hammer attack. When there's a few ghosts on you, let go. Do this two more times and the ghosts will get angry.
Secret Mini-Boss: Atomic Boo[edit | edit source]
| Atomic Boo — Tattle Entry #72 (GC) / #75 (Switch) | ||||

|
Max HP | Attack | Defense | Other notes |
|---|---|---|---|---|
| 40 | 4 | 0 | Levitating | |
| Tattle: That's an Atomic Boo. It's a giant Boo made up of a ton of smaller Boos. Max HP is 40, Attack is 4, and Defense is 0. This thing will try to smoosh us. It can also split up and send hundreds of Boos at us. And, when we attack, we might get so scared that we get confused or can't move. I sure wouldn't want to see this thing standing behind me in the middle of the night... Creeeeeepy... | ||||
It will use smash attack on you most often. If you use Power Lift at the beginning of battle and hit it with your strongest moves afterward, it won't be able to do any more dangerous attacks. When it cowers, it's charging up for the atomic scare (sort of like a warning). Try to damage it as much as you can at that time. When you win, you'll get the Lucky Start badge.
Whether you fight Atomic Boo or not (though doing so is encouraged), go into the door in the background and go right until you see another switch. Hit that twice and go in the nearby door. Go up the stairs and go across the upper hallway again. Save and unlock the door. Inside, use the health block and go up the stairs and use the spring. At the top watch the cutscene and you will finally fight the boss.
Boss Fight[edit | edit source]

| ????? — Tattle Entry #104 (GC) / #107 (Switch) | ||||

|
Max HP | Attack | Defense | Other notes |
|---|---|---|---|---|
| 40 | 4 | 0 | None | |
| Tattle: ...??? Wow, how totally bizarre... This thing isn't listed in here. There's a monster in here that looks like this thing... But it doesn't list a name. Max HP is 40, Attack is 4, and Defense is 0. It's apparently really good at transforming itself and other things. Maybe it used that power to turn the villagers into pigs! This thing is a real jerk! | ||||

OK, so he's not exactly monster-like, but he will still pay for pigifying the villagers. The head-butt is easily guarded, so that shouldn't be too much of a problem. When half of his health is gone he'll change into a shadowy version of Mario. He'll use your jump and hammer attacks (which you probably aren't used to guarding against). But, other than that, he's not that dangerous.
End of Chapter!

or is it?
Identity Theft[edit | edit source]

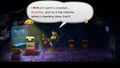
Yep, that's right. You actually beat the REAL Mario. This would explain why Mario's stance was weird, and why he acted strangely after getting beaten. So, now you're alone in the Creepy Steeple. It's best to figure out what this faker is doing, by first heading back to Twilight Town. Be careful: It is not recommended to fight enemies alone, so try to avoid them and flee if needed. Clock Out can buy time if needed.

When you get to the shack the thief will appear and have you try to guess his name. Because there's a letter missing (p), which is obviously part of his name, you can't enter his name right now (and for those that know, a capital P won't work), so just type in anything.
Boss Fight[edit | edit source]
Upon trying to get back to town, you'll be ambushed by the fake Mario. At this point, just run. Don't bother attacking him, as he's completely invincible right now (and he can't damage you either), so it's pointless to try.
You'll run back into Twilight Town. Go to the west side of town and talk to Vivian and then inspect the far-left bush for the ![]() Superbombomb. Go back to her to give her the bomb and, after a short conversation, she'll join you. You can use her Veil ability to listen in on the crow's conversations. Just press X when "..." appears when near a group of crows. If you're wondering where your friends are, they're at the mayor's house with "Mario". They'll all ignore you (except the mayor. He'll just tell you to leave). Hide in the shadows while near the crows closest to the gate for some very important info—there's a bird in the Steeple basement and the monster's magic will lose power if his name is said. Return to Creepy Steeple.
Superbombomb. Go back to her to give her the bomb and, after a short conversation, she'll join you. You can use her Veil ability to listen in on the crow's conversations. Just press X when "..." appears when near a group of crows. If you're wondering where your friends are, they're at the mayor's house with "Mario". They'll all ignore you (except the mayor. He'll just tell you to leave). Hide in the shadows while near the crows closest to the gate for some very important info—there's a bird in the Steeple basement and the monster's magic will lose power if his name is said. Return to Creepy Steeple.
-
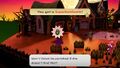
Location of the Superbombomb. Looks dangerous...
-
Vivian joins your team!


Boss Fight[edit | edit source]
Once again when trying to leave, just run off.
Now that you have someone in your party, going through the trail will be much safer. However, you should still be careful. Use Vivian's Veil if a hyper enemy charges up.
Steeple that is Creepy[edit | edit source]
Instead of using the front door, jump down the nearby well. Get the ![]() Shine Sprite and defeat the Buzzy Beetle. In the next room, you'll have to defeat the seemingly endless supply of Spike Tops and Buzzy Beetles. The
Shine Sprite and defeat the Buzzy Beetle. In the next room, you'll have to defeat the seemingly endless supply of Spike Tops and Buzzy Beetles. The ![]() Quake Hammer badge is very useful to stop most of these enemies. Get the badge from the block containing
Quake Hammer badge is very useful to stop most of these enemies. Get the badge from the block containing ![]() Tornado Jump. After that, push the door-shaped barrier to the top of the incline. When you can't push it any further, use Vivian's Veil ability to slip into the shadows. The door will slip past you and you can continue on. Get the
Tornado Jump. After that, push the door-shaped barrier to the top of the incline. When you can't push it any further, use Vivian's Veil ability to slip into the shadows. The door will slip past you and you can continue on. Get the ![]() Shine Sprite, save, and turn into a tube to go under the hole. Roll up the stairs and Spin Jump through the wooden panel. Go right, search between the two right-most windows for a
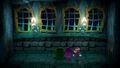
Shine Sprite, save, and turn into a tube to go under the hole. Roll up the stairs and Spin Jump through the wooden panel. Go right, search between the two right-most windows for a ![]() Star Piece, then go left and roll into the next room. Get the items from the chests and the two boxes. Hide while next to the bird to find out that the bad guy's name: Doopliss! A
Star Piece, then go left and roll into the next room. Get the items from the chests and the two boxes. Hide while next to the bird to find out that the bad guy's name: Doopliss! A ![]() Star Piece lurks in the bottom right under a panel. Leave the Steeple.
Star Piece lurks in the bottom right under a panel. Leave the Steeple.
-
The first Shine Sprite.
-

The Tornado Jump badge.
-
Slipping past the well's barricade.
-
The other Shine Sprite.
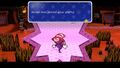
-
The Parrot holds a secret.
-
That's not a normal item to collect...
-
The Switch version's shortcut pipe.


In the Nintendo Switch version, a new room appears with a pipe that leads directly to Twilight Town instead, saving the trip on Twilight Path.

Go all the way back to Twilight Town until Doopliss ambushes you again. Input "Doopliss" when prompted (the name is case sensitive). He'll panic and run off. Go back to Twilight Town and stock up on items (and also sleep in the inn). When you're ready, leave toward Creepy Steeple one last time.
Steeple, Creepy[edit | edit source]
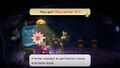
Once you're there, go through the front door. Go into the door at the top. Towards the end of the hallway, there is a break in the fence that can be slipped through in Paper Mode. Hitting the yellow tree will drop a ![]() Golden Leaf, which is a useful cooking item. Go back to the red switch and hit it twice. Go through the nearby door, collect the
Golden Leaf, which is a useful cooking item. Go back to the red switch and hit it twice. Go through the nearby door, collect the ![]() Star Piece, and go up the stairs. Heal and save as you make your way back to Doopliss's room. Once you're there, watch the dialogue.
Star Piece, and go up the stairs. Heal and save as you make your way back to Doopliss's room. Once you're there, watch the dialogue.
Boss Fight[edit | edit source]
| Doopliss — Tattle Entry #104 (GC) / #107 (Switch) | ||||
|
|
Max HP | Attack | Defense | Other notes |
|---|---|---|---|---|
| 40 | 4 | 0 | None | |
| Tattle: N/A | ||||
Your partners use their primary attacks, and have their rank 1 health:
- Headbonk
- Shell Toss
- Body Slam
- Ground Pound
It doesn't really start off good this time. You have to fight alone for the first few turns against Doopliss and your friends (starts off with Goombella), as Vivian feels betrayed that she was helping Mario all along. Focus your attacks on Doopliss. Forget about your partner—if you beat them, another partner will replace them (each one generally more dangerous than the last), and it grants no extra Star Points. Koops can be knocked on his back, rendering Doopliss solo, but he also still has 1 DEF. Flurrie also is levitating, so ground-based attacks won't work. Continue to attack Doopliss with your most powerful attacks until Vivian comes in to help you. Keep attacking until Doopliss falls—Power Lift will make quick work of the ghoul, and almost all status conditions have a high success rate.
-
The true battle.
-

Beating the boss.
-

The chapter truly comes to an end.


Watch the scene and the chapter will REALLY end.
- Behind the wall to the left of the gate, behind the Save Block.
- Behind the table in the secret room.
- Under a flippable panel to the right of the stairs in the east room.
- Behind the two rightmost windows on the passage beneath the main room in Creepy Steeple. Accessible from the pipe entrance outside the steeple.
- Under a flippable panel in the parrot's room.
- The bottom of the well, next to the spring.
- In the secret room near the Cookbook.
- Halfway through the tunnel to enter the Creepy Steeple from the well.
Interlude[edit | edit source]
Watch the short cutscene with the other two Shadow Sirens.
Peach[edit | edit source]

Watch another scene and answer TEC's questions as follows:
- What will happen if you collect seven Crystal Stars? - Thousand-Year Door opens.
- What is the goal of Grodus, leader of the X-Nauts? - To conquer the world.
- What is the legendary treasure that waits behind the Thousand-Year Door? - A 1,000-year-old demon's soul.
- What does Sir Grodus wish to do with this ancient demon's soul? - Bring the demon back to life.
- What is required to seal up the demon again? - Crystal Stars.
Bowser[edit | edit source]
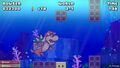
For Bowser's section, watch the cutscene and you'll be in another side-scrolling stage, only underwater this time! Watch for falling enemies, and keep collecting meat to stay powerful. Some waterfalls drag Bowser into pits. Just get to the end and watch more comedic dialogue.
-

Bowser time!
-
A less-than ideal vacation.


Intermission[edit | edit source]
The Twilighters will send you off, and you're free to return to Rogueport. Make your way to the east part of the sewers (you can roll under the fallen pillars in the underground town to get to Dazzle). Go into the pipe behind the gate, to the right of the pipe that goes to Eastern Rogueport. Go to the next pipe, but go back right. Slip through the bars that have an entrance behind them. Go inside, and use Vivian to pull you into the shadows before the spikes come back up get out when they go back down and continue this until you get to the treasure chest. It contains the ![]() Spike Shield badge (an extremely useful badge when fighting enemies that have spikes on their head). Do the same thing to go back to the entrance, and continue on to the Thousand-Year Door. Step on the pedestal and watch the cutscenes.
Spike Shield badge (an extremely useful badge when fighting enemies that have spikes on their head). Do the same thing to go back to the entrance, and continue on to the Thousand-Year Door. Step on the pedestal and watch the cutscenes.
Super Luigi is now available at the item shop. It's a different perspective of what Luigi's been doing during the game, and is a requirement for completion.
-

The Spike Shield badge.
-
Super Luigi!
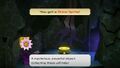
-
The third Rogueport Shine Sprite.


On the west side of Rogueport, enter the first house. Use your new Tube Mode at the top of the stairs and move right, to enter a hidden garden area with a ![]() Shine Sprite. Leave into the second house the same way.
Shine Sprite. Leave into the second house the same way.
Now's the time to upgrade partner, Vivian. Then, should you wish, new tasks are available at the Trouble Center.
Troubles unlocked[edit | edit source]
- Client: Zess T. (Rogueport)
- Title: Seeking legendary book!
- Reward: Honey Shroom
Go to Zess T. and give her the ![]() Cookbook you found in Creepy Steeple (if you didn't find it, it's in the small hole near the entrance. You'll have to turn into a tube to go through it). She'll be able to cook two items and gives you a
Cookbook you found in Creepy Steeple (if you didn't find it, it's in the small hole near the entrance. You'll have to turn into a tube to go through it). She'll be able to cook two items and gives you a ![]() Honey Shroom. For more information on the available recipes, consult the recipes page.
Honey Shroom. For more information on the available recipes, consult the recipes page.
You'll also have a trouble from a Client: ??? (Rogueport) and Mayor Dour. It is advised to not tackle these troubles at the moment, as one is better tackled after Chapter 5 in conjunction with a different quest and the other during Chapter 7, when navigating multiple places simultaneously.