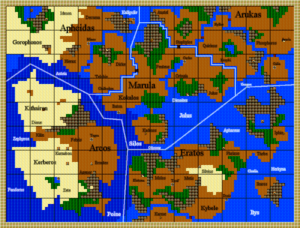
The Kingdom of Arasia[edit]
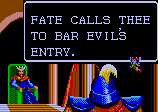
You begin the game standing before the castle of the Kingdom of Arasia. Inside, the king will tell you of the land's dire need to restore the Seal of the Dark Lord, held in the shrine of Gorkis. Your first instruction is to find the ancient Sage, Kosama. With that, you are left to your own devices.
You begin the game unarmed, and defenseless. Before you seek out the Sage, you will want to build up some power, save up money, and buy some equipment. There is one town, and only one town, in the near vicinity. Directly to the south, across a bridge, you will find a town known as Garia. This should be your first destination.
The Town of Garia[edit]
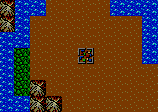
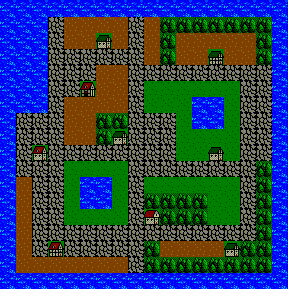
The inhabitants of the town of Garia are typical of most towns in the world. Explore it thoroughly to get an idea of what to expect when you find a new town. Among the town's inhabitants, you will find a man who will tell you the name of the town, which is important should you ever decide to use a feather; it will return you to the last town whose name you heard. You will also find a healer, a purchaser of fangs (50 guilder for each fang), a blacksmith, and a weapons shop, selling a knife, armor, shield, and a feather. You will also find regular citizens who may or may not have useful information, including the town elder who asks for a 500 guilder contribution in return for his knowledge. The elder of Garia informs you that the Sage Kosama lives in a valley along the border (meaning the blocks which surround the land).
Building strength[edit]
Once you know the lay of the town, it's time to start building your power. Your goal should be to rise three or four levels, as well as obtaining enough guilders to buy armor and a shield. This will take a considerable amount of work. You should wander the plains around Garia in search of monsters or other encounters. Under no circumstances should you set foot in the forests or the mountains, as the monsters there will be undoubtedly too strong for you to fight. Below is a table of enemies you are likely to encounter, and the strategies you should employ when fighting them. If you meet any monster other than the ones listed below, you should retreat immediately.
Your pattern should be to heal up at Garia, venture forth, encounter enemies (or innocent travelers), defeat them in combat to earn money, fangs, and experience points, and return to Garia when you are close to defeat. If you are in need of healing and desperate for money don't be afraid to sell your fangs for extra guilders; there will be plenty of other opportunities to collect them in much greater quantities later in the game. Continue to save up 11,000 guilder for armor and a shield. You have the option of purchasing a knife for 3000 guilder, but it's usefulness is limited, and better weapons can be had.
Maintenance and upkeep[edit]
In the game of Miracle Warriors, weapons and armor (including shields) are not resistant to wear. Items start out pristine, but they eventually erode with use. You can see the strength of an item by examining your status. The closer an item is to 0, the closer it is to falling apart and becoming useless. To prevent this from happening, it is important to visit a town's blacksmith and pay him for the service to repair your equipment. If this seems like a chore to worry about, don't worry; you'll soon encounter a blacksmith who is looking for new employment. While you're not required to hire him, having him in your party more than pays for itself in short order, and removes a major concern from your list of worries throughout the game.
Venturing onward[edit]

Once you are outfitted with armor and a shield, and at a sufficient level of experience (at least three or four), you are prepared to head west in search of new territory. Upon examining the cloth map supplied with the game, you may identify Oruk as the next closest town. Make your way across the west-bound bridges, and one south-bound bridge to arrive at your destination. Along the way, you will encounter many of the enemies detailed above, as well as some new ones. Gauge the life meter of each new enemy you encounter to determine if you have the stamina to face them. One new enemy that is particularly worth noting is the Great Lion. Defeating these lions is great indeed, rewarding you with 3000 guilders, along with fangs and reputation. If you were hurting for money before you fight one of these, you won't be anymore if you win.
The Town of Oruk[edit]
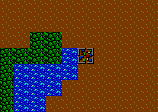
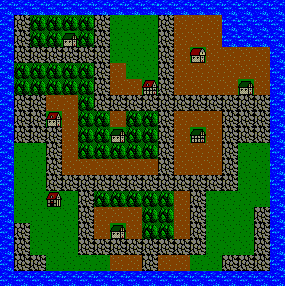
Nestled beside the end of a river, Oruk is situated close to the center of the northern lands. Inside the town, you will find the town name provider, a healer, informative citizens and two noteworthy shops. The first is the blacksmith. The smith you find in this town recently lost his job, and is looking for new employment. The price to hire him is rather steep, a whopping 12,000 guilders. However, this is a one-time fee, and he will join you for the remainder of the game. While under your employ, he will automatically repair and restore any damage to your equipment and keep them in like-new condition forever. While saving up to hire him may take a while, it's worth the effort. The second noteworthy shop is the weapon's store. In addition to knives, armor and shields, it also sells swords and a Mask. At 4000 guilders, a sword is a considerably stronger upgrade to your offensive power than a knife (although you may be able to skip buying a weapon all together if you are close to 300 fangs already). However, the Mask is a far more helpful item, allowing you to see eight times more of your surroundings underground than normal. But at 15,000 guilder, it will not be easy to obtain.
Altogether, Oruk will set you back 27,000 guilder for the smith and the Mask, but the effort is well worth it. You will gain valuable experience and fangs in the process, and grow even stronger. From Oruk, there are several worthwhile destinations. You should consider one destination to the north before all others.
Finding the Sage Kosama[edit]
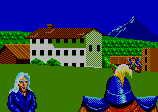
As you heard in Garia, Kosama can be found in a village in a valley along the border. By traveling north from Oruk to the top of the map, it's only a short travel west before you discover a small village tucked between some mountains and the coast. If you visit this village, you will find Kosama. Kosama will tell you all about your need to locate three companions who have been cursed. This curse causes them to forget their own identity, and thus require a spell to awaken them and remind them who they are. Kosama teaches you this spell {"AWAKE, GIANT") and indicates that the first companion may be found in a town that worships the sea. Having spoken to Kosama, you may now return to Oruk.
Explore the Monument of Julus[edit]
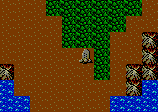
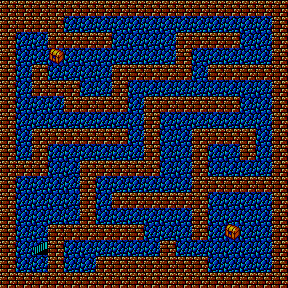
Note: If you already have 300 fangs in your possession, skip down to the next step, and then return to this one. Your next destination is south east of Oruk. If you head down in that direction, you will eventually find a monument. Examining the monument will place you inside your first dungeon. If you did not purchase the Mask from Oruk, you will have an extremely difficult time navigating the dungeon even with the provided map to the right. The monsters in this dungeon should not present a dire threat, but it is very wise to purchase at least two sets of five herbs from the Healer in Oruk before you enter. You begin on the stairs in the lower left corner. There are two treasures inside, one in the upper left corner, and one in the lower right. The chest in the upper left contains 100 Fangs. If you were not yet at the 300 fang mark by the time you came here, this chest should bring you a lot closer, if not past it. The chest in the lower right corner is much more important, containing a Helmet that allows you to read a long forgotten language that many dungeon signs are written in. In fact, there is one such message written in a corridor that you must take to reach the Helmet. The message informs you that you must find Iason's Arms to free your companions. This means the "AWAKE, GIANT" spell alone is not enough to awaken your recruits; you must also possess a particular piece of Iason's equipment for the spell to work. When you have opened both chests, you are finished with this dungeon.
Visit the Kingdom of Marula[edit]
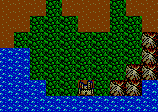

Once you have collected at least 300 fangs, you should pay the Kingdom of Marula a visit. It is located directly south of Oruk, through a forest. The castle is not very deep within the forest, but you do run the risk of running into stronger monsters than you are used to encountering on the plains. One creature worth noting is the Liphant. They are unique in that they may leave behind a useful item upon defeat. Some Liphants carry Sacred Nuts which can be used as a Magical weapon against foes. Liphants drop three nuts at a time, and the most you can carry is eleven. Therefore, in order to carry eleven, you must use one nut up before you collect your fourth batch. When you reach the castle, you will be greeted by the king who will require proof of your skills in battle. The 300 fangs in your possession serves as this proof, and he will reward you with the first Legendary weapon, the Iris Axe. Stronger than a sword, it is a powerful weapon for you to use, but it can be upgraded later in the game to an even more powerful weapon.
The Town of Kadia[edit]
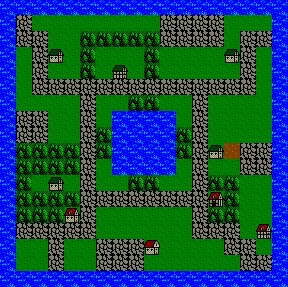
You've now been every which way around Oruk but west. The time has come to explore this region. If you follow the plain west from Oruk, you will soon reach a bridge. Before crossing that bridge, explore the region to the south, and you will find a new town right along the coast line into the raging sea that surround Areos. This town is a lot like the two that you've seen so far with one minor difference. When you go to visit the Healer, you are also given the option to cast a spell. Since the only spell you know is "AWAKE, GIANT", you have few choices. However, in order for this spell to work, you must also possess the Iris Axe. Provided you have the Axe, cast the spell, and your first companion, Guy, will awaken from the curse he was under, regain his memory, and accompany you. Another Healer will immediately replace him once he departs with you.
Guy will start just one level of experience below you. Therefore, if you're really close to leveling up, you should attempt to complete that level before you awaken Guy. Like you, Guy starts out defenseless. Consider buying him armor and a shield, but hold off on getting him a weapon just yet. With Guy in your party, you may now select from among two fighters when attacking a monster. Note that you can only attack with one party member per turn, and that member will be the focus of the enemy's counter attack. Now you must prepare to recruit your next companion, Medi, who Guy indicates can be found to the south.


