| Line 127: | Line 127: | ||
== Route 17 == | == Route 17 == | ||
[[Image:Pokemon_FRLG_Route17.png|left|thumb|300px|Route #17]] | [[Image:Pokemon_FRLG_Route17.png|left|thumb|300px|Route #17]] | ||
{|{{prettytable|notwide=1}} | Route #17's brutal slope drags you downward unless you hold the {{gb|A}} or {{gb|B}} buttons to steady yourself. But there's no reason not to speed to the bottom, since the only thing of interest here is the {{bp|Ponyta}} in Yellow. | ||
{| {{prettytable|notwide=1|text center=1|}} | |||
|- | |- | ||
! style="background-color:#{{Pokemon color|Fighting light}};color:#ffffff;" | Name | |||
| | ! style="background-color:#{{Pokemon color|Fighting light}};color:#ffffff;" | 1st | ||
! style="background-color:#{{Pokemon color|Fighting light}};color:#ffffff;" | 2nd | |||
! style="background-color:#{{Pokemon color|Fighting light}};color:#ffffff;" | 3rd | |||
| | ! style="background-color:#{{Pokemon color|Fighting light}};color:#ffffff;" | 4th | ||
! style="background-color:#{{Pokemon color|Fighting light}};color:#ffffff;" | 5th | |||
! style="background-color:#{{Pokemon color|Fighting light}};color:#ffffff;" | Money | |||
|- align="center" | |||
|[[File:Pokemon FRLG Cue Ball.png]]<br>Isaiah | |||
| style="background-color:#{{Pokemon color|Fighting}};" | [[Image:Pokemon 066Machop.png|40px]]{{bp|Machop}} 29 | |||
| style="background-color:#{{Pokemon color|Fighting}};" | [[Image:Pokemon 068Machamp.png|40px]]{{bp|Machamp}} 29 | |||
| | |||
| | |||
|- | | | ||
|<br>[[File:Pokebuck.png]]696 | |||
| | |- align="center" | ||
|[[File:Pokemon FRLG Biker.png]]<br>Virgil | |||
| | | style="background-color:#{{Pokemon color|Poison}};" | [[Image:Pokemon 110Weezing.png|40px]]{{bp|Weezing}} 28 | ||
| | | style="background-color:#{{Pokemon color|Poison}};" | [[Image:Pokemon 109Koffing.png|40px]]{{bp|Koffing}} 28 | ||
| | | style="background-color:#{{Pokemon color|Poison}};" | [[Image:Pokemon 110Weezing.png|40px]]{{bp|Weezing}} 28 | ||
| | | | ||
|- | | | ||
|<br>[[File:Pokebuck.png]]560 | |||
|- align="center" | |||
|[[File:Pokemon FRLG Biker.png]]<br>Billy | |||
| | | style="background-color:#{{Pokemon color|Poison}};" | [[Image:Pokemon 089Muk.png|40px]]{{bp|Muk}} 33 | ||
| | |||
| | | | ||
| | |||
| | |||
|<br>[[File:Pokebuck.png]]660 | |||
| | |- align="center" | ||
| | |[[File:Pokemon FRLG Cue Ball.png]]<Br>Raul | ||
| | | style="background-color:#{{Pokemon color|Fighting}};" | [[Image:Pokemon 056Mankey.png|40px]]{{bp|Mankey}} 29 | ||
| | | style="background-color:#{{Pokemon color|Fighting}};" | [[Image:Pokemon 057Primeape.png|40px]]{{bp|Primeape}} 29 | ||
|- | | | ||
| | |||
| | | | ||
| | |<br>[[File:Pokebuck.png]]696 | ||
| | |- align="center" | ||
| | |[[File:Pokemon FRLG Cue Ball.png]]<Br>Jamal | ||
| | | style="background-color:#{{Pokemon color|Fighting}};" | [[Image:Pokemon 056Mankey.png|40px]]{{bp|Mankey}} 26 | ||
| | | style="background-color:#{{Pokemon color|Fighting}};" | [[Image:Pokemon 056Mankey.png|40px]]{{bp|Mankey}} 26 | ||
| | | style="background-color:#{{Pokemon color|Fighting}};" | [[Image:Pokemon 068Machamp.png|40px]]{{bp|Machamp}} 26 | ||
| style="background-color:#{{Pokemon color|Fighting}};" | [[Image:Pokemon 066Machop.png|40px]]{{bp|Machop}} 26 | |||
|- | | | ||
|<br>[[File:Pokebuck.png]]624 | |||
| | |- align="center" | ||
|[[File:Pokemon FRLG Biker.png]]<br>Nikolas | |||
| style="background-color:#{{Pokemon color|Electric}};" | [[Image:Pokemon 100Voltorb.png|40px]]{{bp|Voltorb}} 29 | |||
| style="background-color:#{{Pokemon color|Electric}};" | [[Image:Pokemon 100Voltorb.png|40px]]{{bp|Voltorb}} 29 | |||
| | | | ||
| | |||
| | | | ||
| | |<br>[[File:Pokebuck.png]]580 | ||
| | |- align="center" | ||
| | |[[File:Pokemon FRLG Cue Ball.png]]<Br>Zeek | ||
|- | | style="background-color:#{{Pokemon color|Fighting}};" | [[Image:Pokemon 067Machoke.png|40px]]{{bp|Machoke}} 33 | ||
| | |||
| | | | ||
| | | | ||
| | | | ||
|<br>[[File:Pokebuck.png]]792 | |||
|- align="center" | |||
|[[File:Pokemon FRLG Cue Ball.png]]<Br>Corey | |||
| | | style="background-color:#{{Pokemon color|Fighting}};" | [[Image:Pokemon 056Mankey.png|40px]]{{bp|Mankey}} 29 | ||
| | | style="background-color:#{{Pokemon color|Fighting}};" | [[Image:Pokemon 067Machoke.png|40px]]{{bp|Machoke}} 29 | ||
| | |||
| | |||
| | |||
|<br>[[File:Pokebuck.png]]696 | |||
| | |- align="center" | ||
| | |[[File:Pokemon FRLG Biker.png]]<Br>Jaxon | ||
| | | style="background-color:#{{Pokemon color|Poison}};" | [[Image:Pokemon 110Weezing.png|40px]]{{bp|Weezing}} 29 | ||
| | | style="background-color:#{{Pokemon color|Poison}};" | [[Image:Pokemon 089Muk.png|40px]]{{bp|Muk}} 29 | ||
| | | | ||
| style="background: | | | ||
| | | | ||
| style=" | |<br>[[File:Pokebuck.png]]580 | ||
|- align="center" | |||
|[[File:Pokemon FRLG Biker.png]]<Br>William | |||
| style="background-color:#{{Pokemon color|Poison}};" | [[Image:Pokemon 109Koffing.png|40px]]{{bp|Koffing}} 25 | |||
| | | style="background-color:#{{Pokemon color|Poison}};" | [[Image:Pokemon 110Weezing.png|40px]]{{bp|Weezing}} 25 | ||
| | | style="background-color:#{{Pokemon color|Poison}};" | [[Image:Pokemon 109Koffing.png|40px]]{{bp|Koffing}} 25 | ||
| | | style="background-color:#{{Pokemon color|Poison}};" | [[Image:Pokemon 110Weezing.png|40px]]{{bp|Weezing}} 25 | ||
| | | style="background-color:#{{Pokemon color|Poison}};" | [[Image:Pokemon 109Koffing.png|40px]]{{bp|Koffing}} 25 | ||
| style="background: | |<br>[[File:Pokebuck.png]]500 | ||
| | |||
| | |||
| | |||
| | |||
| | |||
| | |||
| | |||
| style=" | |||
| | |||
{| | |||
| | |||
| | |||
| | |||
| | |||
| | |||
| style="background: | |||
| | |||
| style=" | |||
| | |||
| | |||
| | |||
| | |||
| style="background: | |||
| style=" | |||
| | |||
| style="background: | |||
| | |||
| style=" | |||
| | |||
| style="background: | |||
| | |||
| | |||
|} | |} | ||
== Route 18 == | == Route 18 == | ||
When you get to Route #18, don't miss the trader in the top floor of the guardpost. He'll trade you a Lickitung for a Slowbro. Just before you arrive at Fuchsia City via Route #18, you will find three bird keepers waiting for you on the other side of the guard house. With the help of one little electric Pokémon (you know the one), you can make short work of all three in no time. | When you get to Route #18, don't miss the trader in the top floor of the guardpost. He'll trade you a Lickitung for a Slowbro. Just before you arrive at Fuchsia City via Route #18, you will find three bird keepers waiting for you on the other side of the guard house. With the help of one little electric Pokémon (you know the one), you can make short work of all three in no time. | ||
Revision as of 06:15, 11 December 2009
| FireRed | LeafGreen |
|---|---|
| Route 16: | |
Also known as "Cycling Road," Routes #16, #17, and #18 are a favorite hangout for bicyclists and motorcyclists alike. It just so happens that many of these two-wheeling enthusiasts are Pokémon trainers as well, and you must fight your way down the long slope to Fuchsia City. Once there, you will have a chance to visit the Safari Zone.
Route 16
Before you head past the guard post, dig your Cut-trained Pokémon out of the computer in Celadon City and use him to snip away at the tree blocking the norther part of Route #16. It's here that you'll find the patch of wild grass that is your first chance to catch a Doduo, as well as a secret house containing HM 02, Fly. Use this to teleport to any city you've visited, or for a two-turn Flying-type attack that is similar to Dig.
| Name | 1st | 2nd | 3rd | Money |
|---|---|---|---|---|
 Lea & Jed |
||||
 Lao |
||||
 Koji |
||||
 Luke |
||||
 Hideo |
||||
 Ruben |
||||
 Camron |
| FireRed | Level | Encounter Rate | LeafGreen | Level | Encounter Rate |
|---|---|---|---|---|---|
| 18-22 | %35 | 18-22 | %35 | ||
| 18-22 | %30 | 18-22 | %30 | ||
| 20-22 | %30 | 20-22 | %30 | ||
| 23-25 | %5 | 23-25 | %5 | ||
| Special Pokemon | |||||
| 30 | Only one | 30 | Only one | ||
| #143 Snorlax | #84 Doduo |
|---|---|
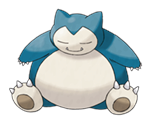
 There's only one more Snorlax in the game (at Route #12), so capture him now! He'll learn some okay attacks at level 35 and beyond, but for now he's mainly defensive. He has a ton of hit points, comes with Rest, and wakes from it quickly. |
 Doduo, which can be caught in any version, is by no means terrible. Drill Peck is a strong attack that's great against the many Fighting-type Pokémon in this area (as well as more seldom seen Grass and Bug Pokémon), but there's not a whole lot else to get excited about. The evolved form, Dodrio, which can be caught in Route #17 in Yellow only (or raised at level 31 in any version) is a fairly speedy, strong attacker that can do good damage with Normal skills like Tri Attack. |
Route 17
Route #17's brutal slope drags you downward unless you hold the ![]() or
or ![]() buttons to steady yourself. But there's no reason not to speed to the bottom, since the only thing of interest here is the Ponyta in Yellow.
buttons to steady yourself. But there's no reason not to speed to the bottom, since the only thing of interest here is the Ponyta in Yellow.
| Name | 1st | 2nd | 3rd | 4th | 5th | Money |
|---|---|---|---|---|---|---|
 Isaiah |
||||||
 Virgil |
||||||
 Billy |
||||||
 Raul |
||||||
 Jamal |
||||||
 Nikolas |
||||||
 Zeek |
||||||
 Corey |
||||||
 Jaxon |
||||||
 William |
Route 18
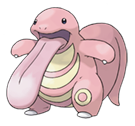
When you get to Route #18, don't miss the trader in the top floor of the guardpost. He'll trade you a Lickitung for a Slowbro. Just before you arrive at Fuchsia City via Route #18, you will find three bird keepers waiting for you on the other side of the guard house. With the help of one little electric Pokémon (you know the one), you can make short work of all three in no time.
| #77 Ponyta |
|---|
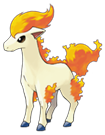
 Ponyta doesn't get the greatest skills... For Fire, it's just Ember for starters and Fire Spin at level 39. But the saving grace of Ponyta and its evolved form, Rapidash, is their incredible speed, making them easily the fastest of the Fire Pokémon. |
| #108 Lickitung |
 |
| Rattata |
N/A | N/A | 25% |
| 15% | 15% | 10% | |
| Spearow |
35% | 35% | 25% |
| 15% | 15% | 10% | |
| Doduo |
35% | 35% | 30% |
| 1 | Birdkeeper | |
| Spearow | LV29 | |
| Fearow | LV29 | |
| 2 | Birdkeeper | |
| Spearow | LV26 | |
| Spearow | LV26 | |
| Fearow | LV26 | |
| Spearow | LV26 | |
| 3 | Birdkeeper | |
| Dodrio | LV34 |
| Shellder |
- | - | ✓ |
| ✓ | ✓ | - | |
| Krabby |
✓ | ✓ | - |
| ✓ | ✓ | - | |
| Tentacool |
✓ | ✓ | ✓ |