Notmyhandle (talk | contribs) (added image) |
m (fixed linked game box for Donkey Kong) Tags: Mobile edit Mobile web edit |
||
| (37 intermediate revisions by 10 users not shown) | |||
| Line 1: | Line 1: | ||
{{Header Nav|game=The Legend of Zelda: Oracle of Ages}} | {{Header Nav|game=The Legend of Zelda: Oracle of Ages}} | ||
''The Maku Tree said:''' "Link! You have the Echoing Howl! But things are not going well. The Black Tower was nearing completion 400 years ago. Terrible things will happen if you do not hurry. I hear an Essence echoing from the peaks northwest of Lynna City. Can you go?"''''' | |||
{|{{prettytable|notwide=1}} | |||
|Quest items: | |||
* [[File:Zelda Oracles Strange Flute.png]] '''Strange Flute''' | |||
** [[File:Zelda Oracles Mooshs Flute.png]] '''Moosh's Flute''' | |||
** [[File:Zelda Oracles Dimitris Flute.png]] '''Dimitri's Flute''' | |||
** [[File:Zelda Oracles Rickys Flute.png]] '''Ricky's Flute''' | |||
* [[File:Zelda Oracles Tune of Currents.png]] '''Tune of Currents''' | |||
* [[File:Zelda Oracles Cracked Tuni Nut.png]] '''Cracked Tuni Nut''' | |||
* [[File:Zelda Oracles Tuni Nut.png]] '''Tuni Nut''' | |||
|Optional items: | |||
* [[File:Zelda Oracles Ring 24.png]] '''Light Ring L-1''' | |||
* [[File:Zelda Oracles Gale Seed.png]] '''18 Gale Seeds''' | |||
* [[File:Zelda Oracles Piece of Heart.png]] '''Pieces of Heart''' | |||
* [[File:Zelda Oracles Gasha Seed.png]] '''Gasha Seed''' | |||
* [[File:Zelda Oracle Doggie Mask.png]] '''Doggie Mask''' | |||
* [[File:Zelda Oracle Dumbbell.png]] '''Dumbbell''' | |||
* [[File:Zelda Oracle Cheesy Mustache.png]] '''Cheesy Mustache''' | |||
|Dungeon items: | |||
* [[File:Zelda Oracles Switch Hook.png]] '''Switch Hook''' | |||
* [[File:Zelda Oracles Heart Container.png]] '''Heart Container''' | |||
* [[File:Zelda Oracles Burning Flame.png]] '''Burning Flame''' | |||
|} | |||
== Before the next quest == | |||
[[File:Zelda Ages Overworld Dimitri.png|left|frame|Meet the last of three Animals.]] | |||
After leaving the {{zw|Moonlit Grotto|Moonlit Cave}}, you will meet two {{zw|Tokay}} near {{zw|Dimitri}}, who is washed up on the shore. Talk to the Tokay, let them eat Ember seeds, and they will leave. Dimitri will offer his services for now, and let you ride his back to return to {{zw|Labrynna}}. | |||
If you go east with Dimitri you get to a small Island with a {{zw|Soft Soil}} there. It is one of the better Soft Soils in the game, able to produce 4th-level rings. You may wish to plant a Gasha Seed there. | |||
{{-}} | |||
{{sidebar | |||
|width=30% | |||
|title=Linked game: [[Donkey Kong]] cameo | |||
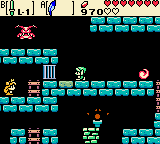
|contents=''(If you already cleared [[The Legend of Zelda: Oracle of Seasons/Secrets to and from Labrynna|Oracle of Seasons]] and linked to this game)''<br/> [[File:LZ7_Ages_MarioBros.png|center]] <br>In a linked game, Princess Zelda will come to Labrynna, but she will be abducted by Vire and brought to the Tower Ruins. Link has to climb the tower, playing the same way as in [[Donkey Kong]]. The Princess will reward Link with the [[File:Zelda Oracles Ring 38.png]]'''Blue Joy Ring''' (n.38). Anyway, in ''Oracle of Ages'' Link may already have found the Gold Joy Ring (n.39), that trumps this one. | |||
}} | |||
Return to {{zw|Lynna City}} and leave to the west. Instead of entering the Faeries Woods, go north. Give the Tasty Meat to the hungry trader to receive the [[File:Zelda Oracle Doggie Mask.png]] '''Doggie Mask'''. Return to Lynna City and enter the southern house. Give the Doggie Mask to {{zw|Mamamu Yan}} and she will in return give you the [[File:Zelda Oracle Dumbbell.png]] '''Dumbbell'''. | |||
[[File:Zelda Ages Overworld Seed Satchel Upgrade.png|left|frame|The Seed Satchel will be upgraded from 20 to 50.]] | |||
In the Forest of Time, enter the cave at the extreme south. Use the Seed Shooter to hit the Crystal Ball. Climb up the stairs and talk with Tingle again to receive an upgrade for your Seed Satchel, which will now carry 50 Seeds each instead of only 20. | |||
{{-}} | |||
== Nuun Highlands == | |||
To progress, you will need a [[File:Zelda Oracles Strange Flute.png]] '''Strange Flute'''. One of three possible flutes can be obtained, and is associated with the animal companion: | |||
* Go to Nuun Highlands before getting any flute: {{zw|Moosh}} will be your companion. | |||
* Purchase a flute from the Lynna City Shop for 150 Rupees: Dimitri will be your companion. | |||
* Win a flute at the shooting gallery (score at least 50 pts.): {{zw|Ricky}} will be your companion. | |||
The choice (or lack-thereof) remains the same for the rest of the game, as well as any linked game you start. It also affects the region east of Symmetry City, requiring your companion's assistance to traverse. | |||
=== Nuun Highlands === | |||
[[File:Zelda Ages Overworld Nuun Highlands.png|left|frame|Reaching the Nuun Highlands.]] | |||
{{sidebar|title=Strange Flute|width=200px||contents=Depending on which Flute you will get, the Area of {{zw|Nuun Highlands}} will look different, so there are three different walkthroughs for each Animal.}} | |||
To reach {{zw|Symmetry City}} (known as {{zw|Symmetry Village}} 400 years earlier), head north-west of Lynna City. Use the Seed Shooter to burn away the tree, and hit the switch to extend the bridge. | |||
In Nuun Highlands there are two new monsters called {{zw|Buzz Blob}} and {{zw|River Zora}}. Buzz Blobs cannot be attacked with the sword and River Zoras spit fireball at you. Proceed north. The way to the builders supervisor {{zw|Mutoh}} will depend on which animal will join you. Still, your movement ability will be restricted to a specific path (few screens) that invariably leads you to the bridge building site. | |||
Return south, and a fairy will ask for your help to find an animal within their woods. Go to the {{zw|Fairies Woods}} for the animal. Repeatedly scroll up and down between two screens to find the animal. Once you find him, he will identify the flute as belonging to him ([[File:Zelda Oracles Dimitris Flute.png]] '''Dimitri's Flute''' or [[File:Zelda Oracles Rickys Flute.png]] '''Ricky's Flute''') or provide you with one ([[File:Zelda Oracles Mooshs Flute.png]] '''Moosh's Flute'''). With the flute, go back to Nuun highlands, summon your animal companion, and search for the three workers east of the bridge. | |||
Return to Mutoh and talk again with him. He asks you to get the three workers back. | |||
In the middle of the Nuun Highlands you can find a cave with the [[File:Zelda Oracles Ring 24.png]] '''Light Ring L-1''' (different location for each animal). On the north edge (identical for all three animals) there is a cave with a healing {{zw|Great Fairy}} and a lv.4[[../Gasha Seeds|Gasha spot]]. Regardless of your animal companion, the three workers are in similar parts of the Highlands: | |||
# more or less in the center; | |||
# to the north, near the Great Fairy cave and the Gasha soil; | |||
# to the south-east, near the cave with the magic ring. | |||
==== [[File:Zelda Oracles Moosh.png]] Exploring with Moosh ==== | |||
[[File:Zelda Ages Overworld Moosh Flute.png|left|frame|Receive it from Moosh.]] | |||
[[File:Zelda Ages Overworld Nuun Highlands with Moosh.png|right|frame|Nuun Highlands with Moosh.]] | |||
# Go right and smash the bush. Ride Moosh over the holes north to the first worker. Talk with him and he will return to Mutoh. | |||
# Go all the way north; check the Great Fairy cave and dig in the west for the Gasha spot. Leave to the east to find the second worker. | |||
# Navigate to the east, then to the south. The cave on the way holds the aforementioned ring. Continue up the plateau and talk with the third worker. | |||
{{-}} | |||
==== [[File:Zelda Oracles Dimitri.png]] Exploring with Dimitri ==== | |||
[[File:Zelda Ages Overworld Dimitri Flute.png|left|frame|Buy it for 150 Rupees.]] | |||
[[File:Zelda Ages Overworld Nuun Highlands with Dimitri.png|right|frame|Nuun Highlands with Dimitri.]] | |||
The region is made of three north-south waterways. | |||
# Go down and right up the waterfall. Talk to the first worker and go back down. | |||
# If you go up the second waterway you can get to the Great Fairy cave and continue to the Gasha soil. Go to the east and up the eastmost waterfall. Talk to the second worker. | |||
# Go to the south-east corner and talk with the second worker. Go up the waterfall into cave for the aforementioned ring. | |||
{{-}} | |||
==== [[File:Zelda Oracles Ricky.png]] Exploring with Ricky ==== | |||
[[File:Zelda Ages Overworld Ricky Flute.png|left|frame|Win it for 50 Points in Shooting Game Gallery.]] | |||
[[File:Zelda Ages Overworld Nuun Highlands with Ricky.png|right|frame|Nuun Highlands with Ricky.]] | |||
#Go right and down. Jump on the ledge, go up and smash the bushes with Ricky. Talk to the first worker; he will run back to Mutoh. | |||
# Return to the carpenter and go up all the way to the ledge. Jump on it and dig for the Gasha soil. Go right and down to find the second worker. | |||
# From the second worker, continue all the way east (the Great Fairy cave is visible on the way), the go to all the way south. Jump on the ledge, go up and enter the cave for the aforementioned ring. On the ledge above the cave you can talk to the last worker. | |||
{{-}} | |||
=== Symmetry City === | |||
When the bridge is built, cross and head north to Symmetry City, which is currently in ruins. Go left and get [[File:Zelda Oracles Gale Seed.png]] '''18 Gale Seed''' from the Gale Tree. To figure out the cause for the state of the city, cut the grass next to the Gale Tree, and use the time portal to travel to Ambi's age 400 years before. | |||
The girl in the center building tells you their current problem: the {{zw|Tuni Nut}} was cracked and needs to be repaired. While you're there, you can head downstairs and exchange the dumbbell for a [[File:Zelda Oracle Cheesy Mustache.png]] '''Cheesy Mustache'''. Leave the house and explore the village. Talk with everybody to receive the [[File:Zelda Oracles Cracked Tuni Nut.png]] '''Cracked Tuni Nut'''. | |||
=== Talus Peaks === | |||
{| | |||
|[[File:LZ7 map4 TalusPeaksA.png|thumb|Talus Peaks and Symmetry City during Ambi's age.]] | |||
|[[File:LZ7 map4 TalusPeaksZ.png|thumb|Talus Peaks and Symmetry City during Zelda's age.]] | |||
|} | |||
[[File:Zelda Ages Overworld Tokkey.png|frame|Tokkey will try out the new tune.]] | |||
[[File:Zelda Ages Overworld Bombs Upgrade.png|frame|You can now carry 20 more Bombs.]] | |||
[[File:Zelda Ages Overworld Tuni Nut repaired.png|frame|You get the fixed Tuni Nut.]] | |||
[[File:Zelda Ages Overworld Skull Dungeon.png|frame|Entrance to Skull Dungeon.]] | |||
Exit the city to the west, and reach the top of the peaks. Swim to the end, dive, and locate {{zw|Tokkey}}. To receive the [[File:Zelda Oracles Tune of Currents.png]] '''Tune of Currents''', you must play the Harp of Ages in front of him. | |||
After you learn the Tune of Currents from Tokkey, you can soon realize that there are no passages towards Restoration Wall. The owl statue tells you that the landscape changed over 400 years. | |||
# '''(Ambi's age)''' From Tokkey's home, go south, then west and play the Harp at the dead-end: you can collect a [[File:Zelda Oracles Piece of Heart.png]] '''Heart Piece'''. Back to Ambi's age, continue to the Owl Statue. South from it, play the Harp. | |||
# '''(Zelda's age)''' Follow the path south. You can see a ledge on the way, but it will become accessible in a later chapter. Where you see a climbing vine, climb the nearby stairs instead, lift the rock and use the Harp to open the time gate. | |||
# '''(Ambi's age)''' Enter the nearby cave, take the east exit, and push the red boulder there: the river will change course. Backtrack to the cave entrance and to Zelda's age (using the Harp, obviously). | |||
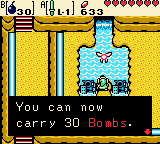
# '''(Zelda's age)''' Climb the vine you saw earlier. A sign says: "throw nothing in the water". The only item you can throw is a bomb: try it! A faerie will appear; answer honestly her question, and she will give you a '''Bomb bag upgrade''': you can now carry 30 bombs (50 in a linked game). Now go back to Ambi's age. | |||
# '''(Ambi's age)''' Push the sapling (that will become a vine in 400 year) to the east. Go and check in the future. | |||
# '''(Zelda's age)''' Climb the vine to the new area, then continue north-east and until you find another Time Gate. Play the Harp there. | |||
# '''(Ambi's age)''' Backtrack to the pond, but continue south instead of west. In the southmost screen, play the Harp. | |||
# '''(Zelda's age)''' Open a chest for a [[File:Zelda Oracles Gasha Seed.png]] '''Gasha Seed''', then go back to Ambi's age. | |||
# '''(Ambi's age)''' Continue east and onwards, and you will reach a signpost that reads: "Restoration wall"! | |||
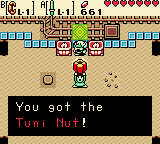
Climb {{zw|Restoration Wall}} to find {{zw|Patch}}. He will play a repair minigame called Patch's Crazy Cart, where you have to push {{zw|Hardhat Beetle}}s into a hole. The only concern is a cart that will smash against the nut, which can be redirected by standing on a switch just before it strikes. When the four beetles are pushed into the hole, the repair is complete and you will get the repaired [[File:Zelda Oracles Tuni Nut.png]] '''Tuni Nut'''. Bring the Tuni Nut back to Symmetry City on the altar. | |||
You may now return to Zelda's age, where the nightmarish illusions have been dispelled (how and by whom?). Without the illusions, you can now enter the dungeon under the former volcano. | |||
{{-}} | {{-}} | ||
< | <references/> | ||
Level 4 - Skull Dungeon | |||
== Skull Dungeon == | |||
===Dungeon, part 1=== | |||
[[File:LoZ OA Level 4 Skull Dungeon.png|frame|left|Level 4: Skull Dungeon]] | |||
[[File:Zelda Ages Skull Dungeon Map.png|frame|right|Map of the dungeon.]] | |||
When you enter the Skull Dungeon, you will need a Small Key before you go to the east wing. Head north, and follow the rooms to the west. In the second one you must kill all enemies to open the door. Turn to the north, being careful as you jump across the lava pit. Cross the room to the west exit, keeping watch for the incoming {{zw|Spark}}. When you enter the first south room, push the eastern-most block downward to get the [[File:Zelda Oracles Compass.png]] '''Compass''' from the chest. | |||
In the last room, after dealing with the monsters, jump over the lava, and push the block onto the designated square, blue facing up. The shortest path is pushing the cube down four times, right, up, left, down, and left twice. When you complete this, you will obtain the first [[File:Zelda Oracles Small Key.png]] '''Small Key'''. | |||
Backtrack to the first lava room (take the shortcut on the right), and continue east. In the room with the locked door, make the series of jumps toward the center. When you jump on the center floor, push a block left to make the jump across the lava safer and jump across. Push the next block to the right, and you can now reach the door. | |||
[[File:Zelda Ages Skull Dungeon Puzzle.png|frame|left|Solving the puzzle and receiving the Small Key.]] | |||
[[File:Zelda Ages Skull Dungeon Puzzle2.png|frame|right|Arrange the left field to mirror the right field.]] | |||
After the first door is a room with four Stalfos, one Spark and an east exit leading to the first minecart. You should first get the map. Hit the switch and enter the minecart to reach the chest containing the [[File:Zelda Oracles Dungeon Map.png]] '''Dungeon Map''', then return. Return the switch to the normal position and ride to the southern end. On the way south hit the switch to change the track. To get the key from this room, use the Seed Shooter to hit the switch. When you get the [[File:Zelda Oracles Small Key.png]] '''Small Key''', enter the cart to stop in the middle room. Unlock the door on the right, and exit to the right. | |||
You will see the first {{zw|Blade Trap}}. Move right and quickly step back to safely spring the trap, then jump over the lava to reach the north exit. Equip the Power Bracelet, and pull the lever until the lava flow stops. Quickly cross the floor to reach the next north exit. Defeat the four yellow Stalfos, so that the west door opens. The enemies are best handled by cornering them, and striking them as they land. To unlock the left door in the room after the {{zw|Hardhat Beetle}}s, jump over the tiles to match the pattern on the right. | |||
Run past the Blade Traps before they hit, and defeat two Shrouded Stalfos that will hinder you. You now need to get the block into position. First, spring the trap, and circle around the block as they retract. Push the block down two squares. Spring the trap once more, and quickly push the block left before the traps or floor catches you. The gate opens once the block is in position, allowing you to use the minecart. | |||
The minecart stops at the north of the dungeon. Head east first. Use the Seed Shooter to hit the switch to reveal the chest; you can do so either on or off the moving platform. Get the [[File:Zelda Oracles Small Key.png]] '''Small Key''' and move two rooms west. | |||
Use the Small Key on the key block, open the barrier, then return east, and enter the second minecart. The minecart will enter a room with a long track and three Stalfos at the top. Equip the Seed Shooter and destroy all three Stalfos before you reach the end. This allows you to continue to the left. | |||
Jump across the moving platforms, and go south. Jump onto the colored platforms and match them with the block shown on top, and collect the [[File:Zelda Oracles Small Key.png]] '''Small Key''' that falls down. Return north, unlock the Key Block, and board the minecart. When you reach the end of the track, head through the left door. | |||
=== Miniboss: Armos Warrior === | |||
[[File:Zelda Ages Skull Dungeon Miniboss.png|left]] | |||
The {{zw|Armos Warrior}} will boast about his mighty sword and mighty shield. In the first phase, it will control the sword and fling it towards you. Its sword travels in a straight line, and if guided correctly, can be used to hit the Armos Warrior. After three hits, the sword and shield shatter. | |||
The warrior can now be defeated through conventional means, but it is safest to attack after it charges and hits a wall. Exit through the south door after defeating the Armos Warrior. | |||
{{-}} | |||
===Dungeon, part 2=== | |||
[[File:Zelda Ages Skull Dungeon Cracked Wall.png|frame|left|Destroy the Wall.]] | |||
[[File:Zelda Ages Skull Dungeon Switch Hook.png|frame|right|Use the Switch Hook to swap yourself with the vase.]] | |||
There is only one path south of the miniboss, which you will follow until you see a cracked wall. Drop a bomb at the crack, and go through the hole. You enter a room where you need to change each square from blue to read. With abbreviated directions, one possible route is: L, U6, R, D2, R, D2, L, D, R2, D, R5, U2, L2, D, L2, U, R, U, R2, U, R, U2, L2, D2, L, U2, L3, D, R, D, L, D. This reveals the chest which contains the [[File:Zelda Oracles Switch Hook.png]] '''Switch Hook'''. | |||
Leave to the west, where you can use the Switch Hook on the diamond. Backtrack to the cart room, but continue on foot to the north. Use the Switch Hook on the diamond, exit south and east. Continue using the Switch Hook on the first diamond. Walk onto the button, and use the Switch Hook on the other diamond. Exit and follow the path to the down staircase. | |||
Head north and remove the {{zw|Rope}}s. Switch with the diamond from the bottom, then switch with the vase. Use the Switch Hook to move the diamond onto the button (which will require multiple uses of the Switch Hook). Exit through the newly opened door, then move left. Cross the lava using the Switch Hook on the vases. If you slip, exit and re-enter the room. In the next room, jump onto the center tile to make the {{zw|Gel}}s visible (and vulnerable). After you eliminate them, continue west past the lava and blade traps. | |||
[[File:Zelda Ages Skull Dungeon Passage.png|frame|right|Come across with the help of the Switch Hook.]] | |||
[[File:Zelda Ages Skull Dungeon Lava Run.png|frame|left|Run fast across before the Lava reach you.]] | |||
D | The next room requires changing all tiles from blue to red. Here is one possible solution with abbreviated directions: L, D, R, D3, L2, U5, R2, U, L, U, R, U, L2, D, L, U, L9, D2, R, D3, L, D3, R, U2, R, D2, R7, U2, L2, D, L, U, L, D, L, U, L, U, L, U3, R, U, R, D, R2, U, R2, D, R, D, L6, D, R, D, R, U, R4, D, L2. Open the chest for a [[File:Zelda Oracles Small Key.png]] '''Small Key''' and exit north. | ||
Jump across the moving platforms to reach the stairs. You will need to first switch with the diamond, move onto the second platform, and jump across the lava to reach the stairs. There is also a Hardhat Beetle, which may be a problem, but easily handled. Since you do not yet have the Boss Key, climb the stairs. The stairs lead to a side view platform-jumping room. It is easiest to switch with the pots, but you can also jump over them. After climbing the stairs, unlock the keyhole-block, and use the Switch Hook on the diamond. | |||
You are now at a series of three lava puzzle rooms. The first one requires pulling a lever up as far as you can, and making a run for the other side of the lava. You can barely make it across, as the lava starts when you are just about to reach the end. The second room requires pulling the lever to turn off the lava. Cross the open area, until you reach the first pot; switch or lift it, and stand on that square (the lava won't enter the tiles that originally contained pots). Switch with the remaining pots until you reach the top-left corner, then do a diagonal jump. | |||
In the final room of the three, you will need to plan your approach. If you fail, leave and re-enter the room. Climb the steps, lift the first pot, and push the second pot to the right. Switch with the first pot in the upper-right corner, and push the second pot to the top. Switch with the pot to the left, and push the other pot onto the button. Switch back to the upper-right corner, and open the chest to get the [[File:Zelda Oracles Boss Key.png]] '''Boss Key'''. Now jump off the ledge and return to the stairs. | |||
=== Boss: Eyesoar === | |||
[[File:LZ7 Ages boss4 Eyesoar.png|frame|Eyesoar]] | |||
You will face {{zw|Eyesoar}}, which will engage without introduction. Eyesoar will defend itself with four orbiting eyes that will block attacks, and resists direct attacks. If the outer eyes are destroyed, they are quickly regenerated. | |||
It is vulnerable to the Switch Hook, but it must connect directly with the large central eye. To reach it, you need to damage the outer eyes to create an opening, or approach it when it moves its eyes further out. When the Switch Hook connects, the outer eyes will scatter chaotically, allowing you to inflict damage with your sword. The eyes will attempt to reform, but won't resume the orbit until all four eyes are in place. When the Eyesoar is destroyed, pick up the [[File:Zelda Oracles Heart Container.png]] '''Heart Container''' and head north and collect the [[File:Zelda Oracles Burning Flame.png]] '''Burning Flame'''. | |||
:''"It reignites wavering hearts with a hero's burning passion."'' | |||
{{Footer Nav|game=The Legend of Zelda: Oracle of Ages|prevpage=Moonlit Grotto|nextpage=Crown Dungeon}} | {{Footer Nav|game=The Legend of Zelda: Oracle of Ages|prevpage=Moonlit Grotto|nextpage=Crown Dungeon}} | ||
Latest revision as of 00:26, 8 February 2023
The Maku Tree said: "Link! You have the Echoing Howl! But things are not going well. The Black Tower was nearing completion 400 years ago. Terrible things will happen if you do not hurry. I hear an Essence echoing from the peaks northwest of Lynna City. Can you go?"
| Quest items: | Optional items: | Dungeon items: |
Before the next quest[edit]
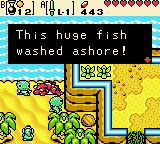
After leaving the Moonlit Cave, you will meet two Tokay near Dimitri, who is washed up on the shore. Talk to the Tokay, let them eat Ember seeds, and they will leave. Dimitri will offer his services for now, and let you ride his back to return to Labrynna.
If you go east with Dimitri you get to a small Island with a Soft Soil there. It is one of the better Soft Soils in the game, able to produce 4th-level rings. You may wish to plant a Gasha Seed there.
Return to Lynna City and leave to the west. Instead of entering the Faeries Woods, go north. Give the Tasty Meat to the hungry trader to receive the ![]() Doggie Mask. Return to Lynna City and enter the southern house. Give the Doggie Mask to Mamamu Yan and she will in return give you the
Doggie Mask. Return to Lynna City and enter the southern house. Give the Doggie Mask to Mamamu Yan and she will in return give you the ![]() Dumbbell.
Dumbbell.
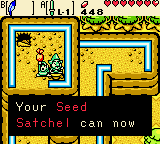
In the Forest of Time, enter the cave at the extreme south. Use the Seed Shooter to hit the Crystal Ball. Climb up the stairs and talk with Tingle again to receive an upgrade for your Seed Satchel, which will now carry 50 Seeds each instead of only 20.
Nuun Highlands[edit]
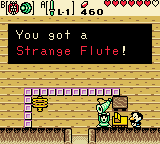
To progress, you will need a ![]() Strange Flute. One of three possible flutes can be obtained, and is associated with the animal companion:
Strange Flute. One of three possible flutes can be obtained, and is associated with the animal companion:
- Go to Nuun Highlands before getting any flute: Moosh will be your companion.
- Purchase a flute from the Lynna City Shop for 150 Rupees: Dimitri will be your companion.
- Win a flute at the shooting gallery (score at least 50 pts.): Ricky will be your companion.
The choice (or lack-thereof) remains the same for the rest of the game, as well as any linked game you start. It also affects the region east of Symmetry City, requiring your companion's assistance to traverse.
Nuun Highlands[edit]
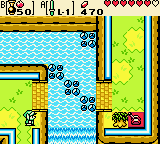
To reach Symmetry City (known as Symmetry Village 400 years earlier), head north-west of Lynna City. Use the Seed Shooter to burn away the tree, and hit the switch to extend the bridge.
In Nuun Highlands there are two new monsters called Buzz Blob and River Zora. Buzz Blobs cannot be attacked with the sword and River Zoras spit fireball at you. Proceed north. The way to the builders supervisor Mutoh will depend on which animal will join you. Still, your movement ability will be restricted to a specific path (few screens) that invariably leads you to the bridge building site.
Return south, and a fairy will ask for your help to find an animal within their woods. Go to the Fairies Woods for the animal. Repeatedly scroll up and down between two screens to find the animal. Once you find him, he will identify the flute as belonging to him (![]() Dimitri's Flute or
Dimitri's Flute or ![]() Ricky's Flute) or provide you with one (
Ricky's Flute) or provide you with one (![]() Moosh's Flute). With the flute, go back to Nuun highlands, summon your animal companion, and search for the three workers east of the bridge.
Moosh's Flute). With the flute, go back to Nuun highlands, summon your animal companion, and search for the three workers east of the bridge.
Return to Mutoh and talk again with him. He asks you to get the three workers back.
In the middle of the Nuun Highlands you can find a cave with the ![]() Light Ring L-1 (different location for each animal). On the north edge (identical for all three animals) there is a cave with a healing Great Fairy and a lv.4Gasha spot. Regardless of your animal companion, the three workers are in similar parts of the Highlands:
Light Ring L-1 (different location for each animal). On the north edge (identical for all three animals) there is a cave with a healing Great Fairy and a lv.4Gasha spot. Regardless of your animal companion, the three workers are in similar parts of the Highlands:
- more or less in the center;
- to the north, near the Great Fairy cave and the Gasha soil;
- to the south-east, near the cave with the magic ring.
 Exploring with Moosh[edit]
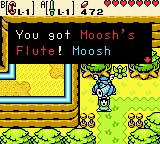
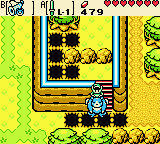
- Go right and smash the bush. Ride Moosh over the holes north to the first worker. Talk with him and he will return to Mutoh.
- Go all the way north; check the Great Fairy cave and dig in the west for the Gasha spot. Leave to the east to find the second worker.
- Navigate to the east, then to the south. The cave on the way holds the aforementioned ring. Continue up the plateau and talk with the third worker.
 Exploring with Dimitri[edit]
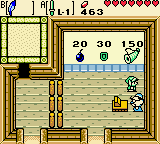
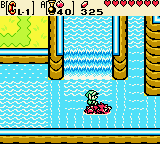
The region is made of three north-south waterways.
- Go down and right up the waterfall. Talk to the first worker and go back down.
- If you go up the second waterway you can get to the Great Fairy cave and continue to the Gasha soil. Go to the east and up the eastmost waterfall. Talk to the second worker.
- Go to the south-east corner and talk with the second worker. Go up the waterfall into cave for the aforementioned ring.
 Exploring with Ricky[edit]
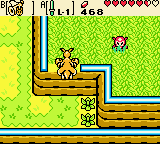
- Go right and down. Jump on the ledge, go up and smash the bushes with Ricky. Talk to the first worker; he will run back to Mutoh.
- Return to the carpenter and go up all the way to the ledge. Jump on it and dig for the Gasha soil. Go right and down to find the second worker.
- From the second worker, continue all the way east (the Great Fairy cave is visible on the way), the go to all the way south. Jump on the ledge, go up and enter the cave for the aforementioned ring. On the ledge above the cave you can talk to the last worker.
Symmetry City[edit]
When the bridge is built, cross and head north to Symmetry City, which is currently in ruins. Go left and get ![]() 18 Gale Seed from the Gale Tree. To figure out the cause for the state of the city, cut the grass next to the Gale Tree, and use the time portal to travel to Ambi's age 400 years before.
18 Gale Seed from the Gale Tree. To figure out the cause for the state of the city, cut the grass next to the Gale Tree, and use the time portal to travel to Ambi's age 400 years before.
The girl in the center building tells you their current problem: the Tuni Nut was cracked and needs to be repaired. While you're there, you can head downstairs and exchange the dumbbell for a ![]() Cheesy Mustache. Leave the house and explore the village. Talk with everybody to receive the
Cheesy Mustache. Leave the house and explore the village. Talk with everybody to receive the ![]() Cracked Tuni Nut.
Cracked Tuni Nut.
Talus Peaks[edit]
 |
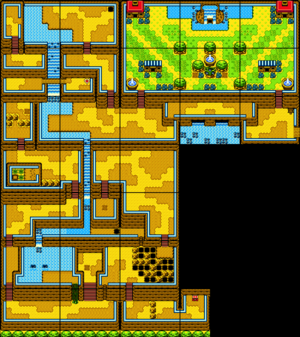 |
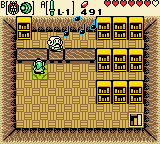
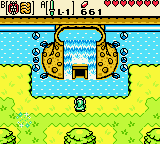
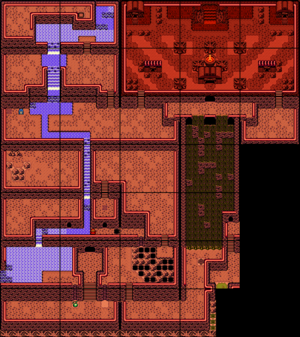
Exit the city to the west, and reach the top of the peaks. Swim to the end, dive, and locate Tokkey. To receive the ![]() Tune of Currents, you must play the Harp of Ages in front of him.
Tune of Currents, you must play the Harp of Ages in front of him.
After you learn the Tune of Currents from Tokkey, you can soon realize that there are no passages towards Restoration Wall. The owl statue tells you that the landscape changed over 400 years.
- (Ambi's age) From Tokkey's home, go south, then west and play the Harp at the dead-end: you can collect a
 Heart Piece. Back to Ambi's age, continue to the Owl Statue. South from it, play the Harp.
 - (Zelda's age) Follow the path south. You can see a ledge on the way, but it will become accessible in a later chapter. Where you see a climbing vine, climb the nearby stairs instead, lift the rock and use the Harp to open the time gate.
- (Ambi's age) Enter the nearby cave, take the east exit, and push the red boulder there: the river will change course. Backtrack to the cave entrance and to Zelda's age (using the Harp, obviously).
- (Zelda's age) Climb the vine you saw earlier. A sign says: "throw nothing in the water". The only item you can throw is a bomb: try it! A faerie will appear; answer honestly her question, and she will give you a Bomb bag upgrade: you can now carry 30 bombs (50 in a linked game). Now go back to Ambi's age.
- (Ambi's age) Push the sapling (that will become a vine in 400 year) to the east. Go and check in the future.
- (Zelda's age) Climb the vine to the new area, then continue north-east and until you find another Time Gate. Play the Harp there.
- (Ambi's age) Backtrack to the pond, but continue south instead of west. In the southmost screen, play the Harp.
- (Zelda's age) Open a chest for a
 Gasha Seed, then go back to Ambi's age.
 - (Ambi's age) Continue east and onwards, and you will reach a signpost that reads: "Restoration wall"!
Climb Restoration Wall to find Patch. He will play a repair minigame called Patch's Crazy Cart, where you have to push Hardhat Beetles into a hole. The only concern is a cart that will smash against the nut, which can be redirected by standing on a switch just before it strikes. When the four beetles are pushed into the hole, the repair is complete and you will get the repaired ![]() Tuni Nut. Bring the Tuni Nut back to Symmetry City on the altar.
Tuni Nut. Bring the Tuni Nut back to Symmetry City on the altar.
You may now return to Zelda's age, where the nightmarish illusions have been dispelled (how and by whom?). Without the illusions, you can now enter the dungeon under the former volcano.
Skull Dungeon[edit]
Dungeon, part 1[edit]
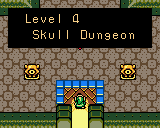

When you enter the Skull Dungeon, you will need a Small Key before you go to the east wing. Head north, and follow the rooms to the west. In the second one you must kill all enemies to open the door. Turn to the north, being careful as you jump across the lava pit. Cross the room to the west exit, keeping watch for the incoming Spark. When you enter the first south room, push the eastern-most block downward to get the ![]() Compass from the chest.
Compass from the chest.
In the last room, after dealing with the monsters, jump over the lava, and push the block onto the designated square, blue facing up. The shortest path is pushing the cube down four times, right, up, left, down, and left twice. When you complete this, you will obtain the first ![]() Small Key.
Small Key.
Backtrack to the first lava room (take the shortcut on the right), and continue east. In the room with the locked door, make the series of jumps toward the center. When you jump on the center floor, push a block left to make the jump across the lava safer and jump across. Push the next block to the right, and you can now reach the door.
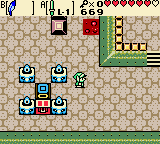
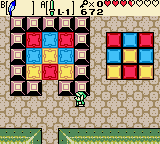
After the first door is a room with four Stalfos, one Spark and an east exit leading to the first minecart. You should first get the map. Hit the switch and enter the minecart to reach the chest containing the ![]() Dungeon Map, then return. Return the switch to the normal position and ride to the southern end. On the way south hit the switch to change the track. To get the key from this room, use the Seed Shooter to hit the switch. When you get the
Dungeon Map, then return. Return the switch to the normal position and ride to the southern end. On the way south hit the switch to change the track. To get the key from this room, use the Seed Shooter to hit the switch. When you get the ![]() Small Key, enter the cart to stop in the middle room. Unlock the door on the right, and exit to the right.
Small Key, enter the cart to stop in the middle room. Unlock the door on the right, and exit to the right.
You will see the first Blade Trap. Move right and quickly step back to safely spring the trap, then jump over the lava to reach the north exit. Equip the Power Bracelet, and pull the lever until the lava flow stops. Quickly cross the floor to reach the next north exit. Defeat the four yellow Stalfos, so that the west door opens. The enemies are best handled by cornering them, and striking them as they land. To unlock the left door in the room after the Hardhat Beetles, jump over the tiles to match the pattern on the right.
Run past the Blade Traps before they hit, and defeat two Shrouded Stalfos that will hinder you. You now need to get the block into position. First, spring the trap, and circle around the block as they retract. Push the block down two squares. Spring the trap once more, and quickly push the block left before the traps or floor catches you. The gate opens once the block is in position, allowing you to use the minecart.
The minecart stops at the north of the dungeon. Head east first. Use the Seed Shooter to hit the switch to reveal the chest; you can do so either on or off the moving platform. Get the ![]() Small Key and move two rooms west.
Small Key and move two rooms west.
Use the Small Key on the key block, open the barrier, then return east, and enter the second minecart. The minecart will enter a room with a long track and three Stalfos at the top. Equip the Seed Shooter and destroy all three Stalfos before you reach the end. This allows you to continue to the left.
Jump across the moving platforms, and go south. Jump onto the colored platforms and match them with the block shown on top, and collect the ![]() Small Key that falls down. Return north, unlock the Key Block, and board the minecart. When you reach the end of the track, head through the left door.
Small Key that falls down. Return north, unlock the Key Block, and board the minecart. When you reach the end of the track, head through the left door.
Miniboss: Armos Warrior[edit]
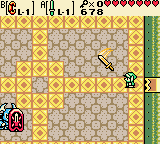
The Armos Warrior will boast about his mighty sword and mighty shield. In the first phase, it will control the sword and fling it towards you. Its sword travels in a straight line, and if guided correctly, can be used to hit the Armos Warrior. After three hits, the sword and shield shatter.
The warrior can now be defeated through conventional means, but it is safest to attack after it charges and hits a wall. Exit through the south door after defeating the Armos Warrior.
Dungeon, part 2[edit]
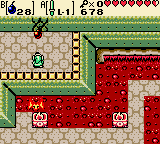
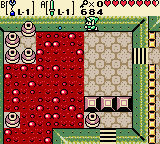
There is only one path south of the miniboss, which you will follow until you see a cracked wall. Drop a bomb at the crack, and go through the hole. You enter a room where you need to change each square from blue to read. With abbreviated directions, one possible route is: L, U6, R, D2, R, D2, L, D, R2, D, R5, U2, L2, D, L2, U, R, U, R2, U, R, U2, L2, D2, L, U2, L3, D, R, D, L, D. This reveals the chest which contains the ![]() Switch Hook.
Switch Hook.
Leave to the west, where you can use the Switch Hook on the diamond. Backtrack to the cart room, but continue on foot to the north. Use the Switch Hook on the diamond, exit south and east. Continue using the Switch Hook on the first diamond. Walk onto the button, and use the Switch Hook on the other diamond. Exit and follow the path to the down staircase.
Head north and remove the Ropes. Switch with the diamond from the bottom, then switch with the vase. Use the Switch Hook to move the diamond onto the button (which will require multiple uses of the Switch Hook). Exit through the newly opened door, then move left. Cross the lava using the Switch Hook on the vases. If you slip, exit and re-enter the room. In the next room, jump onto the center tile to make the Gels visible (and vulnerable). After you eliminate them, continue west past the lava and blade traps.
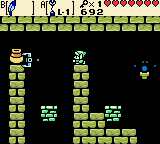
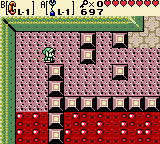
The next room requires changing all tiles from blue to red. Here is one possible solution with abbreviated directions: L, D, R, D3, L2, U5, R2, U, L, U, R, U, L2, D, L, U, L9, D2, R, D3, L, D3, R, U2, R, D2, R7, U2, L2, D, L, U, L, D, L, U, L, U, L, U3, R, U, R, D, R2, U, R2, D, R, D, L6, D, R, D, R, U, R4, D, L2. Open the chest for a ![]() Small Key and exit north.
Small Key and exit north.
Jump across the moving platforms to reach the stairs. You will need to first switch with the diamond, move onto the second platform, and jump across the lava to reach the stairs. There is also a Hardhat Beetle, which may be a problem, but easily handled. Since you do not yet have the Boss Key, climb the stairs. The stairs lead to a side view platform-jumping room. It is easiest to switch with the pots, but you can also jump over them. After climbing the stairs, unlock the keyhole-block, and use the Switch Hook on the diamond.
You are now at a series of three lava puzzle rooms. The first one requires pulling a lever up as far as you can, and making a run for the other side of the lava. You can barely make it across, as the lava starts when you are just about to reach the end. The second room requires pulling the lever to turn off the lava. Cross the open area, until you reach the first pot; switch or lift it, and stand on that square (the lava won't enter the tiles that originally contained pots). Switch with the remaining pots until you reach the top-left corner, then do a diagonal jump.
In the final room of the three, you will need to plan your approach. If you fail, leave and re-enter the room. Climb the steps, lift the first pot, and push the second pot to the right. Switch with the first pot in the upper-right corner, and push the second pot to the top. Switch with the pot to the left, and push the other pot onto the button. Switch back to the upper-right corner, and open the chest to get the ![]() Boss Key. Now jump off the ledge and return to the stairs.
Boss Key. Now jump off the ledge and return to the stairs.
Boss: Eyesoar[edit]
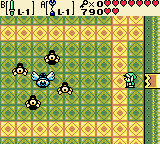
You will face Eyesoar, which will engage without introduction. Eyesoar will defend itself with four orbiting eyes that will block attacks, and resists direct attacks. If the outer eyes are destroyed, they are quickly regenerated.
It is vulnerable to the Switch Hook, but it must connect directly with the large central eye. To reach it, you need to damage the outer eyes to create an opening, or approach it when it moves its eyes further out. When the Switch Hook connects, the outer eyes will scatter chaotically, allowing you to inflict damage with your sword. The eyes will attempt to reform, but won't resume the orbit until all four eyes are in place. When the Eyesoar is destroyed, pick up the ![]() Heart Container and head north and collect the
Heart Container and head north and collect the ![]() Burning Flame.
Burning Flame.
- "It reignites wavering hearts with a hero's burning passion."
