{{Header Nav|game=Paper Mario: The Thousand-Year Door}}
{{Header Nav|game=Paper Mario: The Thousand-Year Door}}
The Trouble Center is a series of small objectives for Mario to complete, usually transporting items or talking with certain characters. It is located on the east side of Rogueport and can be accessed at any time. Only one trouble can be taken on from the Trouble Center at a time, and it costs 30 coins to cancel any trouble undertaken.
Mario also has the ability to get into the back of the Trouble Center by slipping behind the house and using Flurrie's wind to blow off a secret panel, revealing a door. There is nothing notable inside.
The Nintendo Switch version introduces Ian Foomus, a Mouser who will give hints on how to solve troubles for a cost.
==After Intro to Chapter 1, and after you beat Gus==
==After Intro to Chapter 1, and after you beat Gus==
===Garf===
===Garf===
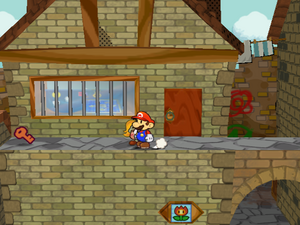
[[File:Paper Mario TTYD TroubleCenter Key.png|thumb|right|The key is outside this shop.]]
[[File:PMTTYD Trouble Center Key.png|thumb|right|The key is outside this shop.]]
*Title: Need a Key!
*Title: {{A|Need a Key!}}
*Location: Rogueport, outside his house.
*Location: Rogueport, outside his house.
*Reward: 20 Coins.
*Reward: 20 Coins
*Objective: Meet Garf outside his house and he'll tell you where he dropped his key: outside the Lovely Howz of Badges. To reach it, head into the inn, and climb to the second floor. Exit by the left door and collect the key from infront of the Lovely Howz of Badges. Return the give it to Garf.
*Objective: Meet Garf outside his house and he'll tell you where he dropped his key: outside the Lovely Howz of Badges. To reach it, head into the inn, and climb to the second floor. Exit by the left door and collect the key from in front of the Lovely Howz of Badges. Return the give it to Garf.
===McGoomba===
===McGoomba===
*Title: Safe Delivery...
*Title: {{A|Safe Delivery...}}
*Location: Rogueport, in the alley.
*Location: Rogueport, in the alley.
*Reward: 20 Coins.
*Reward: 20 Coins
*Objective: Talk to McGoomba in the Alley in Rogueport Plaza. He'll give you a package that's for Goomfrey. Give the package to Goomfrey, loitering outside Prof. Frankly's place, then return to McGoomba to claim your reward.
*Objective: Talk to McGoomba in the Alley in Rogueport Plaza. He'll give you a package that's for Goomfrey. Give the package to Goomfrey, loitering outside Prof. Frankly's place, then return to McGoomba to claim your reward.
===Arfur===
===Arfur===
*Title: Price Adjustment
*Title: {{A|Price Adjustment}}
*Location: Rogueport, outside the Toad Bros. Bazaar.
*Location: Rogueport, outside the Toad Bros. Bazaar.
*Reward: 20 Coins.
*Reward: 20 Coins
*Objective: Talk to Arfur and go to Plenn T.'s store to get the prices on 3 items: Tasty Tonic, Fire Flower and Sleepy Sheep. Tell Arfur your findings and collect your reward.
*Objective: Talk to Arfur and go to Plenn T.'s store to get the prices on 3 items: {{TTYD Item|Tasty Tonic}} (3 coins), {{TTYD Item|Fire Flower}} (10 coins) and {{TTYD Item|Sleepy Sheep}} (8 coins). Tell Arfur your findings and collect your reward.
===Goomther===
===Goomther===
*Title: Find this guy!
*Title: {{A|Find this guy!}}
*Location: Rogueport, next to the noose.
*Location: Rogueport, next to the noose.
*Reward: 20 Coins.
*Reward: 20 Coins
*Objective: Goomther has been defrauded by Larson the Bandit. Talk to Goomther, then go in search of Larson. You'll first find him in the alley behind Merlon and Prof. Frankly's houses, and he'll flee. Talk to Goomther again and continue your search. You'll find him in the docks and he'll flee again. Corner him at his hideout in the alley, behind the inn and collect your reward.
*Objective: Goomther has been defrauded by Larson the Bandit. Talk to Goomther, then go in search of Larson. You'll first find him in the alley behind Merlon and Prof. Frankly's houses, and he'll flee. Talk to Goomther again and continue your search. You'll find him in the docks and he'll flee again. Corner him at his hideout in the alley, behind the inn and collect your reward.
===Mousimilian===
===Mousimilian===
*Title: Hit me, please!
*Title: {{A|Hit me, please!}}
*Location: Rogueport, outside the Toad Bros. Bazaar.
*Location: Rogueport, outside the Toad Bros. Bazaar.
*Reward: Information.
*Reward: Information
*Objective: Mousimilian forgot his latest money-making scheme. Hit him a few times with your hammer to jog his memory. Once the therapy ends, he'll tell you that you can buy Sleepy Sheep in the Rogueport shop and sell it in Petalburg for a two-coin profit.
*Objective: Mousimilian forgot his latest money-making scheme. Hit him a few times with your hammer to jog his memory. Once the therapy ends, he'll tell you that you can buy Sleepy Sheep in the Rogueport shop and sell it in Petalburg for a two-coin profit.
===Bomberto===
===Bomberto===
*Title: I'm hungry!
*Title: {{A|I'm hungry!}}
*Location: Rogueport Harbor.
*Location: Rogueport Harbor
*Reward: 11 Coins.
*Reward: 11 Coins
*Objective: Give him some food from your inventory and he'll scarf it down and collect your reward.
*Objective: Give him some food from your inventory and he'll scarf it down and collect your reward. Example items to use are a {{TTYD Item|Dried Shroom}}, {{TTYD Item|Mushroom}}, or {{TTYD Item|Spicy Soup}}.
==After clearing Chapter 1==
==After clearing Chapter 1==
===Koopook===
===Koopook===
*Title: Try to find me!
*Title: {{A|Try to find me!}}
*Location: Hooktail Castle, on the Fifth Floor right near the room where you met Ms. Mowz.
*Location: Hooktail Castle, on the fifth floor right near the room where you met Ms. Mowz.
*Reward: Special Card.
*Reward: Special Card
*Objective: Visit Hooktail Castle and trek to the Fifth Floor, right where you found Ms. Mowz, make Koops as your partner, then talk to him and claim your reward.
*Objective: Visit Hooktail Castle and trek to the fifth floor, right where you found Ms. Mowz, make Koops as your partner, then talk to him and claim your reward.
===Mayor Kroop===
===Mayor Kroop===
*Title: Listen to me!
*Title: {{A|Listen to me!}}
*Location: Petaburg, Kroop's residence.
*Location: Petalburg, Kroop's residence.
*Reward: Turtley Leaf.
*Reward: {{TTYD Item|Turtley Leaf}}
*Objective: Listen to Kroop's musings and claim your reward.
*Objective: Listen to Kroop's musings and claim your reward.
===Plenn T.===
===Plenn T.===
*Title: Order me an item!
*Title: {{A|Order me an item!}}
*Location: Toad Bros. Bazaar.
*Location: Toad Bros. Bazaar
*Reward: Ultra Shroom.
*Reward: {{TTYD Item|Ultra Shroom}}
*Objective: Purchase 5 Courage Shells at the store in Petalburg, then give them to Plenn T. and claim your reward.
*Objective: Purchase 5 {{TTYD Item|Courage Shell}}s at the store in Petalburg, then give them to Plenn T. and claim your reward.
==After clearing Chapter 2==
==After clearing Chapter 2==
===Puni Elder===
===Puni Elder===
*Title: Emergency Shroom!
*Title: {{A|Emergency Shroom!}}
*Location: Great Tree.
*Location: Great Tree
*Reward: 60 Coins.
*Reward: 60 Coins
*Objective: Give the Puni Elder a Life Shroom and claim your reward.
*Objective: Give the Puni Elder a {{TTYD Item|Life Shroom}} and claim your reward.
===Lahla===
===Lahla===
*Title: Play with me.
*Title: {{A|Play with me.}}
*Location: Rougeport, the Pianta Parlor.
*Location: Rougeport, at the Pianta Parlor.
*Reward: 10 Piantas.
*Reward: 10 Piantas
*Objective: Talk to Lahla and claim your reward.
*Objective: Talk to Lahla and claim your reward.
===Pine T. Jr.===
===Pine T. Jr.===
*Title: Help my Daddy!
*Title: {{A|Help my Daddy!}}
*Location: Rougeport Sewers, the entrance to the Pit of 100 Trials.
*Location: Rougeport Sewers, the entrance to the Pit of 100 Trials.
*Reward: Silver Card.
*Reward: Silver Card
*Objective: Fight your way to the 18th floor, revive Pine T. Sr. and locate an emergency exit and claim your reward.
*Objective: Fight your way to the 18th floor, revive Pine T. Sr. and locate an emergency exit to claim your reward.
==After clearing Chapter 3==
==After clearing Chapter 3==
===Jolene===
===Jolene===
*Title: Help Wanted!
*Title: {{A|Help Wanted!}}
*Location: Glitzville's Glitz Pit.
*Location: Glitzville's Glitz Pit.
*Reward: 30 Coins.
*Reward: 30 Coins
*Objective: Get rid of the Battle Trunks in the Storeroom, talk to Jolene again so Goomfrey knows to expect you, then sell the Battle Trunks to Goomfrey in front of Merlon's house (Where you power up your partner) and NOT Goomther, then go back to the Glitz Pit, talk to Jolene and claim your reward.
*Objective: Get rid of the Battle Trunks in the Storeroom, talk to Jolene again so Goomfrey knows to expect you, then sell the Battle Trunks to Goomfrey in front of Merlon's house (where you power up your partner). Then go back to the Glitz Pit, talk to Jolene and claim your reward.
===Merlee===
===Merlee===
*Title: Heartful Cake Recipe...
*Title: {{A|Heartful Cake Recipe...}}
*Location: Rogueport Sewers.
*Location: Rogueport Sewers
*Reward: 30 Coins.
*Reward: 30 Coins
*Objective: Talk to Merlee, then visit Toce T. in Petalburg, next to Koops' house. She'll tell you the recipe for the Heartful Cake is Cake Mix and Ruin Powder. Pick up the Cake Mix at the Pianta Parlor, then return to Merlee's place, give Merlee the Cake Mix and claim your reward.
*Objective: Talk to Merlee, then visit Toce T. in Petalburg, next to Koops' house. She'll tell you the recipe for the Heartful Cake is Cake Mix and Ruin Powder. Pick up the Cake Mix at the Pianta Parlor, then return to Merlee's place, give Merlee the Cake Mix and claim your reward.
===Bub-ulber===
===Bub-ulber===
*Title: The food I want.
*Title: {{A|The food I want.}}
*Location: Petalburg
*Location: Petalburg
*Reward: Dried Flowers.
*Reward: {{TTYD Item|Dried Bouquet}}
*Objective: Talk to Bub-Ulber, then head up to the Hot Dog Stand in Glitzville and purchase two Hot Dogs. Pick up a Cake Mix from the Pianta Parlor and make Zess T. cook you a Mousse Cake with it. Give Bub-Ulber both Hot Dogs and the Mousse Cake then collect your reward.
*Objective: Talk to Bub-Ulber, then head up to the Hot Dog Stand in Glitzville and purchase two {{TTYD Item|Hot Dog}}s. Pick up a {{TTYD Item|Cake Mix}} from the Pianta Parlor and make Zess T. cook you a {{TTYD Item|Mousse Cake}} with it. Give Bub-Ulber both {{TTYD Item|Hot Dogs}} and the {{TTYD Item|Mousse Cake}} then collect your reward. After completing this trouble, Mario can trade Hot Dogs for more Dried Bouquets.
==After clearing Chapter 4==
==After clearing Chapter 4==
===???===
===???===
*Title: Elusive Badge!
*Title: {{A|Elusive Badge!}}
*Location: Rogueport, on the roof of Zess T.'s house.
*Location: Rogueport, on the roof of Zess T.'s house.
*Reward: Attack FX B Badge, and Ms. Mowz will join your party.
*Reward: {{TTYD Badge|Attack FX B}} Badge, and Ms. Mowz will join your party.
*Objective: Talk to the person (Ms. Mowz) who put the trouble up, then go to Hooktail's lair. Make your way to the top room (where you fought Hooktail) and blow away the wall in the middle of the room with Flurrie to reveal a treasure chest holding the Attack FX B Badge. Give the badge to Ms. Mowz. She'll let you keep the Attack FX B Badge and she'll join your party.
*Objective: Talk to the person (Ms. Mowz) who put the trouble up, then go to Hooktail's lair. Make your way to the top room (where you fought Hooktail) and blow away the wall in the middle of the room with Flurrie to reveal a treasure chest holding the Attack FX B Badge. Give the badge to Ms. Mowz. She'll let you keep the Attack FX B Badge and she'll join your party.
===Mayor Dour===
===Mayor Dour===
*Title: Newsletter...
*Title: {{A|Newsletter...}}
*Location: Twilight Town.
*Location: Twilight Town
*Reward: 30 Coins.
*Reward: 30 Coins
*Objective: Talk to Mayor Dour, then give the newsletter he gave to you to the Elder Puni at the Great Tree. She'll give you a newsletter to give to Mayor Kroop in Petalburg, who asks you to forward it back to Dour due to a nasty cold. Talk to Mayor Dour and claim your reward.
*Objective: Talk to Mayor Dour, then give the newsletter he gave to you to the Elder Puni at the Great Tree. She'll give you a newsletter to give to Mayor Kroop in Petalburg, who asks you to forward it back to Dour due to a nasty cold. Talk to Mayor Dour and claim your reward.
===Zess T.===
===Zess T.===
*Title: Seeking Legendary Book!
*Title: {{A|Seeking Legendary Book!}}
*Location: Rogueport.
*Location: Rogueport Plaza, in her house.
*Reward: Honey Shroom.
*Reward: {{TTYD Item|Honey Shroom}}
*Objective: Roll under a passageway, near the entrance to Creepy Steeple, grab the Cookbook during Chapter 4 quest. After completing your Chapter 4 quest, accept Zess T.'s trouble and give her the cookbook.
*Objective: Roll under a passageway near the entrance to the Creepy Steeple and grab the Cookbook during Chapter 4. After completing Chapter 4, accept Zess T.'s trouble and give her the cookbook.
==After clearing Chapter 5==
==After clearing Chapter 5==
===Eve===
===Eve===
*Title: Tell that person...
*Title: {{A|Tell that person...}}
*Location: Twilight Town, next door to the shop.
*Location: Twilight Town, next door to the shop.
*Reward: Meteor Meal.
*Reward: {{TTYD Item|Meteor Meal}}
*Objective: Talk to Eve, then speak to Podley at the inn in Rogueport, then return to Eve's house to get your reward.
*Objective: Talk to Eve, then speak to Podley at the inn in Rogueport, then return to Eve's house to get your reward.
===Goom Goom===
===Goom Goom===
*Title: Looking for a gal!
*Title: {{A|Looking for a gal!}}
*Location: Pirate's Grotto.
*Location: Pirate's Grotto
*Reward: Couple's Cake.
*Reward: {{TTYD Item|Couple's Cake}}
*Objective: Trek into the Pirate's Grotto, and introduce Goom Goom to Goombella. Goombella will snub his advances and Goom Goom will be driven off. Collect the rejected Couple's Cake.
*Objective: Trek into the Pirate's Grotto, and introduce Goom Goom to Goombella. Goombella will snub his advances and Goom Goom will be driven off. Collect the rejected Couple's Cake.
==After clearing Chapter 6==
==After clearing Chapter 6==
===Frankie===
===Frankie===
*Title: Important Thing!
*Title: {{A|Important Thing!}}
*Location: Rogueport, in the park.
*Location: Rogueport, in the park.
*Reward: Gold Card.
*Reward: Gold Card
*Objective: Talk to Frankie and get his missing wedding ring. It's in front of Garf's house. Give the ring to Frankie and collect your reward.
*Objective: Talk to Frankie and get his missing wedding ring. In the GameCube version, it's in front of Garf's house; In the Switch version, it is on top of the wall where Gus was fought. Give the ring to Frankie and collect your reward.
===Chef Shimi===
===Chef Shimi===
*Title: Get these ingredients!
*Title: {{A|Get these ingredients!}}
*Location: Excess Express.
*Location: Excess Express
*Reward: 40 Coins.
*Reward: 40 Coins
*Objective: Chef Shimi is looking for 3 ingredients: a Mystic Egg, a Golden Leaf and Keel Mango.
*Objective: Chef Shimi is looking for 3 ingredients: a {{TTYD Item|Mystic Egg}}, a {{TTYD Item|Golden Leaf}}, and a {{TTYD Item|Keel Mango}}.
**To get the Mystic Egg: Play Stump Petuni with Petuni.
**To get the Mystic Egg: Play Stump Petuni with Petuni in the Great Tree.
**To get the Golden Leaf: Venture to Creepy Steeple in the northern corridor go trough a hole in the fence then on the right and hammer the golden tree.
**To get the Golden Leaf: Venture to Creepy Steeple. In the northern outside corridor, go trough a hole in the fence then on the right and hammer the golden tree.
**To get the Keel Mango: Whack a palm tree on Keelhaul. There are few near the blue pipe.
**To get the Keel Mango: Whack a palm tree on Keelhaul Key in the first area after the camp.
After getting the ingredients, give them to Shimi and collect your reward.
After getting the ingredients, give them to Shimi and collect your reward.
===Toodles===
===Toodles===
*Title: I must have that book.
*Title: {{A|I must have that book.}}
*Location: Poshley Heights. Pink house near the train station.
*Location: Poshley Heights. Pink house near the train station.
*Reward: Platium Card.
*Reward: Platinum Card
*Objective: Visit Toodles' house to for your assignment: Toodles lent a book to Jolene in Glitzville and it's your job to get it. Take the train to Rogueport and ride the blimp to Glitzville. Visit the manager's office and get the wrestling magazine. Deliver the book to Toodles and get the Platinum Card.
*Objective: Visit Toodles' house to for your assignment: Toodles lent a book to Jolene in Glitzville and it's your job to get it. Take the train to Rogueport and ride the blimp to Glitzville. Visit the manager's office and get the wrestling magazine. Deliver the book to Toodles and get the Platinum Card.
===Ratooey Buisnessman===
===Ratooey Buisnessman===
*Title: Security Code...
*Title: {{A|Security Code...}}
*Location: Glitzville.
*Location: Glitzville
*Reward: Hot Sauce.
*Reward: {{TTYD Item|Hot Sauce}}
*Objective: The businessman from the Excess Express has forgotten the combination to his briefcase. Visit the following places: Kroop's house (2), Flurrie's house (6), Don Pianta's office (2) and Toodles' house (5). Tell him the code is 2625 and claim your reward.
*Objective: The businessman from the Excess Express has forgotten the combination to his briefcase. Visit the following places: Kroop's house (2), Flurrie's house (6), Don Pianta's office (2) and Toodles' house (5). Tell him the code is 2625 and claim your reward.
==After clearing Chapter 7==
==After clearing Chapter 7==
===Goldbob===
===Goldbob===
*Title: Delivery, please!
*Title: {{A|Delivery, please!}}
*Location: Poshley Heights.
*Location: Poshley Heights
*Reward: 64 Coins.
*Reward: 64 Coins
*Objective: Goldbob wants you to deliver a package to General White. Go to Fahr Outpost and speak to the Bob-omb in the General's house. He'll tell you he's in Rogueport. Podley will tell you he's in Glitzville. Go to Glitzville and chat with the Juice Bar owner. Return to Poshley Heights and talk to Goldbob, then return to Fahr Outpost to wake up the General. Give the package to the General and return to Poshley Heights to claim your reward.
*Objective: Goldbob wants you to deliver a package to General White. Go to Fahr Outpost and speak to the Bob-omb in the General's house. He'll tell you he's in Rogueport. Podley will tell you he's in Glitzville. Go to Glitzville and chat with the Juice Bar owner Podler. Return to Poshley Heights and talk to Goldbob, then return to Fahr Outpost to wake up the General. Give the package to the General and return to Poshley Heights to claim your reward.
===Gob===
===Gob===
*Title: I can't speak!
*Title: {{A|I can't speak!}}
*Location: Fahr Outpost, behind the inn.
*Location: Fahr Outpost, behind the inn
*Reward: 20 Coins.
*Reward: 20 Coins
*Objective: Give him honey candy and he'll be able to speak again.
*Objective: Give him {{TTYD Item|Honey Candy}} and he'll be able to speak again.
===Toadia===
===Toadia===
*Title: I wanna meet Luigi!
*Title: {{A|I wanna meet Luigi!}}
*Location: Poshley Heights, right near the Sanctum.
*Location: Poshley Heights, right near the Sanctum.
*Reward: Choco Cake.
*Reward: {{TTYD Item|Choco Cake}}
*Objective: Grab the L Emblem from the Poshley Sanctum, put it on and watch the chaos start.
*Objective: Grab the {{TTYD Badge|L Emblem}} from the Poshley Sanctum. Enable the badge and speak with Toadia for your reward.
==After clearing all Chapters==
==After clearing all Chapters==
===Doe T.===
===Doe T.===
*Title: Roust these cads!
*Title: {{A|Roust these cads!}}
*Location: Boggly Woods.
*Location: Boggly Woods
*Reward: 20 Coins.
*Reward: 20 Coins
*Objective: Kill all the enemies in the Boggly Woods blocking Doe T.'s path to the Great Tree.
*Objective: Defeat all the enemies in the Boggly Woods blocking Doe T.'s path to the Great Tree.
===Bub===
===Bub===
*Title: Help me make up.
*Title: {{A|Help me make up.}}
*Location: Poshley Heights.
*Location: Poshley Heights
*Reward: 3 Coins.
*Reward: 3 Coins
*Objective: Bub needs you to deliver either a Shroom Cake, a Keel Mango or a Fright Mask to his mom, as well as a touching apology. Give the gift to Sylvia, then return to Bub to get your reward.
*Objective: Bub needs you to deliver either a {{TTYD Item|Shroom Cake}}, a {{TTYD Item|Keel Mango}}, or a {{TTYD Item|Fright Mask}} to his mom, as well as a touching apology. Give the gift to Sylvia, then return to Bub to get your reward.
===Swob===
===Swob===
*Title: Erase that graffiti!
*Title: {{A|Erase that graffiti!}}
*Location: Fahr Outpost, next to the cannon statue.
*Location: Fahr Outpost, next to the cannon statue.
*Reward: Snow Bunny.
*Reward: {{TTYD Item|Snow Bunny}}
*Objective: Talk to Swob in Fahr Outpost and then, go to Level 50 of the Pit of 100 Trials and use Bobbery to blow up the graffiti. Return to Fahr Outpost to claim your reward.
*Objective: Talk to Swob in Fahr Outpost and then, go to Level 50 of the [[Paper Mario: The Thousand-Year Door/Pit of 100 Trials|Pit of 100 Trials]] and use Bobbery to blow up the graffiti. Return to Fahr Outpost to claim your reward.
{{Footer Nav|game=Paper Mario: The Thousand-Year Door|prevpage=Recipes|nextpage=Pit of 100 Trials}}
Latest revision as of 03:55, 3 June 2024
cleanup
This article could use a cleanup
in order to be more legible and/or presentable. Please help improve this article in any way possible. Remember to follow our editing guidelines when improving existing articles. If you can improve this page, please edit it, or help by discussing possible changes on the talk page.
If you need help with wiki markup, see the wiki markup page. If you want to try out wiki markup without damaging a page, why not use the sandbox?
The Trouble Center is a series of small objectives for Mario to complete, usually transporting items or talking with certain characters. It is located on the east side of Rogueport and can be accessed at any time. Only one trouble can be taken on from the Trouble Center at a time, and it costs 30 coins to cancel any trouble undertaken.
Mario also has the ability to get into the back of the Trouble Center by slipping behind the house and using Flurrie's wind to blow off a secret panel, revealing a door. There is nothing notable inside.
The Nintendo Switch version introduces Ian Foomus, a Mouser who will give hints on how to solve troubles for a cost.
Objective: Meet Garf outside his house and he'll tell you where he dropped his key: outside the Lovely Howz of Badges. To reach it, head into the inn, and climb to the second floor. Exit by the left door and collect the key from in front of the Lovely Howz of Badges. Return the give it to Garf.
Objective: Talk to McGoomba in the Alley in Rogueport Plaza. He'll give you a package that's for Goomfrey. Give the package to Goomfrey, loitering outside Prof. Frankly's place, then return to McGoomba to claim your reward.
Location: Rogueport, outside the Toad Bros. Bazaar.
Reward: 20 Coins
Objective: Talk to Arfur and go to Plenn T.'s store to get the prices on 3 items: Tasty Tonic (3 coins), Fire Flower (10 coins) and Sleepy Sheep (8 coins). Tell Arfur your findings and collect your reward.
Objective: Goomther has been defrauded by Larson the Bandit. Talk to Goomther, then go in search of Larson. You'll first find him in the alley behind Merlon and Prof. Frankly's houses, and he'll flee. Talk to Goomther again and continue your search. You'll find him in the docks and he'll flee again. Corner him at his hideout in the alley, behind the inn and collect your reward.
Location: Rogueport, outside the Toad Bros. Bazaar.
Reward: Information
Objective: Mousimilian forgot his latest money-making scheme. Hit him a few times with your hammer to jog his memory. Once the therapy ends, he'll tell you that you can buy Sleepy Sheep in the Rogueport shop and sell it in Petalburg for a two-coin profit.
Objective: Give him some food from your inventory and he'll scarf it down and collect your reward. Example items to use are a Dried Shroom, Mushroom, or Spicy Soup.
Location: Hooktail Castle, on the fifth floor right near the room where you met Ms. Mowz.
Reward: Special Card
Objective: Visit Hooktail Castle and trek to the fifth floor, right where you found Ms. Mowz, make Koops as your partner, then talk to him and claim your reward.
Objective: Get rid of the Battle Trunks in the Storeroom, talk to Jolene again so Goomfrey knows to expect you, then sell the Battle Trunks to Goomfrey in front of Merlon's house (where you power up your partner). Then go back to the Glitz Pit, talk to Jolene and claim your reward.
Objective: Talk to Merlee, then visit Toce T. in Petalburg, next to Koops' house. She'll tell you the recipe for the Heartful Cake is Cake Mix and Ruin Powder. Pick up the Cake Mix at the Pianta Parlor, then return to Merlee's place, give Merlee the Cake Mix and claim your reward.
Objective: Talk to Bub-Ulber, then head up to the Hot Dog Stand in Glitzville and purchase two Hot Dogs. Pick up a Cake Mix from the Pianta Parlor and make Zess T. cook you a Mousse Cake with it. Give Bub-Ulber both Hot DogsHot Dogs and the Mousse Cake then collect your reward. After completing this trouble, Mario can trade Hot Dogs for more Dried Bouquets.
Location: Rogueport, on the roof of Zess T.'s house.
Reward: Attack FX B Badge, and Ms. Mowz will join your party.
Objective: Talk to the person (Ms. Mowz) who put the trouble up, then go to Hooktail's lair. Make your way to the top room (where you fought Hooktail) and blow away the wall in the middle of the room with Flurrie to reveal a treasure chest holding the Attack FX B Badge. Give the badge to Ms. Mowz. She'll let you keep the Attack FX B Badge and she'll join your party.
Objective: Talk to Mayor Dour, then give the newsletter he gave to you to the Elder Puni at the Great Tree. She'll give you a newsletter to give to Mayor Kroop in Petalburg, who asks you to forward it back to Dour due to a nasty cold. Talk to Mayor Dour and claim your reward.
Objective: Roll under a passageway near the entrance to the Creepy Steeple and grab the Cookbook during Chapter 4. After completing Chapter 4, accept Zess T.'s trouble and give her the cookbook.
Objective: Trek into the Pirate's Grotto, and introduce Goom Goom to Goombella. Goombella will snub his advances and Goom Goom will be driven off. Collect the rejected Couple's Cake.
Objective: Talk to Frankie and get his missing wedding ring. In the GameCube version, it's in front of Garf's house; In the Switch version, it is on top of the wall where Gus was fought. Give the ring to Frankie and collect your reward.
To get the Mystic Egg: Play Stump Petuni with Petuni in the Great Tree.
To get the Golden Leaf: Venture to Creepy Steeple. In the northern outside corridor, go trough a hole in the fence then on the right and hammer the golden tree.
To get the Keel Mango: Whack a palm tree on Keelhaul Key in the first area after the camp.
After getting the ingredients, give them to Shimi and collect your reward.
Location: Poshley Heights. Pink house near the train station.
Reward: Platinum Card
Objective: Visit Toodles' house to for your assignment: Toodles lent a book to Jolene in Glitzville and it's your job to get it. Take the train to Rogueport and ride the blimp to Glitzville. Visit the manager's office and get the wrestling magazine. Deliver the book to Toodles and get the Platinum Card.
Objective: The businessman from the Excess Express has forgotten the combination to his briefcase. Visit the following places: Kroop's house (2), Flurrie's house (6), Don Pianta's office (2) and Toodles' house (5). Tell him the code is 2625 and claim your reward.
Objective: Goldbob wants you to deliver a package to General White. Go to Fahr Outpost and speak to the Bob-omb in the General's house. He'll tell you he's in Rogueport. Podley will tell you he's in Glitzville. Go to Glitzville and chat with the Juice Bar owner Podler. Return to Poshley Heights and talk to Goldbob, then return to Fahr Outpost to wake up the General. Give the package to the General and return to Poshley Heights to claim your reward.
Objective: Bub needs you to deliver either a Shroom Cake, a Keel Mango, or a Fright Mask to his mom, as well as a touching apology. Give the gift to Sylvia, then return to Bub to get your reward.
Objective: Talk to Swob in Fahr Outpost and then, go to Level 50 of the Pit of 100 Trials and use Bobbery to blow up the graffiti. Return to Fahr Outpost to claim your reward.

 Tasty Tonic (3 coins),
  Fire Flower (10 coins) and
  Sleepy Sheep (8 coins). Tell Arfur your findings and collect your reward.
 Dried Shroom,
  Mushroom, or
  Spicy Soup.
 Turtley Leaf
 Ultra Shroom
 Courage Shells at the store in Petalburg, then give them to Plenn T. and claim your reward.
 Life Shroom and claim your reward.
 Dried Bouquet
 Hot Dogs. Pick up a
  Cake Mix from the Pianta Parlor and make Zess T. cook you a
  Mousse Cake with it. Give Bub-Ulber both Hot Dogs Hot Dogs and the
 Attack FX B Badge, and Ms. Mowz will join your party.
 Honey Shroom
 Meteor Meal
 Couple's Cake
 Mystic Egg, a
  Golden Leaf, and a
  Keel Mango.
 Hot Sauce
 Honey Candy and he'll be able to speak again.
 Choco Cake
 L Emblem from the Poshley Sanctum. Enable the badge and speak with Toadia for your reward.
 Shroom Cake, a
  Fright Mask to his mom, as well as a touching apology. Give the gift to Sylvia, then return to Bub to get your reward.
 Snow Bunny