From StrategyWiki, the video game walkthrough and strategy guide wiki
Jump to navigation Jump to search
(Enemies)
 
(Added official names, sourced from the official Japanese Metafight Strategy Guide. Thanks to Codiekitty for helping me obtain these!)
Line 1: Line 1:
{{Header Nav|game=Blaster Master}}


Line 5: Line 7:
== Outdoor enemies ==
{| {{prettytable}}
{| {{prettytable}}
! width="50%" | Jumpers || Twisters
! width="50%" | {{nihongo|Default|デフォルト}} and {{nihongo|Blackfoot|ブラックフット}} || {{nihongo|Eyelet|アイレット}} and {{nihongo|Neo Eyelet|ネオアイレット}}
|-
|-
| [[File:Blaster Master enemy jumper.gif|left]][[File:Blaster Master enemy jumper2.gif|right]] Jumpers are a basic type of enemy that plods back and forth until SOPHIA or Jason get close to them.  When they come in range, they begin to jump towards you in an effort to stomp you.
| [[File:Blaster Master enemy jumper.gif|left]][[File:Blaster Master enemy jumper2.gif|right]] Default and Blackfoot are basic enemies that plod back and forth until SOPHIA or Jason get close to them.  When they come in range, they begin to jump towards you in an effort to stomp you.
| [[File:Blaster Master enemy twister.gif|left]][[File:Blaster Master enemy twister red.gif|right]] Twisters fly very quickly across the screen in a wave pattern.  Because they move so fast, they are often hard to hit.  Gray twisters frequently leave Hover capsules behind and appear constantly in certain sections in order to allow you to refuel SOPHIA's Hover engines.  Red Twisters appear in {{~|Area 7}} and take more shots to destroy.
| [[File:Blaster Master enemy twister.gif|left]][[File:Blaster Master enemy twister red.gif|right]] Eyelets fly very quickly across the screen in a wave pattern.  Because they move so fast, they are often hard to hit.  Gray twisters frequently leave Hover capsules behind and appear constantly in certain sections in order to allow you to refuel SOPHIA's Hover engines.  Neo Eyelets appear in {{~|Area 7}} and take more shots to destroy.
|-
|-
! Bombers || Wall-walkers
! {{nihongo|Bellbomber|ベルボマー}} || {{nihongo|Sunami|スナミ}} and {{nihongo|Neo Sunami|ネオスナミ}}
|-
|-
| [[File:Blaster Master enemy bomber.gif|left]] Bombers will fly very quickly across the screen until they are directly above SOPHIA or Jason.  Then they will open their hatch and release a bomb which drops to the ground, before flying straight up into the air in order to get away.
| [[File:Blaster Master enemy bomber.gif|left]] Bellbombers will fly very quickly across the screen until they are directly above SOPHIA or Jason.  Then they will open their hatch and release a bomb which drops to the ground, before flying straight up into the air in order to get away.
| [[File:Blaster Master enemy wall-walker.gif|left]][[File:Blaster Master enemy wall-walker red.gif|right]] Wall-walkers remain stuck to the surface or platform that they are walking on, clinging to the sides and even the ceiling as they walk.  However, when SOPHIA or Jason crosses their path, they immediately fling themselves across a room in an effort to crash into you.  Red Wall-walkers appear on {{~|Area 7}} and take more shots to destroy.
| [[File:Blaster Master enemy wall-walker.gif|left]][[File:Blaster Master enemy wall-walker red.gif|right]] Sunamies remain stuck to the surface or platform that they are walking on, clinging to the sides and even the ceiling as they walk.  However, when SOPHIA or Jason crosses their path, they immediately fling themselves across a room in an effort to crash into you.  Neo Sunamies appear on {{~|Area 7}} and take more shots to destroy.
|-
|-
! Ceiling turret || Gunner
! {{nihongo|Offside|オフサイド}} || {{nihongo|Cave Guard|ケイブカード}}
|-
|-
| [[File:Blaster Master enemy ceiling turret.gif|left]] Ceiling turrets alternate between periods of dormancy, and periods of spraying bullets to either side.  The bullets settle down to the ground below.  The turrets take quite a few shots to destroy, and typically leave Hover capsules behind.
| [[File:Blaster Master enemy ceiling turret.gif|left]] Offsides alternate between periods of dormancy, and periods of spraying bullets to either side.  The bullets settle down to the ground below.  They take quite a few shots to destroy, and typically leave Hover capsules behind.
| [[File:Blaster Master enemy gunner.gif|left]] Gunners have a very basic behavior, patrolling to the left and right in search of intruders.  If they spot one ahead of them, they begin firing a large gun.  The bullets from this gun have the ability to block SOPHIA's cannon shots, so wait for the Gunners to finish shooting, or shoot them from behind to destroy them.
| [[File:Blaster Master enemy gunner.gif|left]] Cave Guards have a very basic behavior, patrolling to the left and right in search of intruders.  If they spot one ahead of them, they begin firing a large gun.  The bullets from this gun have the ability to block SOPHIA's cannon shots, so wait for the Cave Guards to finish shooting, or shoot them from behind to destroy them.
|-
|-
! Floaters || Jellies
! {{nihongo|Random|ランダム}} and {{nihongo|False|ファルス}} || {{nihongo|Moeba|メーバ}}
|-
|-
| [[File:Blaster Master enemy floater.gif|left]][[File:Blaster Master enemy floater2.gif|right]] Floaters hover around particular regions of certain areas.  They drift in one direction until they hit a wall, and ricochet off of it.  While the float aimlessly around, they will shoot small bullets at SOPHIA with great accuracy.  Shoot them down before they have the chance.
| [[File:Blaster Master enemy floater.gif|left]][[File:Blaster Master enemy floater2.gif|right]] Randoms and Falses hover around particular regions of certain areas.  They drift in one direction until they hit a wall, and ricochet off of it.  While they float aimlessly around, they will shoot small bullets at SOPHIA with great accuracy.  Shoot them down before they have the chance.
| [[File:Blaster Master enemy jelly.gif|left]] You will find these aquatic life forms in the small lakes of {{~|Area 1}}.  They propel themselves upward before slowly drifting back down to the bottom of the water.  You will typically encounter them while swimming about without the protection of SOPHIA, so approach them carefully.
| [[File:Blaster Master enemy jelly.gif|left]] You will find these aquatic life forms in the small lakes of {{~|Area 1}}.  They propel themselves upward before slowly drifting back down to the bottom of the water.  You will typically encounter them while swimming about without the protection of SOPHIA, so approach them carefully.
|-
|-
! Mines || Domes
! {{nihongo|Claymore|クレイモア}} || {{nihongo|Exor|エックスオア}}
|-
|-
| [[File:Blaster Master enemy mine.gif|left]] Mines lay still on the ground where they have been placed.  Because they are so small, it is not possible to shoot one in front of SOPHIA using the cannon.  Instead, you must either shoot them while jumping or falling, or you must have Jason exit SOPHIA and clear them away using his gun.  You can also ignore them if it's easy enough to avoid them, but they often provide Power capsules when destroyed.
| [[File:Blaster Master enemy mine.gif|left]] Claymores lay still on the ground where they have been placed.  Because they are so small, it is not possible to shoot one in front of SOPHIA using the cannon.  Instead, you must either shoot them while jumping or falling, or you must have Jason exit SOPHIA and clear them away using his gun.  You can also ignore them if it's easy enough to avoid them, but they often provide Power capsules when destroyed.
| [[File:Blaster Master enemy dome.gif|left]] Domes may differ in appearance from Wall-walkers, but their behavior is identical; they cling to the surface of whatever they happen to be moving along, letting go only to fly across an area in an effort to crash into you.
| [[File:Blaster Master enemy dome.gif|left]] Exors may differ in appearance from Sunamies, but their behavior is identical; they cling to the surface of whatever they happen to be moving along, letting go only to fly across an area in an effort to crash into you.
|-
|-
! Worms || Worm pods
! {{nihongo|Hellworm|ヘルワーム}} and {{nihongo|Neoworm|ネオワーム}} || {{nihongo|Interrupt|インタラプト}}
|-
|-
| [[File:Blaster Master enemy worm.gif|left]][[File:Blaster Master enemy worm red.gif|right]] Worms crawl around on the ground and seek out a path to SOPHIA.  Like mines, they are very low to the ground, so you can't hit them with SOPHIA's cannon when you are on the same level as one.  Homing Missiles are very effective at removing these nuisances, but you must remember to jump in the air before firing them, or the missiles will hover harmlessly over the worm.  Red worms are similar to gray worms, except that they can leap higher, and in doing so, reach higher platforms.
| [[File:Blaster Master enemy worm.gif|left]][[File:Blaster Master enemy worm red.gif|right]] Hellworms crawl around on the ground and seek out a path to SOPHIA.  Like mines, they are very low to the ground, so you can't hit them with SOPHIA's cannon when you are on the same level as one.  Homing Missiles are very effective at removing these nuisances, but you must remember to jump in the air before firing them, or the missiles will hover harmlessly over the worm.  Neoworms are similar to Hellworms, except that they can leap higher, and in doing so, reach higher platforms.
| [[File:Blaster Master enemy worm drop.gif|left]] Worm pods are devices which wait for SOPHIA or Jason to walk beneath them before opening up and dropping a single red worm to the ground below.  They take a few shots to destroy, but it's worth taking the time to do so in order to avoid the added trouble that a red worm brings to any situation.
| [[File:Blaster Master enemy worm drop.gif|left]] Interrupts are devices which wait for SOPHIA or Jason to walk beneath them before opening up and dropping a single Neoworm to the ground below.  They take a few shots to destroy, but it's worth taking the time to do so in order to avoid the added trouble that a red worm brings to any situation.
|-
|-
! Insect || Ship
! {{nihongo|Hummel|フンメル}} || {{nihongo|Larha|ラーハ}}
|-
|-
| [[File:Blaster Master enemy insect.gif|left]] Insects are very basic enemies that flutter through the air in a manner similar to the way Jellies move through water.  They lazily drift down until they give themselves a sudden boost and climb higher.  They also shoot at SOPHIA like Floaters do.
| [[File:Blaster Master enemy insect.gif|left]] Hummels are very basic enemies that flutter through the air in a manner similar to the way Moebas move through water.  They lazily drift down until they give themselves a sudden boost and climb higher.  They also shoot at SOPHIA like Randoms and Falses do.
| [[File:Blaster Master enemy ship.gif|left]] Ships fly to the left and right in straight lines, shooting at SOPHIA with a good degree of accuracy as they move.  They aren't particularly fast, but they're big and they take a few shots to destroy.  There aren't many of these to discover in the game.
| [[File:Blaster Master enemy ship.gif|left]] Larhas fly to the left and right in straight lines, shooting at SOPHIA with a good degree of accuracy as they move.  They aren't particularly fast, but they're big and they take a few shots to destroy.  There aren't many of these to discover in the game.
|-
|-
! Skulls || Orbs
! {{nihongo|Header|ヘッダー}} and {{nihongo|Neo Header|ネオヘッダー}} || {{nihongo|Stuka|スツーカ}} and {{nihongo|Wespe|ヴェスペ}}
|-
|-
| [[File:Blaster Master enemy skull.gif|left]] Despite their scarier appearance, Skulls behave just like Bombers.  They fly over an area until they are directly above SOPHIA or Jason, and they release a bomb to the ground below.  The only difference is that Skulls are often contained in hallways with ceilings that prevent their escape, so they typically re-engage after a brief pause.
| [[File:Blaster Master enemy skull.gif|left]] Despite their scarier appearance, Headers behave just like Bellbombers.  They fly over an area until they are directly above SOPHIA or Jason, and they release a bomb to the ground below.  The only difference is that Headers are often contained in hallways with ceilings that prevent their escape, so they typically re-engage after a brief pause. Stronger variants known as Neo Headers appear in Area 7.
| [[File:Blaster Master enemy orb.gif|left]][[File:Blaster Master enemy orb2.gif|right]] Orbs actually have two different types of behaviors.  Some Orbs move about freely until they detect SOPHIA or Jason in their vicinity, and then they quickly rush in to collide with them.  Other Orbs move back and forth between two walls, occasionally adjusting their vertical position before continuing on with their patrol.  This second type of orb does not rush into SOPHIA like the first one does.
| [[File:Blaster Master enemy orb.gif|left]][[File:Blaster Master enemy orb2.gif|right]] Stuka and Wespe, while similar, actually have two different types of behaviors.  Stukas move about freely until they detect SOPHIA or Jason in their vicinity, and then they quickly rush in to collide with them.  Wespes move back and forth between two walls, occasionally adjusting their vertical position before continuing on with their patrol.
|-
|-
! Runners || Armadillos
! {{nihongo|Ball Carry|ボールキャリー}} || {{nihongo|Dump|ダンプ}}
|-
|-
| [[File:Blaster Master enemy runner.gif|left]] Runners start off dormant.  They wait until SOPHIA or Jason get close.  Then they remove their lid and scatter bombs across the floor.  After they have released their bombs, they take off and begin running in a direction away from SOPHIA.  However, they are likely to hit walls and come running back at you, so be prepared to jump or shoot.
| [[File:Blaster Master enemy runner.gif|left]] Ball Carries start off dormant.  They wait until SOPHIA or Jason get close.  Then they remove their lid and scatter bombs across the floor.  After they have released their bombs, they take off and begin running in a direction away from SOPHIA.  However, they are likely to hit walls and come running back at you, so be prepared to jump or shoot.
| [[File:Blaster Master enemy armadillo.gif|left]] The Armadillo-type enemies roll across the floor, bouncing off walls and falling down to platforms below when they reach gaps.  When they get within range of SOPHIA, they stop and open the top hatch, and lob bombs at SOPHIA before continuing on with their patrol.
| [[File:Blaster Master enemy armadillo.gif|left]] Dumps roll across the floor, bouncing off walls and falling down to platforms below when they reach gaps.  When they get within range of SOPHIA, they stop and open their top hatch, and lob bombs at SOPHIA before continuing on with their patrol.
|-
|-
! Ceiling orbs || Hands
! {{nihongo|Ballbot|バルバット}} || {{nihongo|Mad Hand|マッドハンド}}
|-
|-
| [[File:Blaster Master enemy ceiling orb.gif|left]] Ceiling orbs cling to the ceiling until SOPHIA gets close enough for them to attack.  When this happens, they let go of the ceiling and fly through the air in a looping pattern.  After a time, they will return to the ceiling and wait there for SOPHIA to pass close by again.
| [[File:Blaster Master enemy ceiling orb.gif|left]] Ceiling orbs cling to the ceiling until SOPHIA gets close enough for them to attack.  When this happens, they let go of the ceiling and fly through the air in a looping pattern.  After a time, they will return to the ceiling and wait there for SOPHIA to pass close by again.
| [[File:Blaster Master enemy hand.gif|left]] The enemies which appear as disembodied hands remain motionless on particular platforms until SOPHIA gets close.  When they are triggered, they begin tossing bombs out.  The bombs roll across the platform toward SOPHIA until they explode.
| [[File:Blaster Master enemy hand.gif|left]] The enemies which appear as disembodied hands remain motionless on particular platforms until SOPHIA gets close.  When they are triggered, they begin tossing bombs out.  The bombs roll across the platform toward SOPHIA until they explode.
|-
|-
! Fish || Snails
! {{nihongo|Hell Diver|ヘルダイバー}} || {{nihongo|Ammonaga|アンモナーガ}}
|-
|-
| [[File:Blaster Master enemy fish.gif|left]] The Fish enemies are the basic type of enemy that you encounter underwater throughout {{~|Area 5}}.  They swim rather slowly, but they move towards you with a lot of determination.  They also shoot small bullets at Jason as you swim by them.  Clear them away before trying to proceed.
| [[File:Blaster Master enemy fish.gif|left]] Hell Divers are the basic type of enemy that you encounter underwater throughout {{~|Area 5}}.  They swim rather slowly, but they move towards you with a lot of determination.  They also shoot small bullets at Jason as you swim by them.  Clear them away before trying to proceed.
| [[File:Blaster Master enemy snail.gif|left]] Snails sit on platforms or at the bottom of a room beneath the water in {{~|Area 5}}.  They remain still until Jason or SOPHIA is level with them.  Then they suddenly take off and scuttle over towards you.  If they run off a platform, they fall down to the ground below and set up for their next encounter with you.
| [[File:Blaster Master enemy snail.gif|left]] Ammonagas sit on platforms or at the bottom of a room beneath the water in {{~|Area 5}}.  They remain still until Jason or SOPHIA is level with them.  Then they suddenly take off and scuttle over towards you.  If they run off a platform, they fall down to the ground below and set up for their next encounter with you.
|-
|-
! Shark || Boulder
! {{nihongo|Buloba|ブローバ}} || {{nihongo|Morning Star|モーニングスター}}
|-
|-
| [[File:Blaster Master enemy shark.gif|left]] Sharks are very similar to ships; they are large, move back and forth, and their aren't many of them.  You'll have to be on the look-out for them while you swim through {{~|Area 5}}, but they don't veer off course, so you can ignore them once you study their movements.
| [[File:Blaster Master enemy shark.gif|left]] Bulobas are very similar to Larhas; they are large, move back and forth, and their aren't many of them.  You'll have to be on the look-out for them while you swim through {{~|Area 5}}, but they don't veer off course, so you can ignore them once you study their movements.
| [[File:Blaster Master enemy boulder.gif|left]] Boulders sit motionless on certain platforms in {{~|Area 5}}.  Like Hands, they release bombs if SOPHIA or Jason swim close enough to trigger a reaction.  Get in close and destroy them, but avoid the bombs the fling.
| [[File:Blaster Master enemy boulder.gif|left]] Morning Stars sit motionless on certain platforms in {{~|Area 5}}.  Like Mad Hands, they release bombs if SOPHIA or Jason swim close enough to trigger a reaction.  Get in close and destroy them, but avoid the bombs the fling.
|}
|}


== Indoor enemies ==
{| {{prettytable}}
{| {{prettytable}}
! width="50%" | Walkers || Wavers
! width="50%" | {{nihongo|GX-680|GX-680}} and {{nihongo|GX-680S|GX-680S}} || {{nihongo|Binary|バイナリー}}
|-
|-
| [[File:Blaster Master enemy walker.gif|left]][[File:Blaster Master enemy walker red.gif|right]] Walkers are a typical basic enemy encounter while wandering throughout many interiors.  They constantly walk towards Jason, and will collide with him if he stands still for too long.  Destroy them as quickly as you can, but watch out for any shots that they may fire at you.
| [[File:Blaster Master enemy walker.gif|left]][[File:Blaster Master enemy walker red.gif|right]] GX-680s are a typical basic enemy encounter while wandering throughout many interiors.  They constantly walk towards Jason, and will collide with him if he stands still for too long.  Destroy them as quickly as you can, but watch out for any shots that they may fire at you. The red variety is known as GX-680S.
| [[File:Blaster Master enemy waver.gif|left]] Wavers move across interiors in a manner very similar to the way Twisters fly across the screen outside.  They appear on one side, and cross the room in a wave pattern.  They tend to appear continuously, so be prepared to deal with more of them after you find one.
| [[File:Blaster Master enemy waver.gif|left]] Binaries move across interiors in a manner very similar to the way Eyelets fly across the screen outside.  They appear on one side, and cross the room in a wave pattern.  They tend to appear continuously, so be prepared to deal with more of them after you find one.
|-
|-
! Dashers || Heads
! {{nihongo|Drap|ドラップ}} || {{nihongo|Bios|バイオス}}
|-
|-
| [[File:Blaster Master enemy dasher.gif|left]] Dashers are like motion sensors.  When you walk across their line of sight, they dash towards Jason in an attempt to collide with him.  Dashers only dash up and down, or left and right, never both.  It's usually obvious which way Dashers move, but it can sometimes be tricky to make that determination, so use caution.
| [[File:Blaster Master enemy dasher.gif|left]] Draps are like motion sensors.  When you walk across their line of sight, they dash towards Jason in an attempt to collide with him.  Draps only dash up and down, or left and right, never both.  It's usually obvious which way Draps move, but it can sometimes be tricky to make that determination, so use caution.
| [[File:Blaster Master enemy head.gif|left]] Giant heads float around in particular rooms.  They always hover in Jason's direction, but they never shoot.  Bombard them with a series of grenades to destroy them as quickly as possible.  When destroyed, they always leave behind Multi-Warhead Missile ammunition for SOPHIA.
| [[File:Blaster Master enemy head.gif|left]] Bioses float around in particular rooms.  They always hover in Jason's direction, but they never shoot.  Bombard them with a series of grenades to destroy them as quickly as possible.  When destroyed, they always leave behind Multi-Warhead Missile ammunition for SOPHIA.
|-
|-
! Spiral || Sentry
! {{nihongo|Manji|マンジ}} || {{nihongo|Hanilite|ハニリイト}}
|-
|-
| [[File:Blaster Master enemy spiral.gif|left]] Spirals remain stationary in particular locations.  As you approach them, they release up to four bullets that fan out away from the Spiral in a circular motion.  You have to time your approach in order to avoid these bullets.  They tend to leave Gun capsules behind when destroyed.
| [[File:Blaster Master enemy spiral.gif|left]] Manjis remain stationary in particular locations.  As you approach them, they release up to four bullets that fan out away from the Manji in a circular motion.  You have to time your approach in order to avoid these bullets.  They tend to leave Gun capsules behind when destroyed.
| [[File:Blaster Master enemy sentry.gif|left]] Like Spirals, Sentries sit motionless on the ground.  They won't even attack unless you attack them first.  If they are hit with a bullet or grenade, they release a spread of bullets that fans outward.  You can choose to ignore them, but if you do fight them, it's best to remove them with grenades.
| [[File:Blaster Master enemy sentry.gif|left]] Like Manjis, Hanilites sit motionless on the ground.  They won't even attack unless you attack them first.  If they are hit with a bullet or grenade, they release a spread of bullets that fans outward.  You can choose to ignore them, but if you do fight them, it's best to remove them with grenades.
|-
|-
! Teleporters || Eyeballs
! {{nihongo|Druis|ドルイース}} || {{nihongo|Peeper|ピーパ}}
|-
|-
| [[File:Blaster Master enemy teleporter.gif|left]] Teleporters start out motionless like statues. However, after a short pause, they shed their outer protective layer to begin warping from one location to another.  They are only vulnerable to your attack when they are green and moving.  It is not possible to damage them when they return to their gray form.
| [[File:Blaster Master enemy teleporter.gif|left]] Druises start out motionless like statues. However, after a short pause, they shed their outer protective layer to begin warping from one location to another.  They are only vulnerable to your attack when they are green and moving.  It is not possible to damage them when they return to their gray form.
| [[File:Blaster Master enemy eye.gif|left]] There are two types of eyeballs; Eyeballs whose positions are predetermined and remain in place until they are destroyed, and eyeballs which are part of roaming swarms which cross the screen.  Regardless of which type you encounter, its in your best interest to destroy them as quickly as possible.  Their unpredictable nature makes them a threat to both your health, and the preservation of your gun power.
| [[File:Blaster Master enemy eye.gif|left]] There are two types of Peepers; Peepers whose positions are predetermined and remain in place until they are destroyed, and eyeballs which are part of roaming swarms which cross the screen.  Regardless of which type you encounter, its in your best interest to destroy them as quickly as possible.  Their unpredictable nature makes them a threat to both your health, and the preservation of your gun power.
|-
|-
! Cannons || Lasers
! {{nihongo|Crossfighter|クロスファイター}} || {{nihongo|Laser Guard|レーザーガード}}
|-
|-
| [[File:Blaster Master enemy cannon.gif|left]] Cannons are motionless objects which fire pairs of bullets.  The bullet alternate between up and down, and left and right.  Because they don't move, it's easy enough to stand to the side and destroy them with your own guns or grenades.  They have a tendency to leave Gun capsules behind when destroyed.
| [[File:Blaster Master enemy cannon.gif|left]] Crossfighters are motionless objects which fire pairs of bullets.  The bullets alternate between up and down, and left and right.  Because they don't move, it's easy enough to stand to the side and destroy them with your own guns or grenades.  They have a tendency to leave Gun capsules behind when destroyed.
| [[File:Blaster Master enemy laser.gif|left]] Lasers are another form of motion detector.  Unlike the Dashers, Lasers are particularly effective at their job.  They move back and forth waiting for an intruder to pass below.  When one does, they release a laser beam that travels quite fast, and is difficult to avoid.  When you see a Laser, the best strategy is to try and slip above it as quickly as possible, where it can't hurt you.  Lasers tend to drop Gun capsules when destroyed.
| [[File:Blaster Master enemy laser.gif|left]] Laser Guardss are another form of motion detector.  Unlike the Draps, Laser Guards are particularly effective at their job.  They move back and forth waiting for an intruder to pass below.  When one does, they release a laser beam that travels quite fast, and is difficult to avoid.  When you see a Laser Guard, the best strategy is to try and slip above it as quickly as possible, where it can't hurt you.  Laser Guards tend to drop Gun capsules when destroyed.
|-
|-
! Guardian || Ambusher
! {{nihongo|Trigger|トリッガー}} || {{nihongo|Mudanga|ムダンガ}}
|-
|-
| [[File:Blaster Master enemy guardian.gif|left]] Certain areas contain no other interior enemy than these walking GuardiansThe Guardians patrol the interiors and when they sense an intruder, they walk up to them and fire their weapon.  They aren't particularly difficult to deal with if you can remove them from a safe distance.  If you're forced to fight with them up close, try to position yourself so that you have the advantage.
| [[File:Blaster Master enemy guardian.gif|left]] Certain areas contain no other interior enemy than TriggersTriggers patrol the interiors and when they sense an intruder, they walk up to them and fire their weapon.  They aren't particularly difficult to deal with if you can remove them from a safe distance.  If you're forced to fight with them up close, try to position yourself so that you have the advantage.
| [[File:Blaster Master enemy ambush.gif|left]] This enemy is so rare, and moves so quickly that it is scarcely believed to exist.  However, you can find them in one and only one particular interior in {{~|Area 6}}.  As you make your way up the long vertical interior, Ambushers dash from the top of the screen to the bottom.  They whiz by so quickly, you won't even be sure what you saw.
| [[File:Blaster Master enemy ambush.gif|left]] This enemy is so rare, and moves so quickly that it is scarcely believed to exist.  However, you can find them in one and only one particular interior in {{~|Area 6}}.  As you make your way up the long vertical interior, Mudangas dash from the top of the screen to the bottom.  They whiz by so quickly, you won't even be sure what you saw.
|}
|}


{{Footer Nav|game=Blaster Master|prevpage=Items and Upgrades|nextpage=Walkthrough}}

Revision as of 06:46, 5 May 2021

The enemy names provided on this page are not official. No official names are available. The names provided here are merely descriptive, either of the enemies' appearance or behavior.

Outdoor enemies

Default (デフォルト?) and Blackfoot (ブラックフット?) Eyelet (アイレット?) and Neo Eyelet (ネオアイレット?)
Blaster Master enemy jumper.gif
Blaster Master enemy jumper2.gif
Default and Blackfoot are basic enemies that plod back and forth until SOPHIA or Jason get close to them. When they come in range, they begin to jump towards you in an effort to stomp you.
Blaster Master enemy twister.gif
Blaster Master enemy twister red.gif
Eyelets fly very quickly across the screen in a wave pattern. Because they move so fast, they are often hard to hit. Gray twisters frequently leave Hover capsules behind and appear constantly in certain sections in order to allow you to refuel SOPHIA's Hover engines. Neo Eyelets appear in Template:~ and take more shots to destroy.
Bellbomber (ベルボマー?) Sunami (スナミ?) and Neo Sunami (ネオスナミ?)
Blaster Master enemy bomber.gif
Bellbombers will fly very quickly across the screen until they are directly above SOPHIA or Jason. Then they will open their hatch and release a bomb which drops to the ground, before flying straight up into the air in order to get away.
Blaster Master enemy wall-walker.gif
Blaster Master enemy wall-walker red.gif
Sunamies remain stuck to the surface or platform that they are walking on, clinging to the sides and even the ceiling as they walk. However, when SOPHIA or Jason crosses their path, they immediately fling themselves across a room in an effort to crash into you. Neo Sunamies appear on Template:~ and take more shots to destroy.
Offside (オフサイド?) Cave Guard (ケイブカード?)
Blaster Master enemy ceiling turret.gif
Offsides alternate between periods of dormancy, and periods of spraying bullets to either side. The bullets settle down to the ground below. They take quite a few shots to destroy, and typically leave Hover capsules behind.
Blaster Master enemy gunner.gif
Cave Guards have a very basic behavior, patrolling to the left and right in search of intruders. If they spot one ahead of them, they begin firing a large gun. The bullets from this gun have the ability to block SOPHIA's cannon shots, so wait for the Cave Guards to finish shooting, or shoot them from behind to destroy them.
Random (ランダム?) and False (ファルス?) Moeba (メーバ?)
Blaster Master enemy floater.gif
Blaster Master enemy floater2.gif
Randoms and Falses hover around particular regions of certain areas. They drift in one direction until they hit a wall, and ricochet off of it. While they float aimlessly around, they will shoot small bullets at SOPHIA with great accuracy. Shoot them down before they have the chance.
Blaster Master enemy jelly.gif
You will find these aquatic life forms in the small lakes of Template:~. They propel themselves upward before slowly drifting back down to the bottom of the water. You will typically encounter them while swimming about without the protection of SOPHIA, so approach them carefully.
Claymore (クレイモア?) Exor (エックスオア?)
Blaster Master enemy mine.gif
Claymores lay still on the ground where they have been placed. Because they are so small, it is not possible to shoot one in front of SOPHIA using the cannon. Instead, you must either shoot them while jumping or falling, or you must have Jason exit SOPHIA and clear them away using his gun. You can also ignore them if it's easy enough to avoid them, but they often provide Power capsules when destroyed.
Blaster Master enemy dome.gif
Exors may differ in appearance from Sunamies, but their behavior is identical; they cling to the surface of whatever they happen to be moving along, letting go only to fly across an area in an effort to crash into you.
Hellworm (ヘルワーム?) and Neoworm (ネオワーム?) Interrupt (インタラプト?)
Blaster Master enemy worm.gif
Blaster Master enemy worm red.gif
Hellworms crawl around on the ground and seek out a path to SOPHIA. Like mines, they are very low to the ground, so you can't hit them with SOPHIA's cannon when you are on the same level as one. Homing Missiles are very effective at removing these nuisances, but you must remember to jump in the air before firing them, or the missiles will hover harmlessly over the worm. Neoworms are similar to Hellworms, except that they can leap higher, and in doing so, reach higher platforms.
Blaster Master enemy worm drop.gif
Interrupts are devices which wait for SOPHIA or Jason to walk beneath them before opening up and dropping a single Neoworm to the ground below. They take a few shots to destroy, but it's worth taking the time to do so in order to avoid the added trouble that a red worm brings to any situation.
Hummel (フンメル?) Larha (ラーハ?)
Blaster Master enemy insect.gif
Hummels are very basic enemies that flutter through the air in a manner similar to the way Moebas move through water. They lazily drift down until they give themselves a sudden boost and climb higher. They also shoot at SOPHIA like Randoms and Falses do.
Blaster Master enemy ship.gif
Larhas fly to the left and right in straight lines, shooting at SOPHIA with a good degree of accuracy as they move. They aren't particularly fast, but they're big and they take a few shots to destroy. There aren't many of these to discover in the game.
Header (ヘッダー?) and Neo Header (ネオヘッダー?) Stuka (スツーカ?) and Wespe (ヴェスペ?)
Blaster Master enemy skull.gif
Despite their scarier appearance, Headers behave just like Bellbombers. They fly over an area until they are directly above SOPHIA or Jason, and they release a bomb to the ground below. The only difference is that Headers are often contained in hallways with ceilings that prevent their escape, so they typically re-engage after a brief pause. Stronger variants known as Neo Headers appear in Area 7.
Blaster Master enemy orb.gif
Blaster Master enemy orb2.gif
Stuka and Wespe, while similar, actually have two different types of behaviors. Stukas move about freely until they detect SOPHIA or Jason in their vicinity, and then they quickly rush in to collide with them. Wespes move back and forth between two walls, occasionally adjusting their vertical position before continuing on with their patrol.
Ball Carry (ボールキャリー?) Dump (ダンプ?)
Blaster Master enemy runner.gif
Ball Carries start off dormant. They wait until SOPHIA or Jason get close. Then they remove their lid and scatter bombs across the floor. After they have released their bombs, they take off and begin running in a direction away from SOPHIA. However, they are likely to hit walls and come running back at you, so be prepared to jump or shoot.
Blaster Master enemy armadillo.gif
Dumps roll across the floor, bouncing off walls and falling down to platforms below when they reach gaps. When they get within range of SOPHIA, they stop and open their top hatch, and lob bombs at SOPHIA before continuing on with their patrol.
Ballbot (バルバット?) Mad Hand (マッドハンド?)
Blaster Master enemy ceiling orb.gif
Ceiling orbs cling to the ceiling until SOPHIA gets close enough for them to attack. When this happens, they let go of the ceiling and fly through the air in a looping pattern. After a time, they will return to the ceiling and wait there for SOPHIA to pass close by again.
Blaster Master enemy hand.gif
The enemies which appear as disembodied hands remain motionless on particular platforms until SOPHIA gets close. When they are triggered, they begin tossing bombs out. The bombs roll across the platform toward SOPHIA until they explode.
Hell Diver (ヘルダイバー?) Ammonaga (アンモナーガ?)
Blaster Master enemy fish.gif
Hell Divers are the basic type of enemy that you encounter underwater throughout Template:~. They swim rather slowly, but they move towards you with a lot of determination. They also shoot small bullets at Jason as you swim by them. Clear them away before trying to proceed.
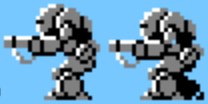
Blaster Master enemy snail.gif
Ammonagas sit on platforms or at the bottom of a room beneath the water in Template:~. They remain still until Jason or SOPHIA is level with them. Then they suddenly take off and scuttle over towards you. If they run off a platform, they fall down to the ground below and set up for their next encounter with you.
Buloba (ブローバ?) Morning Star (モーニングスター?)
Blaster Master enemy shark.gif
Bulobas are very similar to Larhas; they are large, move back and forth, and their aren't many of them. You'll have to be on the look-out for them while you swim through Template:~, but they don't veer off course, so you can ignore them once you study their movements.
Blaster Master enemy boulder.gif
Morning Stars sit motionless on certain platforms in Template:~. Like Mad Hands, they release bombs if SOPHIA or Jason swim close enough to trigger a reaction. Get in close and destroy them, but avoid the bombs the fling.

Indoor enemies

GX-680 (GX-680?) and GX-680S (GX-680S?) Binary (バイナリー?)
Blaster Master enemy walker.gif
Blaster Master enemy walker red.gif
GX-680s are a typical basic enemy encounter while wandering throughout many interiors. They constantly walk towards Jason, and will collide with him if he stands still for too long. Destroy them as quickly as you can, but watch out for any shots that they may fire at you. The red variety is known as GX-680S.
Blaster Master enemy waver.gif
Binaries move across interiors in a manner very similar to the way Eyelets fly across the screen outside. They appear on one side, and cross the room in a wave pattern. They tend to appear continuously, so be prepared to deal with more of them after you find one.
Drap (ドラップ?) Bios (バイオス?)
Blaster Master enemy dasher.gif
Draps are like motion sensors. When you walk across their line of sight, they dash towards Jason in an attempt to collide with him. Draps only dash up and down, or left and right, never both. It's usually obvious which way Draps move, but it can sometimes be tricky to make that determination, so use caution.
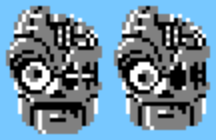
Blaster Master enemy head.gif
Bioses float around in particular rooms. They always hover in Jason's direction, but they never shoot. Bombard them with a series of grenades to destroy them as quickly as possible. When destroyed, they always leave behind Multi-Warhead Missile ammunition for SOPHIA.
Manji (マンジ?) Hanilite (ハニリイト?)
Blaster Master enemy spiral.gif
Manjis remain stationary in particular locations. As you approach them, they release up to four bullets that fan out away from the Manji in a circular motion. You have to time your approach in order to avoid these bullets. They tend to leave Gun capsules behind when destroyed.
Blaster Master enemy sentry.gif
Like Manjis, Hanilites sit motionless on the ground. They won't even attack unless you attack them first. If they are hit with a bullet or grenade, they release a spread of bullets that fans outward. You can choose to ignore them, but if you do fight them, it's best to remove them with grenades.
Druis (ドルイース?) Peeper (ピーパ?)
Blaster Master enemy teleporter.gif
Druises start out motionless like statues. However, after a short pause, they shed their outer protective layer to begin warping from one location to another. They are only vulnerable to your attack when they are green and moving. It is not possible to damage them when they return to their gray form.
Blaster Master enemy eye.gif
There are two types of Peepers; Peepers whose positions are predetermined and remain in place until they are destroyed, and eyeballs which are part of roaming swarms which cross the screen. Regardless of which type you encounter, its in your best interest to destroy them as quickly as possible. Their unpredictable nature makes them a threat to both your health, and the preservation of your gun power.
Crossfighter (クロスファイター?) Laser Guard (レーザーガード?)
Blaster Master enemy cannon.gif
Crossfighters are motionless objects which fire pairs of bullets. The bullets alternate between up and down, and left and right. Because they don't move, it's easy enough to stand to the side and destroy them with your own guns or grenades. They have a tendency to leave Gun capsules behind when destroyed.
Blaster Master enemy laser.gif
Laser Guardss are another form of motion detector. Unlike the Draps, Laser Guards are particularly effective at their job. They move back and forth waiting for an intruder to pass below. When one does, they release a laser beam that travels quite fast, and is difficult to avoid. When you see a Laser Guard, the best strategy is to try and slip above it as quickly as possible, where it can't hurt you. Laser Guards tend to drop Gun capsules when destroyed.
Trigger (トリッガー?) Mudanga (ムダンガ?)
Blaster Master enemy guardian.gif
Certain areas contain no other interior enemy than Triggers. Triggers patrol the interiors and when they sense an intruder, they walk up to them and fire their weapon. They aren't particularly difficult to deal with if you can remove them from a safe distance. If you're forced to fight with them up close, try to position yourself so that you have the advantage.
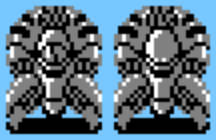
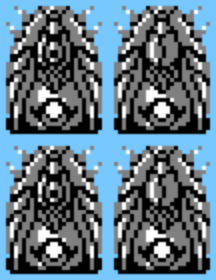
Blaster Master enemy ambush.gif
This enemy is so rare, and moves so quickly that it is scarcely believed to exist. However, you can find them in one and only one particular interior in Template:~. As you make your way up the long vertical interior, Mudangas dash from the top of the screen to the bottom. They whiz by so quickly, you won't even be sure what you saw.