From StrategyWiki, the video game walkthrough and strategy guide wiki
Jump to navigation Jump to search
(cleanup)
m (Updating character move lists)
 
(One intermediate revision by one other user not shown)
Line 3: Line 3:
__TOC__
__TOC__
{{-}}
{{-}}
== Moves ==
==Moves==
=== [[Street Fighter III]] ===
===[[Street Fighter III]]===
{{Movelist|Street Fighter III|Moves|[[Street Fighter III/Gill|Gill]]}}
===[[Street Fighter III: 2nd Impact]]===
{{Movelist|Street Fighter III: 2nd Impact|Moves|[[Street Fighter III/Gill|Gill]]}}
===[[Street Fighter III: 3rd Strike]]===
{{Movelist|Street Fighter III: 3rd Strike|Moves|[[Street Fighter III/Gill|Gill]]}}


{{Moves Header|SF3|Gill|Street Fighter III/Gill}}
{{Special Move|name=Guilty Bomb
|motion=close, {{cade|Left}} or {{cade|Right}}{{plus}}
|button={{cade|MPunch}} or {{cade|HPunch}}}}
{{Special Move|name=Impact Claw
|motion=close, {{cade|Left}} or {{cade|Right}}{{plus}}
|button={{cade|MKick}} or {{cade|HKick}}}}
{{Special Move|name=Palm Upper
|motion={{cade|Left}}{{plus}}
|button={{cade|MPunch}} (cancelable)}}
{{Special Move|name=Pyro-kinesis
|motion={{cade|Qcf}}{{plus}}
|button={{cade|Punch}} (on the left side)}}
{{Special Move|name=Cryo-kinesis
|motion={{cade|Qcf}}{{plus}}
|button={{cade|Punch}} (on the right side)}}
{{Special Move|name=Cyber Lariat (Pyro Heat)
|motion={{cade|Dp}}{{plus}}
|button={{cade|Punch}} (on the right side)}}
{{Special Move|name=Cyber Lariat (Cryo Heat)
|motion={{cade|Dp}}{{plus}}
|button={{cade|Punch}} (on the left side)}}
{{Special Move|name=Moonsault Knee Drop
|motion={{cade|Hcb}}{{plus}}
|button={{cade|Kick}}}}
{{Special Move|name=Psycho Headbutt
|motion={{cade|Qcb}}{{plus}}
|button={{cade|Punch}}}}
{{Super Move|name=Resurrection
|motion=Automatically occurs
|button=when you lose a round (1x meter)}}
|}
=== [[Street Fighter III: 2nd Impact]] ===
{{Moves Header|No|Portrait|Street Fighter III/Gill}}
{{Special Move|name=Guilty Bomb
|motion=close, {{cade|Left}} or {{cade|Right}}{{plus}}
|button={{cade|MPunch}} or {{cade|HPunch}}}}
{{Special Move|name=Impact Claw
|motion=close, {{cade|Left}} or {{cade|Right}}{{plus}}
|button={{cade|MKick}} or {{cade|HKick}}}}
{{Special Move|name=Elbow
|motion={{cade|Down}}{{cade|Down}}{{plus}}
|button={{cade|Punch}} or {{cade|Kick}}}}
{{Special Move|name=Palm Upper
|motion={{cade|Left}}{{plus}}
|button={{cade|MPunch}} (cancelable)}}
{{Special Move|name=Step Kick
|motion={{cade|Right}}{{plus}}
|button={{cade|MKick}}}}
{{Special Move|name=Pyro-kinesis
|motion={{cade|Qcf}}{{plus}}
|button={{cade|Punch}} (on the left side)}}
{{Special Move|name=Cryo-kinesis
|motion={{cade|Qcf}}{{plus}}
|button={{cade|Punch}} (on the right side)}}
{{Special Move|name=Cyber Lariat (Pyro Heat)
|motion={{cade|Dp}}{{plus}}
|button={{cade|Punch}} (on the right side)}}
{{Special Move|name=Cyber Lariat (Cryo Heat)
|motion={{cade|Dp}}{{plus}}
|button={{cade|Punch}} (on the left side)}}
{{Special Move|name=Moonsault Knee Drop
|motion={{cade|Hcb}}{{plus}}
|button={{cade|Kick}}}}
{{Special Move|name=Psycho Headbutt
|motion={{cade|Qcb}}{{plus}}
|button={{cade|Punch}}}}
{{Super Move|name=Meteor Strike
|motion={{cade|Qcf}}{{cade|Qcf}}{{plus}}
|button={{cade|Punch}} (x1 meter)}}
{{Super Move|name=Resurrection
|motion=Automatically occurs
|button=when you lose a round (1x meter)}}
|}
{| {{prettytable|class=move_list}}
!style="text-align:left"|Target Combos
|- class="moves_row_special moves_row2"
| {{cade|LPunch}} {{cade|MPunch}}
|- class="moves_row_special moves_row1"
| (crouching){{cade|LKick}} {{cade|MKick}}
|- class="moves_row_special moves_row2"
| {{cade|LPunch}} {{cade|Down}} {{cade|MPunch}}(doesn't combo/cancelable)
|}
=== [[Street Fighter III: 3rd Strike]] ===
{{Moves Header|SF3|Gill|Street Fighter III/Gill}}
{{Special Move|name=Impact Claw
|motion=
|button={{cade|LPunch}}{{plus}}{{cade|LKick}}}}
{{Special Move|name=Guilty Bomb
|motion={{cade|Left}} or {{cade|Right}}{{plus}}
|button={{cade|LPunch}}{{plus}}{{cade|LKick}}}}
{{Special Move|name=Elbow
|motion=
|button={{cade|MPunch}}{{plus}}{{cade|MKick}}}}
{{Special Move|name=Palm Upper
|motion={{cade|Left}}{{plus}}
|button={{cade|MPunch}} (cancelable)}}
{{Special Move|name=Step Kick
|motion={{cade|Right}}{{plus}}
|button={{cade|MKick}}}}
{{Special Move|name=Pyro-kinesis
|motion={{cade|Qcf}}{{plus}}
|button={{cade|Punch}} (on the left side)}}
{{Special Move|name=Cryo-kinesis
|motion={{cade|Qcf}}{{plus}}
|button={{cade|Punch}} (on the right side)}}
{{Special Move|name=Cyber Lariat (Pyro Heat)
|motion={{cade|Dp}}{{plus}}
|button={{cade|Punch}} (on the right side)}}
{{Special Move|name=Cyber Lariat (Cryo Heat)
|motion={{cade|Dp}}{{plus}}
|button={{cade|Punch}} (on the left side)}}
{{Special Move|name=Moonsault Knee Drop
|motion={{cade|Hcb}}{{plus}}
|button={{cade|Kick}}}}
{{Special Move|name=Psycho Headbutt
|motion={{cade|Qcb}}{{plus}}
|button={{cade|Punch}}}}
{{Super Move|name=Meteor Strike
|motion={{cade|Qcf}}{{cade|Qcf}}{{plus}}
|button={{cade|Punch}} (x1 meter)}}
{{Super Move|name=Seraphic Wing
|motion={{cade|Qcf}}{{cade|Qcf}}{{plus}}
|button={{cade|Kick}} (x1 meter)}}
{{Super Move|name=Resurrection
|motion=Automatically occurs
|button=when you lose a round (1x meter)}}
|}
{| {{prettytable|class=move_list}}
!style="text-align:left"|Target Combos
|- class="moves_row_special moves_row2"
| {{cade|LPunch}} {{cade|MPunch}}
|- class="moves_row_special moves_row1"
| (crouching){{cade|LKick}} {{cade|MKick}}
|- class="moves_row_special moves_row2"
| {{cade|LPunch}} {{cade|Down}} {{cade|MPunch}}(doesn't combo/cancelable)
|}
<noinclude>
{{Footer Nav|game=Street Fighter III|prevpage=Elena|nextpage=Hugo}}
 
[[Category:Character move lists]]
[[Category:Character move lists]]</noinclude>

Latest revision as of 20:20, 20 April 2020

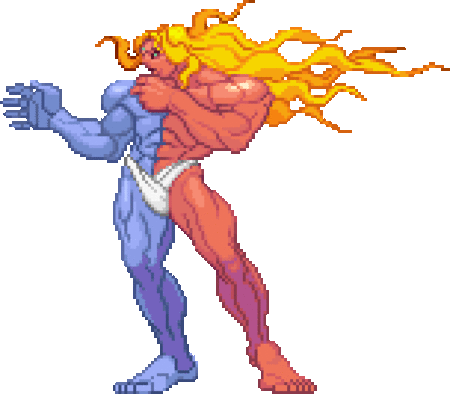
SF3 Gill.gif

Moves[edit]

Street Fighter III[edit]

Portrait SF3 Gill.png
Name Input
Guilty Bomb close, Arcade-Stick-Left.png or Arcade-Stick-Right.png+ Arcade-Button-MPunch.png or Arcade-Button-HPunch.png
Impact Claw close, Arcade-Stick-Left.png or Arcade-Stick-Right.png+ Arcade-Button-MKick.png or Arcade-Button-HKick.png
Palm Upper Arcade-Stick-Left.png+ Arcade-Button-MPunch.png (cancelable)
Pyro-kinesis Arcade-Stick-Qcf.png+ Arcade-Button-Punch.png (on the left side)
Cryo-kinesis Arcade-Stick-Qcf.png+ Arcade-Button-Punch.png (on the right side)
Cyber Lariat (Pyro Heat) Arcade-Stick-Dp.png+ Arcade-Button-Punch.png (on the right side)
Cyber Lariat (Cryo Heat) Arcade-Stick-Dp.png+ Arcade-Button-Punch.png (on the left side)
Moonsault Knee Drop Arcade-Stick-Hcb.png+ Arcade-Button-Kick.png
Psycho Headbutt Arcade-Stick-Qcb.png+ Arcade-Button-Punch.png
Resurrection Automatically occurs when you lose a round (1x meter)

Street Fighter III: 2nd Impact[edit]

Portrait SF3 Gill.png
Name Input
Guilty Bomb close, Arcade-Stick-Left.png or Arcade-Stick-Right.png+ Arcade-Button-MPunch.png or Arcade-Button-HPunch.png
Impact Claw close, Arcade-Stick-Left.png or Arcade-Stick-Right.png+ Arcade-Button-MKick.png or Arcade-Button-HKick.png
Elbow Arcade-Stick-Down.pngArcade-Stick-Down.png+ Arcade-Button-Punch.png or Arcade-Button-Kick.png
Palm Upper Arcade-Stick-Left.png+ Arcade-Button-MPunch.png (cancelable)
Step Kick Arcade-Stick-Right.png+ Arcade-Button-MKick.png
Pyro-kinesis Arcade-Stick-Qcf.png+ Arcade-Button-Punch.png (on the left side)
Cryo-kinesis Arcade-Stick-Qcf.png+ Arcade-Button-Punch.png (on the right side)
Cyber Lariat (Pyro Heat) Arcade-Stick-Dp.png+ Arcade-Button-Punch.png (on the right side)
Cyber Lariat (Cryo Heat) Arcade-Stick-Dp.png+ Arcade-Button-Punch.png (on the left side)
Moonsault Knee Drop Arcade-Stick-Hcb.png+ Arcade-Button-Kick.png
Psycho Headbutt Arcade-Stick-Qcb.png+ Arcade-Button-Punch.png
Meteor Strike Arcade-Stick-Qcf.pngArcade-Stick-Qcf.png+ Arcade-Button-Punch.png (x1 meter)
Resurrection Automatically occurs when you lose a round (1x meter)
Target Combos
Arcade-Button-LPunch.png Arcade-Button-MPunch.png
(crouching)Arcade-Button-LKick.png Arcade-Button-MKick.png
Arcade-Button-LPunch.png Arcade-Stick-Down.png Arcade-Button-MPunch.png(doesn't combo/cancelable)

Street Fighter III: 3rd Strike[edit]

Available for play on the Dreamcast version.

Portrait SF3-3 Gill.png
Name Input
Impact Claw Arcade-Button-LPunch.png+Arcade-Button-LKick.png
Guilty Bomb Arcade-Stick-Left.png or Arcade-Stick-Right.png+ Arcade-Button-LPunch.png+Arcade-Button-LKick.png
Elbow Arcade-Button-MPunch.png+Arcade-Button-MKick.png
Palm Upper Arcade-Stick-Left.png+ Arcade-Button-MPunch.png (cancelable)
Step Kick Arcade-Stick-Right.png+ Arcade-Button-MKick.png
Pyro-kinesis Arcade-Stick-Qcf.png+ Arcade-Button-Punch.png (on the left side)
Cryo-kinesis Arcade-Stick-Qcf.png+ Arcade-Button-Punch.png (on the right side)
Cyber Lariat (Pyro Heat) Arcade-Stick-Dp.png+ Arcade-Button-Punch.png (on the right side)
Cyber Lariat (Cryo Heat) Arcade-Stick-Dp.png+ Arcade-Button-Punch.png (on the left side)
Moonsault Knee Drop Arcade-Stick-Hcb.png+ Arcade-Button-Kick.png
Psycho Headbutt Arcade-Stick-Qcb.png+ Arcade-Button-Punch.png
Meteor Strike Arcade-Stick-Qcf.pngArcade-Stick-Qcf.png+ Arcade-Button-Punch.png (x1 meter)
Seraphic Wing Arcade-Stick-Qcf.pngArcade-Stick-Qcf.png+ Arcade-Button-Kick.png (x1 meter)
Resurrection Automatically occurs when you lose a round (1x meter)
Target Combos
Arcade-Button-LPunch.png Arcade-Button-MPunch.png
(crouching)Arcade-Button-LKick.png Arcade-Button-MKick.png
Arcade-Button-LPunch.png Arcade-Stick-Down.png Arcade-Button-MPunch.png(doesn't combo/cancelable)