Here you'll find a whole bunch of vertical rooms. You'll have to go up and then travel down to get inside. But stay sharp, because you're going to meet up with lots of Sparks. Watch your step at the very end. Mouser (or Robirdo if you're playing Super Mario Advance) is waiting for you!
Map A
Map B
(1) Sub-space 1 and Double POWs! Here in map B, you'll find something really weird. If you have a POW inside Sub-space, and Sub-space disappears, you'll get two POWs! Don't forget to take the Mushroom before lifting the darkened POW up high. You'll still be holding on to the copy when you return.
Map C
Which door will you choose? There are three—count 'em—three doors here. Which one should you pick? The center door has a dead-end. The door on the left is locked. Now the door on the right has potential. There's a key at the top. Get to the top floor and take the key. Then try using it to unlock the door to the left.
(2) Sub-space 2. There's a Mushroom hidden above door E. You can get to the Mushroom if you drop the Potion between the door and the ladder, but look out for Ninji and Spark. They will do everything they can to give you a hard time. If it helps, you can use a POW to do them in.
Map D

(3) Shyguys pop out of the jars. Bad news is heading your way fast. Shyguys are coming out of the jars one after another. Don't even try to tangle with them. Move sideway and go up and down the steps to avoid them.
(4) Find what you've been looking for. Here's the key that unlocks door E in map C. When you take it from the Key Room, Phanto will come after you. You must work fast to get the Key and avoid taking damage. Drop the Key when necessary, and keep an ete out for marauding Ninji. Be careful: If you drop the Key and move off-screen, you may have to track it down all over again.
Map E


(5) A Super (Luigi) shortcut. If you enter this room through door D in map C, you will arrive at the bottom of the map. After scaling to a certain height, you will find that you have no choice bu to turn around and try a different route. Unless, that is, you are Luigi. If so, grab the Ninji that you find at the bottom of the room, and carry him all the way up to the dead-end. Then set him down next to the wall, and jump on top of him. Squat down and charge up for a Power Jump, and leap off Ninji's back at the height of his jump and you move ahead directly to door G. Don't bother going through the door, just keep climbing. With this trick, you don't even need to collect the key from map D!
(6) Beware of those hot flames. Uh-oh, check out these two dangerous Pansers on the platform below. Stay on your toes or they'll hit you. Just keep moving, and don't hesitate. Cross over pronto, and you'll make it to the chains on the right that lead to door H.
Map F


(7) Take your time, but keep moving. If you used the key, you'll start at the very bottom of this room by door E. Sparks really know how to fly and they are after you! Your best escape plan is to make small steady jumps. That should keep you at least one step ahead of them. When you reach door G, you'll have to pass through to map E since climbing any higher will result in a dead-end.
(8) Take a breather here. Hidden in this little patch of grass is a POW. Use it to get that Spark out of your way for good. And don't forget the pick up some cherries on your way. An appearance by Starman will help make the next few seconds of your climb hassle free.
(9) There's the goal! Congratulations! You've made it to the exit to map G. It wasn't easy getting here, but now you're really getting close to your goal. Keep up the good work!
Map G
Turtle power. Although you find a Turtle Shell in the lone tuft of grass after you arrive in map G, you may be surprised at how ineffective it is against an army of leaping Ninji. They have to be down on the ground in order to get hit, so don't assume the shell will wipe out all them. Be prepared to jump.
Boss: Mouser
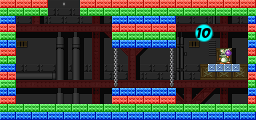
(10) This is it: your last face-off in World 3! Now it's time to make peace in World 3. But first you'll have to deal with an old enemy. The mini-boss is Mouser, bu you know how to deal with him from World 1-3. Catch the bombs and let him have it with six of them (or five in Doki Doki Panic.)


